•DIY: Decorative Santa Claus pendant 🎅🏻✨ | •Contest! [ESP-ENG]
Teniendo en cuenta que amo con locura la navidad, no podia dejar pasar la oportunidad de unirme al concurso activo en la comunidad donde la temática principal es ella ¡La Navidad!.
Últimamente he estado creando adornos para ambientar algunos espacios de mi hogar y aunque solo he hecho unos pocos quiero hacer mas y más jaja. En esta oportunidad, les muestro un hermoso colgante decorativo de Santa Claus, desde que vi algo similar en Pinterest quedé enamorada y sabia que debía hacerme uno, amando mucho más el que elaboré y que por supuesto me parecio mas que perfecto para hacer mi primera entrada a dicho concurso🥰.
Antes de iniciar con la elaboración, me gustaria invitar a mis amigas @mariajcastro28, @yagelybr y @valenpba para que se animen a participar
Hello Creative Friends! How nice to be back here, I hope you are all well, we are here thank God.
Considering that I love Christmas, I couldn't miss the opportunity to join the active contest in the community where the main theme is Christmas!.
Lately I've been creating ornaments to decorate some spaces in my home and although I've only made a few I want to make more and more haha. In this opportunity, I show you a beautiful decorative Santa Claus pendant, since I saw something similar on Pinterest I was in love and I knew I had to make one, loving much more the one I made and of course I thought it was more than perfect to make my first entry to this contest🥰.Before starting with the elaboration, I would like to invite my friends @mariajcastro28, @yagelybr and @valenpba to participate.


Materiales:✨
- Cartón
- Foami escarchado (rojo, verde y plateado)
- Foami liso (color piel y blanco)
- Pintura al frío blanca
- Marcador negro
- Cinta ondulada dorada
- Hilo pabilo (puedes usar estambre)
- Silicón líquido
Materials:✨
- Cardboard
- Frosted Foami (red, green and silver)
- Smooth Foami (skin color and white)
- White cold paint
- Black marker
- Gold wavy ribbon
- Wicker thread (you can use worsted thread)
- Liquid silicone

Paso a Paso | Step by Step✨
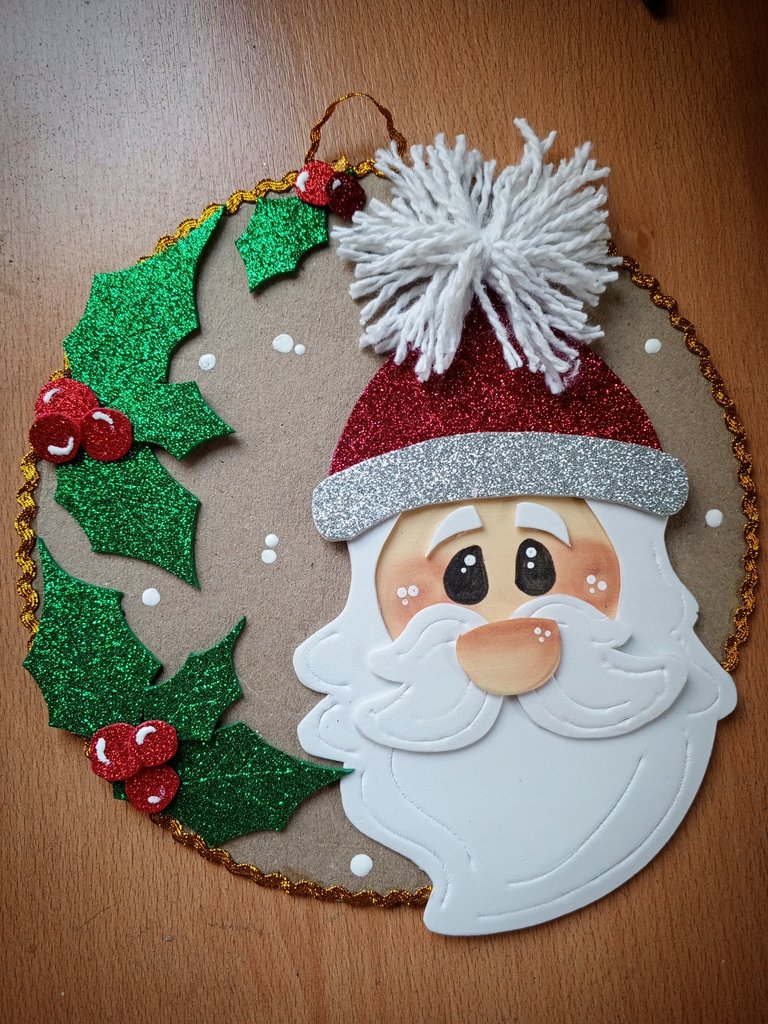
✨ Como la mayoria de mis manualidades, en una hoja blanca realice el boceto de lo que queria, resaltando más el Santa Claus, el cual dividí en patrones para luego marcarlos en el foami correspondiente a cada color (barba, cejas y bigotes en blanco, gorro en rojo, cinta del gorro en plateado, y rostro y nariz en foami color piel
✨ Like most of my crafts, on a white sheet of paper I made the sketch of what I wanted, highlighting more the Santa Claus, which I divided into patterns and then marked them in the foami corresponding to each color (beard, eyebrows and whiskers in white, hat in red, hat band in silver, and face and nose in skin color foami).
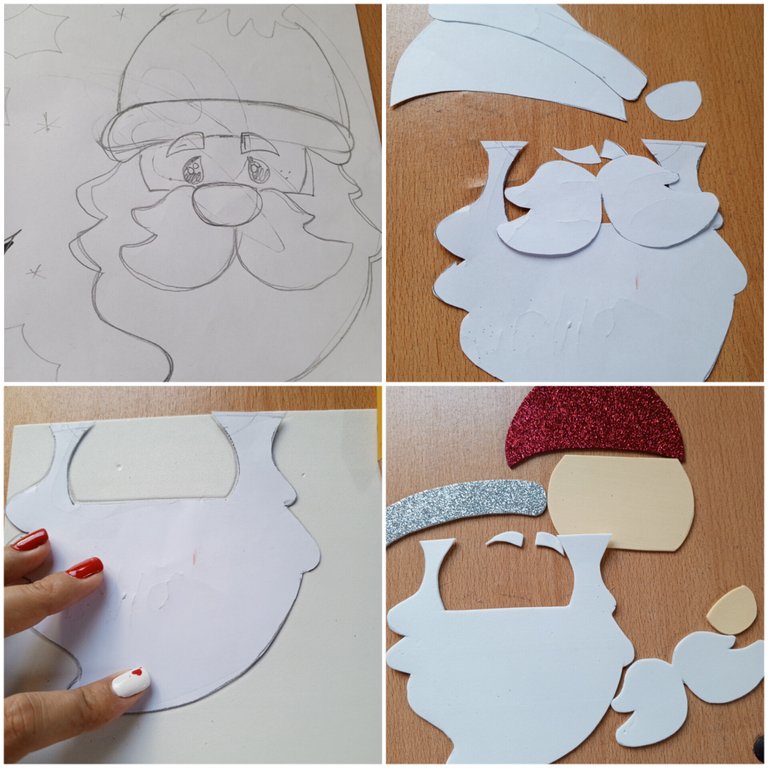
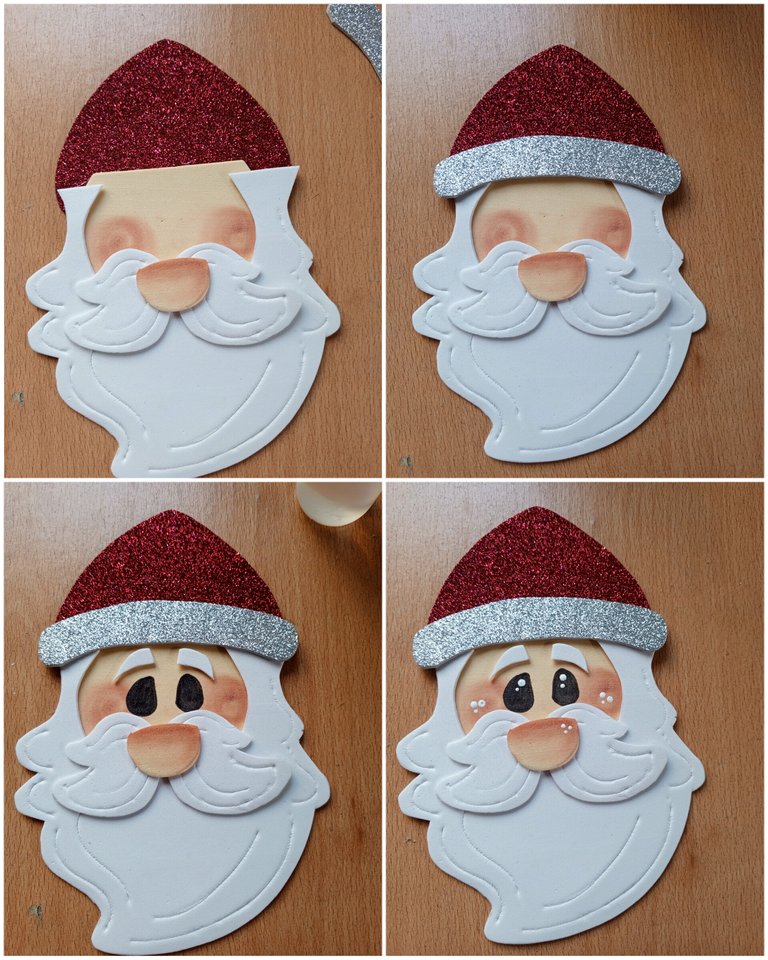
✨ Con ayuda de un puntero (aunque tambien puedes usar un palillo o un color blanco) le realice algunos detalles (tipo relieves) en la barba y bigotes. Luego con un rubor viejo le di un poco de color a las mejillas y nariz, para acto seguido comenzar a pegar y darle forma al rostro.
✨ With the help of a pointer (although you can also use a toothpick or a white color) I made some details (like reliefs) in the beard and whiskers. Then with an old blush I gave a little color to the cheeks and nose, and then I started to glue and shape the face.

✨ Por la parte detras del rostro pegué el gorro, y para cubrir estos detalles pegue la tira del mismo que decidí hacer en color plateado. Pegué las cejas en su lugar y con un marcador negro le realicé los ojos, para luego dar un poco de luz (tanto a ojos, como mejillas y nariz) con pintura al frio blanca.
✨ On the back of the face I glued the hat, and to cover these details I glued the strip of the hat that I decided to do in silver color. I glued the eyebrows in place and with a black marker I made the eyes, and then I gave a little light (both eyes, cheeks and nose) with white cold paint.
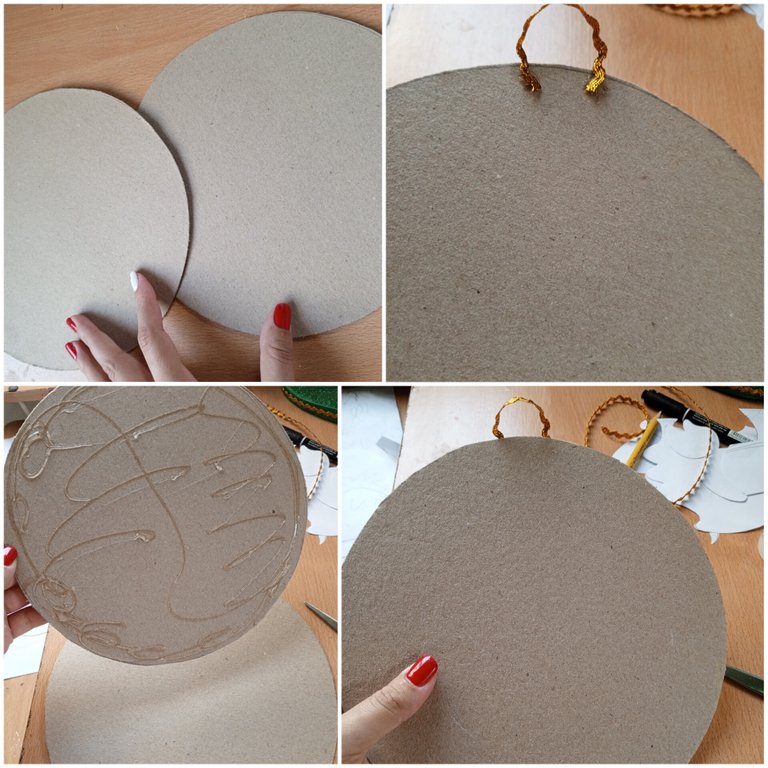
✨ En cartón (yo utilicé carton en kilo) realice y recorté dos circulos, para esto me ayude con un plato mediano. En uno de los círculos pegué un retazo de cinta ondulada dorada (por allí se colgará el adorno), luego pegué sobre este el otro circulo, quedando una pieza mas resistente.
✨También utilicé cinta ondulada dorada para pegar por todo el alrededor y darle un acabado mas bonito al cartón.
✨ In cardboard (I used kilo cardboard) I made and cut out two circles, for this I used a medium size plate. On one of the circles I glued a piece of gold corrugated ribbon (the ornament will hang there), then I glued the other circle on top of it, leaving a more resistant piece.
✨ I also used gold corrugated ribbon to glue all around and give a nicer finish to the cardboard.

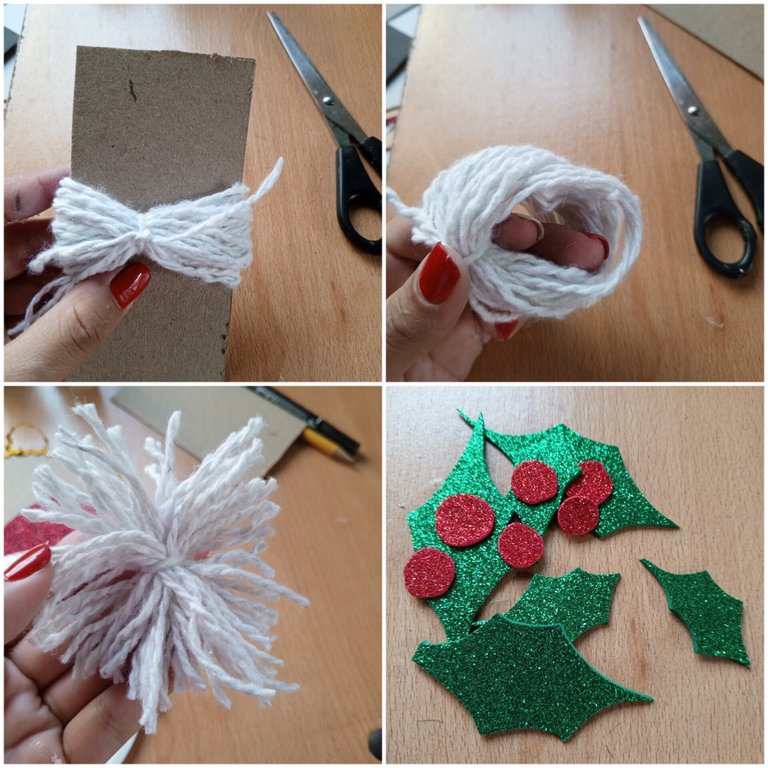
✨ Como detalles extras, en hilo pabilo realicé una borla (en un rectángulo de cartón di varias vueltas, luego utilicé una tira mas pequeña para sujetar bien, luego retiré del cartón y corté en las puntas) y en foami verde y rojo algunas piezas para formar las típicas plantas de cerezas que habitualmente observamos en los adornos navideños.
✨ As extra details, I made a tassel in wicker thread (in a cardboard rectangle I made several turns, then I used a smaller strip to hold it well, then I removed it from the cardboard and cut the ends) and in green and red foami some pieces to form the typical cherry plants that we usually see in Christmas ornaments.
✨ Teniendo listo todos los componentes del colgante, fue momento de armar: pegué el santa del lado derecho y en la parte superior de este (en el gorro específicamente) pegue la borla de hilo pabilo, finalmente posicioné las flores navideñas y en algunos espacios realicé algunos puntos con pintura al frio blanca, terminando asi esta decoración 🥰
✨ Having all the components of the pendant ready, it was time to assemble: I glued the santa on the right side and on the top of it (specifically on the hat) I glued the tassel of wicker thread, finally I placed the Christmas flowers and in some spaces I made some points with white cold paint, finishing this way this decoration 🥰.


Resultado | Result✨
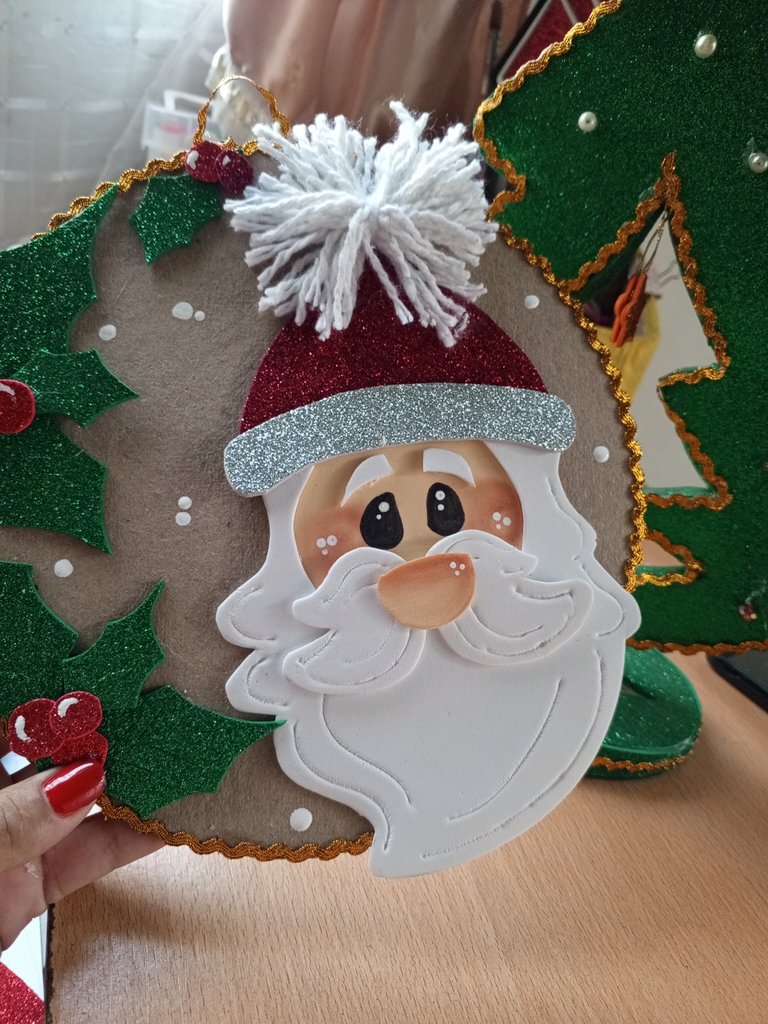
Amé con locura el resultado de este colgante, y ya me ví, haciendo uno similar que le haga compañía, así como también usar esa forma de hacer el santa para otra futura decoración, en fin estoy feliz con esta creación y espero que sea de su agrado🥰💗
I loved with madness the result of this pendant, and I already saw myself, making a similar one to keep him company, as well as using that way of making the santa for another future decoration, in short I am happy with this creation and I hope you like it🥰💗.


📷Ediciones | Editing in Canva and Picstar
✨Traducciones | Translations in Deepl
Qué hermoso Santa! Siempre haciendo cositas bonitas 😍
Tan bella tu, gracias Ami!
Amiga está mas que hermoso ese lindo adorno de Santa Claus que has hecho, me encantó, tan delicado y con detalles tan hermosos y únicos, se que lucirá muy bien en cualquier parte de tu casita 🥰 Gracias por la invitación amiga, ya mismo me pongo manos a la obra ❣️
Gracias amiga, yo quedé enamorada totalmente de este adorno y queriendo hacer otros que le hagan juego 🤭🤭
Gracias por tus palabras Ami linda y espero tu participación que se que vendrá con algo mega hermoso!❤️❤️❤️
https://twitter.com/Blue__vibes/status/1730943577964826913
Gracias amiga!
Encantado santa se ve precioso! Usaste rubor para pintarle la cara ?
Holaaa, gracias!
Si, solo un poco de rubor!🤭
que bonito resultado final, se nota la creatividad y esfuerzo que le pones al trabajo
Muchas gracias✨✨
@alizmarpaola Quedó demasiado hermoso ♥️
Hola preciosa, gracias!🥰
It looks pretty cool and gives positive vibes. Nice work! Thanks!
Se ve muy hermoso, mi mamá compró un material a ver qué hacemos de navidad, ya decoramos.
Pero queremos hacer cosas nuevas, así de lindas como estás.
Espero te quede precioso mi niña, es bonito decorar con cositas hechas en casita y que amemooooss🥰❤️
te quedo super lindo!!
Gracias muñeca ✨
Hola @alizmarpaola, felicidades te ha quedado muy pero muy bonito. Suerte con tu entrada cariño
Gracias muñeca, me alegra que te haya gustado❤️
que bello! muy buen trabajo!
what a beautiful! very good job!
Gracias hermosa!
Quedó super hermoso! Me encantaaaaaa
Te mando uno, o mejor ¡Te lo llevo😁❤️!
Shanta has made a very nice sketch of the collage. Very talented Origami wonderful face full of love and beauty. Every college in Dhaka has been beautifully decorated. I appreciate your experience. Anyone who is talented enough will be able to prepare it by following these steps. My respect and love to you and your family. Hope you are celebrating all your auspicious days with beautiful atmosphere. May you always be healthy and enjoy beautiful moments, Ameen.