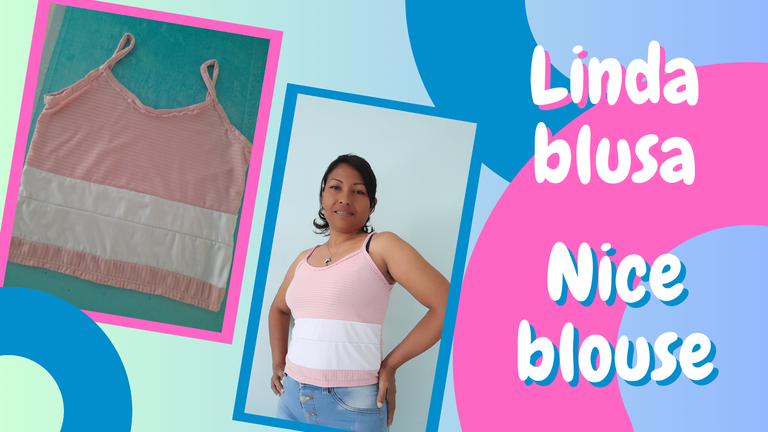
[ESP - ENG] Linda y sencilla blusa de tirantes. || Cute and simple strapless blouse.
Español:
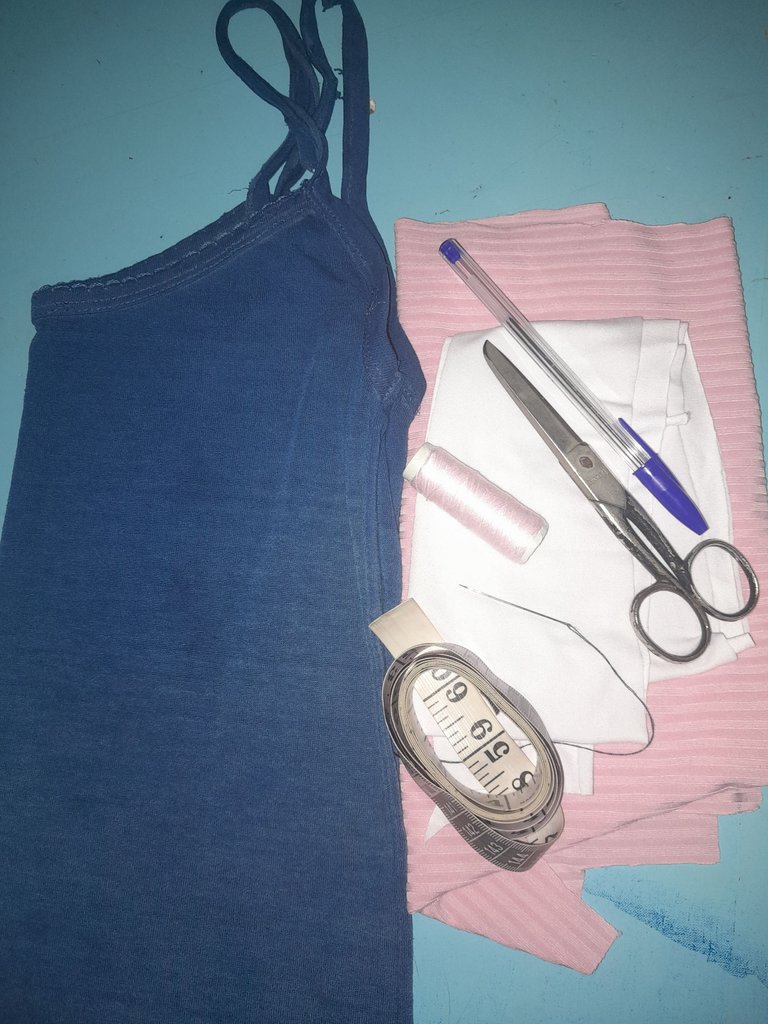
Materiales:
- Retazos de tela reciclada, rosada y blanca.
- Blusa para el patrón.
- Hilo.
- Aguja.
- Tijera.
- Cinta métrica.
English:
Materials:
- Scraps of recycled fabric, pink and white.
- Blouse for the pattern.
- Yarn.
- Needle.
- Scissors.
- Tape measure.

Español:
Paso 1:
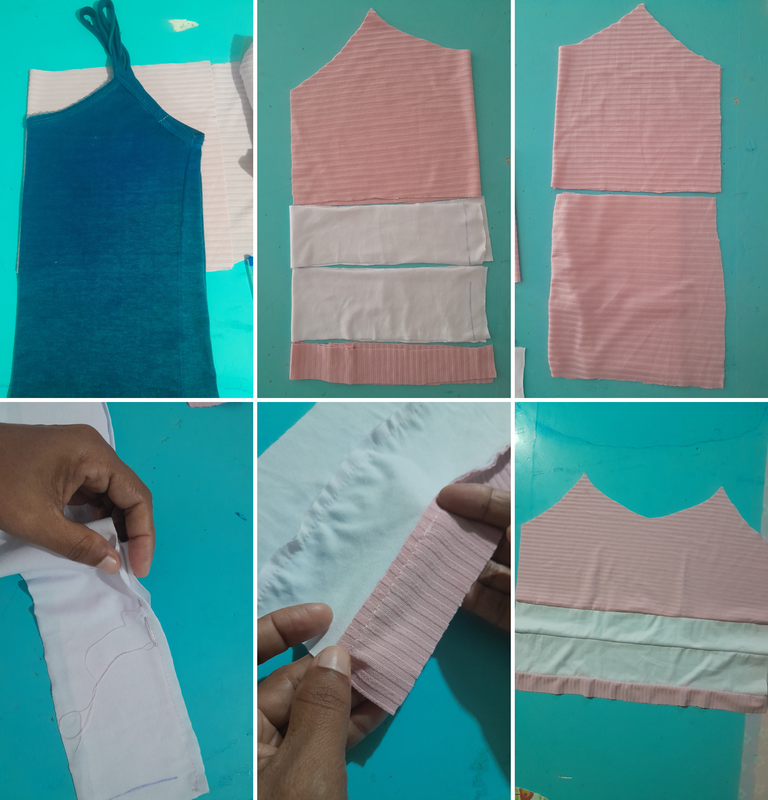
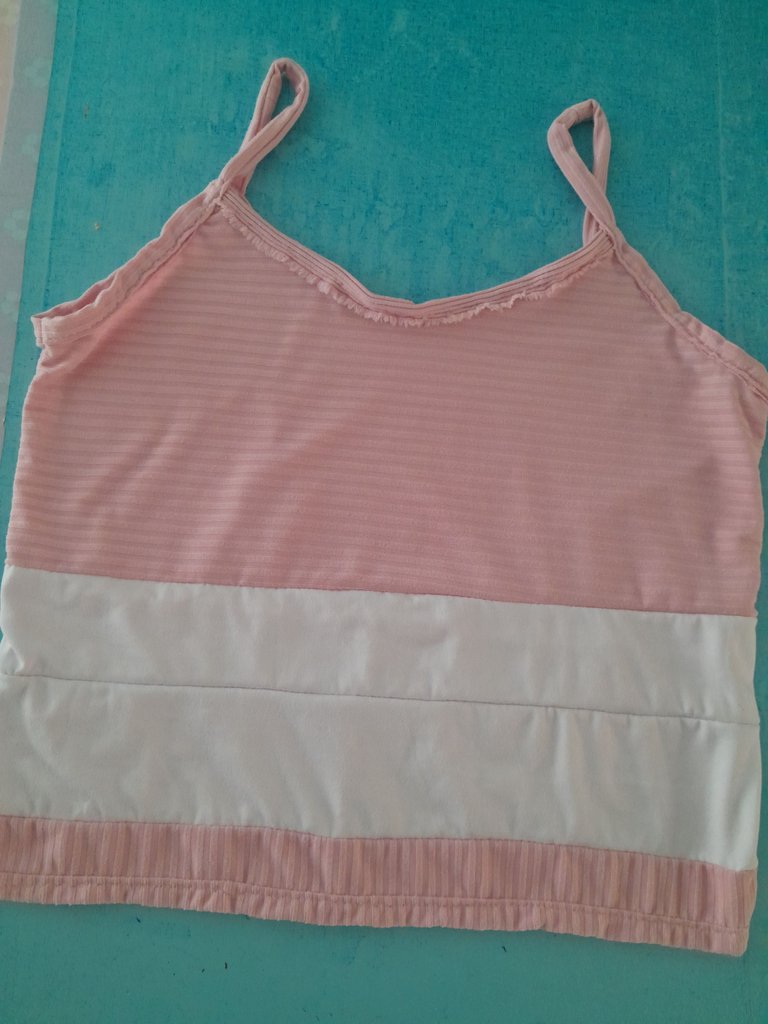
- Doblamos los retazos de telas en dos, tomando en cuenta la medida del patrón. Para la parte frontal de nuestra blusa tuve que marcar en 4 partes, ya que la tela que tengo eran retazos pequeños y tenía que ingeniar para hacer mi blusa y así dejar los retazos más grande para la parte de atrás.
Después de marcar y recortar, comienzo armar, cosiendo la parte frontal primero, cosí los dos pedazos de la tela blanca, luego continuamos cosiendo la blanca junto con la rosada en la parte de abajo, después la cosemos con la de arriba.
Ahora cosemos la parte de atrás de la blusa de la misma manera que la frontal, pero esta fue más fácil ya que cosimos 2 piezas de tela rosada nada más.
English:
Step 1:
- We folded the fabric scraps in two, taking into account the measurement of the pattern. For the front part of our blouse I had to mark in 4 parts, since the fabric I have were small scraps and I had to make my blouse in order to leave the bigger scraps for the back part.
After marking and trimming, I begin to assemble, sewing the front part first, I sewed the two pieces of the white fabric together, then we continue sewing the white together with the pink at the bottom, then we sew it with the top.
Now we sew the back of the blouse in the same way as the front, but this one was easier since we sewed 2 pieces of pink fabric only.

Español:
Paso 2:
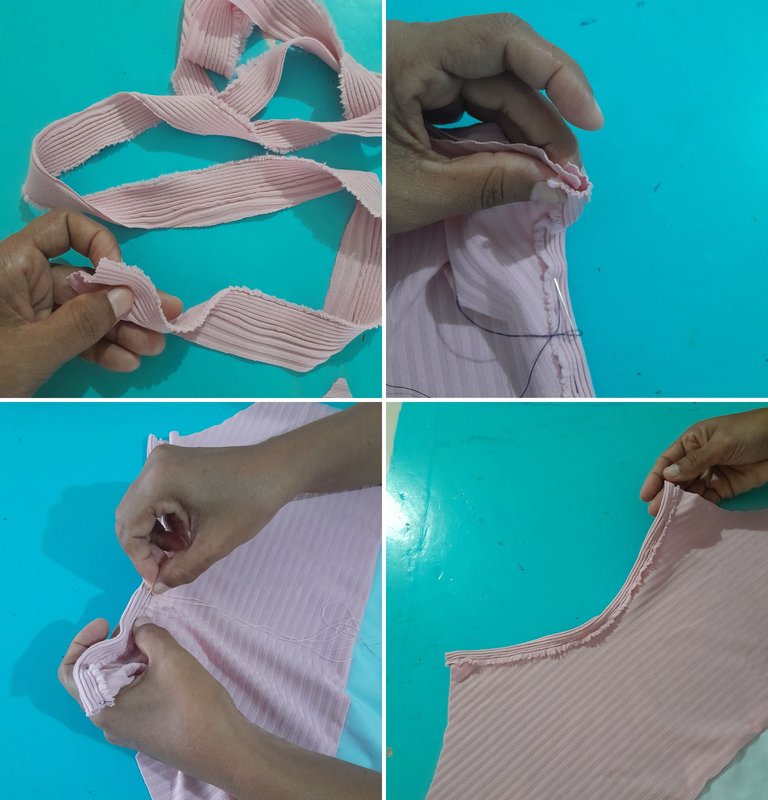
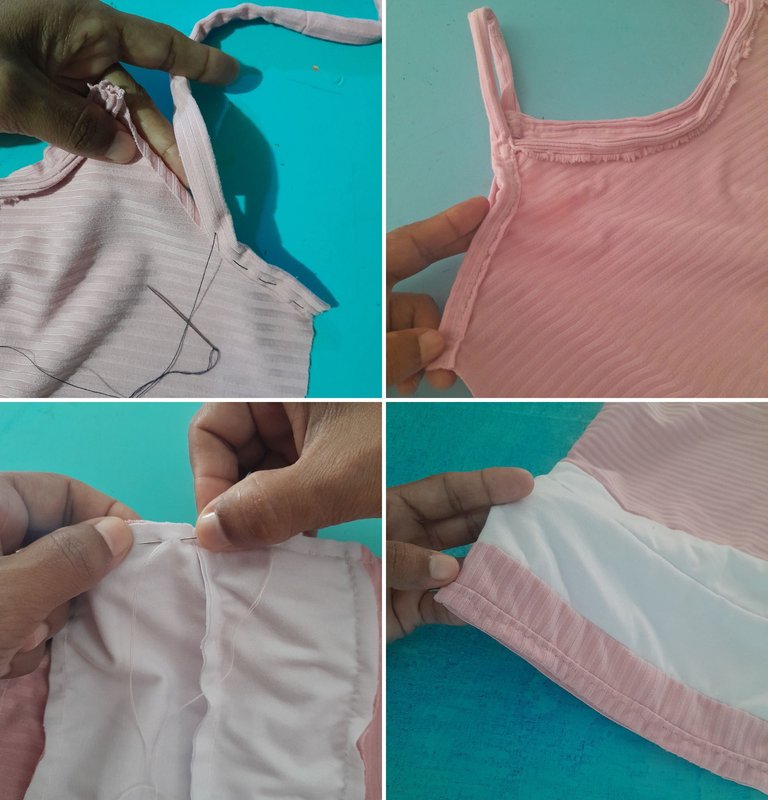
- Aquí cosemos el borde del cuello con una tira 4 cm de ancho con el borde de la tela rosada que ya traiga esos pequeños flequillos y me pareció un detalle para la parte del cuello. Esta tira la doble en dos por todo el borde del cuello, la mitad hacia delante y la otra hacia dentro.
English:
Step 2:
- Here we sew the edge of the collar with a strip 4 cm wide with the edge of the pink fabric that already has those little bangs and I thought it was a detail for the collar part. This strip is folded in two along the edge of the collar, half facing the front and half facing the inside.

Español:
Paso 3:
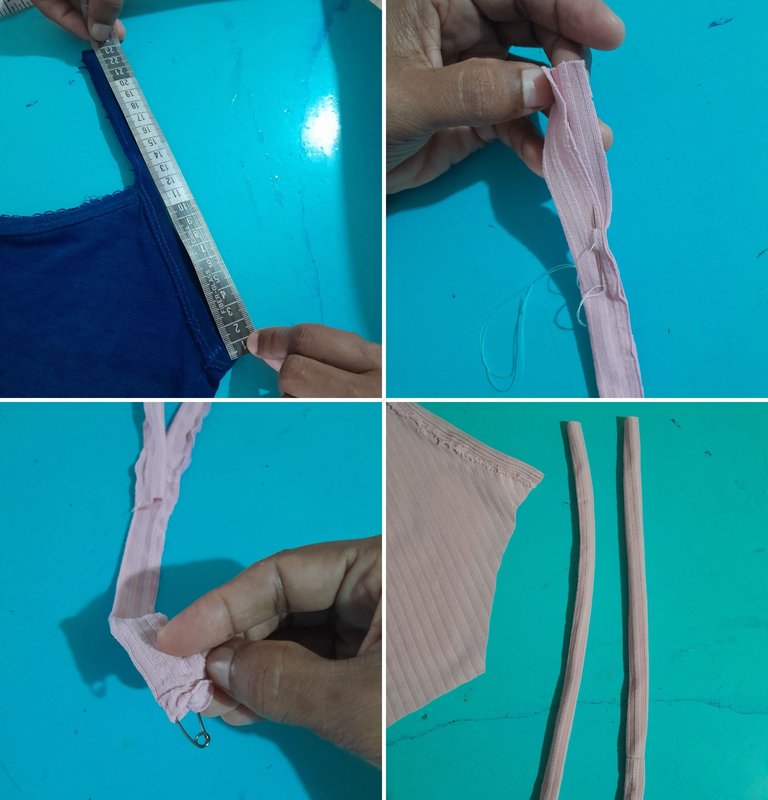
- Ahora tomamos la medida de los tirantes de la blusa con el patrón, así marcamos y recortamos los 2 tirantes en la tela rosada con 5 cm de ancho x 23 cm de largo, doblamos la tira del lado al revés y cosemos muy bien, luego con la ayuda de un alfiler o gancho lo volteamos del lado derecho.
English:
Step 3:
- Now we take the measurement of the straps of the blouse with the pattern, so we mark and cut the 2 straps in the pink fabric with 5 cm wide x 23 cm long, we fold the strip on the wrong side and sew very well, then with the help of a pin or hook we turn it right side out.

Español:
Paso 4:
- Teniendo los tirantes listos, procedemos a coserlos desde la parte lateral de la manga de la blusa hacia el cuello, luego con la otra punta del tirante realizamos lo mismo con la parte de atrás de la blusa, ahora cosemos ambos laterales de la blusa, y terminamos cosiendo el ruedo de la blusa haciendo un dobles de 1 cm hacia dentro.
English:
Step 4:
- Having the straps ready, we proceed to sew them from the side of the sleeve of the blouse towards the neck, then with the other end of the strap we do the same with the back of the blouse, now we sew both sides of the blouse, and we finish sewing the hem of the blouse making a double of 1 cm inwards.

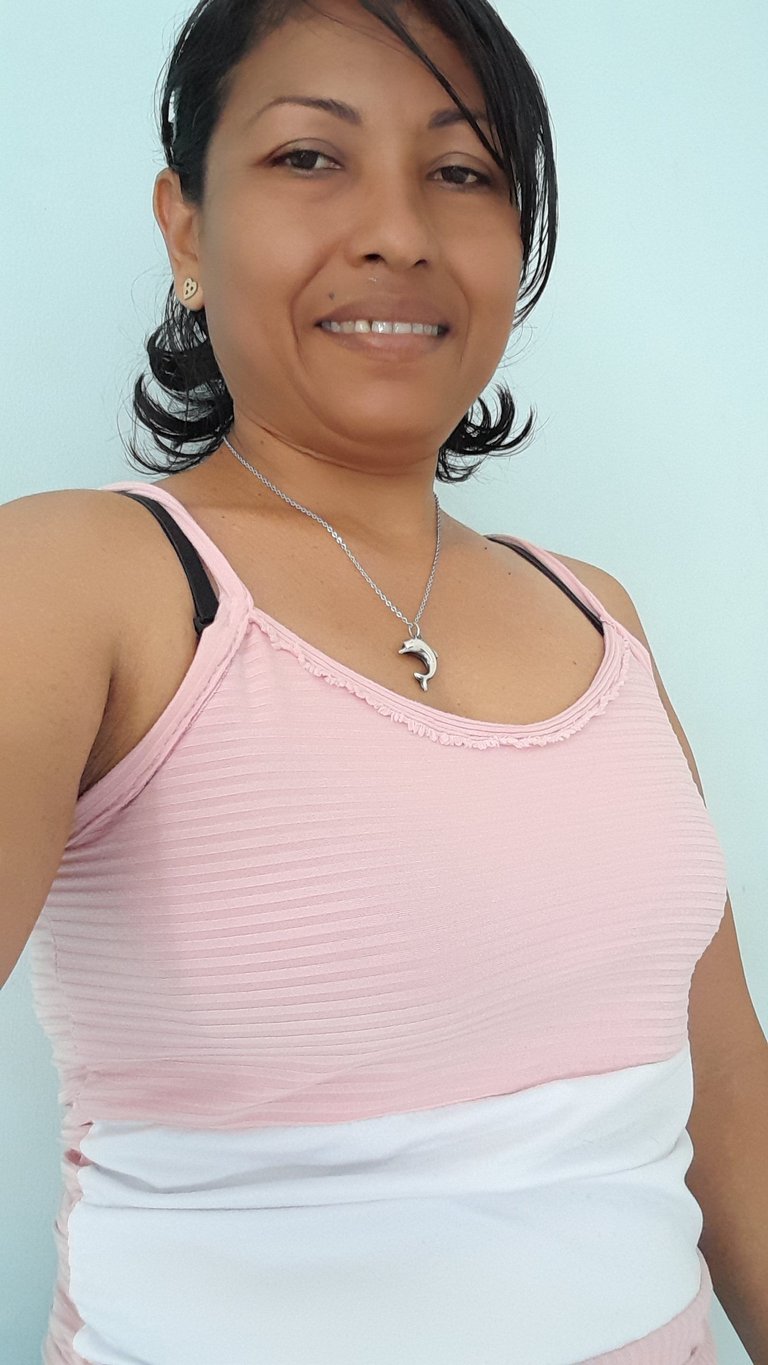
Espero les haya gustado mi resultado final, saludos, nos vemos luego.
I hope you liked my final result, greetings, see you later.
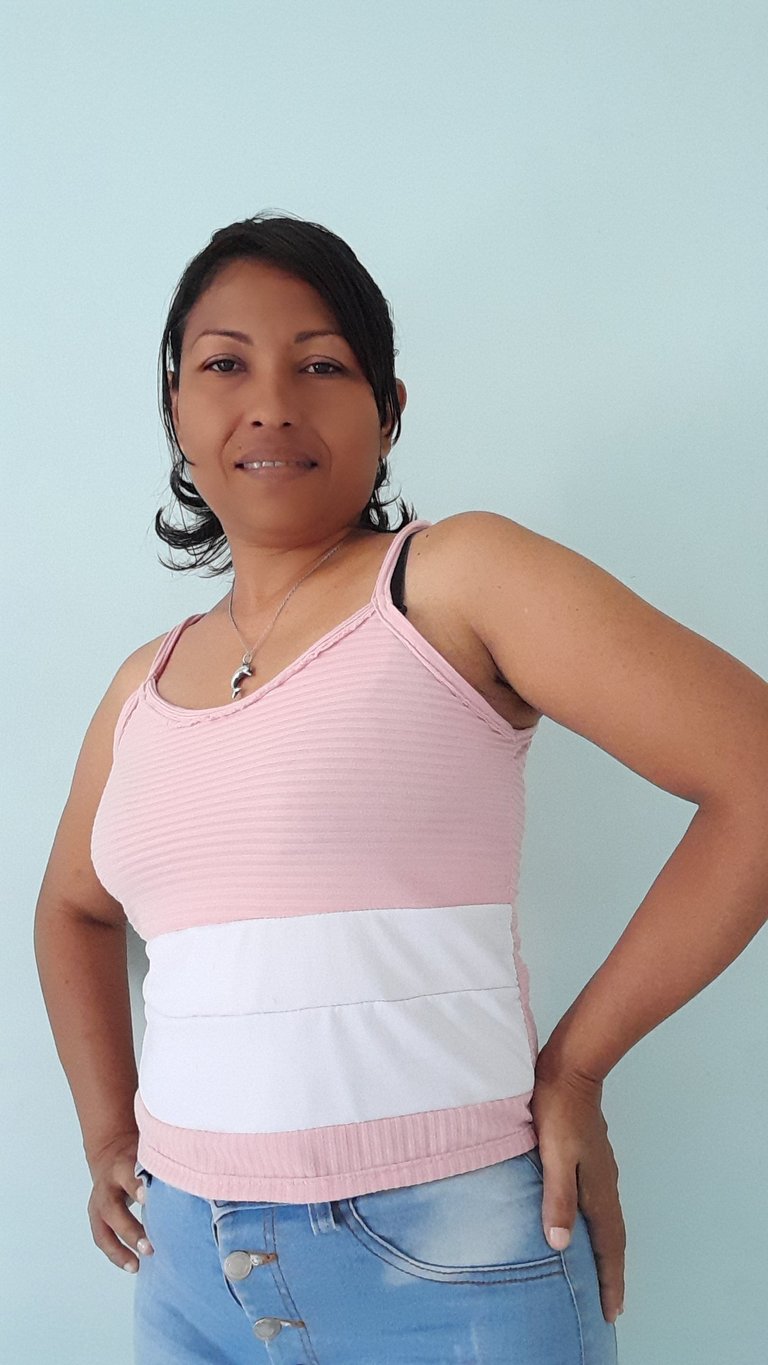
Todas las fotos son de mi autoría y editadas con Canva.Traductor: DeepL Translate.
All photos are my own and edited with Canva.Translator: DeepL Translate.
0
0
0.000
Hola @coromoto20 creo que has hecho un gran trabajo al unir estos retazos, la camisa quedo muy linda. Te felicito porque coser a mano requiere de mucha dedicación, Gracias por compartir.
Si es un gran trabajo coser a mano, pero es muy lindo y me encanta, eso si requiere más de tiempo pero con dedicacion se hacen cosas maravillosas, Gracias por tu lindo comentario, saludos y muchas bendiciones.