[ESP - ENG ] Vestido de niña con escote frontal. - Girl's dress with front neckline.
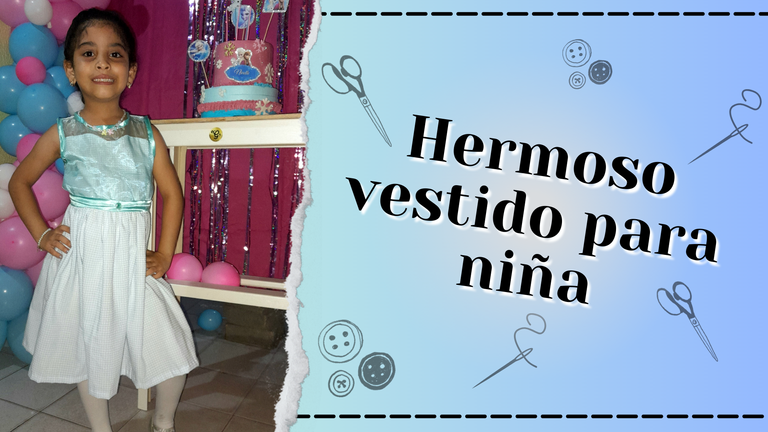
Many greetings my dear Hive friends, today I am going to share with you in the beautiful NeedleWorkMonday community a beautiful dress I made for my niece, as a birthday gift, let's see the step by step.
Español:
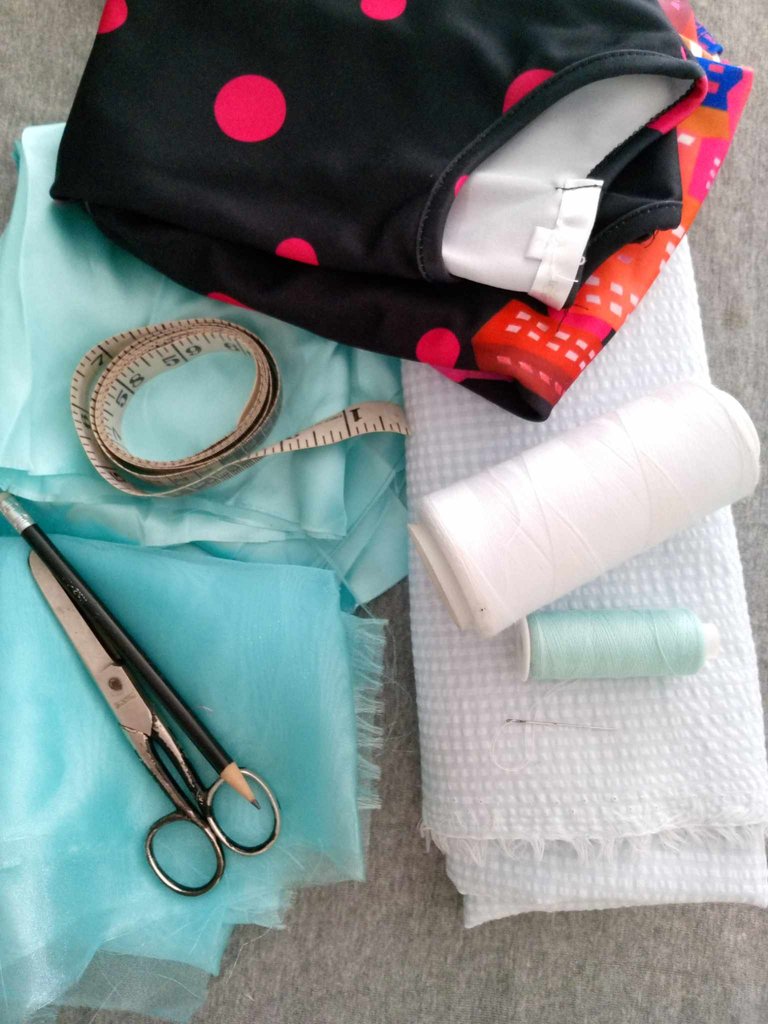
Materiales:
- Tela de bambula semi corrugada.
- Tela organza cristal.
- Tela raso satín.
- Vestido de patrón.
- Cinta métrica.
- Hilo.
- Aguja.
- Tijera.
English:
Materials:
- Semi-corrugated bamboo fabric.
- Crystal organza fabric.
- Satin satin fabric.
- Pattern dress.
- Tape measure.
- Thread.
- Needle.
- Scissors.

Español:
Paso 1:
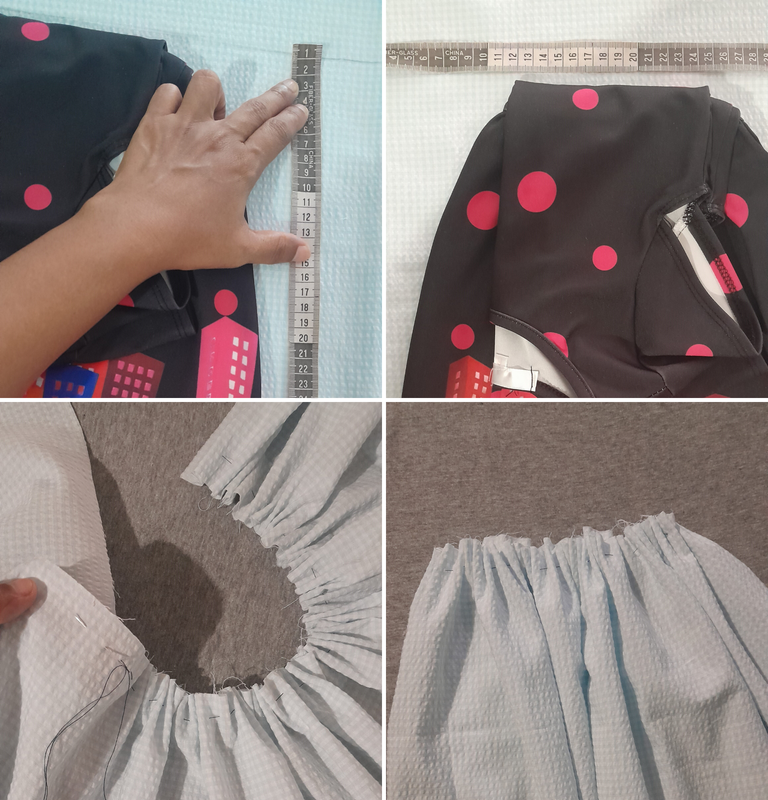
- Tomamos la medida de la parte inferior o falda del vestido con la medida de nuestro patrón, tomando en cuenta primeramente el largo de la falda, luego la parte ancha de la cintura, cortamos con la tijera y comienzo a coser en forma de basteo, para que la costura en la cintura quede arruchada.
English:
Step 1:
- We take the measurement of the lower part or skirt of the dress with the measurement of our pattern, taking into account first the length of the skirt, then the wide part of the waist, cut with the scissors and start sewing in a baste pattern, so that the seam at the waist is gathered.

Español:
Paso 2:
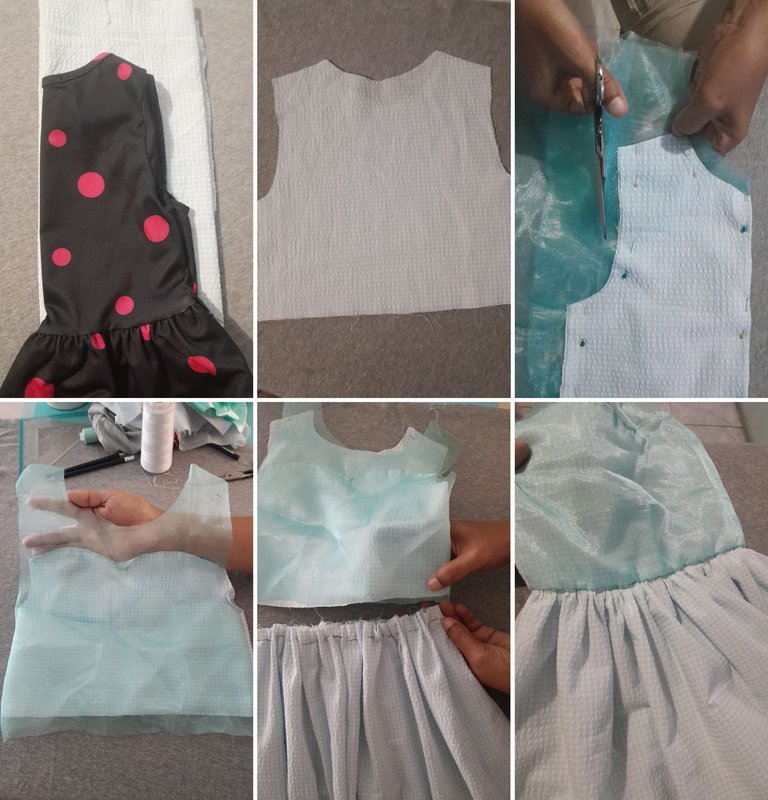
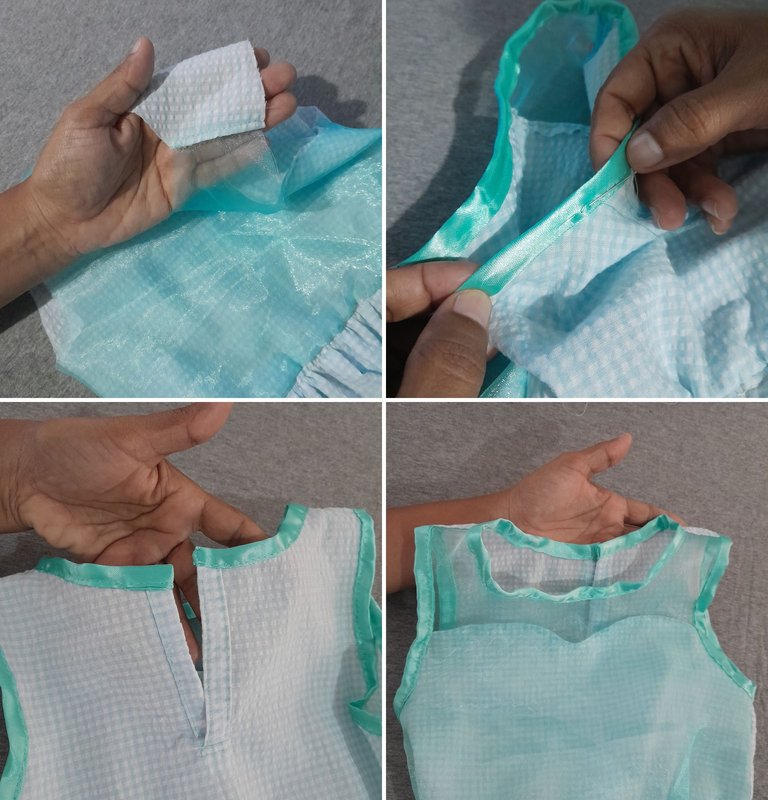
- Ahora comenzamos con la parte superior del vestido, doblamos el patrón del vestido en 2, colocamos la tela doble y también la doblamos en 2 para que salgan las dos piezas, la parte frontal y la parte trasera, la parte frontal le hacemos un corte ondulado en el pecho para que quede con el diseño del escote, luego marcamos y recortamos. Después tomamos la tela de organza, también la doblamos en 2 y la cortamos a la medida de la parte frontal, luego la cosemos junto a la tela del vestido por los laterales uniendo la parte frontal con la de atrás. Seguidamente procedo a coser la parte superior con la inferior del vestido uniendo las dos piezas con la costura por la parte al revés, luego cosemos el ruedo del vestido doblando hacia dentro un centímetro de tela y cosemos.
English:
Step 2:
- Now we start with the upper part of the dress, we fold the pattern of the dress in 2, we place the double fabric and also fold it in 2 so that the two pieces come out, the front and the back, the front we make a wavy cut in the chest so that it is with the design of the neckline, then we mark and cut out. Then we take the organza fabric, we also fold it in 2 and cut it to the size of the front part, then we sew it next to the dress fabric by the sides joining the front part with the back part. Then I proceed to sew the upper part with the lower part of the dress joining the two pieces with the seam on the back side, then we sew the hem of the dress folding inward a centimeter of fabric and sew.

Español:
Paso 3:
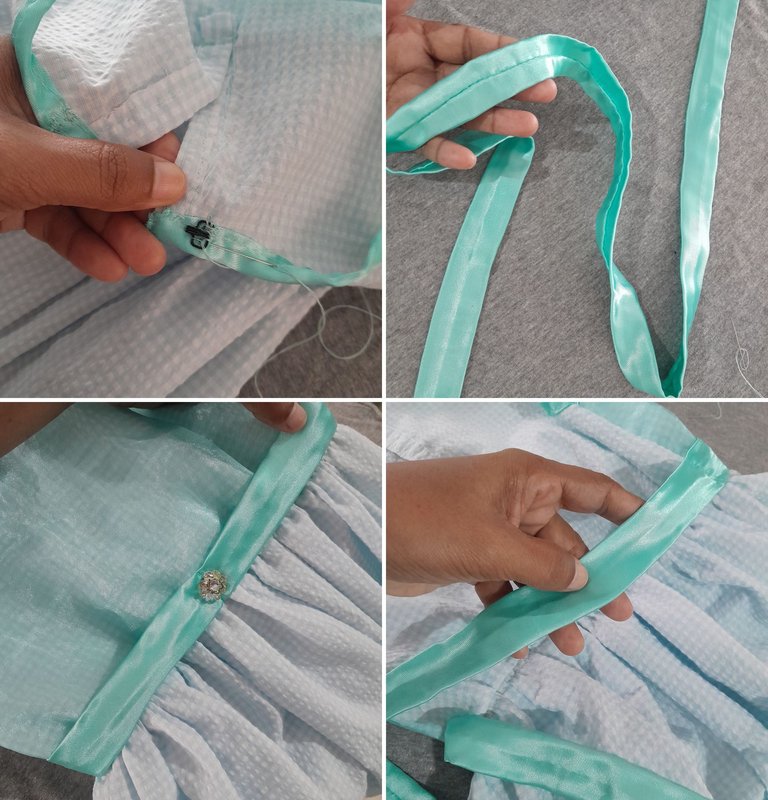
- Aquí continuo, cosiendo la parte del hombro, luego con un tira de 4 cm de ancho de tela raso cosemos por todo el borde de las mangas y el cuello; antes de coser el cuello cortamos una abertura de 8 cm en la parte de la espalda en forma de " V ", y le cosemos una tira por todo el borde de la abertura.
English:
Step 3:
- Here I continue, sewing the shoulder part, then with a 4 cm wide strip of satin fabric we sew all around the edge of the sleeves and the collar; before sewing the collar we cut an 8 cm opening in the back in a "V" shape, and we sew a strip all around the edge of the opening.

Español:
Paso 4:
- Luego coloque ganchlto macho - hembra en la parte de la atrás para cerrar el vestido, ahora cortamos una tira larga de 6 cm de ancho que nos sirve de cinturón la cosemos del lado al revés después la volteamos al derecho, la cosemos con unas pequeñas puntadas de costura a la altura de la cintura donde esta la unión del vestido dejando sin coser la parte de atrás donde se vendría haciendo un lazo quedando de diseño y dándole forma al vestido.
English:
Step 4:
- Then place a male - female hook in the back part to close the dress, now we cut a long strip of 6 cm wide that serves as a belt, we sew it on the back side then we turn it right side up, we sew it with small stitches at the waist where is the union of the dress leaving without sewing the back part where it would come making a loop remaining of design and giving shape to the dress.

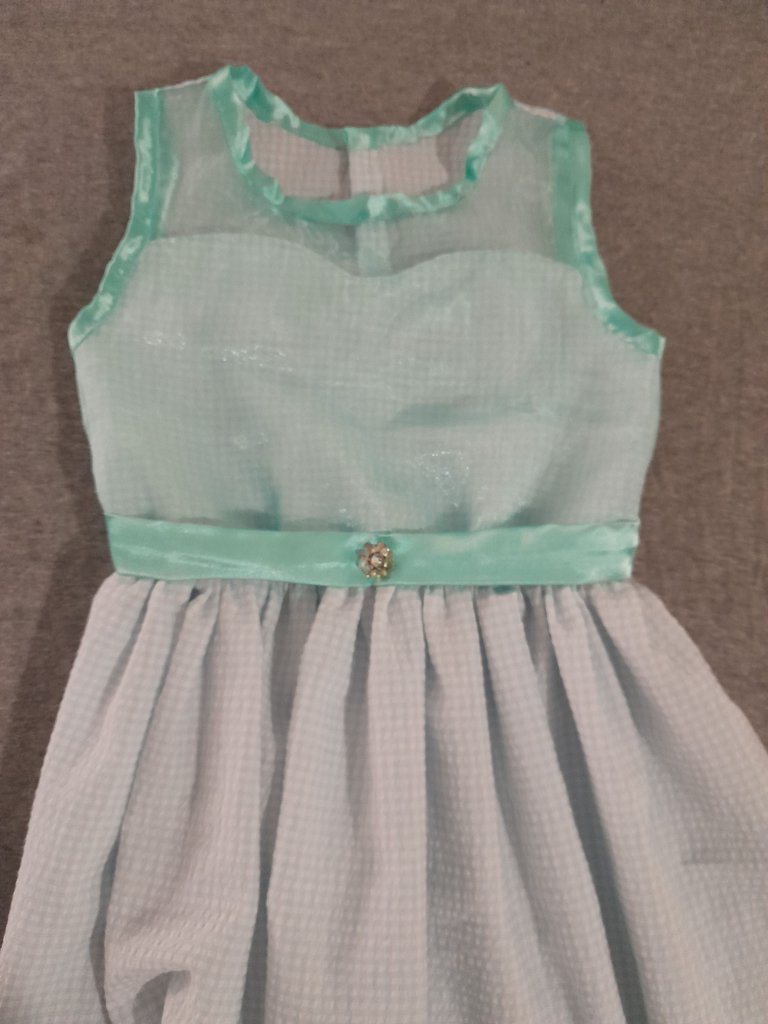
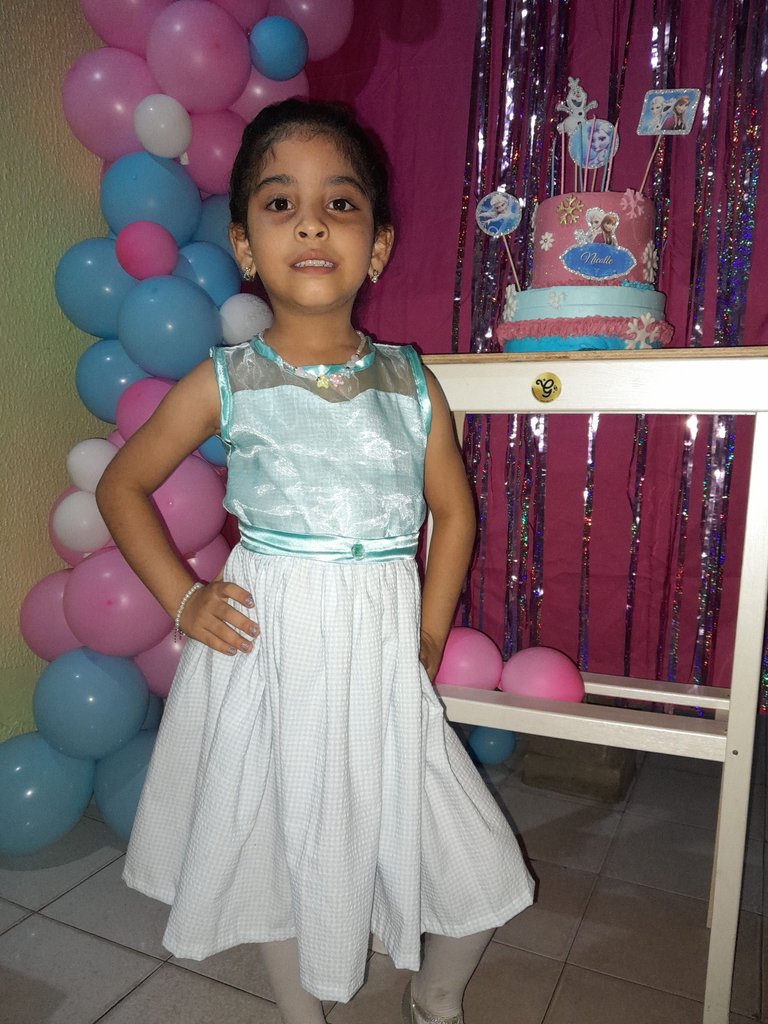
Aquí le muestro mi resultado final espero les haya gustado, saludos feliz día.
Here I show you my final result I hope you liked it, greetings happy day.
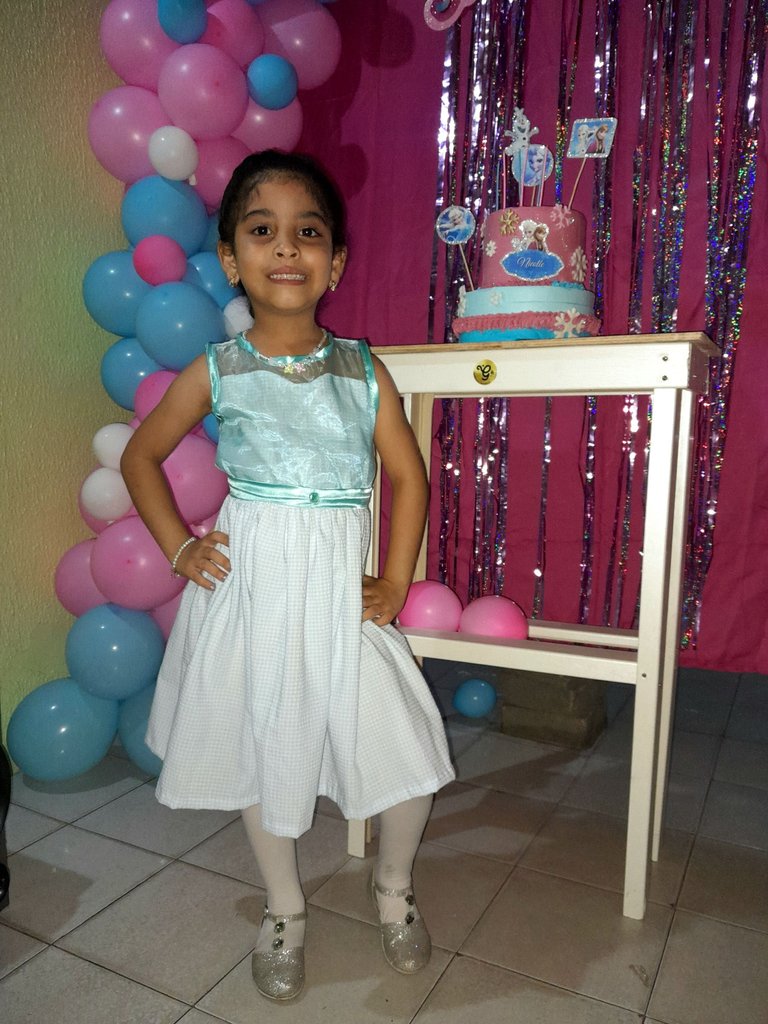
Todas las fotos son de mi autoría y editadas con Canva.
All the photos were taken by me and edited with Canva.
0
0
0.000
This is so beautiful and the color is nice, I hope the little kid will be so happy weldone and thank you for sharing
Yes it is a very tender color, thank you so much that you liked it. Best regards.
Beautiful dress this one
!DIY
!discovery 30
This post was shared and voted inside the discord by the curators team of discovery-it
Join our Community and follow our Curation Trail
Discovery-it is also a Witness, vote for us here
Delegate to us for passive income. Check our 80% fee-back Program
Such a beautiful birthday gift for your niece. She would remember this one for a long long time.
Such a beautiful birthday gift for your niece. She would remember this one for a long long time.
You can query your personal balance by
!DIYSTATSBuenas Coromoto :) Felicitaciones por el hermoso vertido que hiciste. Muy elegante para cualquier celebración. Gracias por compartirlo ❤️.
Por otro lado, te invito a leer esta publicación para redactar posts más valiosos en esta comunidad.
https://peakd.com/hive-127911/@needleworkmonday/oh-just-another-tutorial
Te mando un saludo, que estes bien 😃!
Gracias por tu comentario, saludos.
Saludos @coromoto20, te quedó muy lindo el vestido, tu sobrina se ve muy guapa y feliz con su nuevo atuendo.
Feliz viernes!
Muchas gracias, si esta muy feliz con su nuevo vestido, saludos.