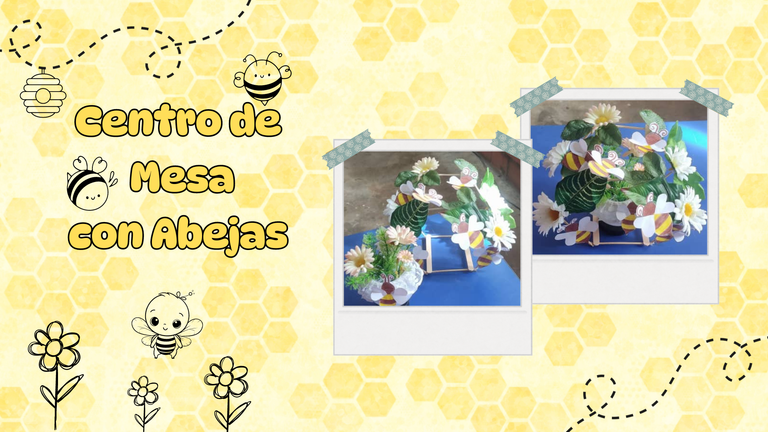
Centerpiece with Bees

🐝🌻¡Welcome!
👉Centerpiece Tutorial made with Recyclable Material Inspired by Bees

🐝🌻Spanish
Hola, familia #DIYHub, la idea de inspirarnos en las abejas para diseñar una bella pieza de manualidades es muy especial. Ciertas de ideas pueden pasar por nuestra mente. Es admirable como un pequeño insecto, como lo son las abejas; tiene un papel fundamental en la naturaleza, además de brindarnos su jugosa producción de miel.
Cuando puedes ver con detalle el pequeño cuerpo de una abeja, se puede admirar su hermosa estructura y vistoso color, aunque es verdad que la mayoría huimos de ella por temor a su picadura.
A continuación les presento mi pieza de manualidad inspirada en las abejas, una pieza elaborada con material reciclado que tenía en casa.
🐝🌻English
Hello #DIYHub family, the idea of being inspired by bees to design a beautiful craft piece is very special. Certain ideas can cross our minds. It is admirable how a small insect, such as bees, has a fundamental role in nature, besides giving us its juicy honey production. When you can see in detail the small body of a bee, you can admire its beautiful structure and colorful color, although it is true that most of us run away from it for fear of its sting. Here I present my craft piece inspired by bees, a piece made with recycled material that I had at home.

🐝🌻List of Materials

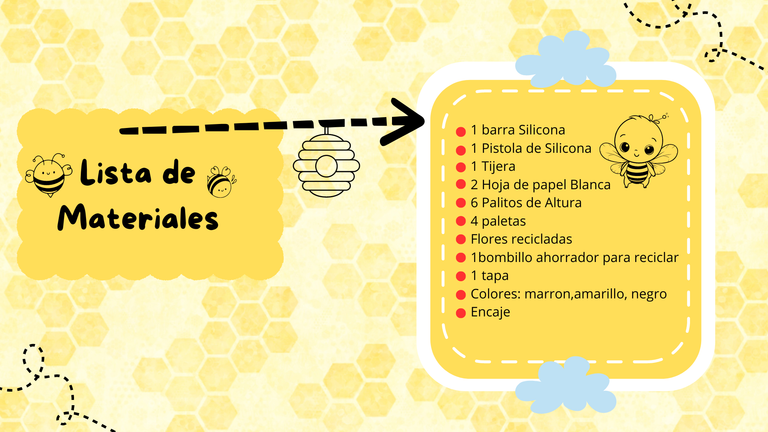
🌻1 Silicona bar
🌻1 Silicone Gun
🌻1 Scissors
🌻2 White sheet of paper
🌻6 Height Sticks
🌻4 pallets
🌻Recycled flowers
🌻1 energy saving light bulb for recycling
🌻1 lid
🌻Colors: brown, yellow, black
🌻Lace

🐝🌻Step 1

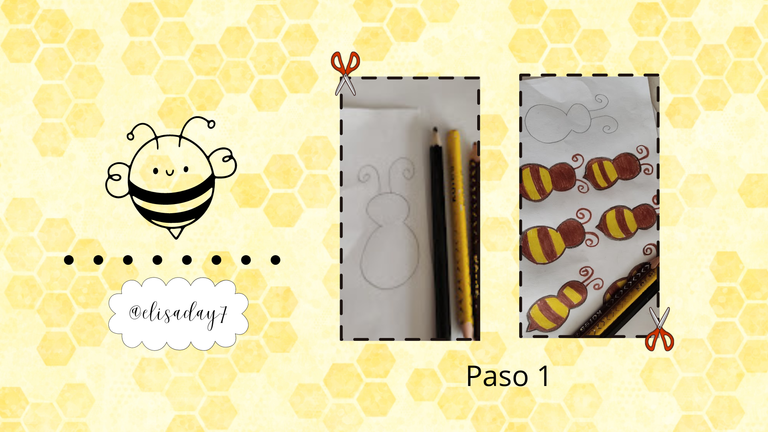
🌻El primer paso es elegir el diseño de tu abeja, pintarlo en una hoja de papel. Para esta manualidad, diseñé un patrón fácil para el cuerpo de mis abejas. Elegí este dibujo porque el pintar un diseño más elaborado nunca ha sido mi fuerte; sin embargo, hice este diseño con mucho cariño para ustedes, fácil y sencillo. El color seleccionado para este diseño es el marrón y el amarillo para el cuerpo de las abejas. El tamaño del cuerpo de cada abeja mide 2 cm. Aplica color y, una vez terminada, recorta el cuerpo. Para las alas de cada abeja usa el resto de hojas que sobra y corta una pequeña pieza en forma de corazón. Puedes hacer muchas abejas con este diseño. En este centro de mesa utilicé 8 pequeñas abejas.
🌻The first step is to choose your bee design, paint it on a sheet of paper. For this craft, I designed an easy pattern for the body of my bees. I chose this pattern because painting a more elaborate design has never been my forte; however, I lovingly made this design for you, easy and simple. The color selected for this design is brown and yellow for the body of the bees. The size of the body of each bee is 2 cm. Apply color and, once finished, cut out the body. For the wings of each bee use the leftover leaves and cut out a small heart-shaped piece. You can make many bees with this design. In this centerpiece I used 8 small bees.


🐝🌻Step 2

🌻Un panal de abejas es una estructura multifuncional que es muy interesante de detallar. Este no solo puede ser el hogar de miles de pequeñas abejas, además es un espacio ideal para abundantes depósitos de miel silvestre.
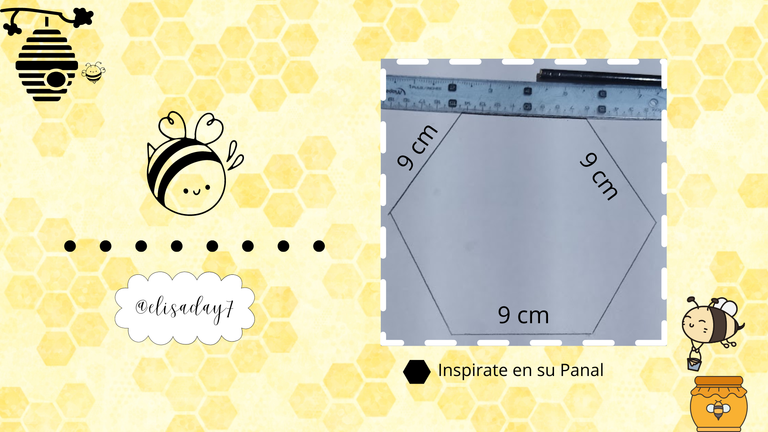
Su estructura es muy parecida a los hexágonos para este diseño. Inspirado en las abejas y su panal, toma una hoja en blanco y con ayuda de una regla dibuja un hexágono de medidas de 9 cm para cada uno de sus lados.
🌻A honeycomb is a multifunctional structure that is very interesting to detail. Not only can it be home to thousands of small bees, it is also an ideal space for abundant stores of wild honey. Its structure is very similar to the hexagons for this design. Inspired by the bees and their honeycomb, take a blank sheet of paper and with the help of a ruler draw a hexagon measuring 9 cm for each of its sides.


🐝🌻Step 3

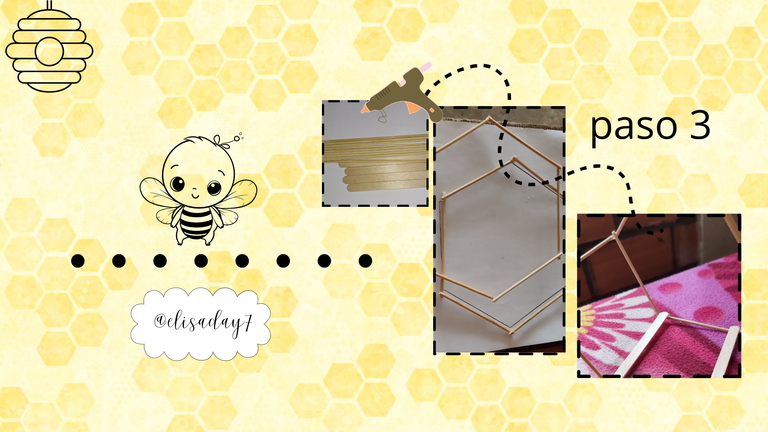
🌻Una vez que el dibujo de la figura de Hexágono esté listo, este patrón te servirá de guía para hacer una pieza en forma de hexágono con los 6 palitos de altura. Corta cada palito de altura siguiendo las medidas del hexágono, arma dos piezas en forma de hexágono. Para unir tus piezas usa silicona caliente. Cuando todas tus piezas estén armadas, une las dos partes de los hexágonos hechos con los palitos de altura con las 4 paletas, colocando 2 en la parte superior y dos en la parte inferior. Casi está listo. Para terminar la estructura, puedes usar dos piezas de palitos de altura de 9 cm para cada lado de tu estructura. De esta forma, tendrás como resultado una pequeña y linda estructura en forma de hexágono.
🌻Once the Hexagon figure drawing is ready, this pattern will serve as a guide to make a hexagon-shaped piece with the 6 height sticks. Cut each stick height following the measurements of the hexagon, assemble two hexagon shaped pieces. To join your pieces together use hot silicone. When all your pieces are assembled, join the two parts of the hexagons made with the height sticks with the 4 paddles, placing 2 at the top and two at the bottom. It's almost ready. To finish the structure, you can use two pieces of 9 cm high sticks for each side of your structure. This way, you will have a nice little hexagon-shaped structure as a result.


🐝🌻Step 4

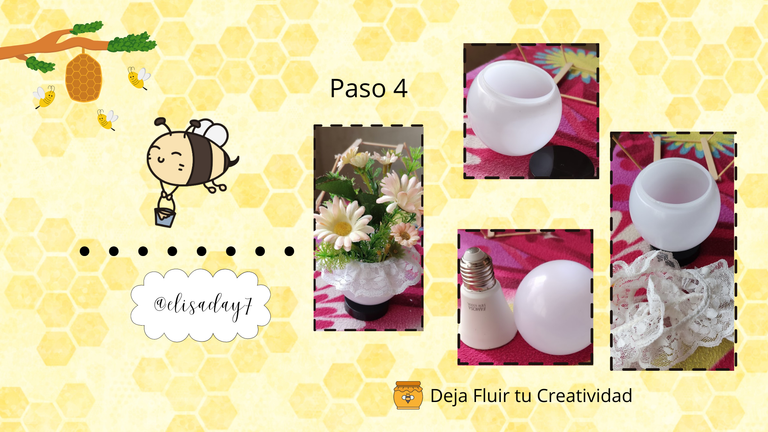
🌻Para acompañar esta estructura en forma de hexágono, utilicé dos piezas de material reciclado. La primera de ellas es una tapa negra de un envase de crema que tenía disponible y el segundo el protector de plástico de un viejo bombillo ahorrador, una gran idea para darle utilidad a estas dos piezas. Al unir la tapa y el protector de plástico, se forma una linda y pequeña maceta ideal para colocarla dentro de la estructura en forma de hexágono con flores. Con ayuda de silicona caliente une el protector y la tapa. Una vez lista, la maceta, agrega apliques de encaje. En casa tenía disponible Encaje Blanco. Para mí, la idea de hacer una maceta con estas dos piezas fue muy especial.
🌻To accompany this hexagon-shaped structure, I used two pieces of recycled material. The first one is a black lid from a cream container I had available and the second one is the plastic protector from an old energy saving light bulb, a great idea to make these two pieces useful. By joining the lid and the plastic protector, a cute little flowerpot is formed, ideal to place inside the hexagon-shaped structure with flowers. With the help of hot silicone, attach the protector and the lid. Once the pot is ready, add lace appliqués. At home I had White Lace available. For me, the idea of making a planter with these two pieces was very special.


🐝🌻Step 5

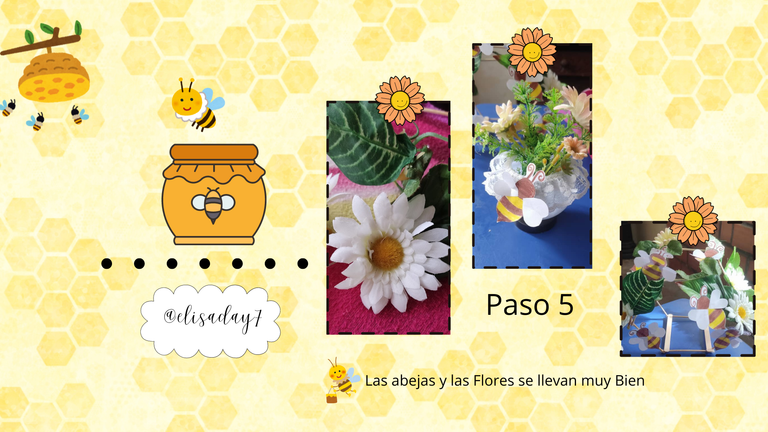
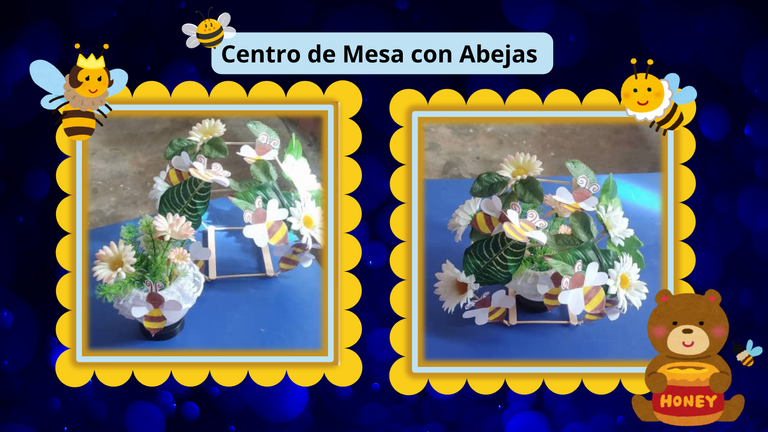
🌻Las abejas y las flores se llevan muy bien, así que para decorar la estructura y la maceta reciclaré un pequeño ramo de flores de margaritas que tenía guardado en casa. Finalmente, a este diseño agregué nuestra fuente de inspiración, las abejas, hechas en papel. Deja volar tu creatividad. Cada flor de mi diseño la coloqué con ayuda de silicona caliente. Finalmente, el centro de mesa con materiales reciclados está listo para decorar un espacio del hogar.
🌻Bees and flowers go very well together, so to decorate the structure and the pot I recycled a small bouquet of daisy flowers that I had stored at home. Finally, to this design I added our source of inspiration, the bees, made in paper. Let your creativity fly. I placed each flower in my design with the help of hot silicone. Finally, the centerpiece with recycled materials is ready to decorate a home space.


🐝🌻Final Result

🌻Did you know that beekeeping is the art of caring for bees, to celebrate this important work a date was set aside to celebrate World Bee Day.
This was my participation to the bee-inspired crafts theme for more details on this initiative visit 👉🍯 DIYHub August Contest: World HONEY BEE Day

🌻Conoce la Comunidad #DIYHubd ven y comparte tus Manualidades
🌻Imagen de portada diseñada con la versión gratuita de Canva por @elisaday7 .
🌻Presentaciones diseñadas a través de Canva.
🌻Separadores de texto hechos en Canva.
🌻Traductor DeepL.
🌻Fotografías y manualidad de abejas de mi propiedad @elisaday7
🌻Meet the #DIYHubd Community come and share your Crafts
🌻Cover image designed with the free version of Canva by @elisaday7 .
🌻Presentations designed through Canva.
🌻Text separators made in Canva.
🌻Translator DeepL.
🌻Photographs and bee craft from my property @elisaday7.

Your bee crafts are a delight. Would be a great beautifier. Good job
thank you @diyhub , it is always a pleasure to share with you🤗😘
Oh que belleza, de verdad es un creativo y lindo centro de mesa 😍
Oh what a beauty, it really is a creative and cute centerpiece 😍.
saludos @yaslenysofia 😘, gracias por apreciar esta manualidad
Very cute and beautiful creativity, thanks for sharing.
thanks for watching this tutorial .
Regards @bimpcy 🤗
This is beautiful ❤️
thanks greetings🤗😘
está hermoso, genial para decorar y sencillo de hacer!
it's beautiful, great for decorating and simple to make!
hello thank you @yasmarit 🤗😘.
It is a very easy piece to elaborate, thank you for appreciating this content. 😉
Saludos @alisaday7, hashecho un hermoso trabajo, el centro de mesa te quedó espectacular; es una gran idea para decorar las mesas en los cumpleaños, seguro los niños estarán felices de comer caramelos de miel, éxito en el concurso.
Feliz lunes!
gracias @belkyscabrera 😘un abrazo para ti 🤗😘
muy lindo a mi tambien eme gustan las manualidades
aunque me parece que el exagono quedo muy cargado de flores te quedo bonito
Greetings @ladyclavel thanks for viewing this post , I like to do crafts from time to time. 😘