Portavasos tejidos en telar / Loom-made cup holders
Hello hivers, two weeks ago I found out about this contest that motivates us to create something for our kitchens. I thought about several things, above all, that it was something that was really needed in my kitchen, but mainly, that we were going to use it hahaha because many times we buy things that we do need but we never use them, either because we're not used to them or because we only buy them on impulse 🙄🤦🏻♀️🤷🏻♀️.
Bueno, me decidí a hacer unos portavasos, no sé tejer crochet pero sí con telar así que les enseñaré cómo hice estos portavasos tejidos en telar, es muy sencillo y se hacen súper rápido. Mi idea era hacer cuatro pero por razones de tiempo sólo hice dos, los otros dos los haré después jajaja.
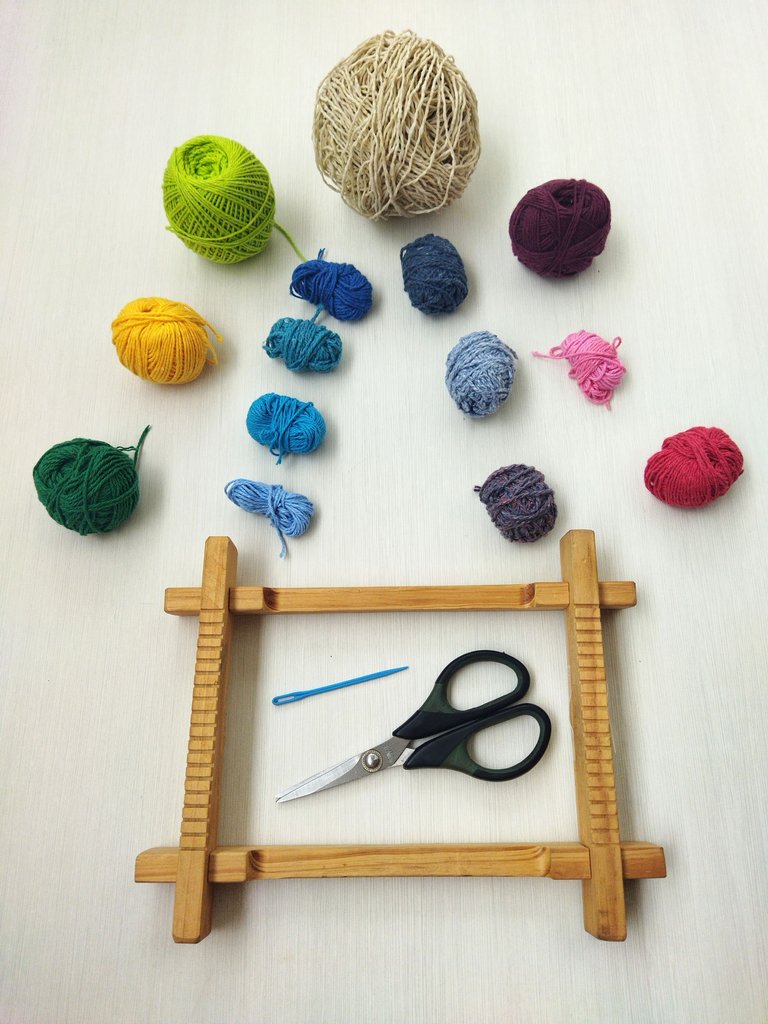
Materiales:
🧶 Un telar pequeño
🧶 Pabilos de colores
🧶 Una aguja gruesa
🧶 Tijeras
Well, I decided to make some cup holders, I don't know how to crochet but I do know how to loom so I will show you how I made these loom woven cup holders, it's very simple and they are done super quickly. My idea was to make four but for reasons of time I only made two, I will do the other two later hahaha.
Materials:
🧶 A small loom
🧶 Colored knitting threads
🧶 A thick needle
🧶 Scissors
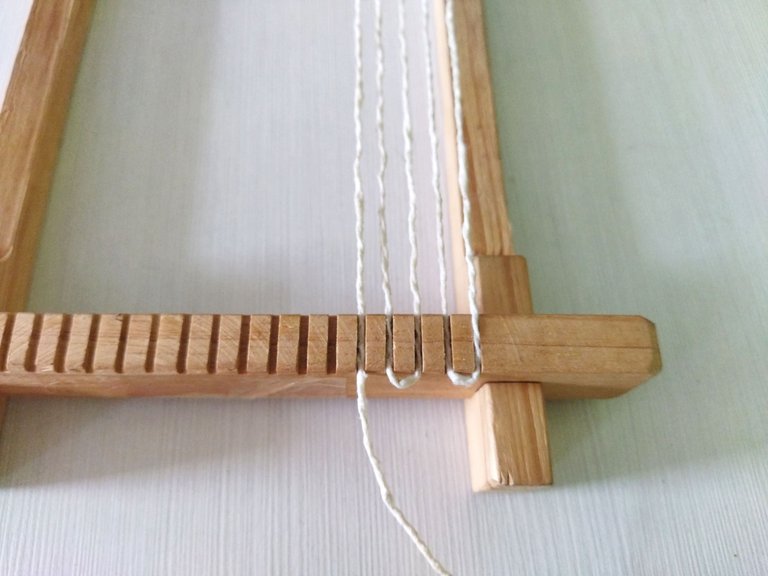
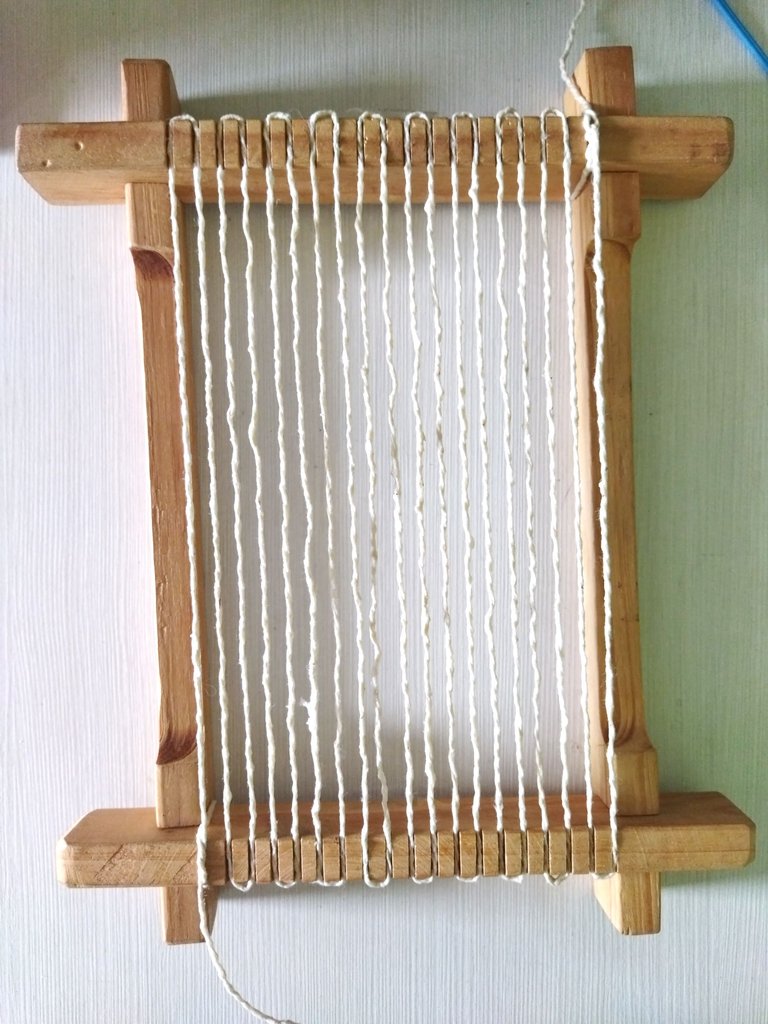
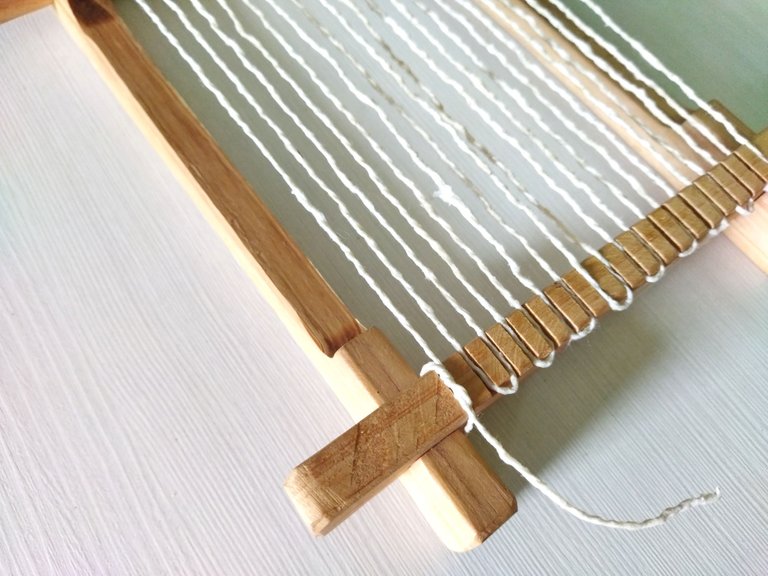
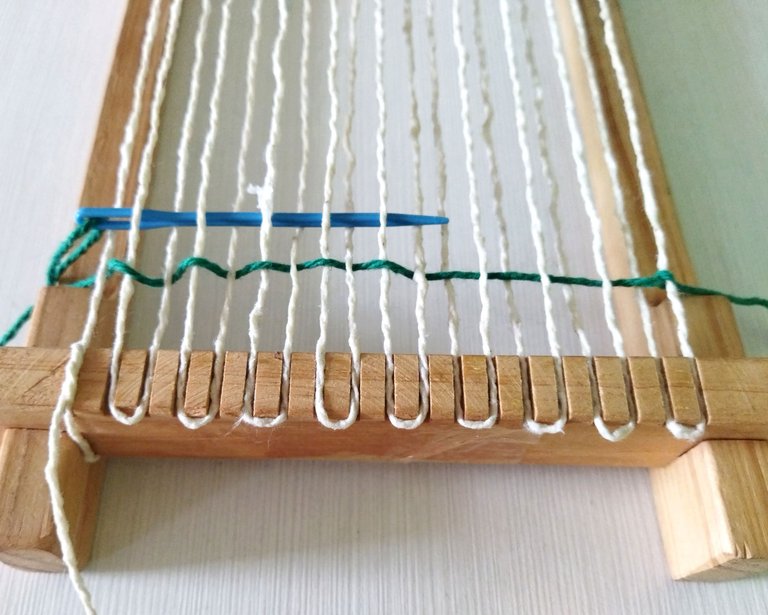
El primer paso es armar la base de nuestro tejido, para eso vamos a usar cualquiera de los pabilos, este color no se verá cuando el tejido esté listo. Yo tenía un pabilo grueso color beige que es rígido así que lo usé como base. Lo primero es empezar amarrando el pabilo al extremo del telar para que no se mueva.
The first step is to assemble the base of our fabric, for that we're going to use any of the threads, this color will not be seen when the fabric is ready. I had a thick beige thread that's stiff so I used that as a base. The first thing is to start tying the thread to the end of the loom so that it doesn't move.
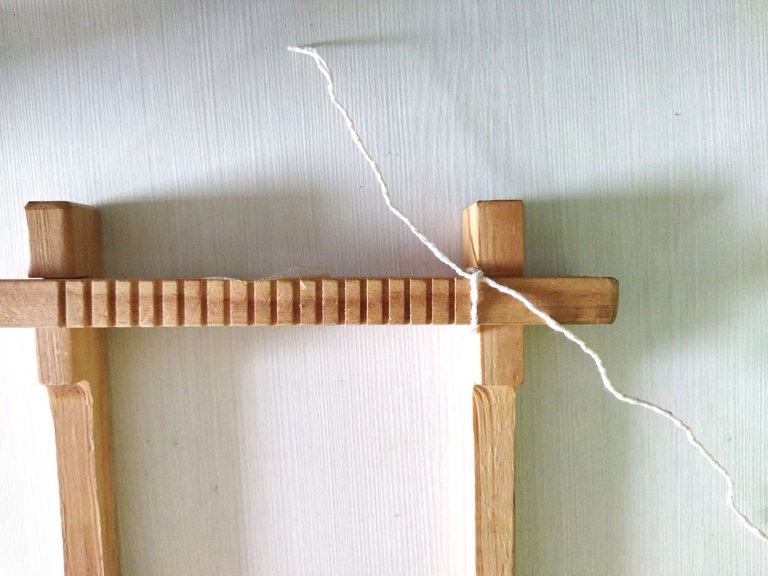
Con este tipo de telar se puede tejer de muchas formas, yo elegí la más sencilla, en esta, no se pasa el hilo por debajo sino simplemente por cada hendidura del telar. Al llegar al otro extremo amarramos el hilo para que esté fijo.
With this type of loom you can weave in many ways, I chose the simplest, in this one, the thread is not passed underneath but simply through each slot of the loom. When we reach the other end we tie the thread so that it's fixed.
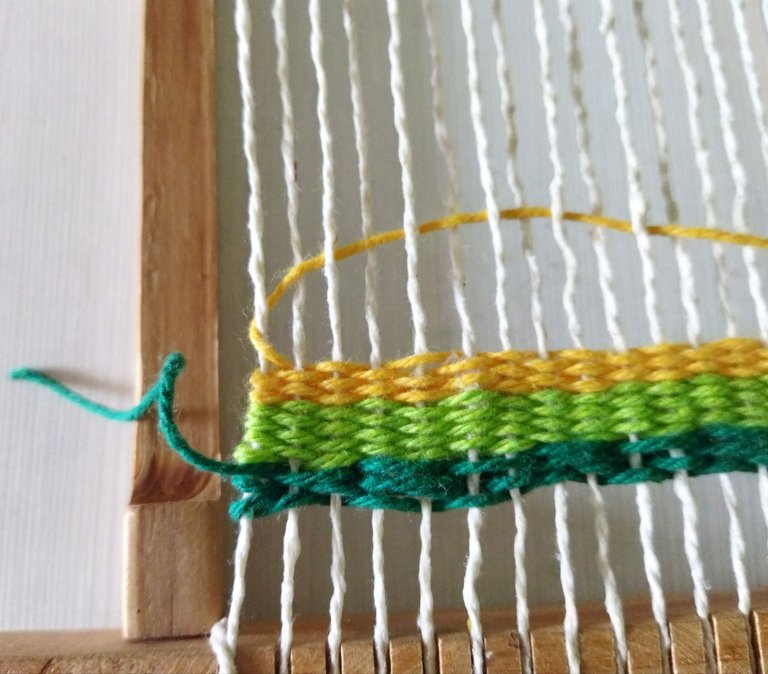
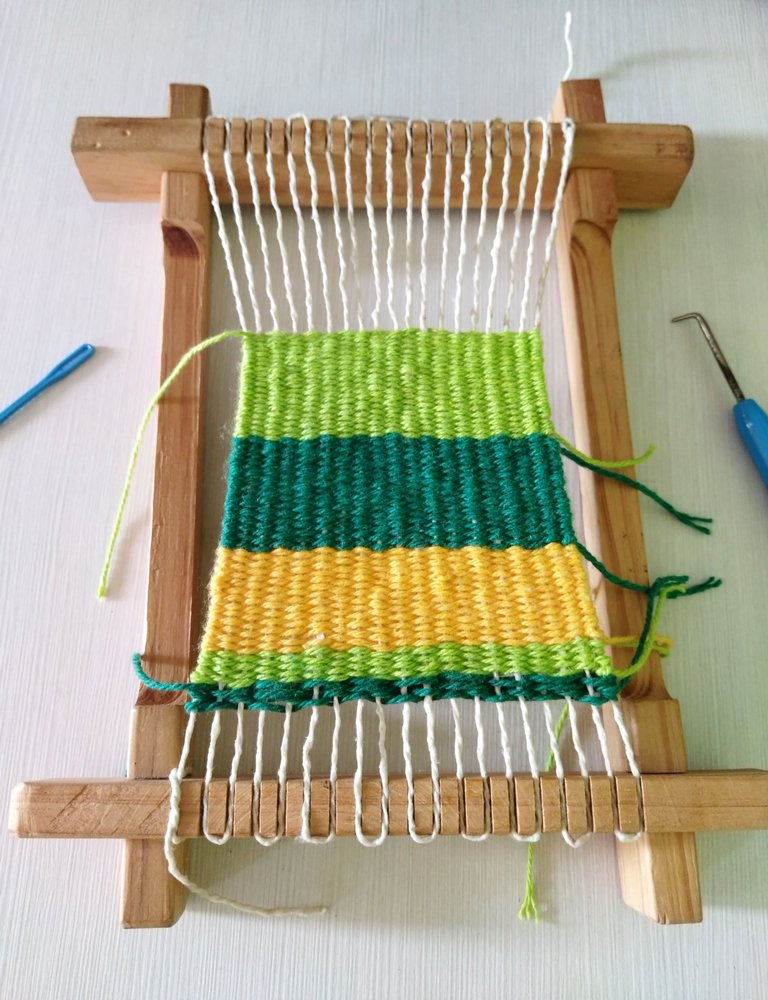
Para mí primer portavasos elegí los colores verde grama, verde claro y amarillo.
For my first cup holder I chose the colors grass green, light green and yellow.
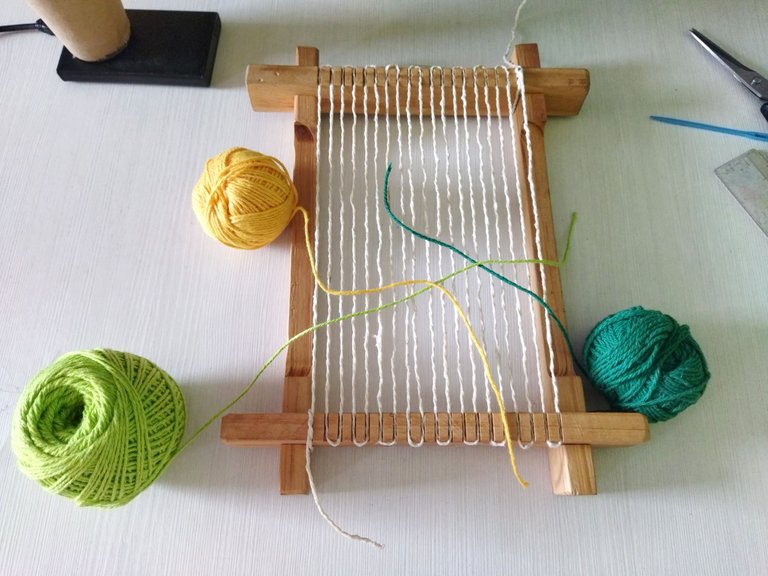
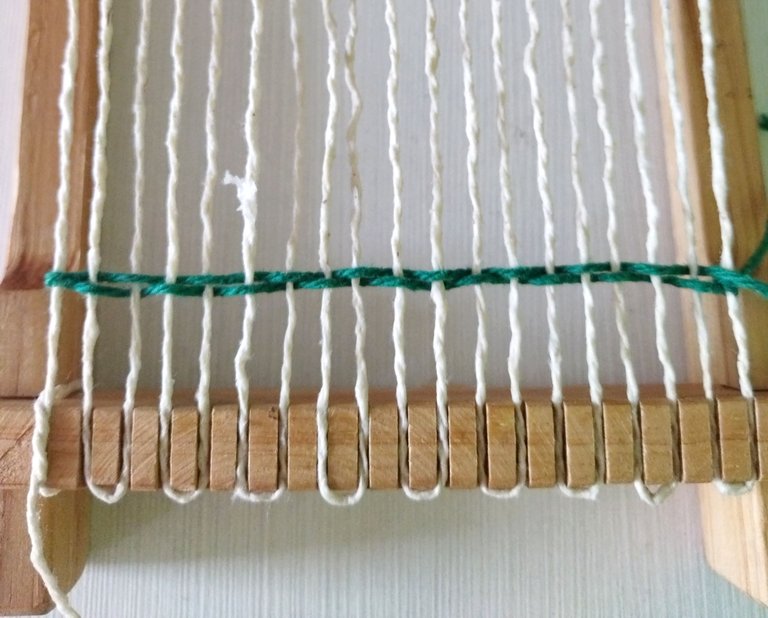
Cortamos la cantidad de hilo a nuestro gusto y empezamos, si quieren un diseño más multicolor deben cortar hilos de uno o dos metros. La técnica del tejido es muy sencilla, vamos a pasar el hilo alternándolo, uno arriba y otro abajo.
We cut the amount of thread to our liking and begin, if you want a more multicolored design you should cut threads of one or two meters. The weaving technique is very simple, we're going to pass the thread alternating, one above and one below.
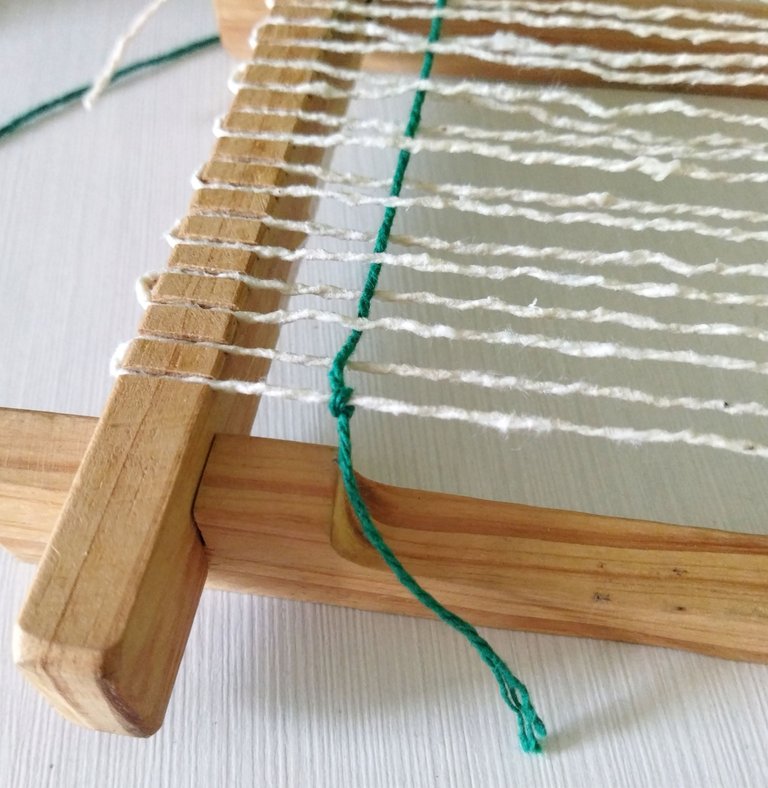
Al llegar al otro extremo seguiremos el mismo patrón, teniendo cuidado de que el tejido sea lo opuesto al de la línea de abajo.
When we reach the other end we will follow the same pattern, taking care that the fabric is the opposite of the line below.
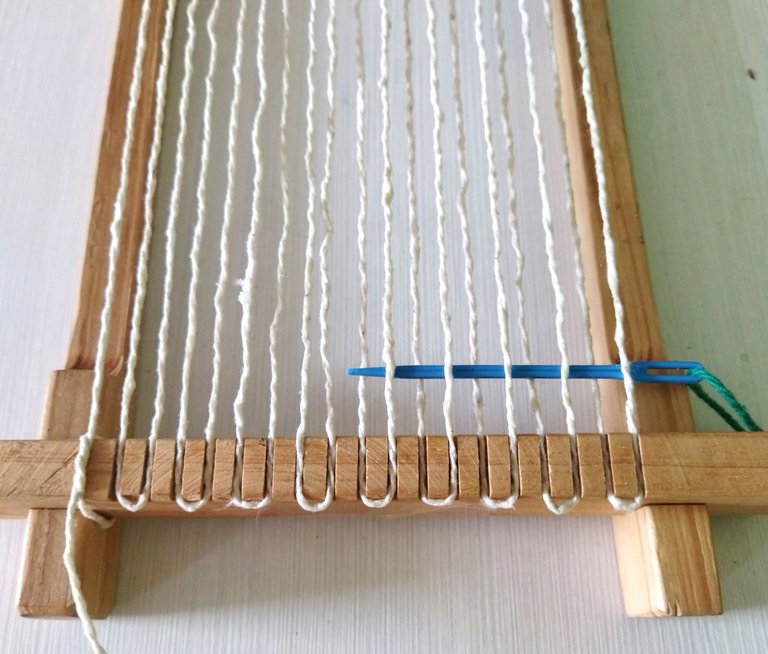
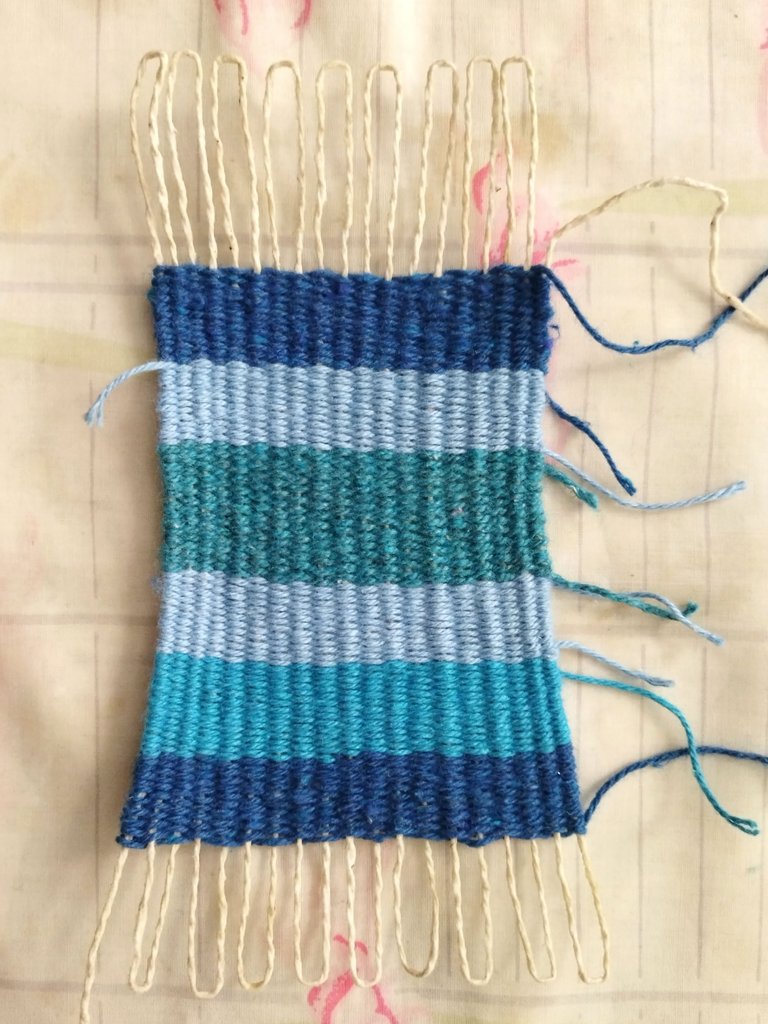
Seguí agregando los otros colores, si sólo tienen un color lo pueden hacer unicolor, eso depende del gusto de cada uno. Es importante que cada vez que terminen una línea vayan empujando el tejido hacia abajo para que quede bien ajustado y sin espacios vacíos, yo usé un gancho de telar.
I continued adding the other colors, if you only have one color you can make it unicolor, that depends on each person's taste. It's important that every time you finish a line you push the fabric down so that it's tight and without empty spaces. I used a loom hook.
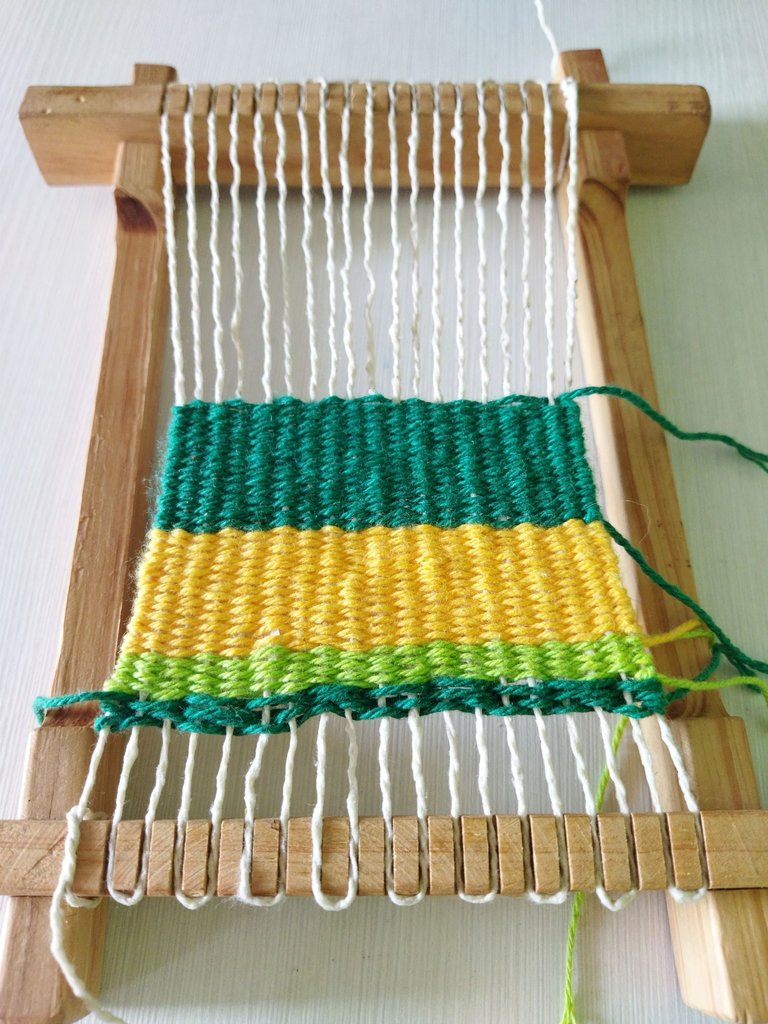
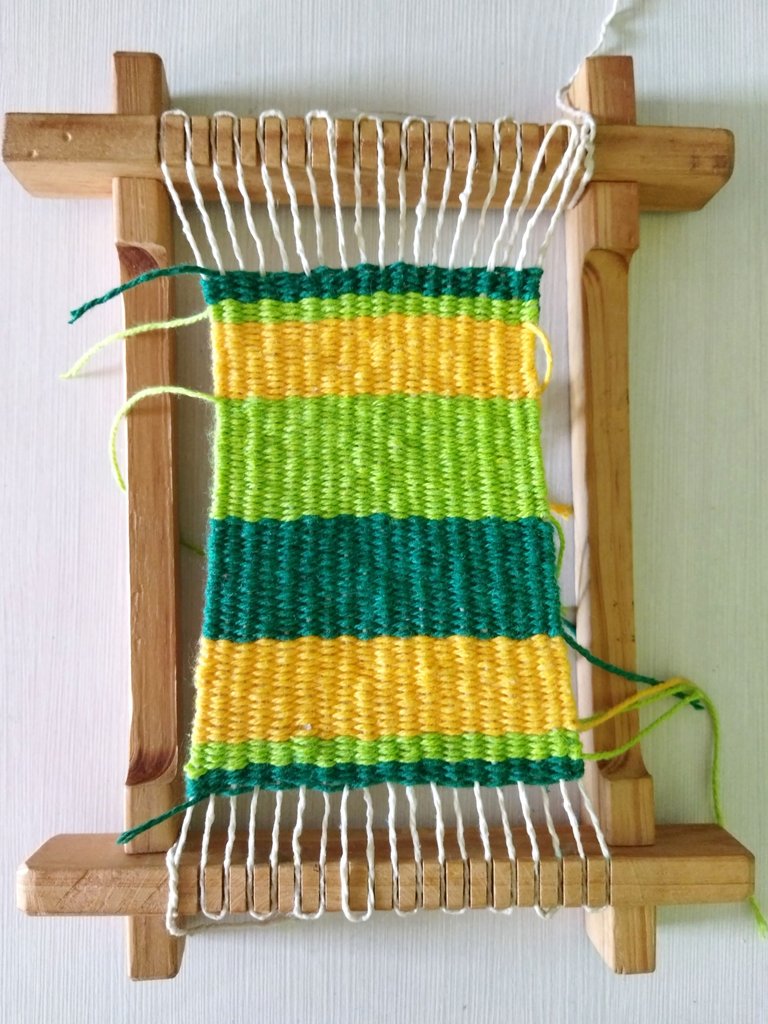
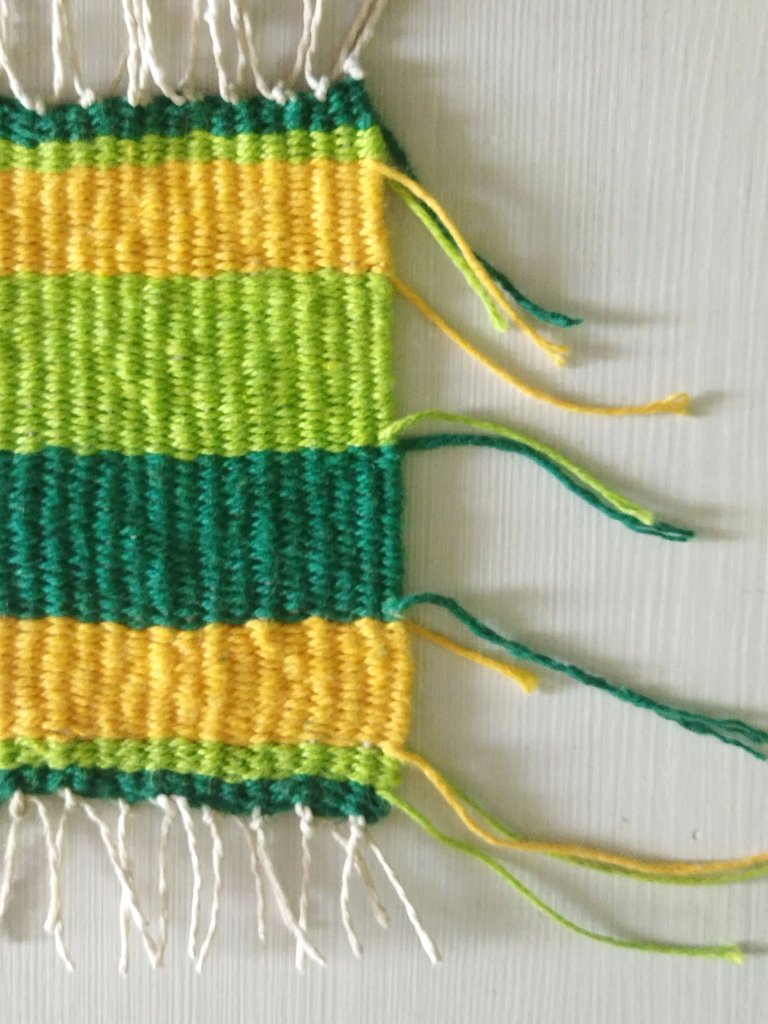
Este portavasos está listo, ahora hay que sacarlo del telar para terminar los últimos detalles. Por lo general los portavasos son cuadrados o redondos, pero como a mi siempre me gusta hacer todo lo contrario a lo que hacen los demás, pues lo hice rectangular jajaja 😎.
This cup holder is ready, now it needs to be taken off the loom to finish the last details. Generally the cup holders are square or round, but since I always like to do the opposite of what others do, I made it rectangular hahaha 😎.
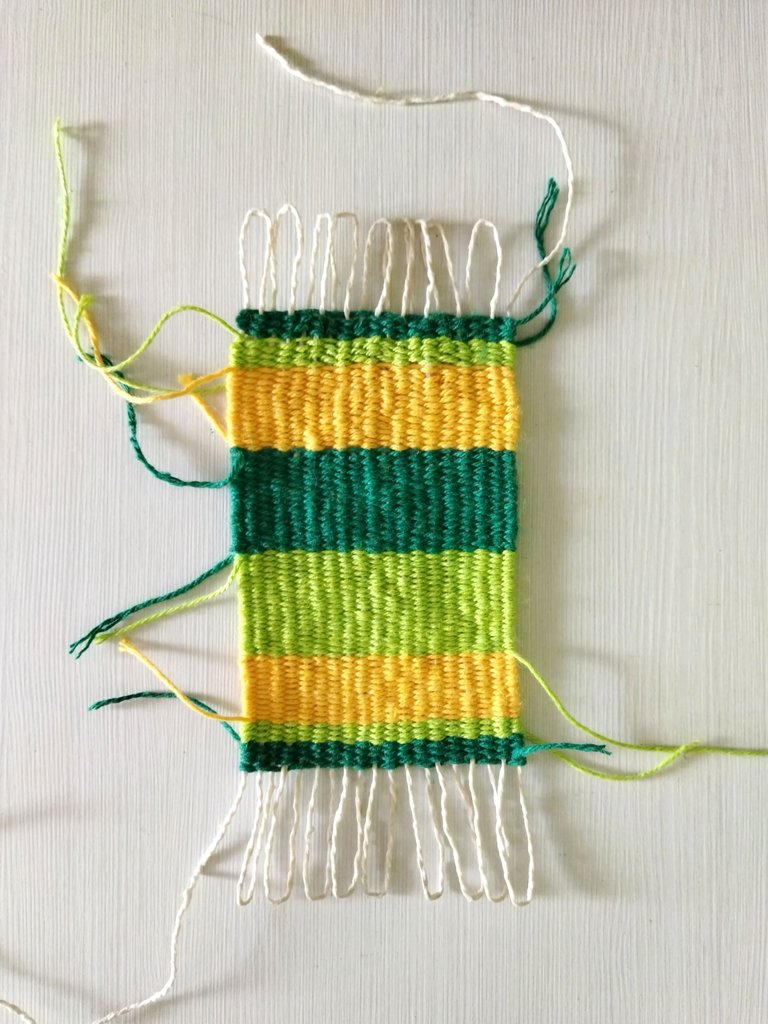
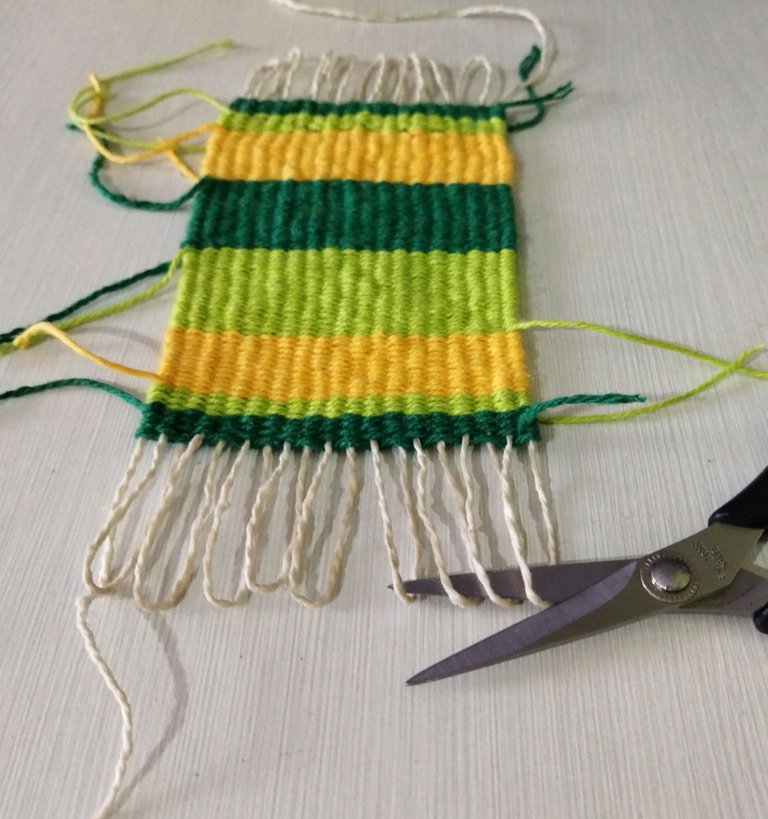
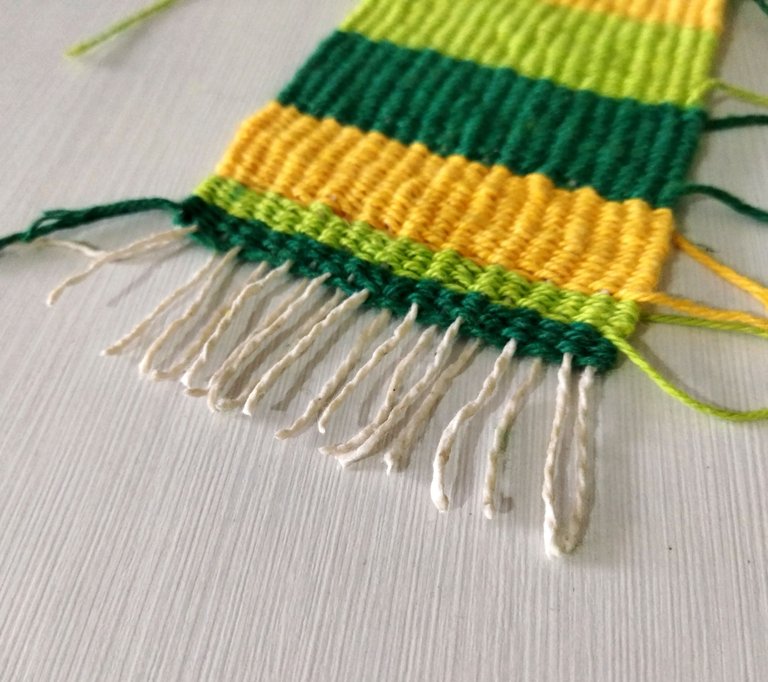
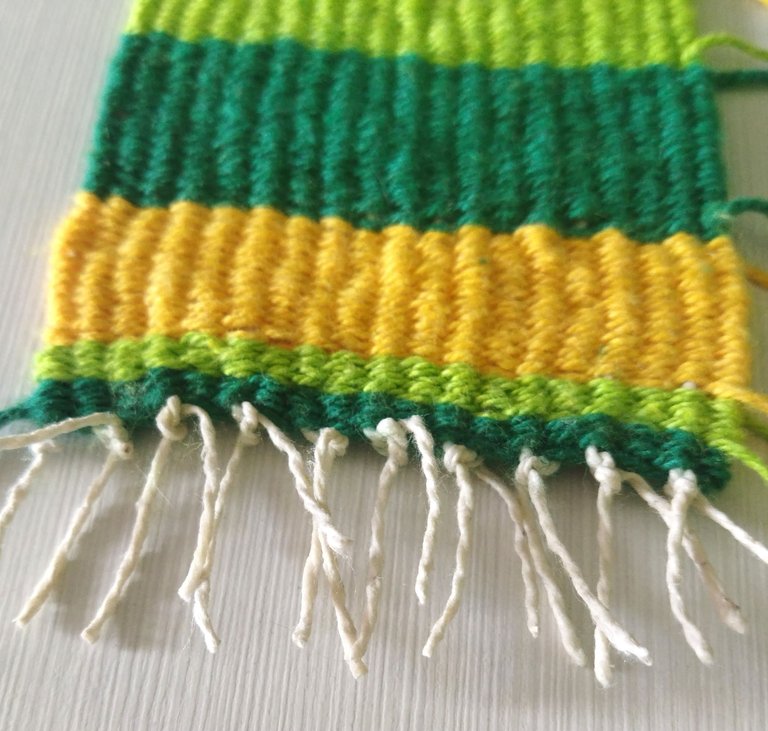
Después de sacarlo del telar vamos a cortar los hilos de abajo para poder hacer los nudos que ayudarán a fijar la parte de arriba y de abajo del tejido del portavasos.
After removing it from the loom we're going to cut the bottom threads to be able to make the knots that will help fix the top and bottom of the cup holder fabric.
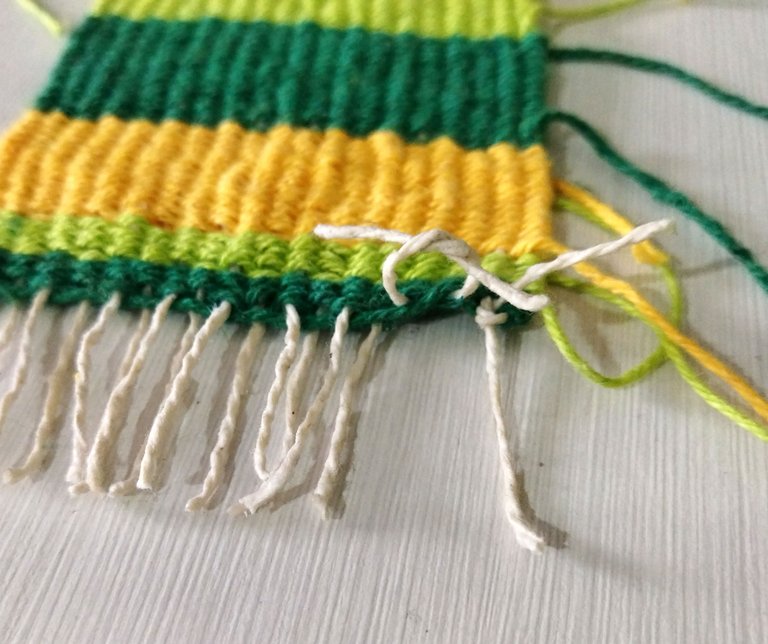
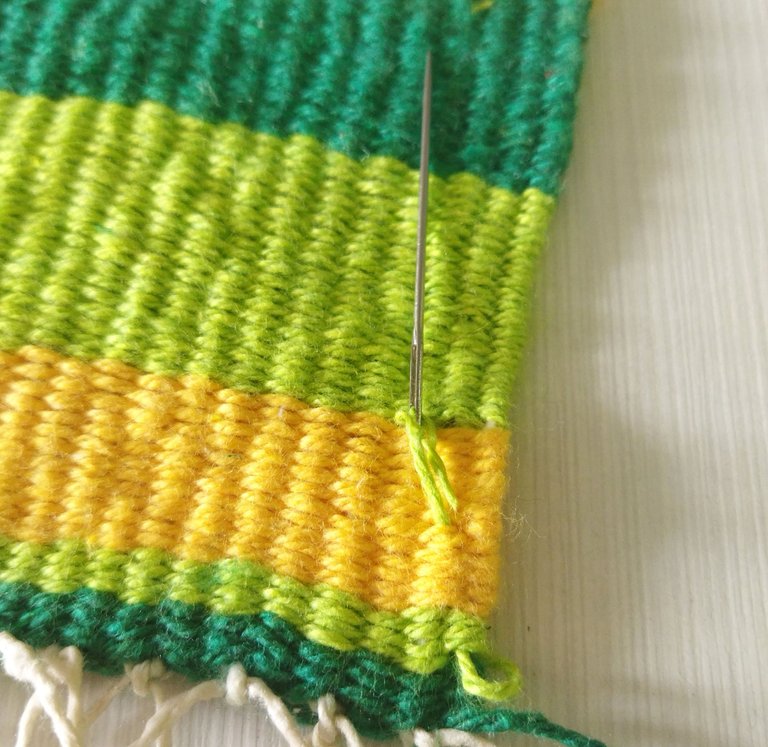
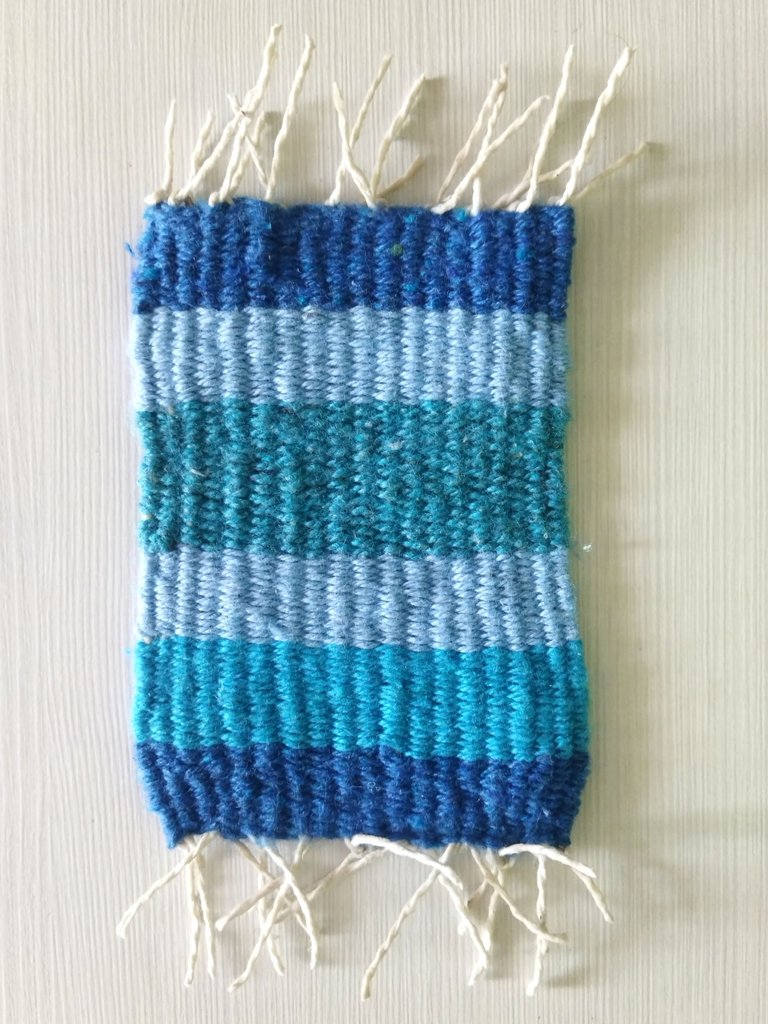
El último paso es esconder los hilos sobrantes, para hacerlo, volteé el portavasos y con una aguja más delgada pasé el hilo entre el tejido y corté el sobrante, queda totalmente imperceptible 😉.
The last step is to hide the excess threads. To do this, I turned the cup holder over and with a thinner needle I passed the thread between the fabric and cut the excess, it's completely imperceptible 😉.
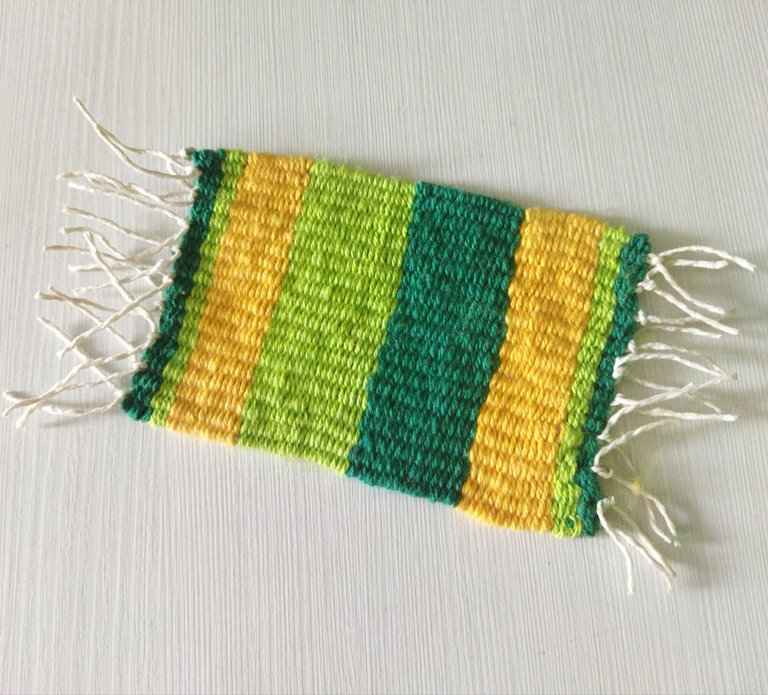
Y así se ve mi portavasos de colores tropicales 🥭🍍.
And this is what my tropical colored cup holder looks like 🥭🍍.
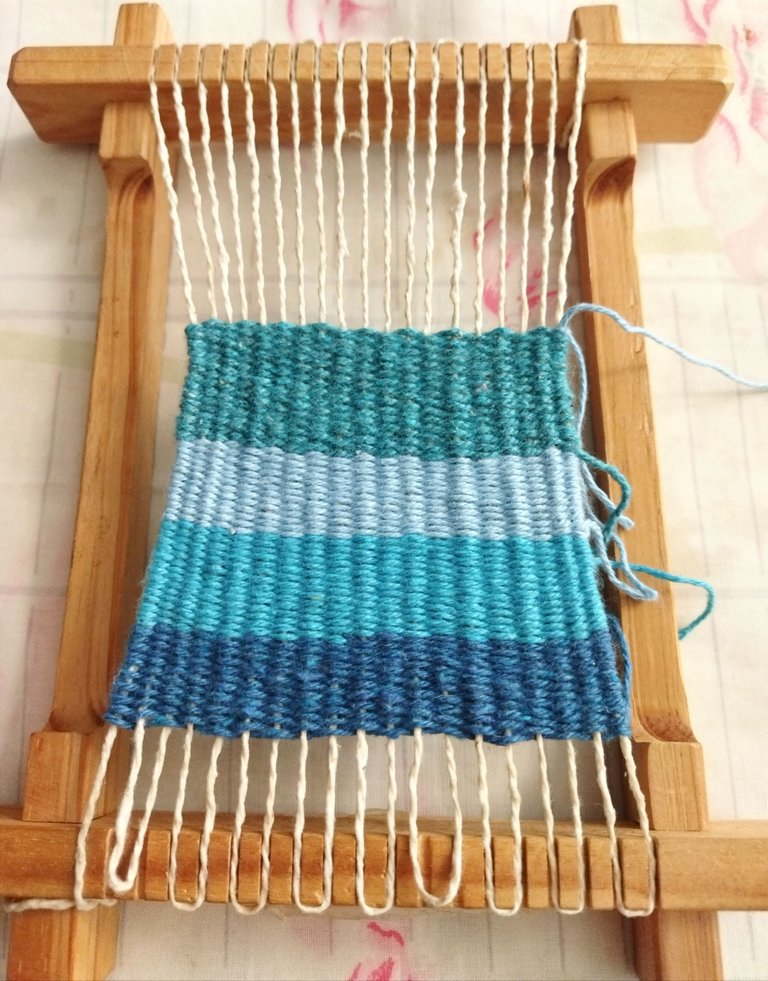
Como les dije al principio, hice dos, el otro lo hice usando diferentes tonalidades de azul para que luciera marino 🐠🐟🐬. Aquí algunas fotos del proceso.
As I told you at the beginning, I made two, the other I made using different shades of blue to make it look marine 🐠🐟🐬. Here are some photos of the process.

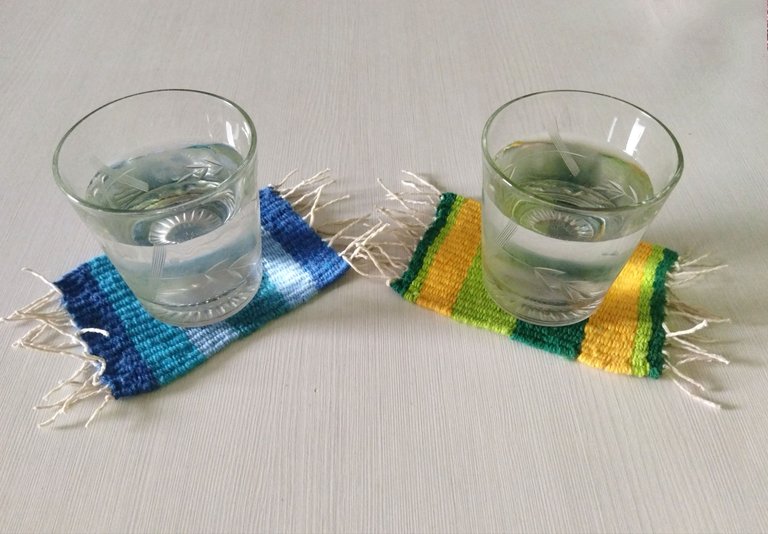
Me he divertido mucho haciendo estos dos portavasos, es la primera vez que hago unos, me quedó como tarea pendiente hacer los otros dos para completar el juego para mí cocina. Espero que esta publicación les haya sido útil y de su agrado. Muchas gracias por su tiempo. Salud y felicidad infinitas para todos 🌞🍀.
I have had a lot of fun making these two cup holders, it's the first time I have made some, I had a pending task to make the other two to complete the set for my kitchen. I hope you found this post useful and to your liking. Thank you very much for your time. Infinite health and happiness for everyone 🌞🍀.
Gracias por leer, compartir, apoyar, votar y comentar.
Hasta la próxima.
¡Miau!
Thanks for read, share, vote and comment.
Until next post.
Meow!
Wow🤩 me encantó la idea de hacer cosas para el hogar en telar!! Queda una textura muy única. Gracias por compartirlo 🌷
Si, la verdad es que no había hecho nada para la cocina en telar jejeje y me gustó el resultado porque la textura es resistente y muy acorde a las cosas de la cocina. Me alegra que te haya gustado 😊. Gracias a ti por apreciar @imena 🌻. Saludos y feliz semana 😺🤘🏻🤗.
Wow, they are lovely all together. It’s my first time getting to learn about this. Well done dear and good luck in the contest.
Thank you very much dear @monica-ene, I'm happy you liked them 😁. I hope you make it, if you don't have a loom like this you can use a piece of cardboard 😉. Thanks for your support and have a wonderful week 😺🤘🏻🤗.
Wow great diy post. I love the way you break down each steps and it makes it simple for anyone going through this post finding it simple to do it. I love everything about it especially the call combination. I will give a try to it. Thanks so much for sharing
😃 it's really easy to do them and fun, too hehehe. Thanks for your support and I hope you try it 😉, you'll love it 😁.
Happy weekend @peperfashion🌻😺🤘🏻🤗
Quedo muy hermoso, mi hija hizo uno así para mi con mi inicial, yo lo tengo de adorno en una silla que uso como mesita, gracias por compartir
Oye, que bien 😃, bueno, yo no llego hasta ese nivel de poder poner una inicial jajaja, pero ahí voy 🤭. Muchas gracias a ti por comentar y apoyar 🌻🍀. Que tengas una linda semana @chironga67, saludos 😺🤘🏻🤗.
Gracias, si te propones lo haras
Claro que sí 😸😸
Thank you very much 😺🤗