Twisted Jester Macrame Bracelet / Splinterlands Art Contest Week 296
Saludos a toda la comunidad Hive DIY, espero tengan un lindo fin de semana, hoy comparto con ustedes mi participación en el Splinterlands Art Contest, el cual es un brazalete hecho en macramé con la figura de la carta Twisted Jester, hace un tiempo hice este mismo personaje pero versión amigurumi, me gustó tanto su apariencia y su lore qué decidí hacerlo de nuevo pero esta vez como un brazalete que puedo llevar a todas partes, además del rostro del personaje añado un detalle en rojo para asemejan la sangre de la masacre de su familia. Espero les guste este brazalete 😊
Greetings to the entire Hive DIY community, I hope you have a nice weekend, today I share with you my participation in the Splinterlands Art Contest, which is a bracelet made of macramé with the figure of the card Twisted Jester, a while ago I made this same character but amigurumi version, I liked his appearance and his lore so much that I decided to do it again but this time as a bracelet that I can wear everywhere, in addition to the character's face I added a red detail to resemble the blood of the massacre of his family. I hope you like this bracelet 😊

Materiales / Materials
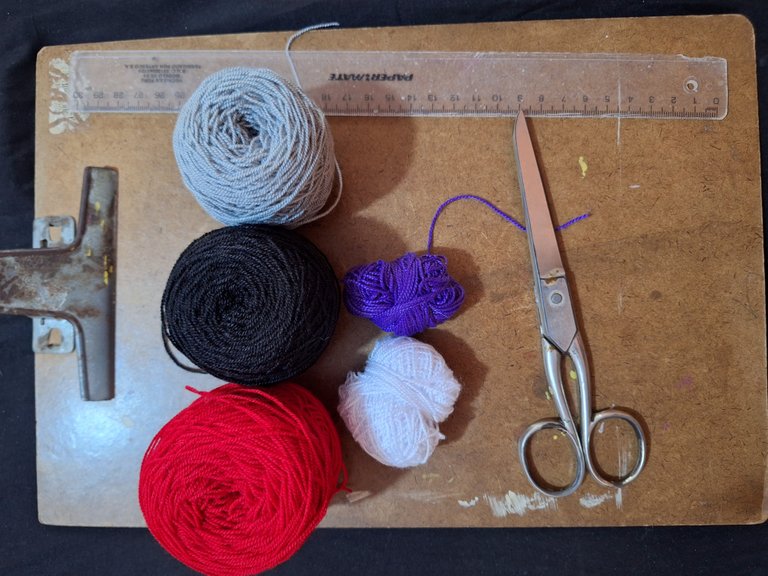
- Hilo acrílico de 1mm para crochet: negro, gris, blanco, rojo, morado y amarillo.
- Tabla con clip
- Regla
- Tijera
- Patrón
- 1mm acrylic crochet thread: black, gray, white, red, purple and yellow.
- Clip board
- Rule
- Scissors
- Pattern
Proceso / Process
Acá les comparto en patrón que hice, lo pueden guardar y redibujar si gustan o si desean pueden fijarse directo de la imagen, mi hijo Rafael acostumbra a redibujar los patrones en papel cuadriculado porque así descansa la vista, así que también lo recomiendo o si pueden imprimirlo en mayor tamaño mucho mejor.
Para hacer este patrón usé la aplicación Pixel Station, la cual es muy fácil de usar, creé un lienzo de 75 cuadros en horizontal y 19 cuadros en vertical, y con el lápiz o bote de pintura se puede pintar cada cuadro. El número de cuadros en horizontal indica el número de hileras de nudos que se deben hacer, mientras que el número de cuadros en vertical indica el número de hilos guía necesarios para la labor. Cada cuadro de color indica un nudo. Los cambios de color se hacen cruzando los hilos anudadores por detrás.
Here I share with you the pattern that I made, you can save it and redraw it if you like or if you want you can look at the image directly, my son Rafael usually redraws the patterns on squared paper because that's how it rests his eyes, so I also recommend it or if you can Printing it larger is much better.
To make this pattern I used the Pixel Station application, which is very easy to use, I created a canvas of 75 horizontal squares and 19 vertical squares, and with the pencil or paint pot you can paint each square. The number of horizontal squares indicates the number of rows of knots that must be made, while the number of vertical squares indicates the number of guide threads necessary for the work. Each colored square indicates a knot. Color changes are made by crossing the knotting threads behind.

Con el hilo gris cortar 8 hebras de 60 cm, una hebra de 70 cm y otra hebra dejarla unida al ovillo. Colocar las hebras más cortas al centro y las largas en cada borde, sujetar las hebras por la mitad con el clip de la tabla, con las hebras largas hacer 20 nudos planos envolviendo las hebras del centro, los nudos se hacen alternando el nudo en forma de P y el nudo en forma de 4.
With the gray yarn, cut 8 strands of 60 cm, one strand of 70 cm and leave another strand attached to the ball. Place the shortest strands in the center and the long ones on each edge, hold the strands in the middle with the clip on the board, with the long strands make 20 flat knots wrapping the center strands, the knots are made alternating the knot in a of P and the knot in the shape of 4.
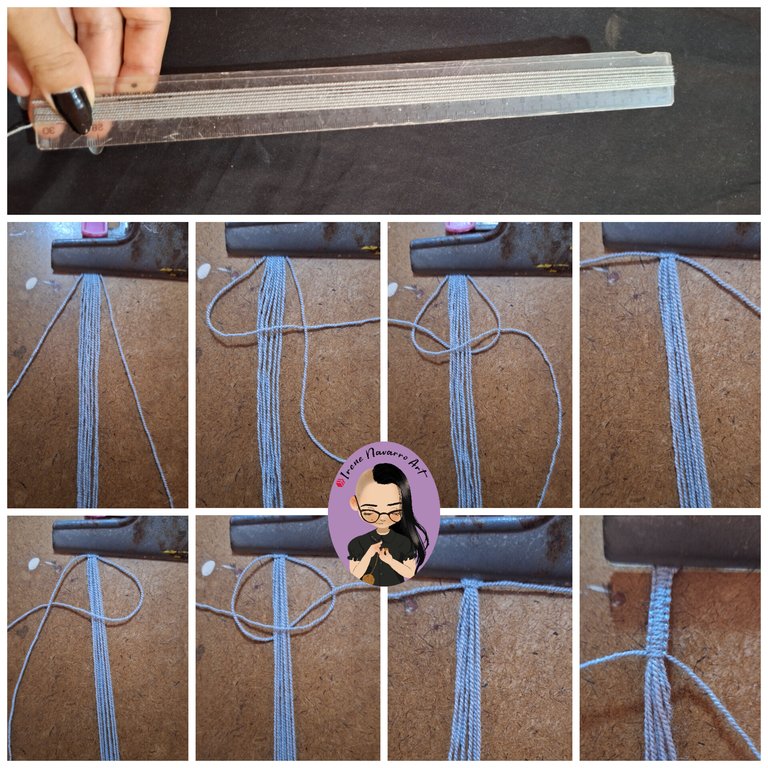
Doblar en forma de U y sujetar con el clip de la tabla, dejando la hebra unida al ovillo de primer lugar a la izquierda, esa hebra será el hilo anudador del color del fondo, las nenas hebras serán los 19 hilos guías.
Comenzar a seguir en patrón con los nudos correspondientes al gris y luego agregar el hilo guía rojo para continuar, en cada nudo el hilo anudador envuelve dos veces al hilo guía, una hilera se completa de izquierda a derecha y luego de derecha a izquierda en la siguiente hileras, como pueden apreciar en las imágenes.
Fold in a U shape and secure with the board clip, leaving the strand attached to the first ball on the left, that strand will be the knotting thread of the background color, the smaller strands will be the 19 guide threads.
Begin to follow the pattern with the knots corresponding to the gray and then add the red guide thread to continue, in each knot the knotting thread wraps the guide thread twice, a row is completed from left to right and then from right to left in the next rows, as you can see in the images.
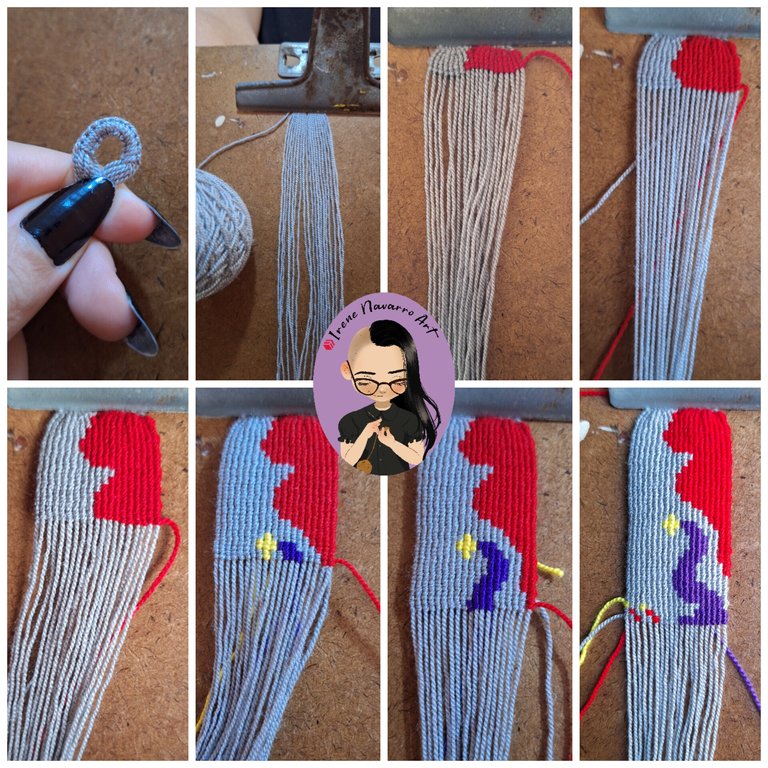
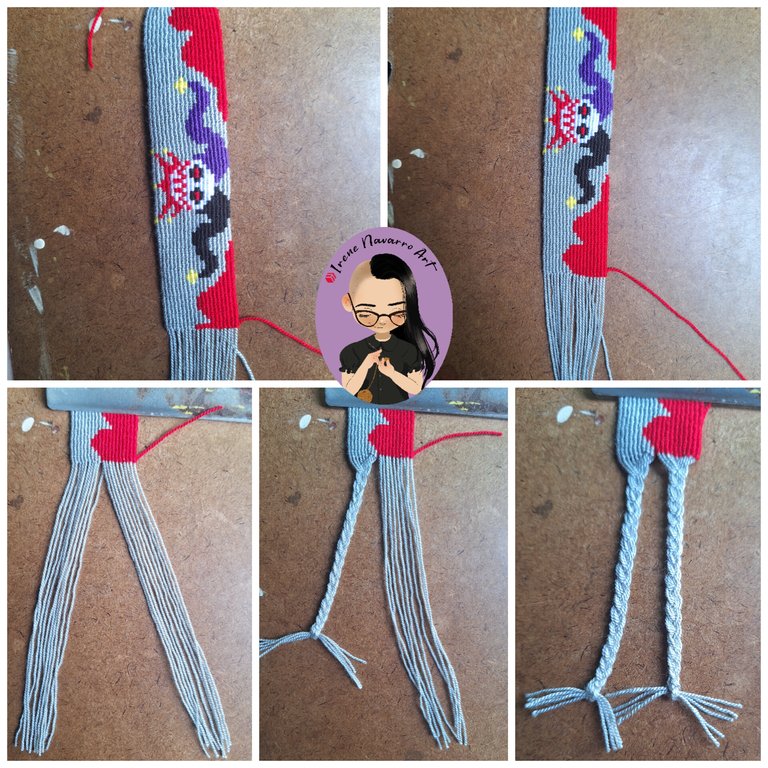
Conforme se van haciendo las hileras de nudos correspondientes al color y agregando los otros colores necesarios, se va formando la figura, visualmente es similar a una impresora de puntos de antaño 😄, pero cada punto es un nudo.
As the rows of knots corresponding to the color are made and the other necessary colors are added, the figure is formed, visually it is similar to a dot printer of yesteryear 😄, but each dot is a knot.

Luego de finalizar la figura, es decir las 75 hileras, se agrupa en dos parte los hilos guía y se hacen dos trenzas.
After finishing the figure, that is, the 75 rows, the guide threads are grouped into two parts and two braids are made.
Resultado / Result
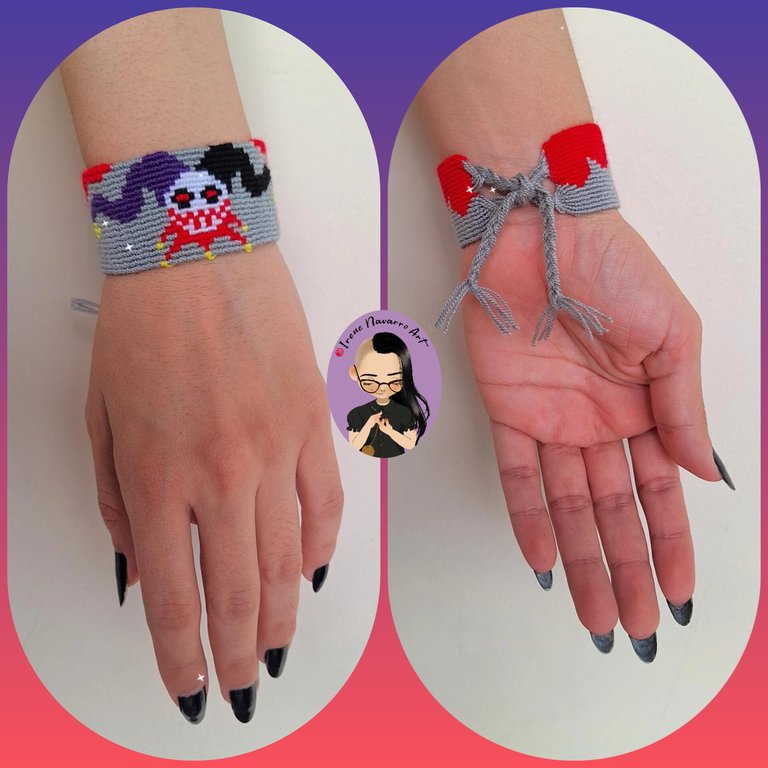
Espero les sea de utilidad el patrón y la explicación del proceso, yo estoy muy complacida con el resultado 🥰
I hope the pattern and the explanation of the process are useful to you, I am very pleased with the result 🥰


Imágenes tomadas con dispositivo Samsung A54. Portada editada en Inshot
Pictures taken with Samsung A54 device. Cover edited in Inshot

Espero les haya gustado. Les invito a leer mis próximas publicaciones y siempre estaré dispuesta a responder sus preguntas y comentarios, también pueden seguirme y contactarme en cualquiera de mis redes sociales. ¡Muchas gracias!
I hope you liked it. I invite you to read my next publications and I will always be willing to answer your questions and comments, you can also follow me and contact me on any of my social networks. Thank you!
Facebook
Twitter
Instagram
Ko-Fi
Discord: irenenavarroart#0361
Posted Using InLeo Alpha
Hola Irene, este trabajo quedó impecable, hermoso.
Muchas gracias profe 😄
Me encanta Twisted Jester, fue uno de los primeros personajes que dibuje, me encantó lo que hiciste en este brazalete 😍
A mi también me gusta por sus colores y todo. Gracias 🥰
Me encanta este personaje...es uno de mis favoritos. Te quedó espectacular 😊
!PIZZA 🍕
!VSC
@chacald.dcymt has sent VSC to @irenenavarroart
This post was rewarded with 0.1 VSC to support your work.
Join our photography communityVisual Shots
Check here to view or trade VSC Tokens
Be part of our Curation Trail
@chacald.dcymt ha enviado VSC a @irenenavarroart
Éste post fue recompensado con 0.1 VSC para apoyar tu trabajo.
Únete a nuestra comunidad de fotografía Visual Shots
Consulte aquí para ver o intercambiar VSC Tokens
Se parte de nuestro Trail de Curación
Gracias Dianita 🥰
$PIZZA slices delivered:
@chacald.dcymt(2/5) tipped @irenenavarroart
Es impresionante como puedes realizar una figura con la Técnica del Macrame, es simplemente impresionante. Te felicito por tu gran don
https://x.com/hivediy47901/status/1799336541283901444
Muchas gracias ☺️
Bellísimo... 😍