( ENG/ESP) CONTEST: BEAUTIFUL, MONTONGUERA POT AND LADEL.
(ENG)
Hello everyone in this beautiful community of great creators, from #needleworkmondy, today I am extremely pleased to be with all of you, to participate in this great Initiative: Sewing in your kitchen. I want to thank my friend, @creacioneslelys, for the invitation and extend it to @jorgelissanchez and @josdelmi, aminence creative friends, for sure, they showed us something great. The kitchen is the most frequented place in the house, we not only prepare food there, but it is a place that needs to be monitored and carefully protected. For my entry, I have made the famous Mondonguera pot, known in the east of the country, Venezuela. This is a large pot that is very necessary at times where a large number of people gather. I have made it in crochet fabric, also accompanied by the ladle or soup spoon. Without further ado, I invite you to follow me, I hope you enjoy it.

,
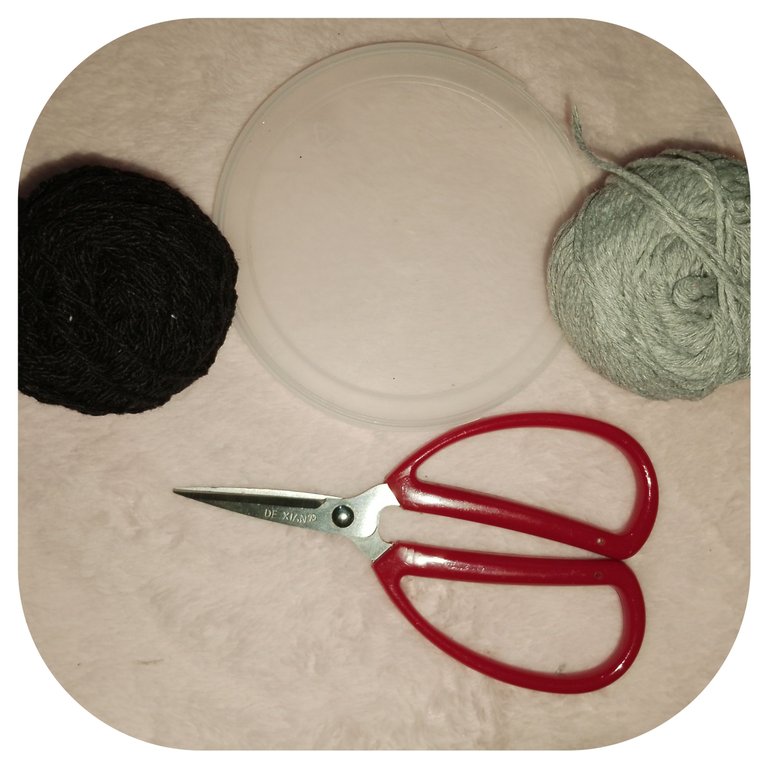
Used materials:
. Colored wick thread, (gray and black)
. Plastic cap.
. Knitting needle.
. Scissors.
Steps to follow:
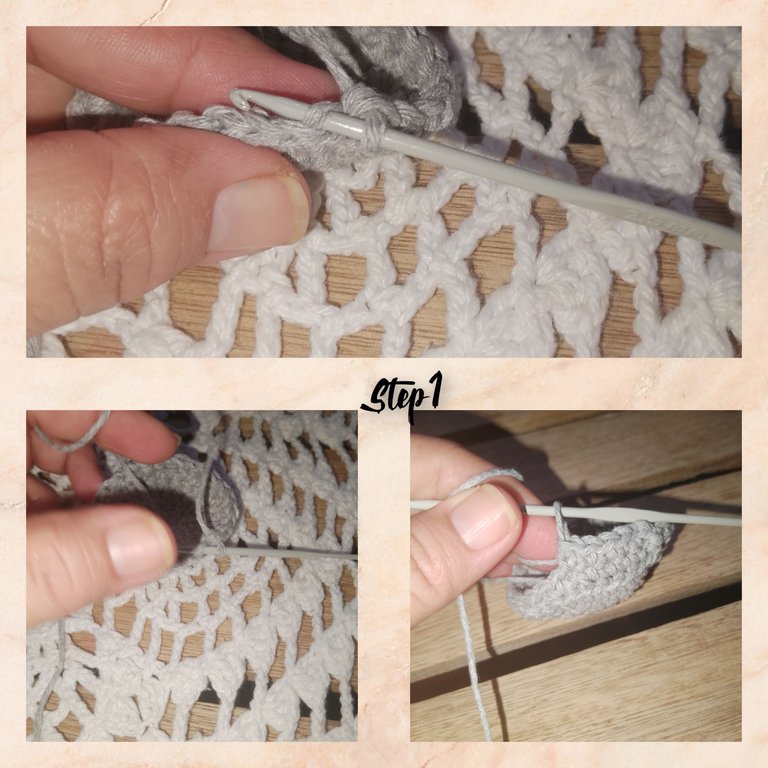
1.) Using the gray thread, I make a magic ring and inside it, (6 sc), I close the ring with (1 sc), for the next count I make six increases, for (12 sc), for the next rows knit, after one, two and three single crochets an increase, to obtain 30 sc). I continue, for row number six, I will take the yarn of the (sc) inside, to make a breaking row, for the next ones I will knit, a (sc), in each (sc), in this way, I will have the height, of the pot, in my case, I knit 18 rows of (30 sc), this will depend on the height you want. I finish off and cut the thread.
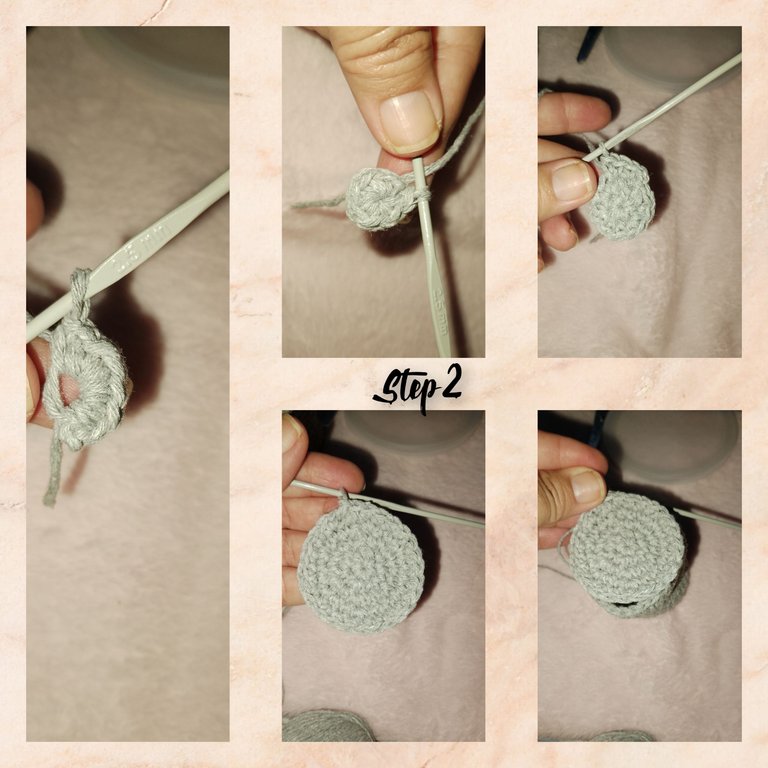
2.) For the lid of the pot, I will repeat the procedure, from the beginning of the pot, just one more turn, than the bottom, for 36sc). This will allow it to fit better on the pot.
3.) cut the edge of the plastic cover. I cut a small piece, which I managed to pass from round three, both sides of the lid.
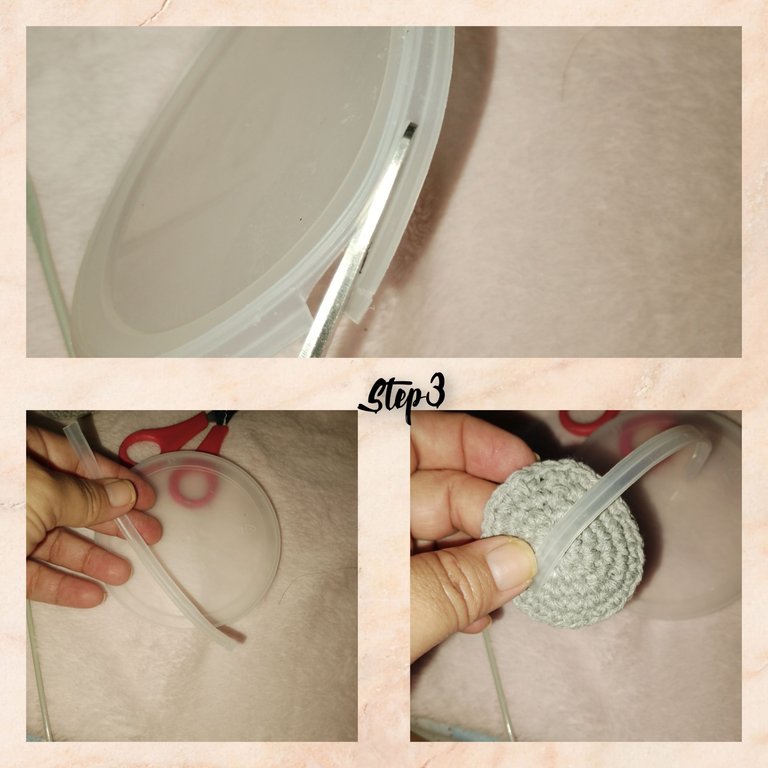
4.) using the black thread, ATI well on round number three and lift (12 pc), placing the small, thin plastic strip, I begin to hug, with (sc, until completely covering it, going from end to end , short and finish, leaving the lid of the pot ready.
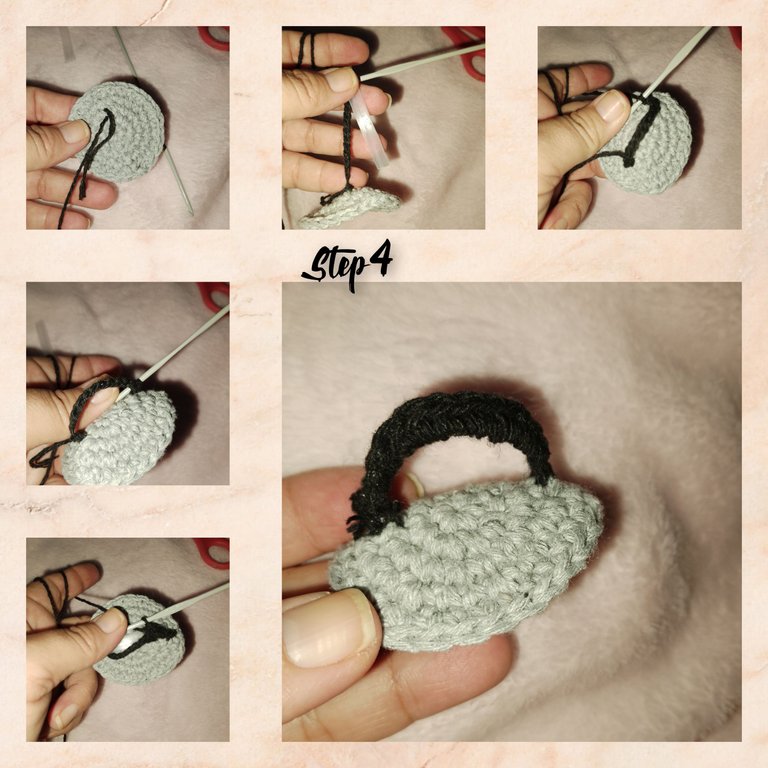
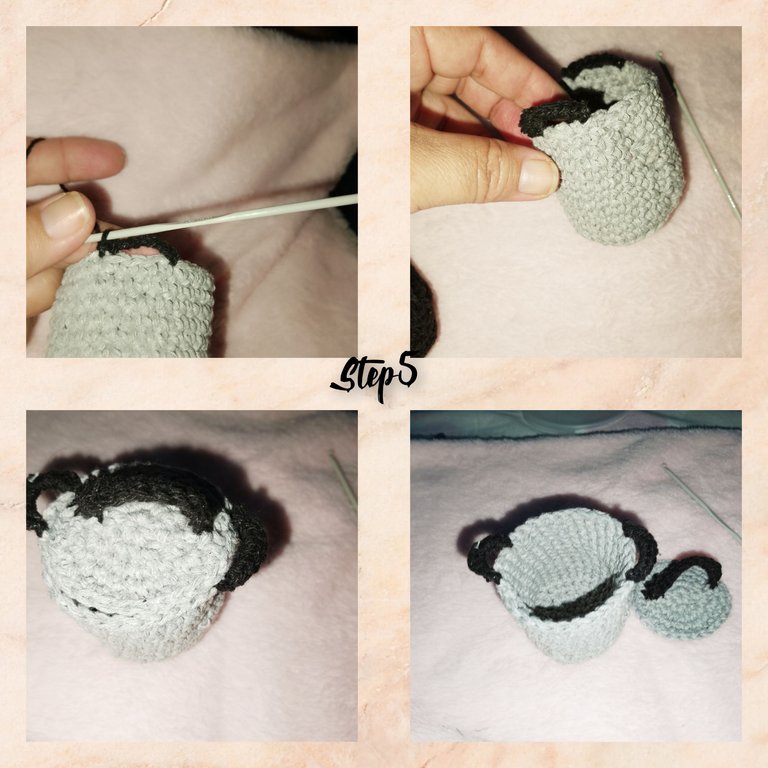
5.) Now I will knit the za to the pot, at both ends, to do this, I pick up six chain stitches, place a small piece of plastic and begin to wrap or cover with (sc). It is important to make sure that the handles are in the same direction and level.
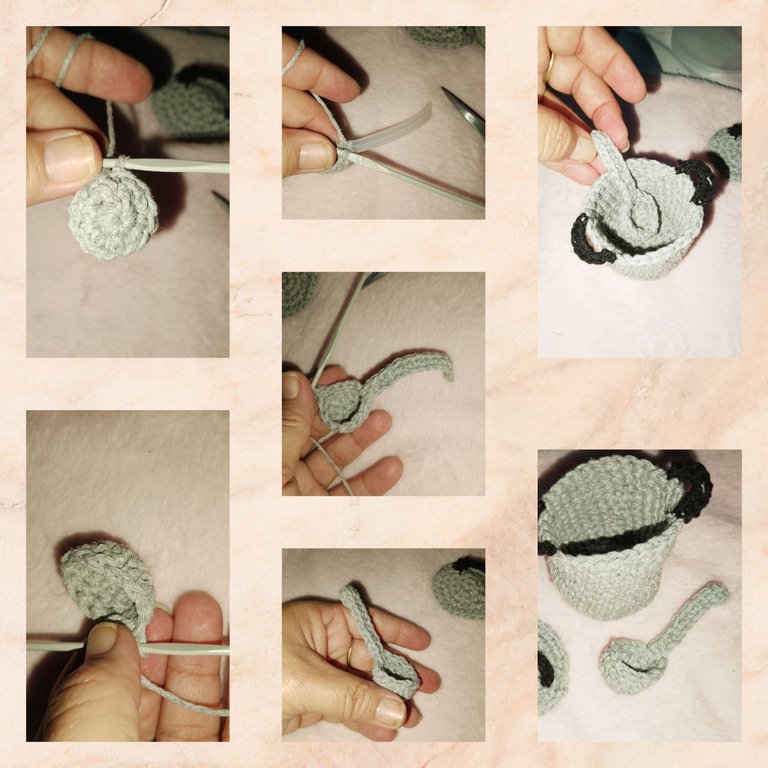
6.) For the Soup Spoon, I will make a magic ring and inside it (6sc), continue with six increases, and the next two passes will be (12sc), without cutting the thread yet, I lift (20pc), place the piece of plastic, the longest one that I will use in the project, and wrap with sc, until covering,thus making the handle to hold the spoon.
In this way, I have concluded, with my participation in the contest, I hope you liked it.
. All photos are my property.
. Use incollage to show step by step. .
Use gif video.
.Use language translator.
Glossary:
.(Pb) Low points.
. (Pd) Slipped point.
.(P.c) Chain points.
Grateful for following me until the end, you are always welcome to my blog. Congratulations to the participants. See you soon.
(ESP)
Hola a todos en esta hermosa, comunidad de grandes creadores, de #needleworkmondy, hoy me complace enormemente estar con todos ustedes, para participar en esta genial,Iniciativa: Costura en tú cocina. Quiero, agradecer la invitación a la amiga, @creacioneslelys y hacerla extensiva, a @jorgelissanchez y a @josdelmi, aminence amigas creadoras, de seguro, nos mostraron algo genial. La cocina, es el lugar, más frecuentado de la casa, no sólo preparamos los alimentos ahí, sino que es un lugar, que necesita estar vigilado y cuidadosamente protegido. Para mí entrada, he elabora, la famosa olla Mondonguera, conocida así en el oriente de el país, Venezuela. Está es una olla de gran tamaño muy necesaria, en los momentos donde se reúnen gran cantidad de personas. Yo la he elaborado en tejido a crochet, acompañada además, por el cucharón o cuchara sopera. Sin más les invito a seguirme, deseo lo disfruten.

Materiales usados:
. Hilo pabilo colores, (gris y negro)
. Tapa, de plástico.
. Aguja para tejer.
. Tijeras.
Pasos a Seguir:
1.) Usando el hilo de color gris, hago un anillo mágico y dentro de el, (6 pb), cierro el anillo con (1pd), para la siguiente cuenta hago seis aumentos, para (12 pb), para la siguientes pasadas tejeres, luego de uno, dos y tres puntos bajos un aumento, para obtener 30pb). Continúo, para la vuelta número seis, tomaré la hebra de el (pb) de adentro, para hacer una vuelta de quiebre, para las siguientes tejere, un (pb), en cada (pb), de esta manera, tendré la altura, de la olla, en mi caso, yo teji 18 vueltas de (30 pb), esto dependerá de l altura que ustedes deseen. Remato y corto el hilo.
2.) Para la tapa de la olla, repetiré el procedimiento, de el inicio de la olla, justo una vuelta más, que el fondo, para 36pb). Así permitirá calzar mejor sobre la olla.
3.) corto el borde de la tapa plástica. Corto un pequeño trozo, que logré este, pasar desde la vuelta tres, ambos lados de la tapa.
4.) usando el hilo de color negro, ATI bien en la vuelta número tres y levanto (12 pc ), colocando, la pequeña y delgada tira plástica, comienzo a abrazar, con (pb, hasta cubrirla completamente, recorriendo de extremo a extremo, corto y remato, quedando lista la tapa de la olla.
5.) ahora tejere el aza a la olla, en bos extremos, para ello, levanto seis puntos cadenas, coloco un pequeño trozo de plástico y comienzo a envolver o cubrir con (pb). Es importante estar pendiente de que las azas queden en la misma dirección y nivel.
6.) Para la Cuchara Sopera, haré un anillo mágico y dentro de el (6pb), continuo con seis aumento, y las dos siguientes pasadas, serán de (12pb), sin cortar aún el hilo, levanto (20pc), coloco el trozo de plástico, el más largo que usare en el proyecto, y envolver con pb, hasta cubrir, haciendo así el mango para sostener la cuchara.
De esta manera, he concluido, con mí participación en el concurso, espero haya Sido de su agrado.
. Todas las fotos son de mí propiedad.
. Use incollage para mostrar el paso a paso.
. Use vídeo gif.
. Use traductor lenguaje.
Glosario:
.(Pb) Puntos bajos.
. (Pd) Punto deslizado.
(P.c) Puntos cadenas.
Agradecida me hayas seguido hasta el final, siempre eres bienvenido a mí blog. Felicidades a los participantes. Hasta pronto.
Hola @katiuskamata gracias por compartirnos este proyecto tan original y creativo. Saludos 🤗
Muy agradecida y gustosa de haberlo compartido mi linda @kattycrochet. Que gusto.
Felicidades este proyecto realmente me encantó, muy original y me dio una idea para algo que necesito para mis clases, jeje gracias por compartir, feliz día.
Que gusto amiga, haya servido, para inspirarla, gracias