(ENG/ESP) INIVIATIVA: CONTEST: SEWING YOUR JEANS. "COMPUTER MOUSE PAD MADE WITH BLUE JEANS"
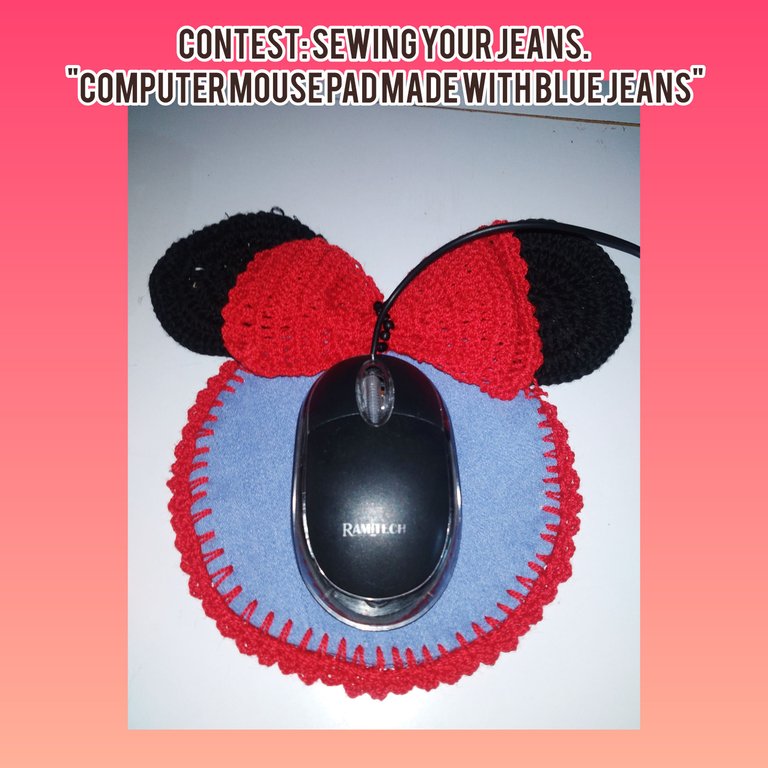
Hello creative people, needle lovers, protagonists is this great Community @needleworkmonday, it is a pleasure to greet you and join this great Initiative, "sewing your Jeans". Very motivated, because, I like to do any sewing, create accessories, bags, pencil cases, in short, its usefulness is so diverse and infinite. It was hard for me to decide what to do, using the leg of a pair of blue jeans, which I kept, because it was very old and stretched. So I decided to do something that I hadn't done yet. For this I made a very cute and decorative "Computer Mouse Pad" Inspired by Minnie the mouse, character in Micky Mauser. I take the opportunity to invite two great creators, @lorennys and @nhaydu. Without further ado, I will tell you how to do it.//
Hola gente creativa, amantes de la aguja, protagonistas es esta gran Comunidad @needleworkmonday, es un gusto saludarles y unirme a esta gran Iniciativa, "cosiendo tus Jeans". Muy motivada, ya qué, me gusta realizar cualquier costura, crear accesorios,bolsos, cartucheras, en fin su utilidad es tan diversa e infinita. Me costó decirdir que hacer, usando la pierna de un pantalón de blue jeans, que conservaba, por estar muy viejo y estirado. Así que decidí hacer algo que aún no habia hecho. Por esto realice , un muy lindo y decorativa "Almohadilla para el mause de la Computadora" Inspirado el la ratoncita Minnie, personaje en Micky Mauser. Aprovecho la oportunidad de invitar, a dos grandes creadoras, @lorennys y @nhaydu. Sin más les cuento, como hacerlo.
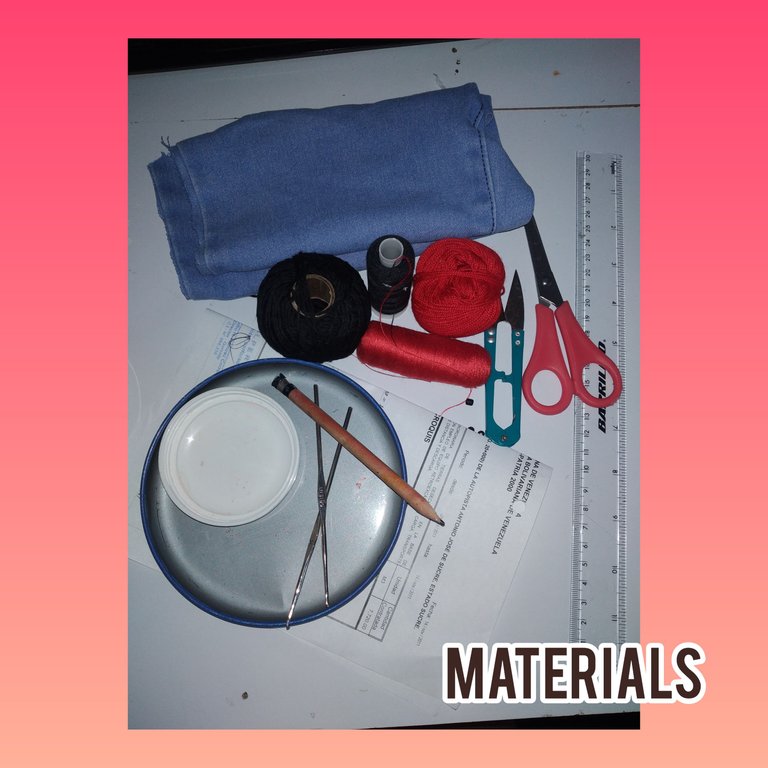
Materials/Materiales.
. Blue jeans trouser legs.
. Yarn for weaving, colors (red and black).
. Colored sewing thread (red and black)
. Sewing needle
. Knitting needles (narrow and thick).
. black beads
. Container lids, large and small.
pencil to mark
. paper to recycle
. Scissors.
. Ruler to measure.//
. Piernas de pantalón de blue jeans.
. Hilo para tejer, colores (rojo y negro).
. Hilo de coser colores (rojo y negro)
. Aguja de coser
. Agujas de tejer( dengada y grueso).
. Chaquiras color negra
. Tapas de envases, grande y pequeñas.
Lápiz para marcar
. Papel para reciclar
. Tijeras.
. Regla mara medir.
Step/ Pasos
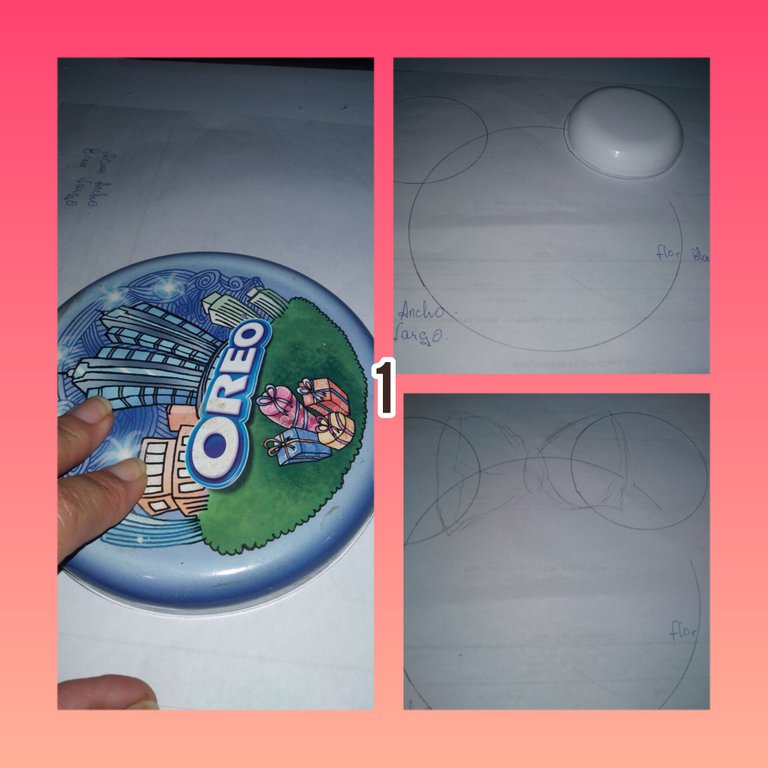
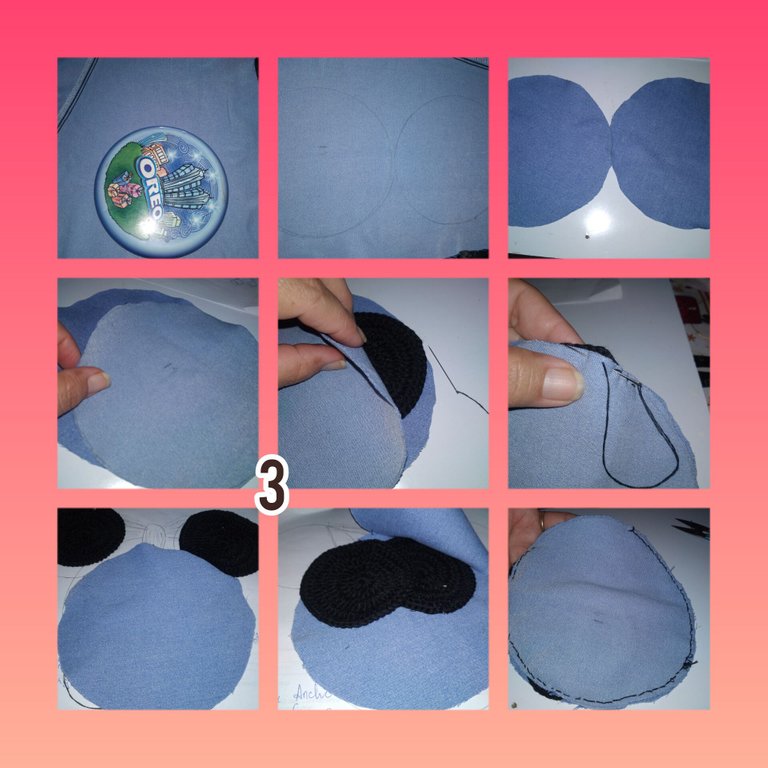
1.) I mark the larger lid, it is 14cm in diameter, on the recycling paper, then with the smaller lid I frame the sides of the first initial circle, to form the ears, in the same way I draw a cute and very striking bow, so, in this way I draw on the paper the silhouette of minnie.//
1.) Marco la tapa de mayor tamaño,está tiene 14cm de diámetro,sobre el papel para reciclar, luego con la tapa más pequeña marco a los lados de el primer círculo inicial, para formar las orejas, de igual manera dibujo un lindo y muy llamativo lazo, así que, de esta manera dibujo sobre el papel la silueta de minnie.
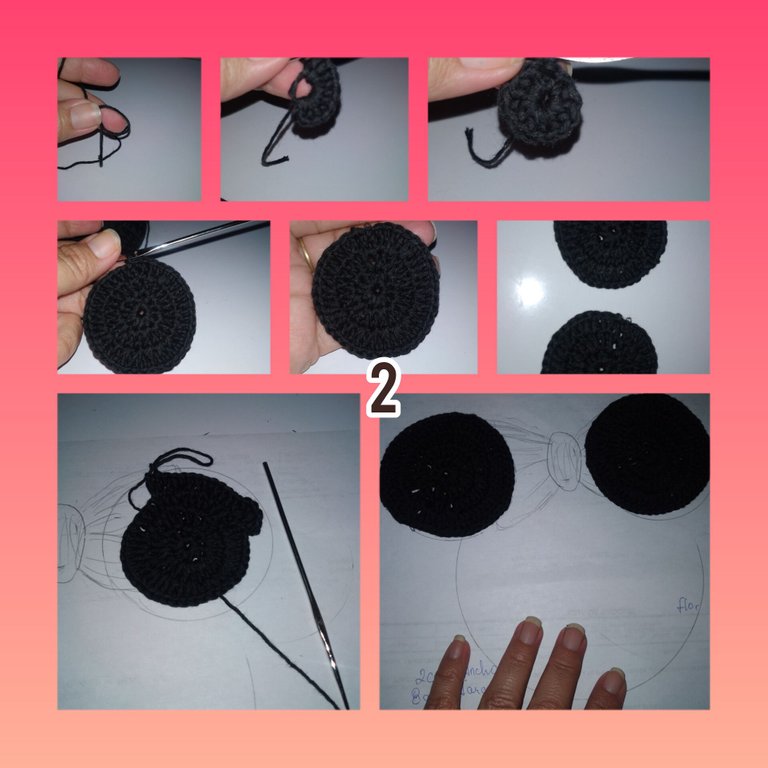
2.) I continue the order of the idea, I use the black thread, I make a magic ring and weave twelve half stitches inside it, I close with a slip stitch and pick up the knot. This is done, I will knit two more rows increasing, after each pubto of the previous row, guided by the silhouette drawn on the paper to recycle, I will go calculating the panamañi of the ears, so to reach the marked size, I do one last turn in midpoints, repeat and form the next little ear.
2.) Continuo el orden de la idea, uso el hilo de color negro, hago un anillo mágico y tejo dentro de el doce medios puntos, cierro con punto deslizado y recojo el nudo. Listo esto, tejere dos vueltas más haciendo aumento, después de cada pubto de la vuelta anterior, guiandome de la silueta dibujada en el papel para reciclar, iré calculando el pamañi de las orejas, así para alcanzar el tamaño marcado, doy un aultima vuelta en puntos medios, repito y forma la siguiente orejita.
3.) In this step, I will use the jeans tile, I mark the larger cover, it will be in pairs, that is to say two circles, after marking it I cut it out with scissors, I continue to be guided by the minnie silhouette, I place it face to face face the right part and place the woven circles that outline the ears, and start to sew, I use the needle and black thread. And I begin to sew around it, without concluding the journey, I finish off, cut the thread and turn it over, leaving the little ears already attached.
3.) En este paso, usaré la teja de jeans, marco la tapa de mayor tamaño, está serán en par, es decir dos círculos, luego de marcado lo recortó con las tijeras, sigo guiandome de la silueta de minnie, coloco cara a cara la parte derecha y coloco los círculos tejidos que siluetan las orejas, y comienzo a coser, uso la aguja e hilo de color negro. Y comienzo a coser por el alrededor, sin concluir el recorrido, remato, corto el hilo y volteo, quedando ya pegada las orejitas.
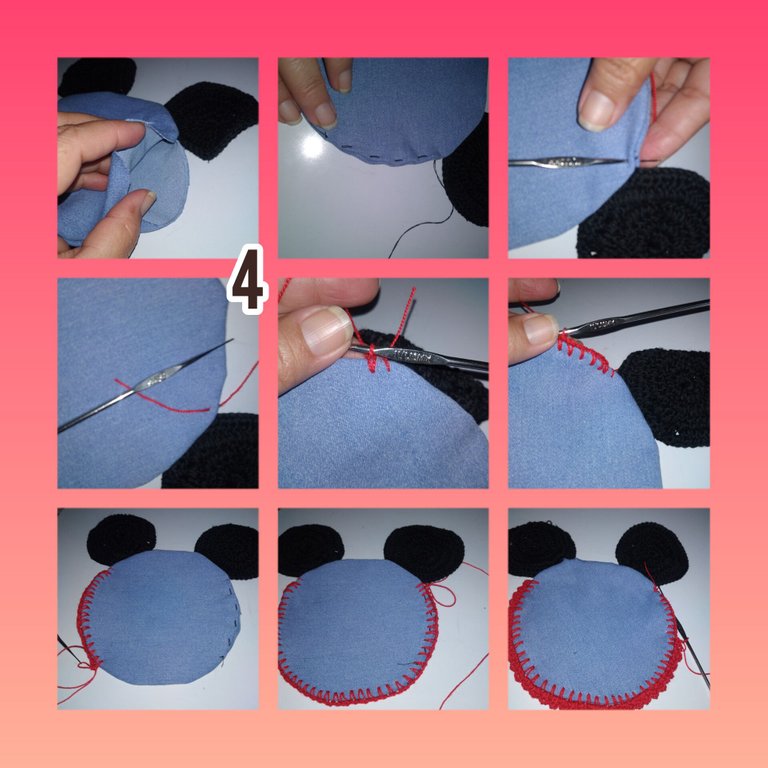
4.) To the part of the circle, without sewing, he passed a stiff thing, then I begin to knit with the red thread, all around the head with half stitches separated by a chain stitch, then I raise three chain stitches equivalent to a high point, btejo in the same place
I leave a space and knit half a stitch in the next space, and in this way I knit all the way, done this, finish off and cut the thread. I loosen the rigid seam, already fixed the head.
4.) A la parte de el círculo, sin coser, le pasó una cosita rígida, luego comienzo a tejer con el hilo de color rojo, todo el alrededor de la cabeza con medio puntos separados por un punto cadena, luego levanto tres puntos cadenas equivalentes a un punto alto,btejo en el mismo lugar
Dejo un espacio y tejo medio punto en el siguiente espacio, y de esta forma tejo todo el recorrido, hecho esto, remato y corto el hilo. Suelto la costura rígida, ya fijado la cabeza.
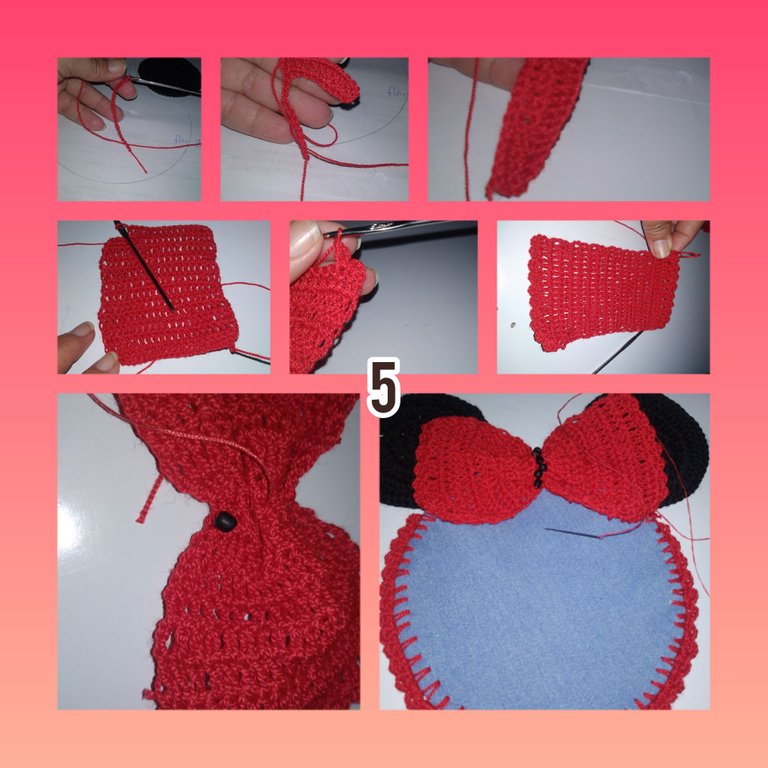
5.) Continue knitting with the red thread, 20 chain stitches, turn around and knit a double crochet into each double crochet. I go around and repeat until completing 20 laps. So to finish, I will knit a double crochet at both ends and another double crochet in the same place, I go down leaving two spaces and knit like this until the end. Finished this, I center the red listos crocheted and formed a loop, I use the same needle and red thread and I glue some black beads, which make it look more elegant and showy.
5.) Continuo tejiendo con el hilo de color rojo, 20 puntos cadenas, doy vuelta y tejo un punto alto en cada punto alto. Voy dando vueltas y repito hasta completar 20vueltas. Así que para finalizar, tejere en ambos extremos un punto alto y otro punto alto en el mismo lugar, bajo dejando dos espacios y así tejo hasta el final. Terminado esto, centro el listos rojo tejido a crochet y formó un lazo, uso la misma aguja e hilo color rojo y pego algunas chaquiras de color negro, que lo hacen lucir más elegante y vistoso.
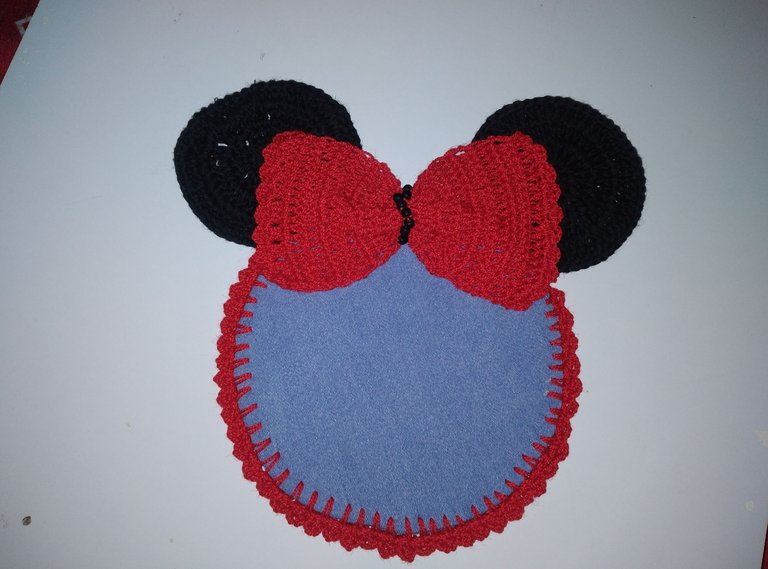
In this way, I culminate, with the entry to this great concert, wishing it to your liking and usefulness.//
De esta manera, culmine, con la entrada a este gran concirso, deseando sea de su agrado y utilidad.
. All photos are my property, taken with my smartphone
. Use InShot to show the steps.
. Use Google translate.
Grateful you have visited my blog, see you soon. You will always be welcome to my blog.//
. Todas las fotos son de mí propiedad, tomadas con mí teléfono inteligente
. Use InShot para mostrar los pasos.
. Use traductor Google.
Agradecida hayas visistado mí blog, será hasta pronto.

Hola @katiuskamata 👋 me da gusto leerte por aquí. Me gusta como se ve la almohadilla, muy coqueta. Gracias por dejarnos tu idea creativa.
Gracias amiga, @creacioneslelys, que lindo te haya gustado
Que lindo te quedó tu trabajo 🤩 @katiuskamata Las orejitas y el lazo me parecen un detalle espectacular, además del borde en hilo rojo. Así el ratón tendrá su ratoncita 🤭 Una gran idea. Gracias! 💟
Hola @purpleglitter que gusto le haya gustado gracias por contar
Que buena idea la de una almohadilla, muy útil amiga. Te ha quedado muy linda, la combinación del jean con el rojo me encanta. Gracias por compartirnos tu trabajo. Saludos.
Gracias a ti cariño, por visistar y ver mi publicación. Abrazos
Hola @katiuskamata gracias por animarte a participar en el concurso. Este proyecto está super lindo y original, me pareció una idea genial. Saludos!
Gracias @kattycrochet, que bueno le haya gustado, abrazos por apoyar..
Que idea más buena, me encanta esa almohadilla, me podré copiar para hacer una.
Holaaa, me encantó tu idea, está genial, te felicito, mucha suerte en el concurso 💕
Hola @ivycrafts gracias amiga, que bueno le haya gustado
Lindo trabajo amiga. ❤️ Mucha suerte en el concurso ❤️
Hola @delvallecedeno, gracias cariño, que bueno te haya gustado.
Saludos querida @katiuskamata, gracias por la invitación está estupenda la iniciativa, tu proyecto está muy original de un ratón a otro ratón me parece muy creativa la idea que desarrollaste.
Feliz tarde @lorennys, que bueno te haya gustado y si justo por ahí es la idea..saludos
Que lindo te quedó tu nueva creación.Saludos.
Gracias @anacarolina2022, por visistar me blog, siempre es un gusto.
Es una almohadilla acogedora para el mouse desplazarse, espero tengas mucha suerte en el concurso y Minnie se sienta contenta con éste diseño en su honor.
Hola @emiliocabrera, que bueno. Tal como lo describes querido amigo. Gracias por tu comentario
Muy tierna esta almohadilla que nos presentas y bien fácil para seguir el paso a paso. Te deseo mucha suerte.