This is how I drew the anime character "Naruto." {Esp-eng}
Edited: Canva
English
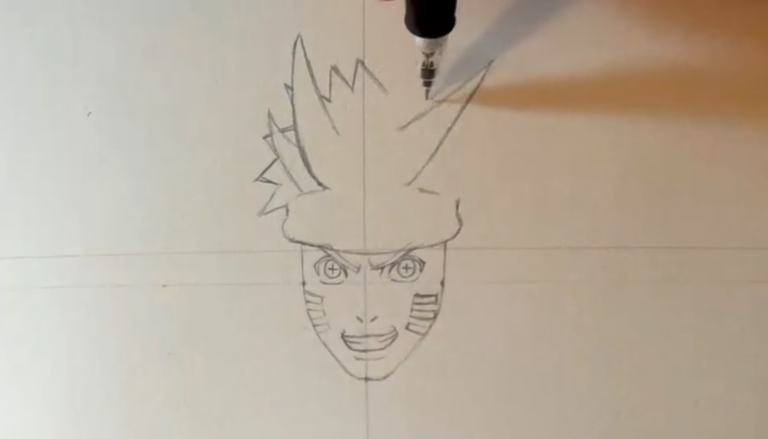
To begin drawing Naruto, I started by making a vertical line down the center, then with the help of the ruler, I made two horizontal lines quite close together that helped me fit the eyes.
taken with a Samsung Galaxy A03
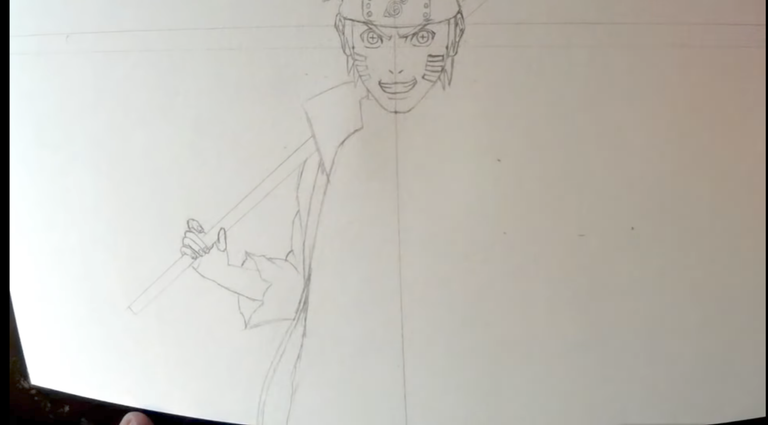
After giving the face a little shape, I started with the robe that falls all the way down. I took advantage of that moment to also draw the hand. To sketch it out, I used a mechanical pencil, since I realized that the tip remains thin all the time and it works better for making small details. With the help of the ruler, to keep it completely straight, I drew the staff that the hand is holding.
taken with a Samsung Galaxy A03
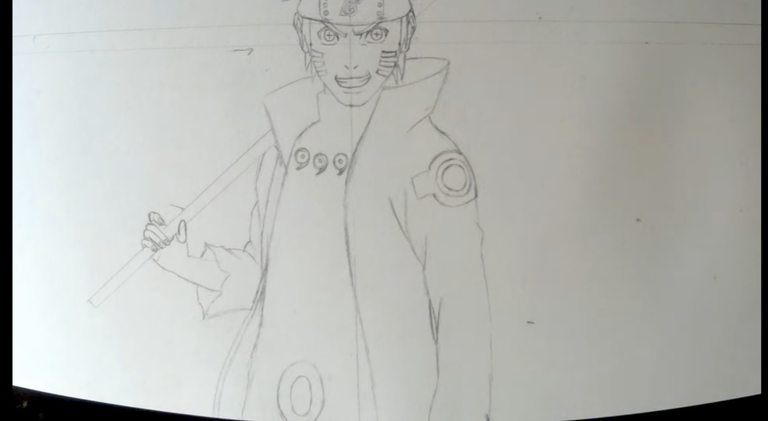
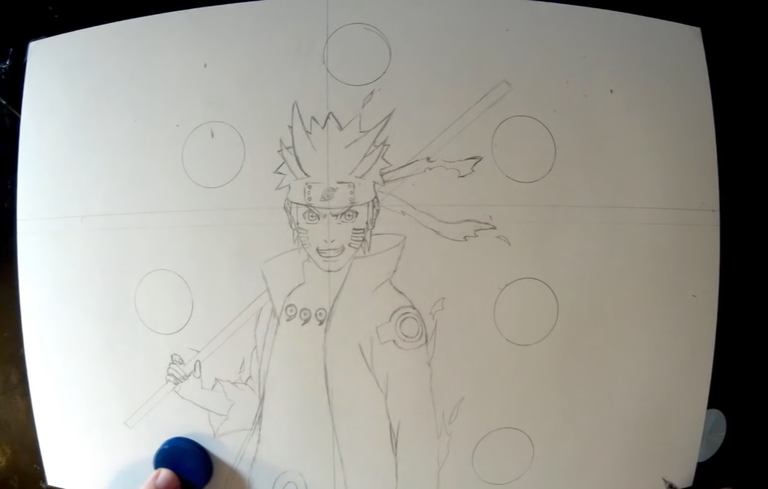
Continue shaping the robe. I also let it fall all the way down, but this time shaping the arm. I went from the shoulder to the bottom to finish shaping the arm. If you look closely, I also made the three circles in the center of the chest that are part of Naruto's symbols.
taken with a Samsung Galaxy A03 A03
The next step was to draw the flame-like shapes coming out of the body to give it a much better effect. Then I drew the rest of the bandana, which goes in the direction of the wind. To finish that sketch, I obviously had the spheres left. I made them with a bottle cap. Then I went over them with a pencil, and that would have them ready.
taken with a Samsung Galaxy A03
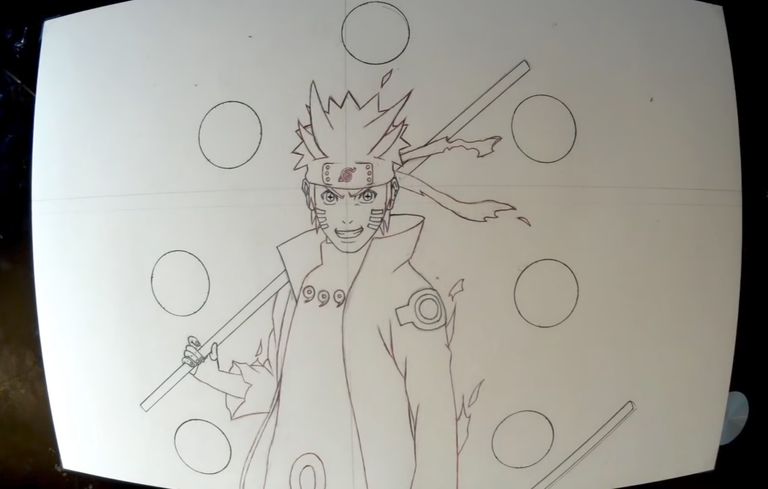
Once the sketch was finished, I began to go over the entire drawing from top to bottom, but this time with a slight difference: part of the drawing will be outlined with a red pen, since I'm using it. This would help me achieve the final effect. Some parts, like the face and eyes, I drew the hands or spheres with a 0.1mm fine-tipped black marker, and to draw the irises and dots, I also used a black pen, as this gives me greater precision.
taken with a Samsung Galaxy A03
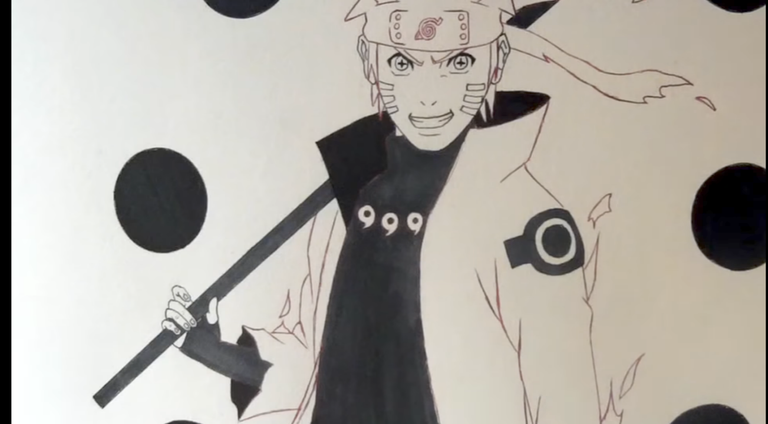
For this drawing, I used alcohol-based markers and pastel pencils. I first started with the alcohol-based markers, using black for the spheres. With the same marker, I continued filling in the neck of the tunic and the sleeve. With the 0.1mm marker, I carefully filled in what used to be the eyelashes. Then, I changed the color to a very dark gray that was almost invisible with the black. I continued coloring the glove and the tunic on the inside, and then the batons.
taken with a Samsung Galaxy A03
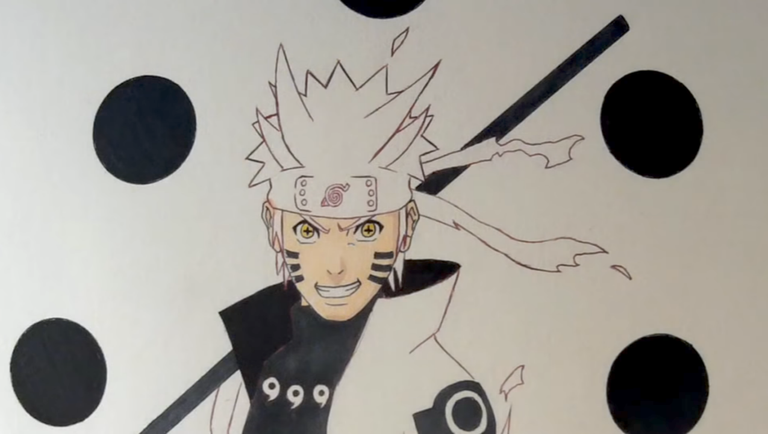
Changing with a skin tone now we are going to color the hand and then towards the face to color it completely, to make a little shade on the face and nose I changed to a darker skin tone, and then with a yellow color the irises are filled, at this point I was already liking how it was turning out the truth, and with the gray that I mentioned previously I draw the stripes of the face
taken with a Samsung Galaxy A03
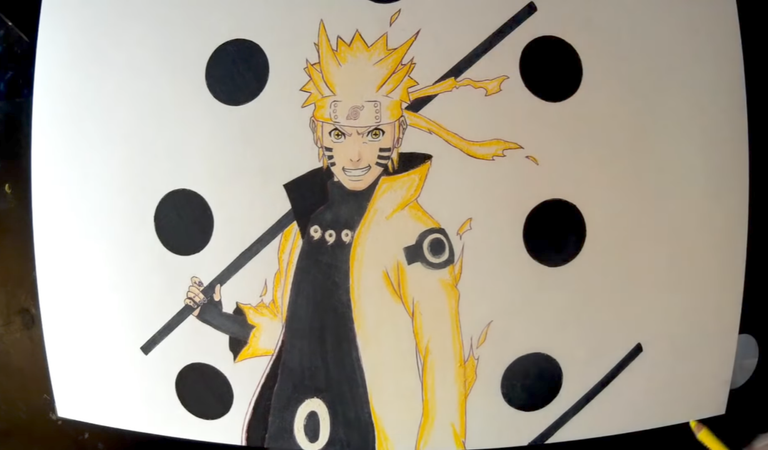
To add some magic, I used pastel pencils, starting with a creamy yellow. I really like using these pencils because they help me achieve that incredible effect in this Naruto mode. That cool effect is achieved when all the colors are blurred together at once, creating a spectacular gradient effect.
taken with a Samsung Galaxy A03 A03*
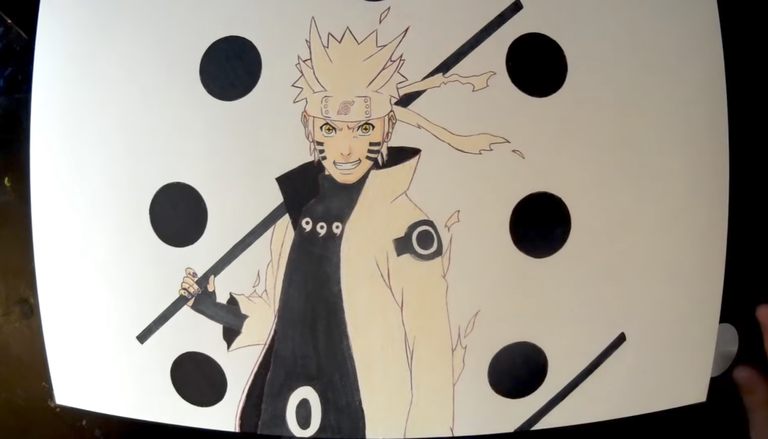
Once I finished that yellow, I used a more powerful one. What I did was apply it to the contours so that the character was shining. At that point, it was already looking pretty good, but it would look even better once I finished it.
taken with a Samsung Galaxy A03
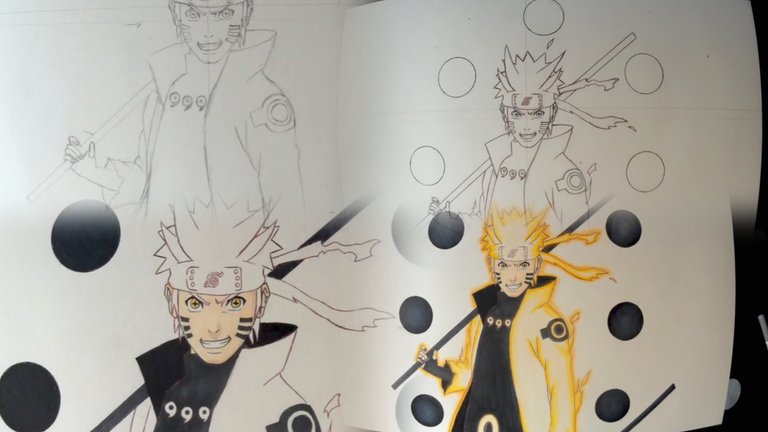
This is the result. Tell me what you thought and if you can, give me ideas for other characters to draw. I would really appreciate it.
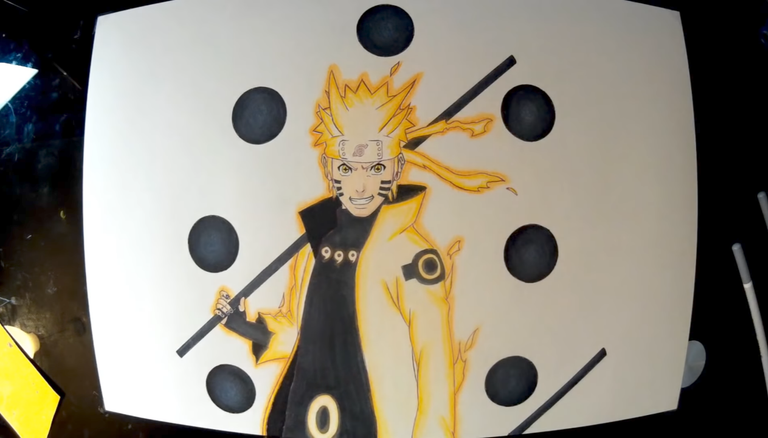
taken with a Samsung Galaxy A03
versión español
_________________
Para comenzar a dibujar a Naruto comence haciendo una línea vertical por el centro, después con la ayuda también de la regla hice dos líneas horizontal bastante pegadas que me ayudaron a encajar los ojos
Tomada con un Samsung Galaxy A03
Después de darle un poco de forma a la cara comencé con la túnica que cae hasta abajo, aproveche en ese momento para hacer también la mano, para bosetear utilice un portaminas, ya que me dí cuenta de que la punta sigue fina todo el rato y me va mejor para hacer pequeños detalles, y con la ayuda de la regla para que me quedace completamente recto dibuje el baston que sujeta la mano
Tomada con un Samsung Galaxy A03
Cuentinue dándole forma a la túnica, de igual manera la dejé caer hasta abajo pero está vez dándole forma al brazo, baje Desde el hombro hasta abajo para acabar de formar Haci el brazo,si se fijan bien también le hice los tres círculos en el centro del pecho que son parte de los símbolos de Naruto
Tomada con un Samsung Galaxy A03
Los siguiente fue acerle esa especies de llamas que salen Desde el cuerpo para darle un efecto mucho mejor, ya después dibuje el resto dela bandana que va e dirección al viento y para finalizar con ese boceto obviamente me quedaban las esferas, las cuales las hice con un tapón de botella, luego se le repasa con el lápiz y ya con eso las tendría listas
Tomada con un Samsung Galaxy A03
Una vez acabado el boceto comencé a repasar todo el dibujo de arriba a abajo pero está vez con una pequeña diferencia, y será que parte del dibujo ira contorneado con un bolígrafo de color rojo ya que estoy m ayudaría a conseguir el efecto final, algunas partes como la cara, los ojos, las manos o las esferas las hice con un marcador negro de punta fina de 0,1mm, y para hacerlos iris y deas utilizo un bolígrafo también de color negro ya que este me otorga mayor precisión
Tomada con un Samsung Galaxy A03
Para este dibujo utilice marcadores a base de alcohol y lápices de pastel, primero comencé con los marcadores a base de alcohol utilizando un negro para las esferas, con e mismo marcador segui rellenando la parte del cuello de la túnica, la manga, y con el de 0,1mm rellene lo que venían siendo las pestañas con mucho cuidado, ya después cambie el color con un gris muy oscuro que casi ni se notaba con el negro para seguir coloreando el guante y la túnica por dentro y después los bastones
Tomada con un Samsung Galaxy A03
Cambiando con un tono piel ahora vamos a colorear la mano y después hacia la cara para colorearla por completo, para hacer un poco de sombra en la cara y la nariz cambie a un tono de piel más oscuro, y después con un color amarillo se rellenan los iris, en este punto ya me estaba gustando como iba quedando la verdad, y con el gris que les mencioné anterior mente dibujo las franjas de la cara
Tomada con un Samsung Galaxy A03
Para darle magia le heche mano a los lápices de pastel, comenzando a utilizar un amarillo crema, me gusta mucho utilizar esto lápices ya que estos me ayudan a conseguir ese efecto tan increíble de este modo de Naruto, ese efecto tan chulo se consigue cuando se difuminan todos los colores juntos a la vez y se cree un efecto de degradado espectacular
Tomada con un Samsung Galaxy A03
Una vez acabé con ese amarillo utilice otro mas potente, con el lo que hice fue ir dándole por los contornos de manera que el personaje está brillando, en ese momento ya se estaba viendo bastante bien, pero mejor se iba a ver una vez que lo terminara
Tomada con un Samsung Galaxy A03
Este es el resultado digan que tal les pareció y si pueden denme ideas de que otros personajes dibujar, les agradecería un montón
Tomada con un Samsung Galaxy A03
Thanks for reading
The English translation was done using Google Translate.
La traducción en ingles fue en el traductor de Google
I like your fanart 😊😊😊😊 in was a big Naruto fan in my teen years 😺
Congratulations @kiritoart! You have completed the following achievement on the Hive blockchain And have been rewarded with New badge(s)
Your next target is to reach 200 upvotes.
You can view your badges on your board and compare yourself to others in the Ranking
If you no longer want to receive notifications, reply to this comment with the word
STOP