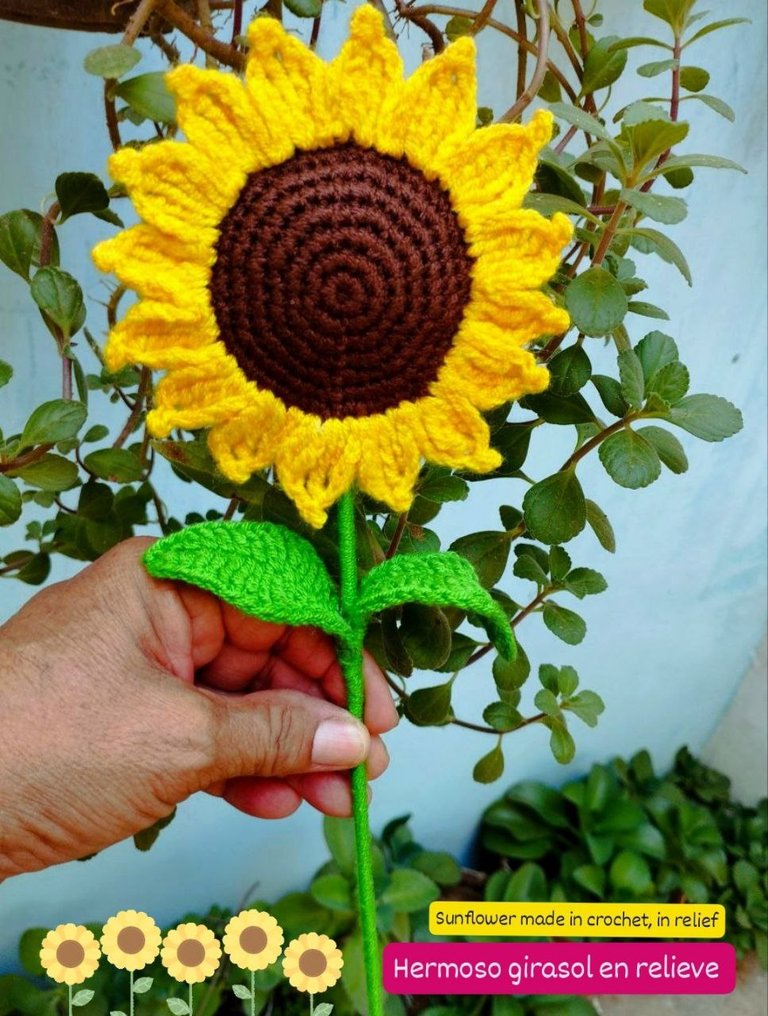
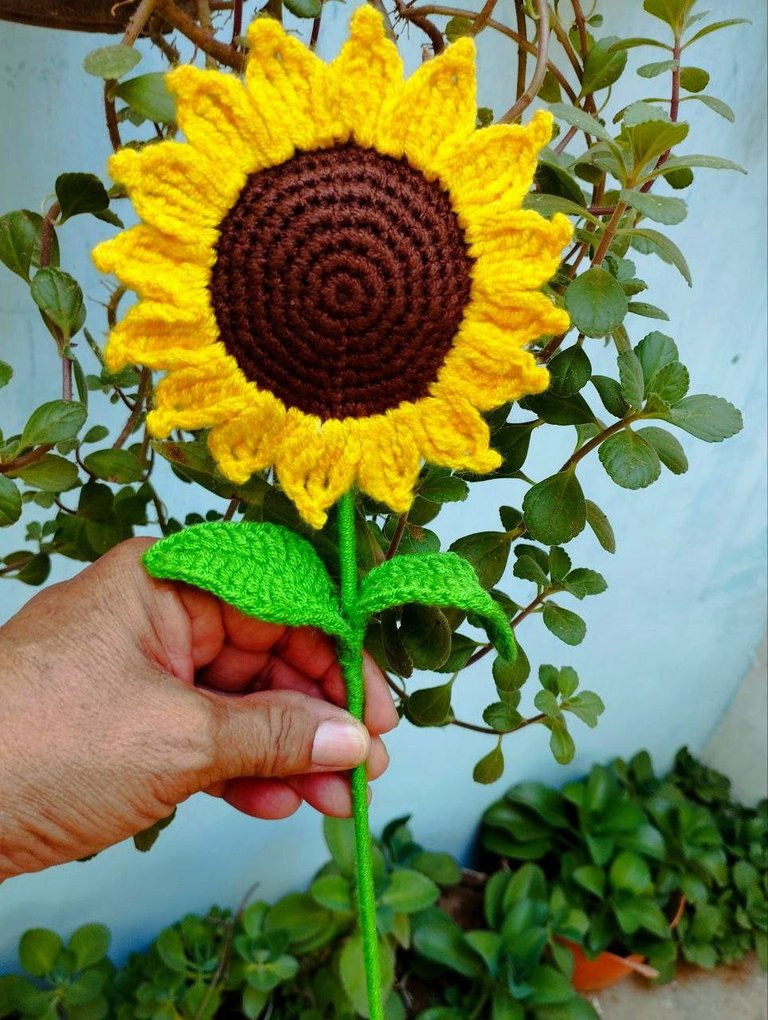
Sunflower made in crochet, in relief - Girasol elaborado en crochet, en relieve. 🌻🧶
Hello, how are you my crochet friends? Today I'm sharing this beautiful crochet sunflower 🌻 with you.
Hola, como están mis amigos crocheteros? Hoy les estoy compartiendo este hermoso girasol 🌻 elaborado en crochet.
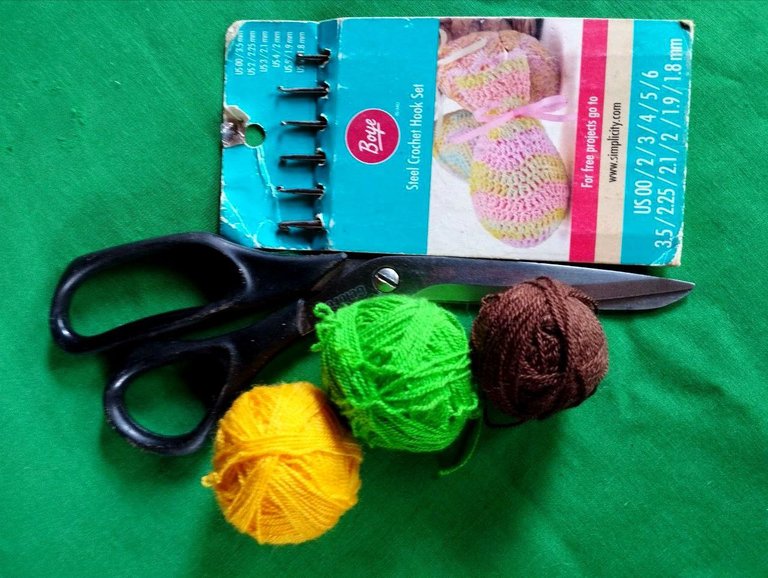
The materials used in this project were crochet threads in the following colors: dark brown, two-tone yellow, and leaf green, crochet hooks sizes 2 and 3, scissors, skewers, and liquid silicone.
For the stitches, I used: single crochet, half double crochet, regular double crochet, double crochet with 2 loops, and double crochet with 3 loops.
Los materiales utilizados en este proyecto han sido hilos crochet en los colores: Marrón oscuro, amarillo en dos tonos, verde hoja, agujas de crochet números 2 y 3, tijeras, palitos de brocheta y silicón líquido.
Para los puntos he usado: Puntos bajos, puntos medios altos, puntos altos normales, puntos altos de 2 lazadas, puntos altos de 3 lazadas.
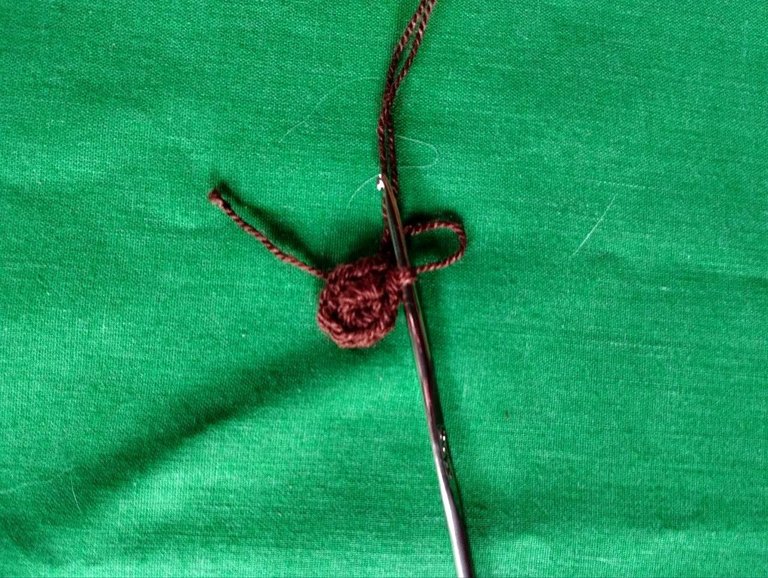
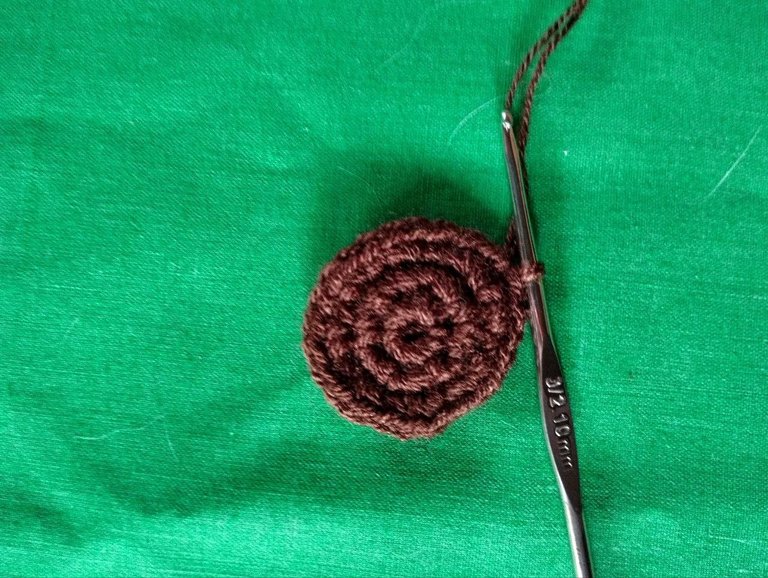
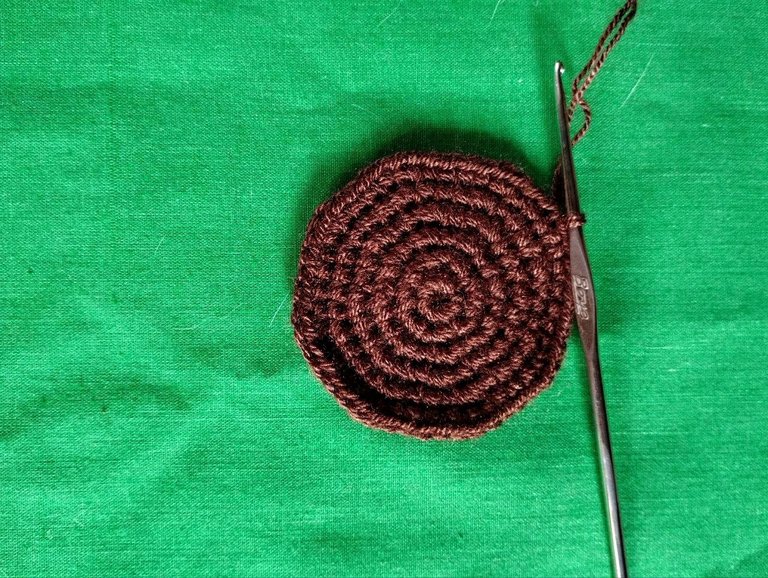
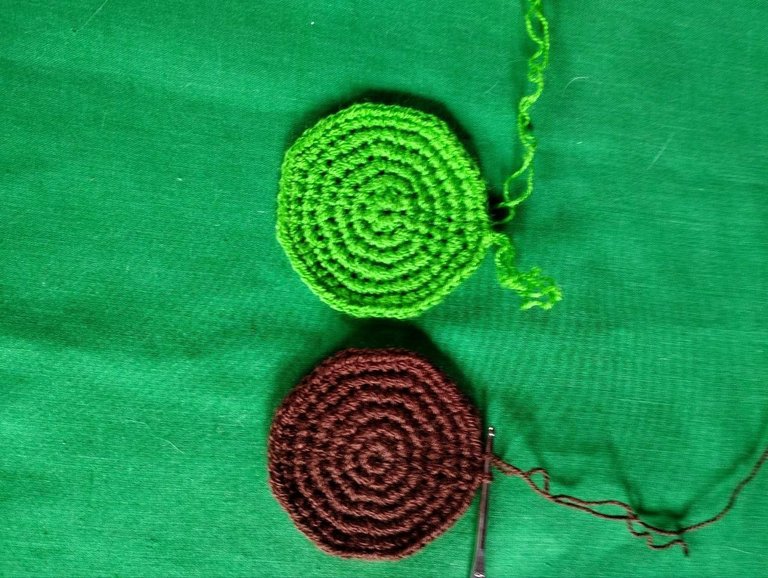
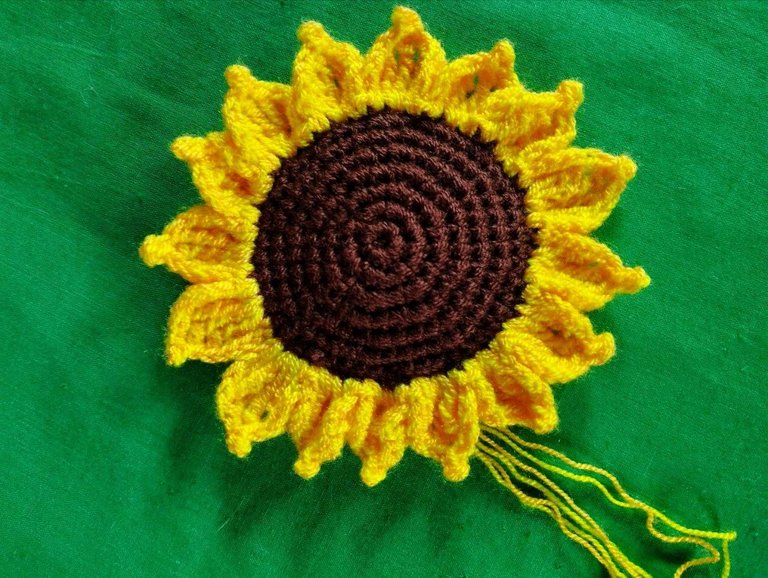
I'll start with the brown yarn and a size 3 needle. We make a magic ring, and within this, we'll crochet 8 single crochet stitches. The next row will increase all the stitches. Rows 3, 4, and 5 will increase 8 times in each row until we have 48 stitches in total. We'll leave the yarn uncut and set it aside. Now we take the green yarn and work another circle like the brown one.
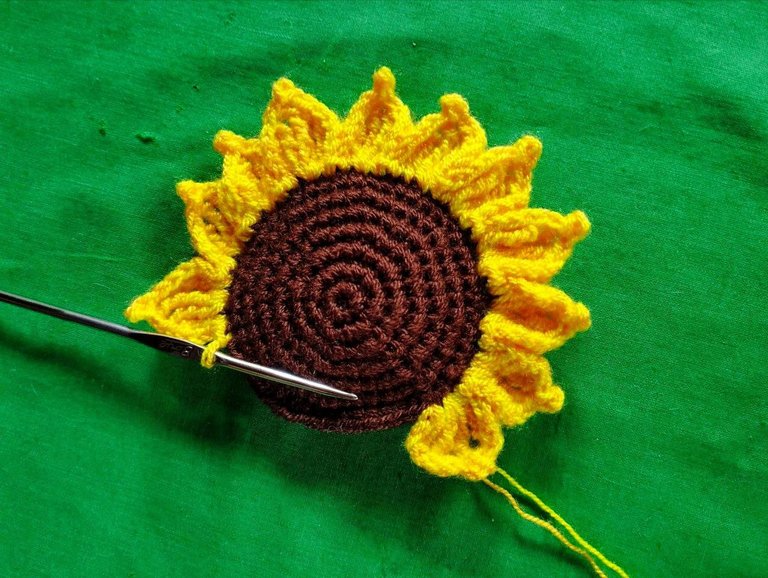
Once we have the two circles, we're going to join them with the brown yarn we had set aside. We take the entire chain of the brown and the green, only taking the front chain, leaving the other one free, and continue until the two circles are joined. We place the two shades of yellow yarn and work the petals in this way. We go up with 3 chains, 1 double crochet in the same space, in the next space 1 double crochet of 3 loops, 1 double crochet of 4 loops, 1 picot stitch of 3 chains, 1 double crochet of 4 loops, 1 double crochet of 3 loops all in the same space, in the next space 1 double crochet, 3 chains and close in the same space with a slip stitch, slip a stitch and repeat the petal, until we have 18 petals in total.
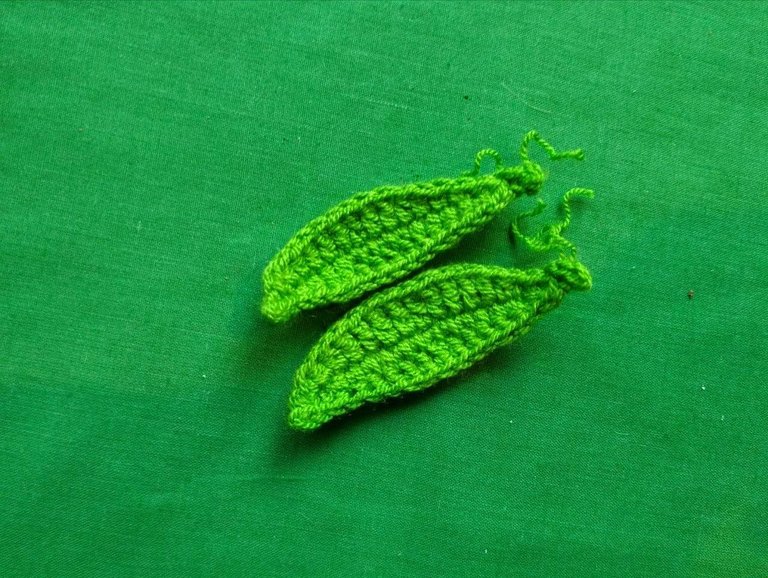
We take the green yarn to make the leaves, make a chain of 15 stitches, go up with a chain, skip a stitch and make 1 slip stitch, 1 single crochet, 2 half double crochets, 3 regular double crochets, 2 double crochets with 3 loops in the same space, 2 double crochets with 3 loops in the next space, 2 double crochets with 3 loops in the next space, 2 regular double crochets, 2 half double crochets, 1 single crochet, in the last chain we make 3 slip stitches and go back doing the same stitch sequences until finished, we make 2 identical leaves. Up to this point we have worked with 2 strands of yarn.
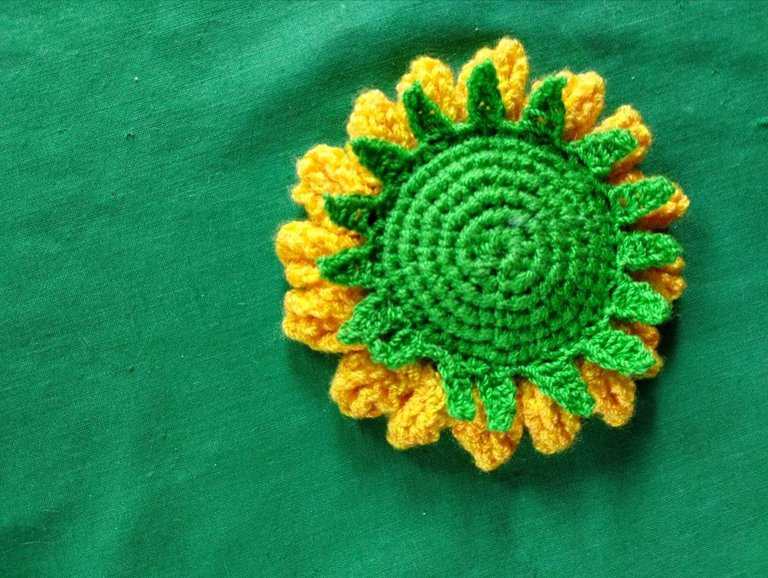
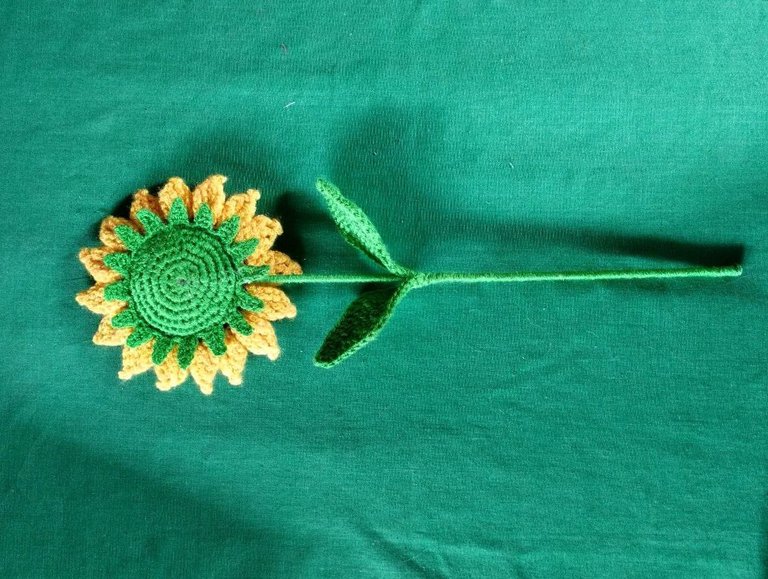
For the petals, we'll use the green yarn. We position ourselves on the other chain that was left over and work like this: 1 chain of 5 stitches, 1 single crochet, 1 half double crochet, 2 regular double crochets, and close with a slip stitch in the next stitch. We skip a space and make a slip stitch and repeat the entire sequence until we have 18 petals. The petals are worked with a single strand of yarn.
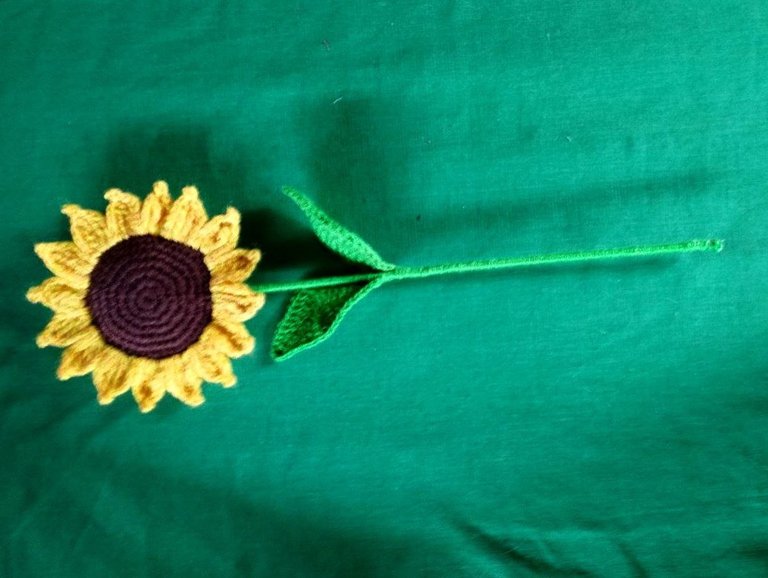
To cover the stick in height, we'll use 2 threads and leave about 2 cm uncovered. At the beginning, we place a silicone stitch and begin wrapping it. We calculate and place the leaves and continue wrapping until the entire stick is covered. Finally, we insert it through the back of the flower between the two colors and glue it with silicone so it doesn't move.
Comenzaré con el hilo marrón y la aguja número 3, hacemos un anillo mágico y dentro de este 8 puntos bajos, la siguiente fila hacia todos los puntos en aumentos, las filas 3, 4 y 5 se hacen 8 aumentos en cada fila hasta obtener 48 puntos en total, no cortamos el hilo y lo reservamos, ahora tomamos el hilo verde y trabajamos otra circulo igual al de color marrón.
Al tener los dos círculos los vamos a unir con el hilo color marrón que teníamos reservado, tomamos la cadena completa del color marrón y del color verde solo tomamos la cadena de adelante dejando la otra libre, así hasta unir las dos circunferencias, colocamos los dos tonos de hilo amarillo y trabajamos los pétalos de esta forma, subimos con 3 cadenas, 1 punto alto doble lazada en el mismo espacio, en el espacio siguiente 1 punto alto de 3 lazadas, 1 punto alto de 4 lazadas, 1 punto picot de 3 cadenas, 1 punto alto de 4 lazadas, 1 punto alto de 3 lazadas todos en el mismo espacio, en el siguiente espacio siguiente 1 punto alto doble lazada, 3 cadenas y cerramos en el mismo espacio con punto deslizado, deslizamos un punto y repetimos el pétalo, hasta obtener 18 pétalos en total.
Tomamos el hilo verde para elaborar las hojas, hacemos una cadena de 15 puntos subimos con una cadena saltamos un punto y hacemos 1 punto deslizado, 1 punto bajo, 2 puntos medio alto, 3 puntos altos normales, 2 puntos altos doble lazada en el mismo espacio, 2 puntos altos de 3 lazadas en el siguiente espacio, 2 puntos altos doble lazada en el siguiente espacio, 2 puntos altos normales, 2 puntos medio alto, 1 punto bajo, en la última cadena hacemos 3 puntos deslizados y nos regresamos haciendo las mismas secuencias de punto hasta finalizar, realizamos 2 hojas iguales hasta este punto hemos trabajado con 2 hebras de hilo.
Para los petalos usaremos el hilo verde, nos posicionamos en la otra cadena que quedó pendiente y trabajamos así , 1 cadena de 5 puntos, 1 punto bajo, 1 punto medio alto, 2 puntos altos normales y cerramos con punto deslizado en el siguiente punto, saltamos un espacio y hacemos un punto deslizado y repetimos toda la secuencia hasta obtener 18 petalos, los petalos están trabajados con una sola hebra de hilo.
Para forrar el palito de altura, usaremos 2 hilos y dejamos unos 2 cm sin forrar al inicio colocamos un punto silicón y empezamos a envolverlo vamos calculando y colocamos las hojas y seguimos envolviendo hasta cubrir todo el palito, finalmente lo introducimos por la parte de atrás de la flor entre los dos colores y lo pegamos con silicón para que no se mueva.

Dear friends, I have made several sunflowers but I had never worked with them as amigurumi, but I have to admit that it is an incredible challenge, I really liked the result of the piece, I hope you like it too, thank you very much for your attention, greetings 🫂🙏🏻.
Apreciados amigos yo he hecho varios girasoles pero nunca los había trabajado como amigurumi, pero tengo que reconocer que es un reto increíble, me gustó muchísimo el resultado de la pieza, espero a ustedes también les agrade , muchísimas gracias por su atención, saludos 🫂🙏🏻.
The photographs are my own, taken with my Redmi Note 11 cell phone and edited with the Instagram application, the translation of the text was done using this means: Google.
My Instagram account and work venture is:
Siriuscrochet, the magic of knitting.
Las fotografías son de mi autoría tomadas con mi celular Redmi Note 11 y editadas con la aplicación Instagram la traducción del texto la realice utilizando este medio: Google.
Mi cuenta de Instagram y emprendimiento laboral es:
Siriuscrochet, la magia de tejer.
WOW! It is so beautiful and shining. Love its design. Good to see how you made it. It shows your skills. Well done!
Thanks You
Que hermoso tu trabajo!
Muchas gracias amiga 🫂
Demasiado lindo, mis flores favoritas. Gracias por compartir. Saludos!
Muchas gracias iga
Hola @maricrochets, mi flor favorita son los girasoles, y desde que comence a tejer he querido hacer uno pero no sabía por dónde empezar, gracias guardaré tu post y me guiare paso a paso. 🥰
Que bella amiga quedó,el girasol es mi flor favorita que bello 🥰🌻
Wow ... That's really nice. You have crochet it really perfectly. It looks like the real one