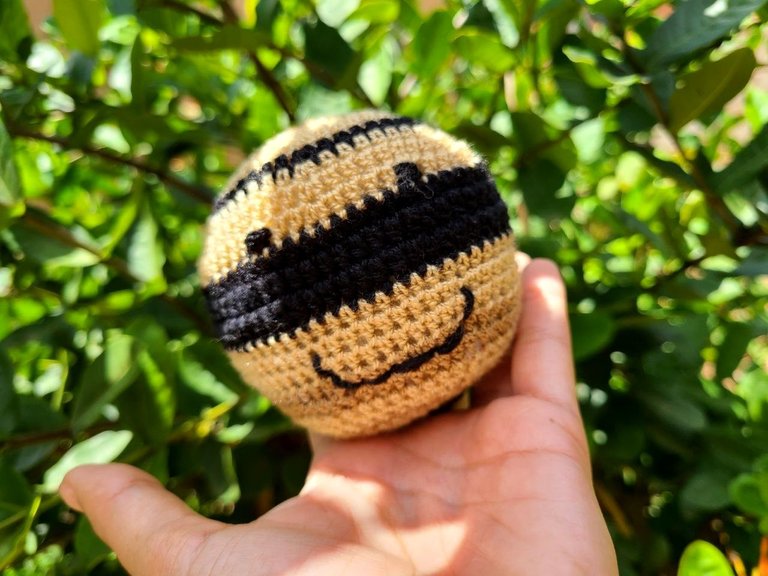
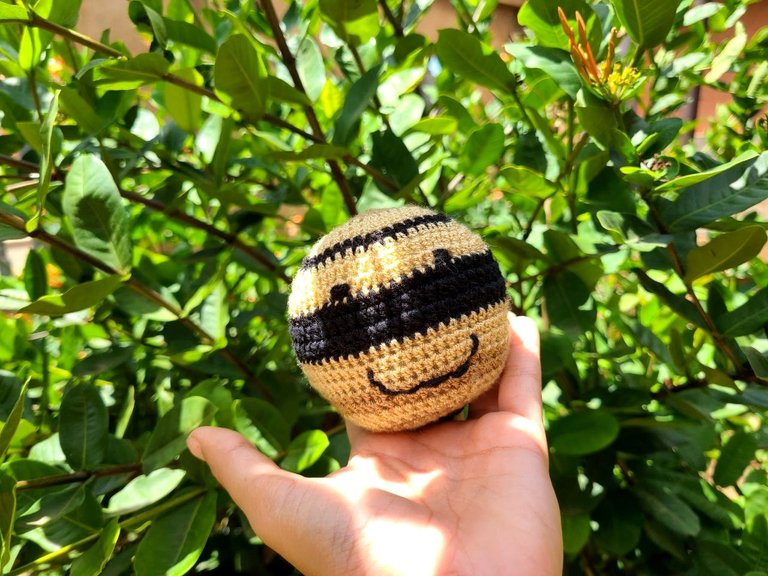
Tutorial: Designing the planet Jupiter in the form of crochet amigurumi (step by step) - Diseñando el planeta Júpiter en forma de amigurumi en crochet (paso a paso). 🌕🧶
Hello friends, I hope you had a very good weekend ☀️ again I bring you a very interesting tutorial, it is about the design of 1 planet, in this case Jupiter in the form of amigurumi, it is made in crochet with its step by step, I hope you like it as usual.
Hola amigos espero hayan pasado un muy buen fin de semana ☀️ de nuevo les traigo un tutorial bastante interesante se trata del diseño de 1 planeta, en este caso Júpiter en forma de amigurumi, está elaborado en crochet con su paso a paso, espero les guste como siempre.

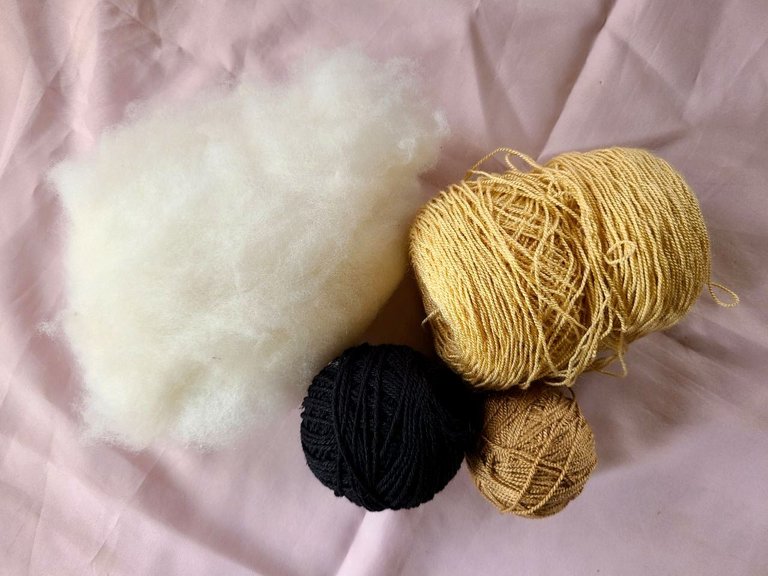
🧶 Materials to use:
✓Crochet threads: brown, beige and black.
✓Crochet needle number 7.
✓Synthetic filling.
✓Sewing needle.
✓Separators or markers.
✓Scissors.
🧶 Points to use:
✓High middle points.
✓Slided points.
🧶 Materiales a utilizar:
✓Hilos crochet: marrón, beig y negro.
✓Aguja de crochet número 7.
✓Relleno sintético.
✓Aguja de coser.
✓Separadores o marcadores.
✓Tijeras.
🧶 Puntos a utilizar:
✓Puntos medios altos.
✓Puntos deslizados.


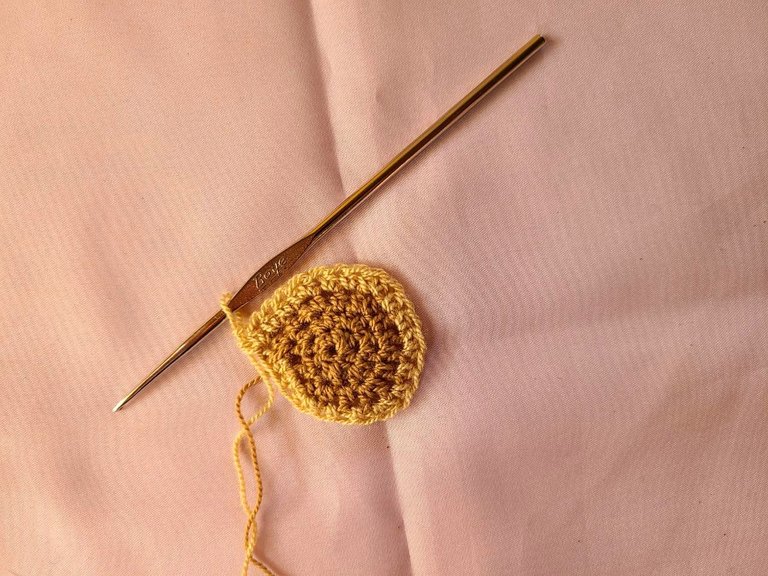
🧶 Step 1: We do this side step with brown thread.
Row 1: We start by making a magic ring and inside it we make 6 single crochets.
Row 2: We make all the stitches with increase (12).
Row 3: 1 single crochet followed by 1 increase (18).
Row 4: Beige yarn, 2 single crochets, followed by an increase (24).
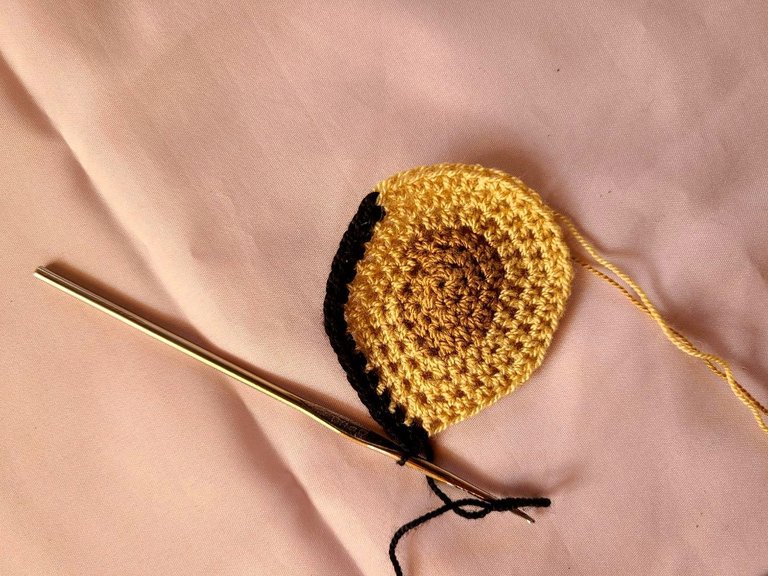
Row 5: 38 single crochets, followed by an increase (30).
Row 6: 4 single crochets, followed by an increase (36).
Row 7: Black yarn, 5 single crochets, followed by an increase (42).
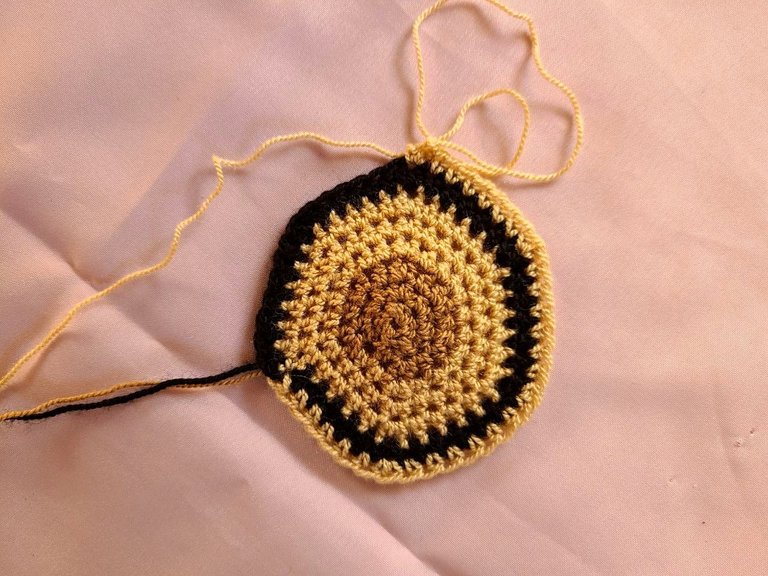
Row 8: Beige yarn, 6 single crochets, followed by an increase (48).
Row 9: 7 single crochets, followed by an increase (54).
Row 10: 8 single crochets, followed by an increase (60).
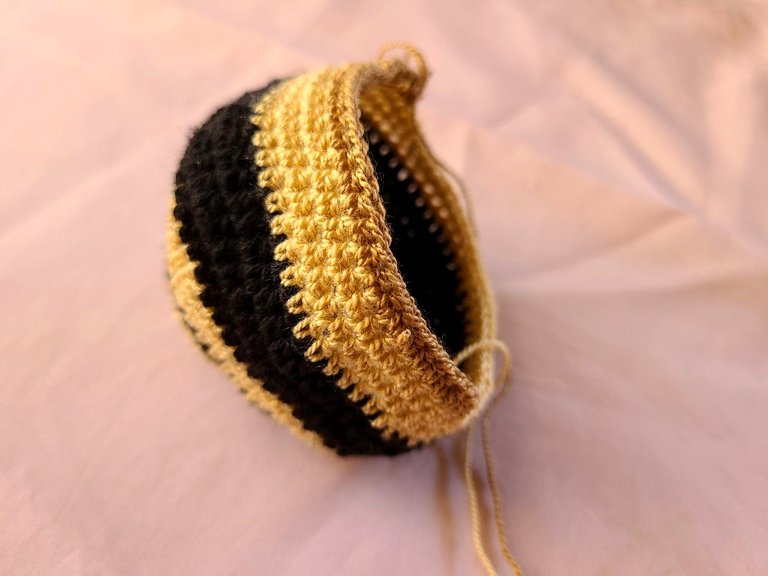
Rows 11, 12 and 13: Black yarn, all single crochets as they appear, without increase (60).
Rows 14, 15 and 16: Beige yarn, all single crochets as they appear, without increase (60).
Row 17: Brown yarn all single crochets as they appear, without increase (60).
Row 18: In this row we work the decreases, 8 single crochets, followed by a decrease of two single crochets together (54).
Row 19: Beige yarn, 7 single crochets, followed by a decrease of two single crochets together (48).
🧶 Paso 1: Este paso lado lo hacemos con hilo marrón.
Fila 1: Comenzamos haciendo un anillo mágico y dentro del mismo hacemos 6 puntos bajos.
Fila 2: Hacemos todos los puntos con aumento (12).
Fila 3: 1 punto bajo seguido de 1 aumento (18).
Fila 4: Hilo beige, 2 puntos bajos, seguido de un aumento (24).
Fila 5: 38 puntos bajos, seguido de un aumento (30).
Fila 6: 4 puntos bajos, seguido de un aumento (36).
Fila 7: Hilo negro, 5 puntos bajos, seguido de un aumento (42).
Fila 8: Hilo beige, 6 puntos bajos, seguido de un aumento (48).
Fila 9: 7 puntos bajos, seguido de un aumento (54).
Fila 10: 8 puntos bajos, seguido de un aumento (60).
Filas 11, 12 y 13: Hilo negro, todos los puntos bajos como aparecen, sin aumento (60).
Filas 14, 15 y 16: Hilo beige, todos los puntos bajos como aparecen, sin aumento (60).
Fila 17: Hilo marrón todos los puntos bajos como aparecen, sin aumento (60).
Fila 18: En esta fila trabajamos las disminuciones, 8 puntos bajos, seguidos de una disminución de dos puntos bajos juntos (54).
Fila 19: Hilo beige, 7 puntos bajos, seguidos de una disminución de dos puntos bajos juntos (48).
Row 20: 6 single crochets, followed by a decrease of two single crochets together (42).
Row 21: Brown yarn, 5 single crochets, followed by a decrease of two single crochets together (36).
Row 22: Beige yarn, 4 single crochets, followed by a decrease of two single crochets together (30).
Row 23: 3 single crochets, followed by a decrease of two single crochets together (24).
Row 24: 2 single crochets, followed by a decrease of two single crochets together (18).
Row 25: Black thread, 1 single crochet, followed by a decrease of two single crochets together (12).
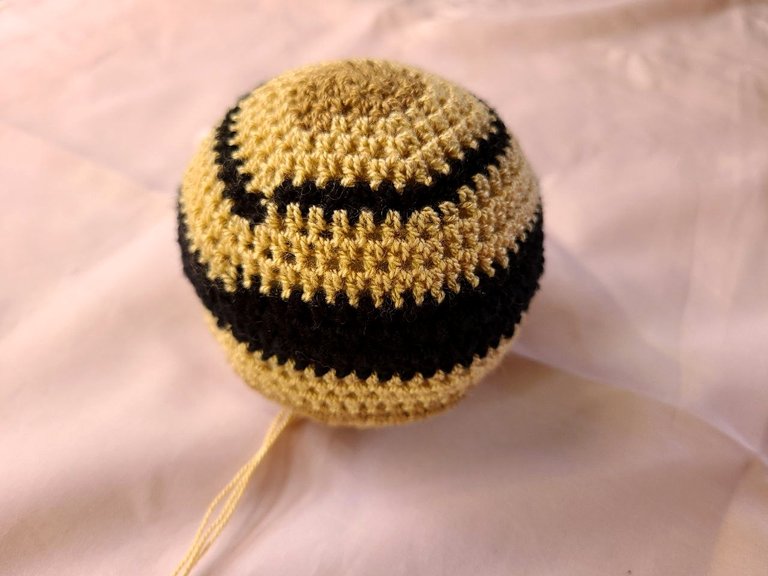
Row 26: All stitches in decrease of two single crochets together (6).
With a needle we proceed to close the piece.
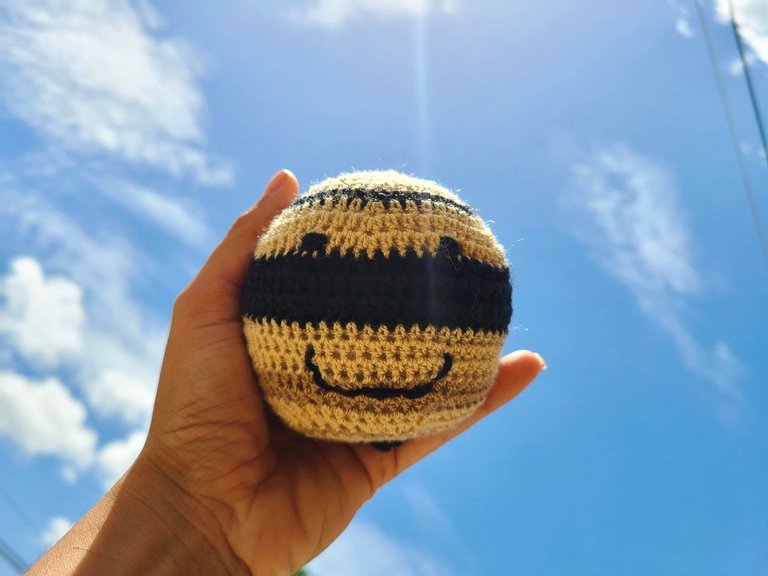
At the end of the piece we grab a needle and thread and proceed to embroider the eyes and mouth.
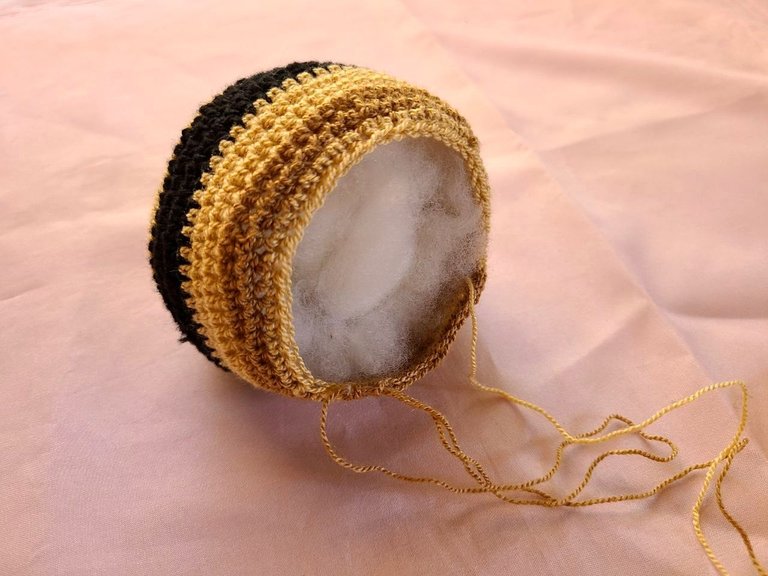
Note: We do the filling progressively as we begin the decreases, so that the handling of the piece is easier.
Fila 20: 6 puntos bajos, seguidos de una disminución de dos puntos bajos juntos (42).
Fila 21: Hilo marrón, 5 puntos bajos, seguidos de una disminución de dos puntos bajos juntos (36).
Fila 22: Hilo beige, 4 puntos bajos, seguidos de una disminución de dos puntos bajos juntos (30).
Fila 23: 3 puntos bajos, seguidos de una disminución de dos puntos bajos juntos (24).
Fila 24: 2 puntos bajos, seguidos de una disminución de dos puntos bajos juntos (18).
Fila 25: Hilo negro, 1 punto bajo, seguidos de una disminución de dos puntos bajos juntos (12).
Fila 26: Todos los puntos en disminucion de dos puntos bajos juntos (6).
Con una aguja procedemos a cerrar la pieza.
Al finalizar la pieza agarramos aguja e hilo y procedemos a bordar los ojos y la boca.
Nota: El relleno lo vamos haciendo progresivamente a lo que empezamos las disminuciones, para que sea más fácil el manejo de la pieza.


Very well friends, once again I have finished a project with its step by step to make it more practical and illustrative, I hope you like it and also your comments as always.
Thank you very much for the time you take to view and review my publications. Greetings, a hug from ❤️
Muy bien amigos una vez más he terminado un proyecto con su paso a paso para que sea más práctico e ilustrativo, espero les agrade y también
sus comentarios como siempre.
Muchas gracias por el tiempo que se toman, en ver y revisar mis publicaciones. Saludos, un abrazo de ❤️
Congratulations @maricrochets! You have completed the following achievement on the Hive blockchain And have been rewarded with New badge(s)
You can view your badges on your board and compare yourself to others in the Ranking
If you no longer want to receive notifications, reply to this comment with the word
STOPCheck out our last posts:
Thanks you
Impressive work, @maricrochets! Your consistency in publishing posts every single day deserves recognition!
Thanks you
Thanks you
You're welcome @maricrochets
BTW, support and vote for our witness.
You will get one more badge and may get bigger upvotes from us when we notify you.