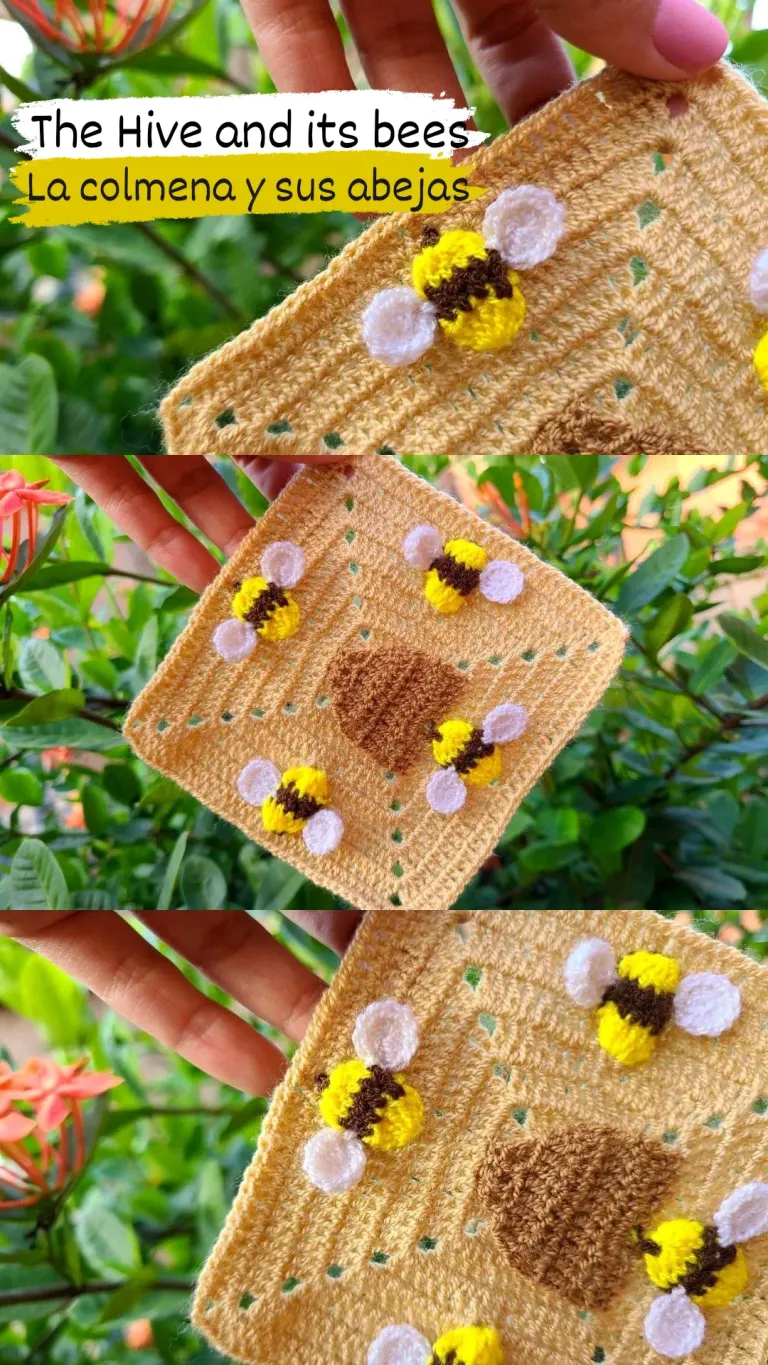
Tutorial: The hive and its bees, beautiful crochet design step by step - La colmena y sus abejas, hermoso diseño en crochet paso a paso. 🐝🍯🧶
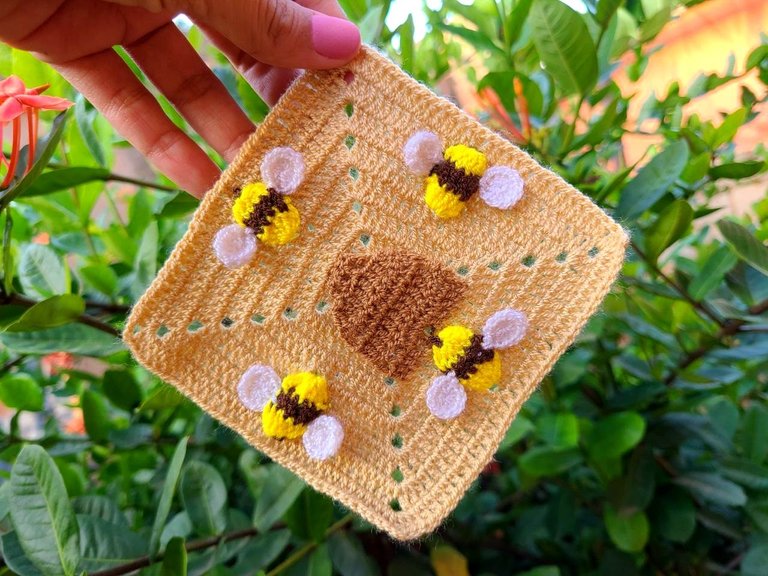
Hello dear friends of Hive, I am pleased to be here sharing with you once again the content of my tutorials, this time I bring you the design of a mat with a hive and its bees, in this case we are the bees and I made our home, our hive. 🐝🍯
Hola queridos amigos de Hive, me complace estar por acá compartiendo una vez más con ustedes el contenido de mis tutoriales, en esta oportunidad les traigo para el diseño de un tapete con una colmena y sus abejas, en este caso nosotros somos las abejas y Hice nuestro hogar, nuestra colmena. 🐝🍯
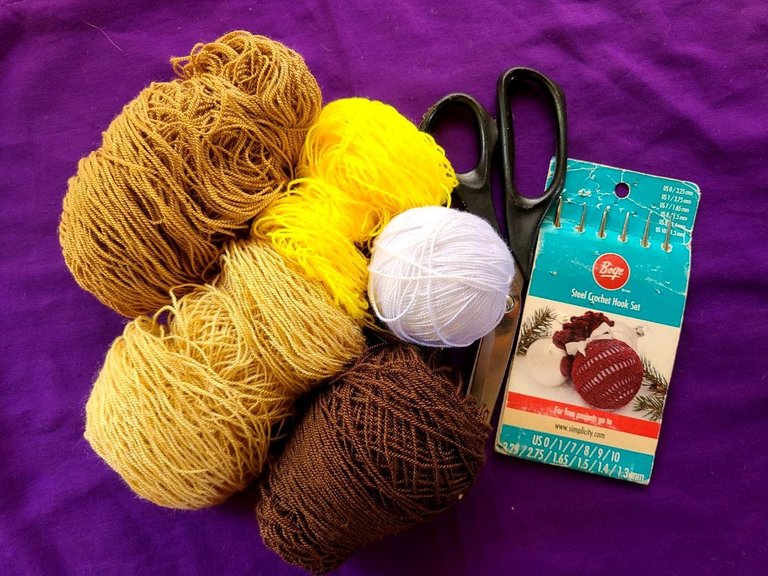
🧶 Materials to use:
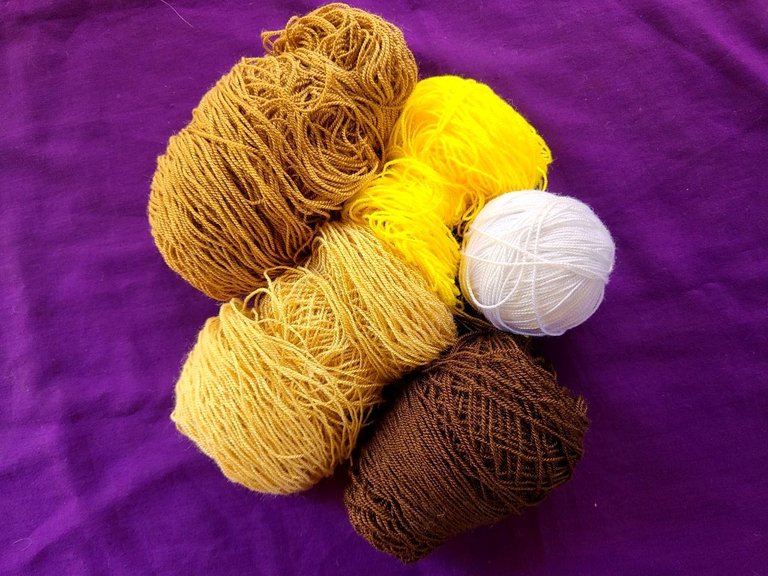
✓Crochet threads: Light beige, khaki beige, yellow, brown and white.
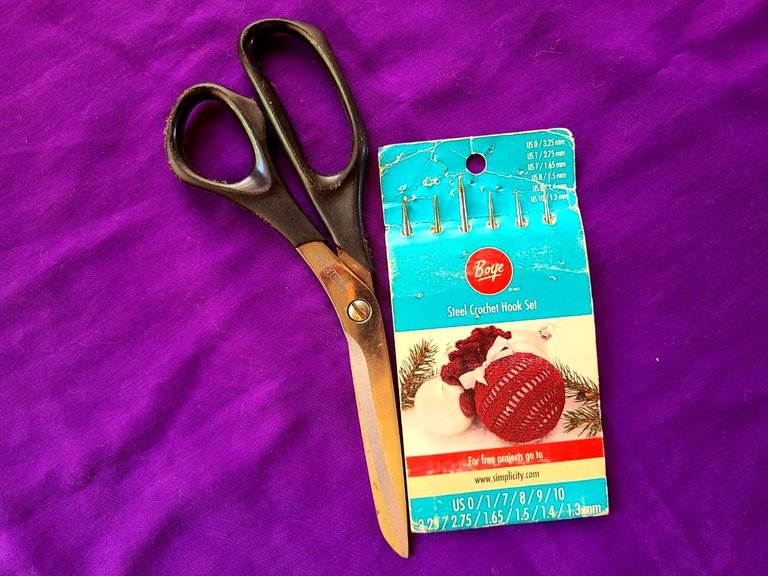
✓Crochet needle number 7.
✓Scissors.
🧶 Points to use:
✓Elongated high points.
✓High points.
✓Slided points.
🧶 Materiales a utilizar:
✓Hilos crochet: Beige claro, beige kaki, amarillo, marrón y blanco.
✓Aguja crochet número 7.
✓Tijeras.
🧶 Puntos a utilizar:
✓Puntos altos alargados.
✓Puntos altos.
✓Puntos deslizados.
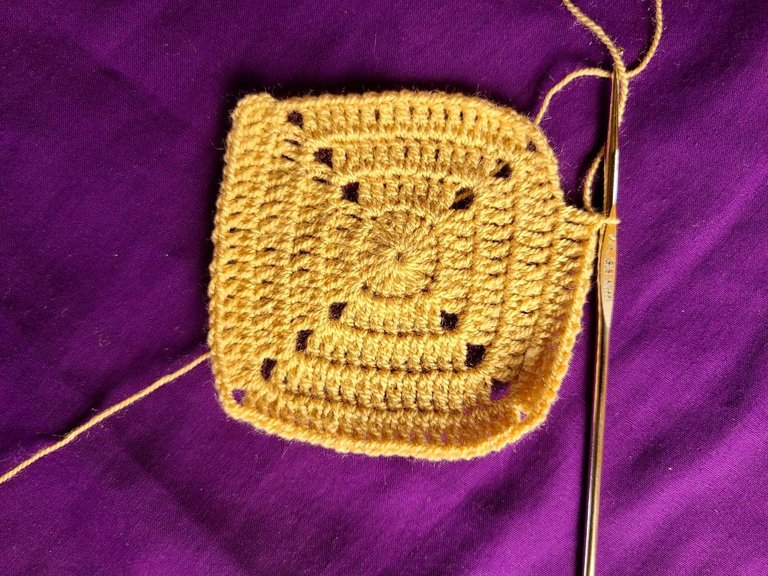
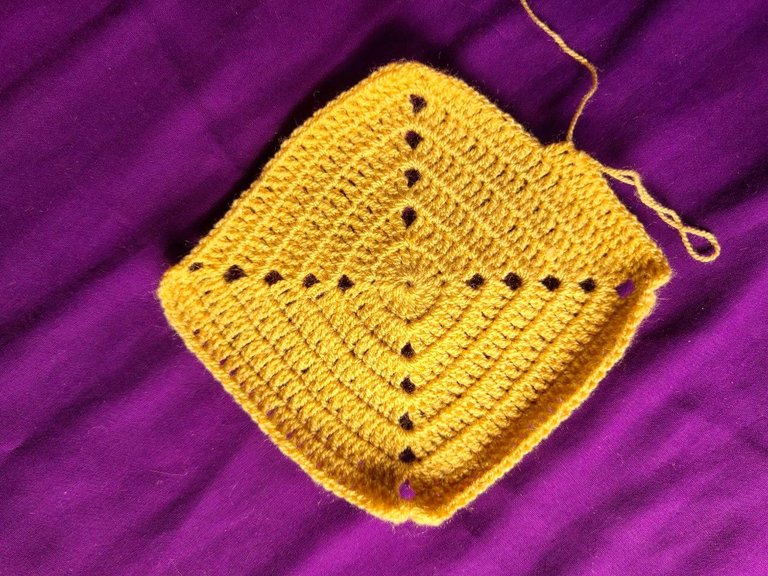
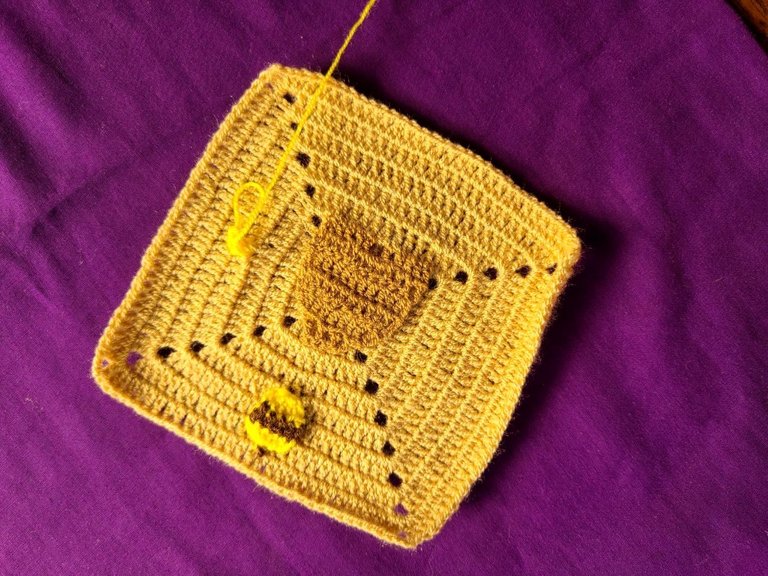
🧶 Step 1: In this row we work it with beige thread.
Row 1: We start with a magic ring and inside we make 16 normal double crochets.
Row 2: 3 elongated double crochets, followed by 2 elongated double crochets together, 3 chains, 2 elongated double crochets together and so on until we have 4 equal blocks.
Row 3: 7 elongated double crochets, followed by 2 elongated double crochets together, 3 chains, 2 elongated double crochets together and so we continue until the end of the row.
Row 4: 11 elongated double crochets, followed by 2 elongated double crochets together, 3 chains, 2 elongated double crochets together and so we continue until the end of the row.
Row 5: 15 elongated double crochets, followed by 2 elongated double crochets together, 3 chains, 2 elongated double crochets together and so we continue until the end of the row.
Row 6: 19 elongated double crochets, followed by 2 elongated double crochets together, 3 chains, 2 elongated double crochets together and so we continue until the end of the row.
Row 7: 23 elongated double crochets, followed by 2 elongated double crochets together, 3 chains, 2 elongated double crochets together and so we continue until the end of the row.
Row 8: 23 elongated double crochets, followed by 2 elongated double crochets together, 3 chains, 2 elongated double crochets together and so we continue until the end of the row.
🧶 Paso 1: En esta fila la trabajamos con hilo beige.
Fila 1: Empezamos haciendo con un anillo mágico y dentro hacemos 16 puntos altos normales.
Fila 2: 3 puntos altos alargados, seguidos de 2 puntos altos alargados juntos, 3 cadenas, 2 puntos altos alargados juntos y así seguimos hasta tener 4 bloques iguales.
Fila 3: 7 puntos altos alargados, seguidos de 2 puntos altos alargados juntos, 3 cadenas, 2 puntos altos alargados juntos y así seguimos hasta el final de la fila.
Fila 4: 11 puntos altos alargados, seguidos de 2 puntos altos alargados juntos, 3 cadenas, 2 puntos altos alargados juntos y así seguimos hasta el final de la fila.
Fila 5: 15 puntos altos alargados, seguidos de 2 puntos altos alargados juntos, 3 cadenas, 2 puntos altos alargados juntos y así seguimos hasta el final de la fila.
Fila 6: 19 puntos altos alargados, seguidos de 2 puntos altos alargados juntos, 3 cadenas, 2 puntos altos alargados juntos y así seguimos hasta el final de la fila.
Fila 7: 23 puntos altos alargados, seguidos de 2 puntos altos alargados juntos, 3 cadenas, 2 puntos altos alargados juntos y así seguimos hasta el final de la fila.
Fila 8: 23 puntos altos alargados, seguidos de 2 puntos altos alargados juntos, 3 cadenas, 2 puntos altos alargados juntos y así seguimos hasta el final de la fila.

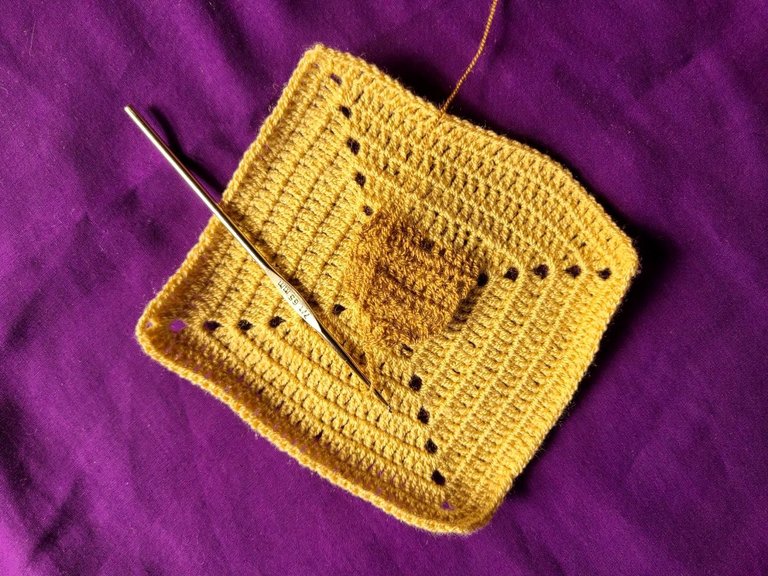
🧶 Step 2: Here we will be working with the khaki beige thread.
To make the beehive we place ourselves in the third row in any of the blocks and take the 9 central points and work as follows:
Row 1: 4 normal double crochets, 2 chains we skip 1 space and 4 normal double crochets.
Rows 2, 3 and 4:** All in normal double crochets.
Row 5: 1 decrease, 6 normal double crochets, 1 decrease.
Row 6: With slipped stitch we run 1 space and make 4 normal double crochets. We proceed to glue the beehive to the mat.
🧶 Paso 2: Acá estaremos trabajando con el hilo beige kaki.
Para hacer la colmena nos ubicamos en la tercera fila en cualquiera de los bloques y tomamos los 9 puntos centrales y trabajamos de la siguiente forma:
Fila 1: 4 puntos altos normales, 2 cadenas saltamos 1 espacio y 4 puntos altos normales.
Filas 2, 3 y 4:** Toda en puntos altos normales.
Fila 5: 1 disminucion, 6 puntos altos normales, 1 disminucion.
Fila 6: Con punto deslizado corremos 1 espacio y hacemos 4 puntos altos normales.
Procedemos a pegar al tapete la colmena.

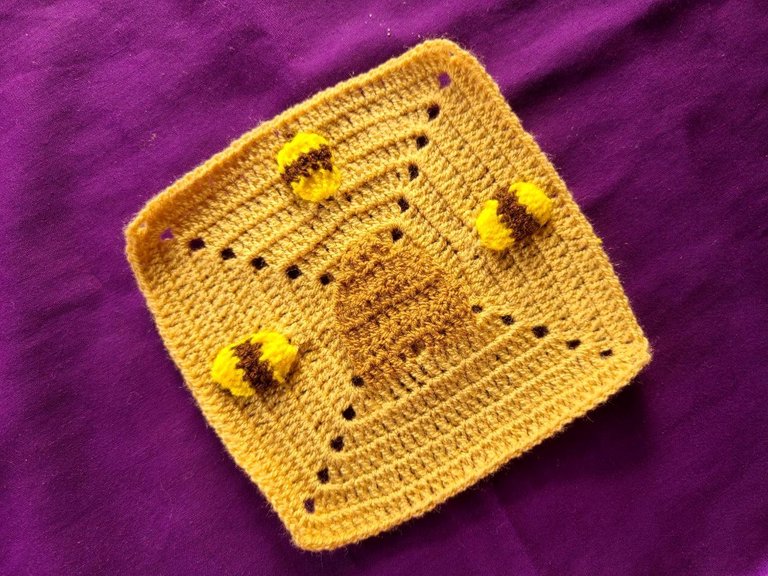
🧶 Step 3: This step is made with the threads, yellow, brown and white (the bees).
Row 1: We are located in the center of row 4 before the edge, we make 6 normal double crochets together, in yellow.
Row 2: 6 normal double crochets in brown.
Row 3: 6 double crochets closed together in yellow.
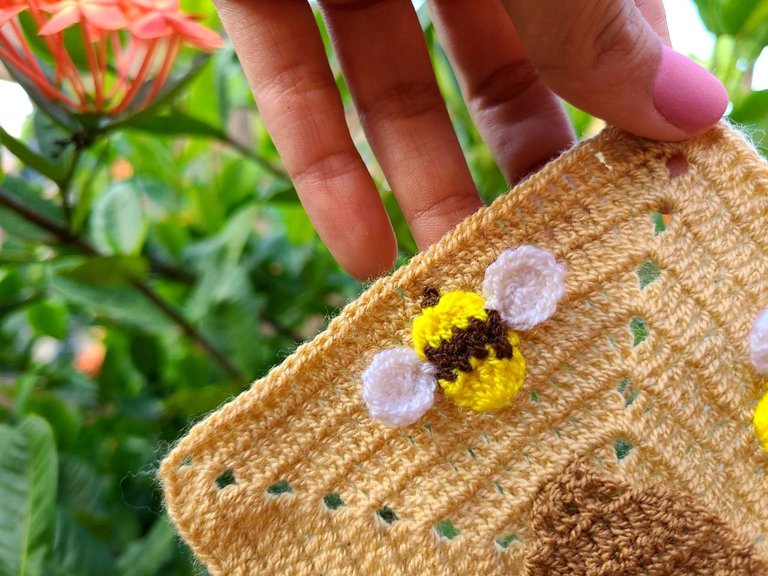
And to finish with the brown thread we make 2 single crochets on the closure of the yellow one and simulate the head, we proceed to correctly locate the bee and fix it on the mat.
🧶 Paso 3: Este paso está elaborado con los hilos, amarillo, marrón y blanco ( las abejas).
Fila 1: Nos ubicamos en el centro de la fila 4 antes del borde, hacemos 6 puntos altos normales juntos, en color amarillo.
Fila 2: 6 puntos altos normales en color marrón.
Fila 3: 6 puntos altos cerrados juntos en color amarillo.
Y para finalizar con el hilo marrón hacemos 2 puntos bajos sobre el cierre del amarillo y simulamos la cabeza, procedemos a ubicar correctamente la abeja y la fijamos en el tapete.
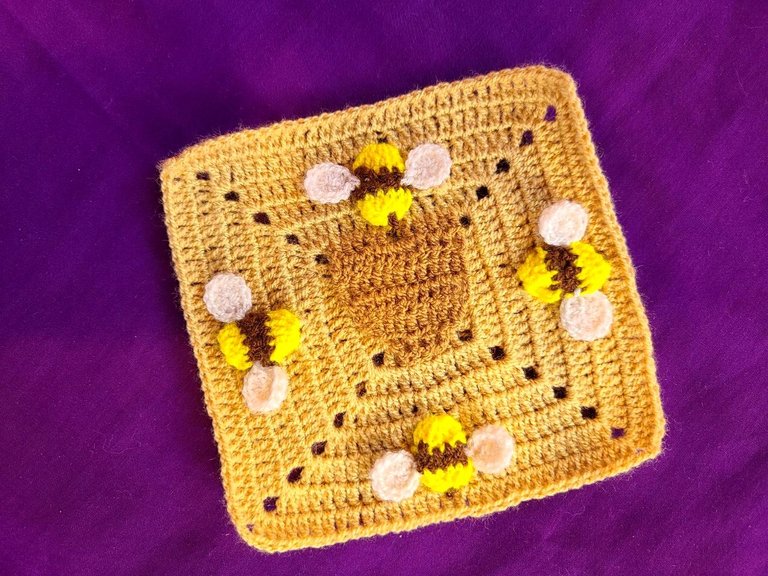
Dear friends, I have finished my new project, with the confidence that once again it will be accepted by you. Once again, thank you very much for the time you take to read and respond to my posts, Greetings.
Apreciados amigos, he terminado mi nuevo proyecto, con la confianza de que una vez más será de su aceptación.
Una vez más muchas gracias por el tiempo que se toman en leer y responder mis publicaciones, Saludos.

They are very cute, I love the bees, they look very original.
thank you so much
Quedó precioso, los colores son muy cálidos y bonitos.
Saludos.
Gracias amiga
Hermoso trabajo @maricrochets!! Me encanta la temática que elegiste, quedan muy lindas las abejitas hechas de esa manera 🐝
Gracias por compartirlo 🌺
Muchas gracias
Me gusta mucho esta idea tan bonita y original. Es la primera vez que veo un granny como colmena y me pareció genial. Las abejitas te quedaron muy tiernas. Gracias por compartir tu proceso creativo con nosotros.
Muchas gracias amiga
Congratulations @maricrochets! You have completed the following achievement on the Hive blockchain And have been rewarded with New badge(s)
Your next target is to reach 8000 upvotes.
You can view your badges on your board and compare yourself to others in the Ranking
If you no longer want to receive notifications, reply to this comment with the word
STOPThanks you
All good @maricrochets! You're a real Hive pro! Onward to that new goal!
test comment
test comment
This is really nice, we definitely need a hives homes
thank you very much friend
Wow 😮 this is lovely🥰🥰🥰
Thanks you
Hermoso 😻💝😻
Gracias amiga
¡Que hermoso diseño! 🤩 Creo que esta pieza sería un hermoso regalo para cualquier Hiver... ¡Super tierno! ❤️
Si así es, muchas gracias
Te quedo bellísimo 😍😍😍😍 una verdadera obra de arte.
Muchas gracias
These is really amazing 🥰
thank you so much
You are highly welcome