🎅DIY Christmas is Here!🎁 // Buzon de Santa 📭🎅, hagamos un lindo buzon con material de reciclaje 📭🎅 [esp/eng]
Saludos amigos de Diyhub, espero disfruten de un excelente fin de semana, por acá vengo nuevamente a participar en el concurso, 🎅DIY Christmas is Here! 🎁
Ya faltan pocos días para navidad y los niños y los no tan niños , ya que me incluyo😊 están muy emocionados por acercarse esta fecha, así que debemos hacerle nuestra carta a Santa para pedirle nuestros deseos, para colocar estas cartas les traigo una idea para hacer un lindo Buzon y así poder colocarle las cartas 🃏 a Santa, y lo mejor es que esta hecho con material de reciclaje, ven y te muestro el paso a paso:
Greetings friends of Diyhub, I hope you enjoy a great weekend, here I come again to participate in the contest, 🎅DIY Christmas is Here! 🎁
There are just a few days left until Christmas and the children and the not so children, myself included😊 are very excited about this date approaching, so we must write our letter to Santa to ask him for our wishes, to place these letters I bring you an idea for make a nice Mailbox so you can place the letters 🃏 to Santa, and the best thing is that it is made with recycling material, come and I will show you the step by step:
🎄🎄🎄🎄🧑🎄🎄🎄🎄🎄
MATERIALES
MATERIALS
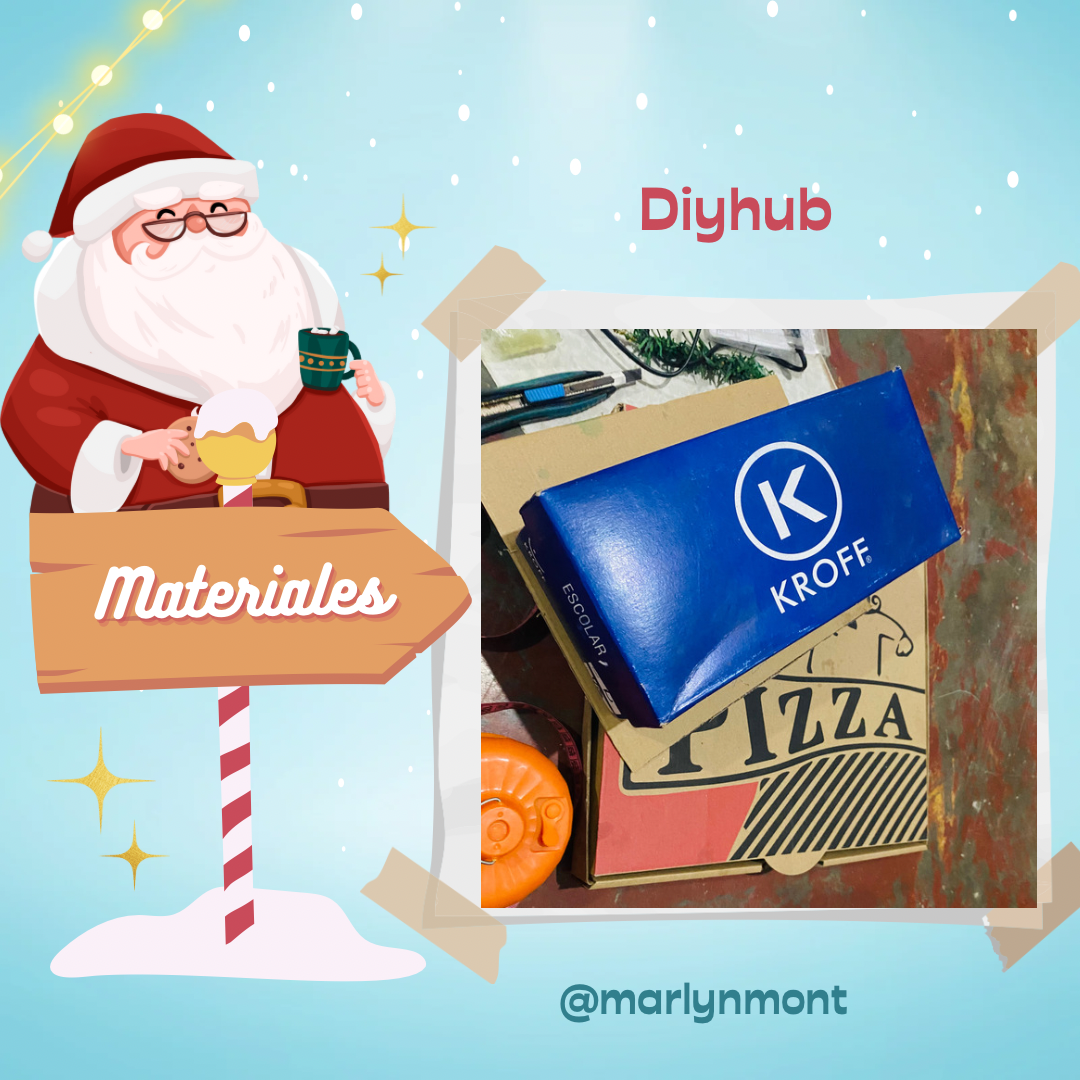
El cartón que yo utilice es el de cajas de pizza, tenía tiempo recolectando estas cajas, me gusta mucho ya que para las manualidades es un cartón bastante resistente.
Para la base de este buzon utilice un cuadrado de madera, le coloque con un tornillo el palo de madera en el centro.
Los materiales a utilizar para fabricar este lindo Buzon, la gran mayoría son de reciclaje y que encontramos en casa, acá te dejo la lista de los materiales que utilicé:
- carton
- caja de zapato
- pintura al frío verde
- cartulina u hojas blancas
- un trozo de palo de madera
- un cuadrado de madera o cartón grueso
- silicone
- pega
- lapiz
- regla
- tijeras
- grapadora
The cardboard that I use is that of pizza boxes, I had been collecting these boxes for a while, I really like it since for crafts it is a fairly resistant cardboard.
For the base of this mailbox, use a square of wood, place the wooden stick in the center with a screw.
The materials to be used to make this beautiful Mailbox, the vast majority are recycled and that we found at home, here is the list of the materials that I used:
- cardboard
- shoe box
- green and red cold paint
- cardboard or white sheets
- a piece of wooden stick
- a square of wood or thick cardboard
-silicone- job
- pencil
- ruler
- scissors
- stapler
🎄🎄🎄🎄🧑🎄🎄🎄🎄🎄
PASO A PASO
STEP BY STEP
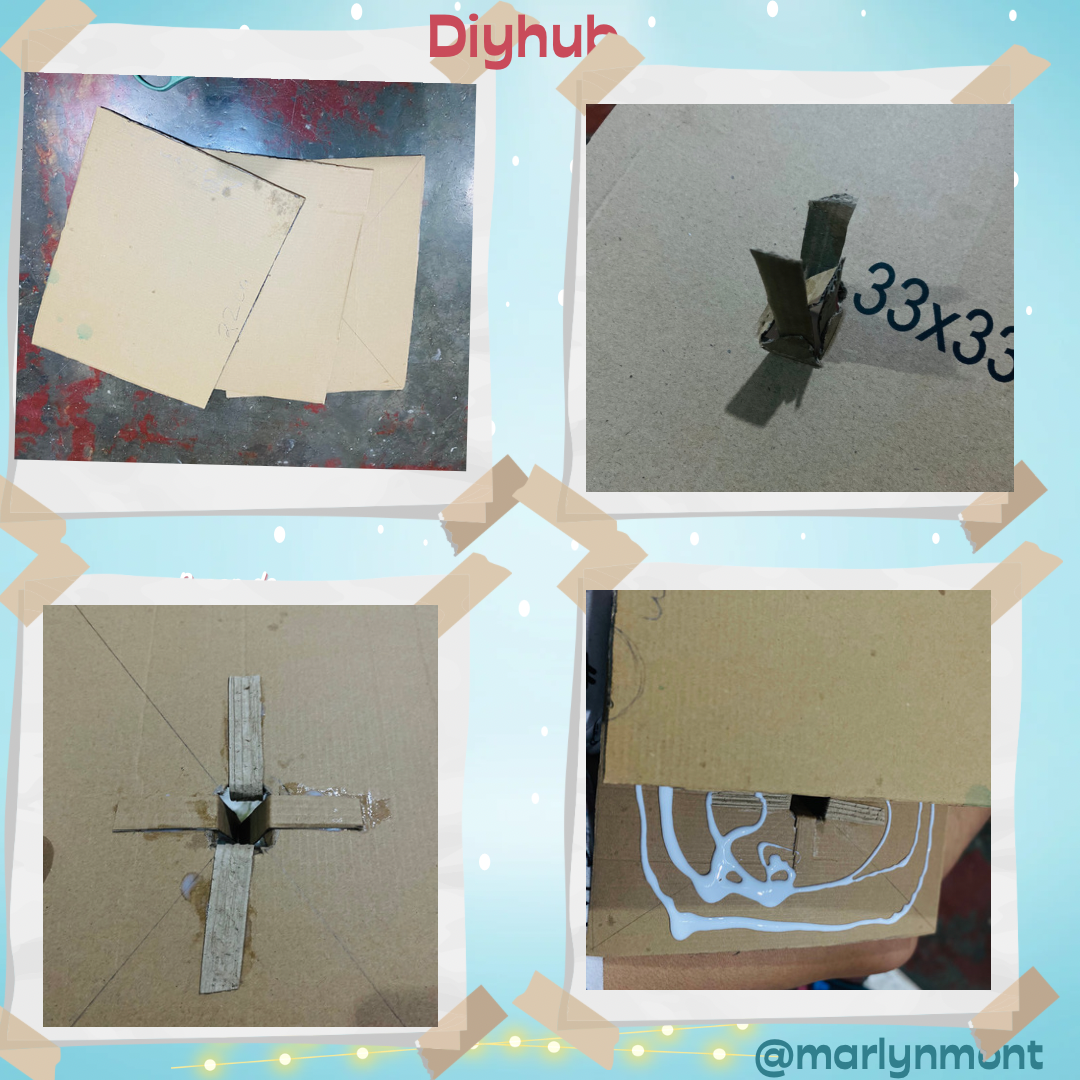
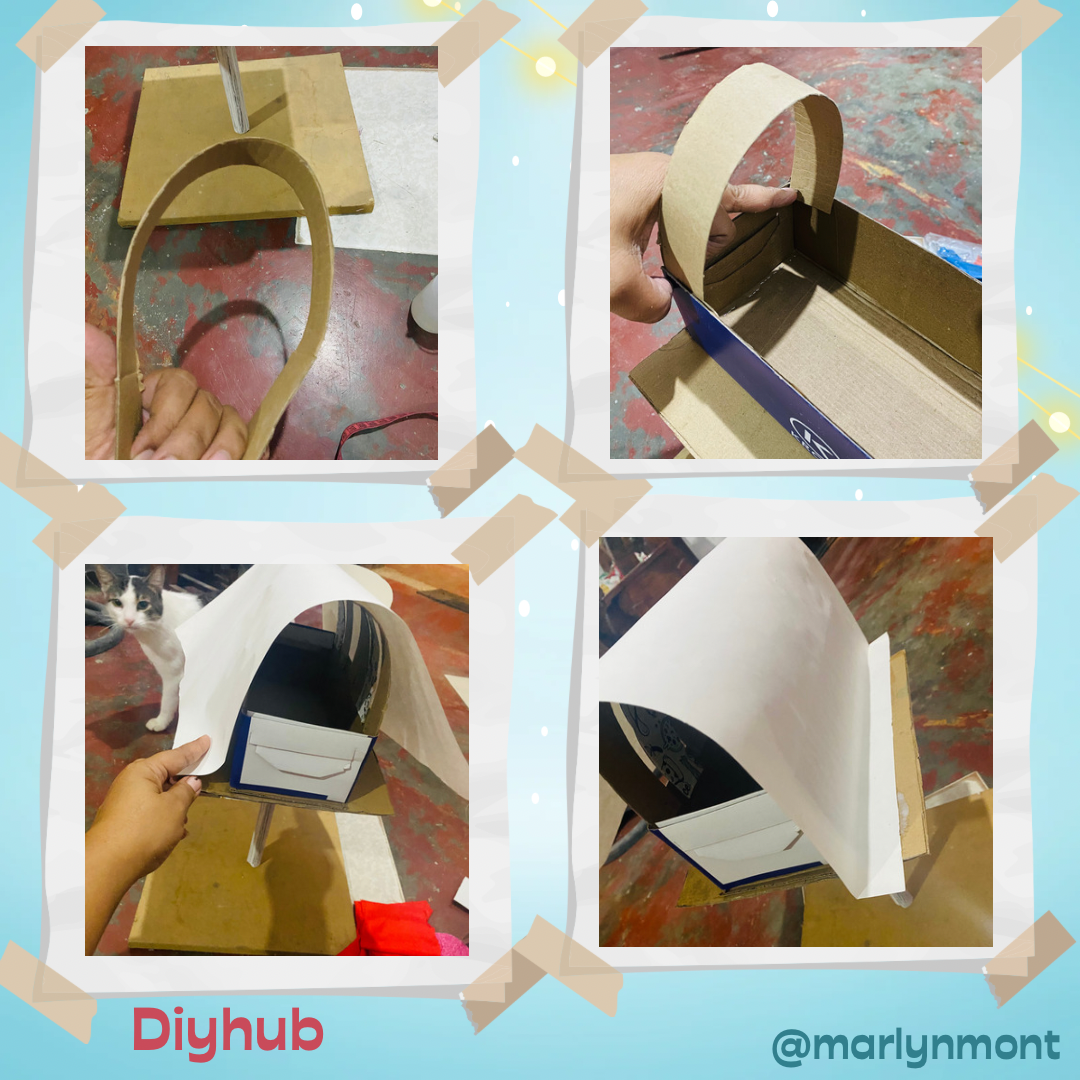
Para comenzar vamos a cortar 3 piezas de cartón de 22 cm de ancho por 28 de largo, esto para que quede resistente, le vamos a hacer un orificio en el centro a una de las piezas y a esto le vamos a colocar cuatro tiras de cartón para poder fijarla al palo, luego pegamos las otras piezas uniendo las 3 piezas de cartón.
To begin, we are going to cut 3 pieces of cardboard 22 cm wide by 28 cm long, this to make it resistant, we are going to make a hole in the center of one of the pieces and to this we are going to place four strips of cardboard to be able to fix it to the stick, then we glue the other pieces joining the 3 pieces of cardboard.
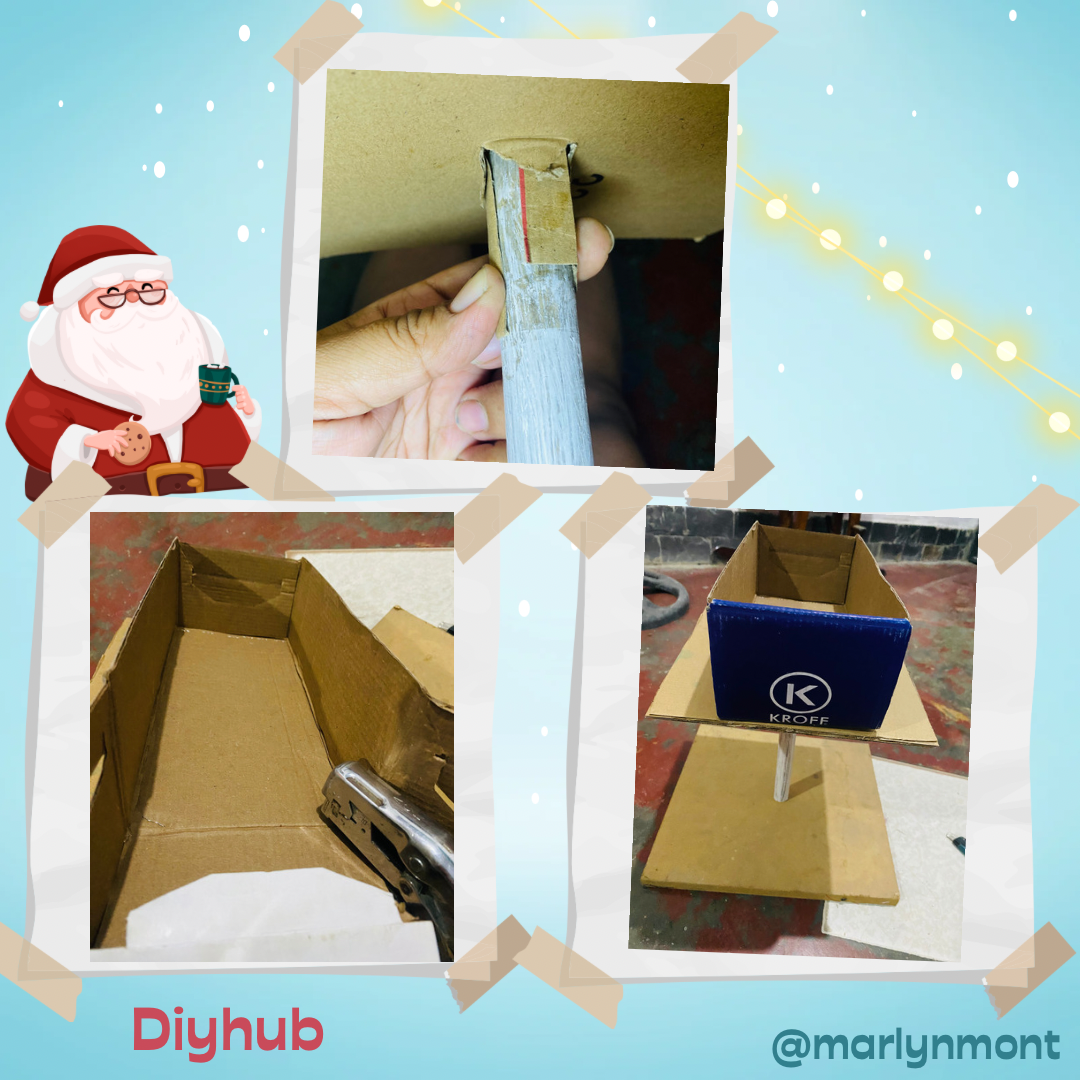
Buscando entre mis cosas conseguir una caja de zapatos angosta, esta me pareció perfecta para mi buzón, está tiene el mismo largo y tiene una abertura que me encantó para que sea la boca del buzon
en este paso vamos a pegar la base del Buzon al palo de madera, éste lo refuerce colicuándole un aro de cartón, luego grape la caja de zapatos a mi base para fijarla
Looking through my things to get a narrow shoe box, this one seemed perfect for my mailbox, it is the same length and has an opening that I loved to be the mouth of the mailbox.
In this step we are going to glue the base of the Mailbox to the wooden stick, reinforce it by attaching a cardboard ring to it, then staple the shoe box to my base to fix it
Vamos a cortar varias tiras de cartón tratando de que nos queden onduladas y las grapamos a la caja de orilla a orilla esto le dará la forma redondeada en la parte de arriba al Buzon,, al tenerlo listo lo voy a cubrir con cartulina pegándolo por todo el alrededor
We are going to cut several strips of cardboard trying to make them wavy and staple them to the box from edge to edge. This will give the mailbox a rounded shape at the top. When I have it ready I am going to cover it with cardboard and glue it all over. the around
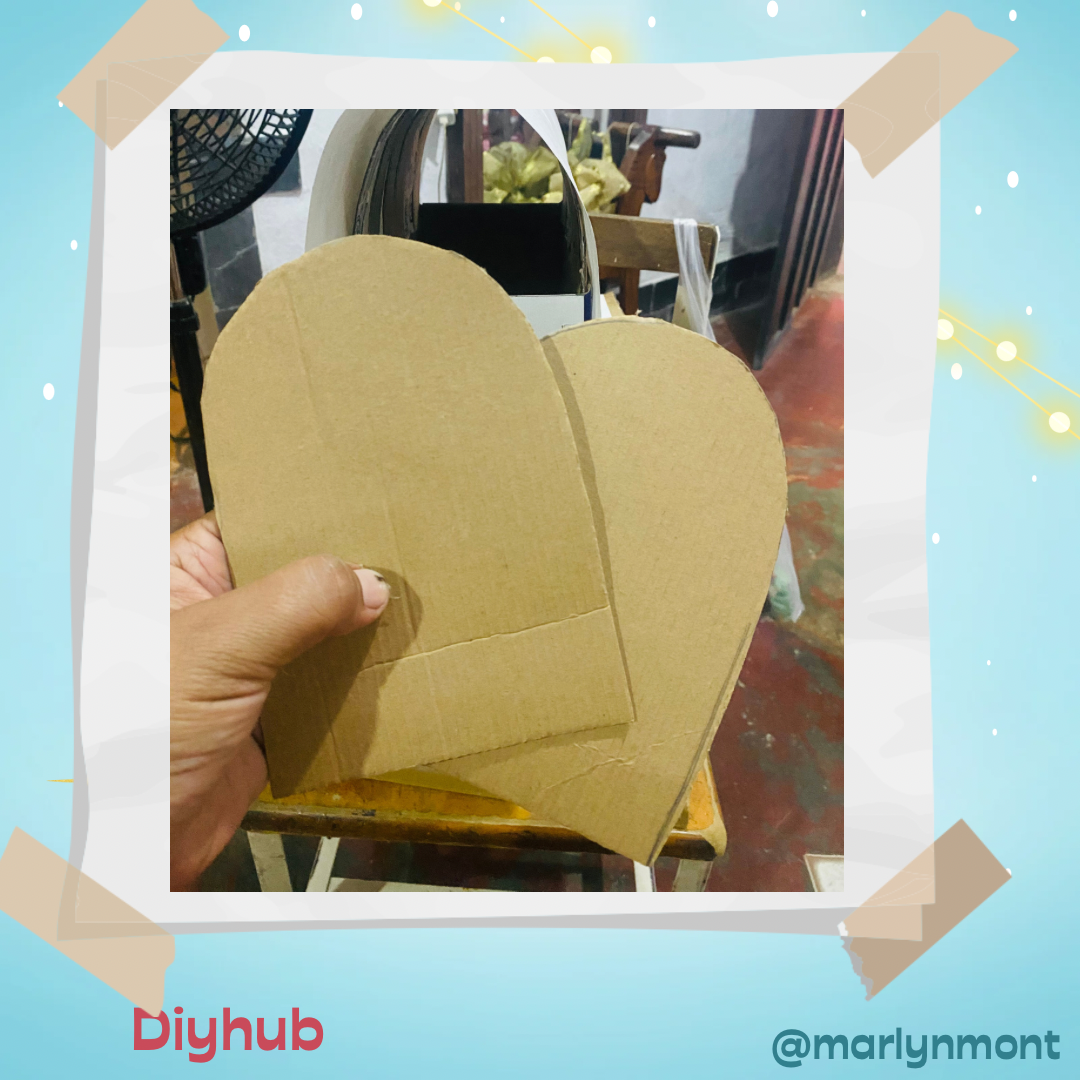
Cortamos dos piezas de cartón así como muestro en imagen para colocar delante y detrás de nuestro Buzon
We cut two pieces of cardboard as shown in the image to place in front and behind our Mailbox
En la parte de atrás esta pieza la vamos a colocar pegándola a la caja luego la cubrimos con papel del que tengas a la mano yo utilicé papel de block de construcción, para la parte de adelante vamos a hacer como una compuerta una de las aletas de la caja tiene para hacerle una abertura por allí será la entrada de los sobres de las cartas, luego le voy a pegar encima la otra pieza de cartón esta la voy a doblar a la mitad y en la parte superior le voy a colocar un agarradero para que sea más fácil a la hora de abrirla y va a ser Para que Santa saque las cartas por allí 😊
In the back part we are going to place this piece by gluing it to the box then we will cover it with paper that you have on hand. I used construction block paper, for the front part we are going to make one of the fins like a gate. The box has to make an opening, there will be the entrance for the letter envelopes, then I am going to glue the other piece of cardboard on top, this one I am going to fold in half and on the top I am going to place a handle to make it easier when opening it and it will be so that Santa can take the letters out there 😊
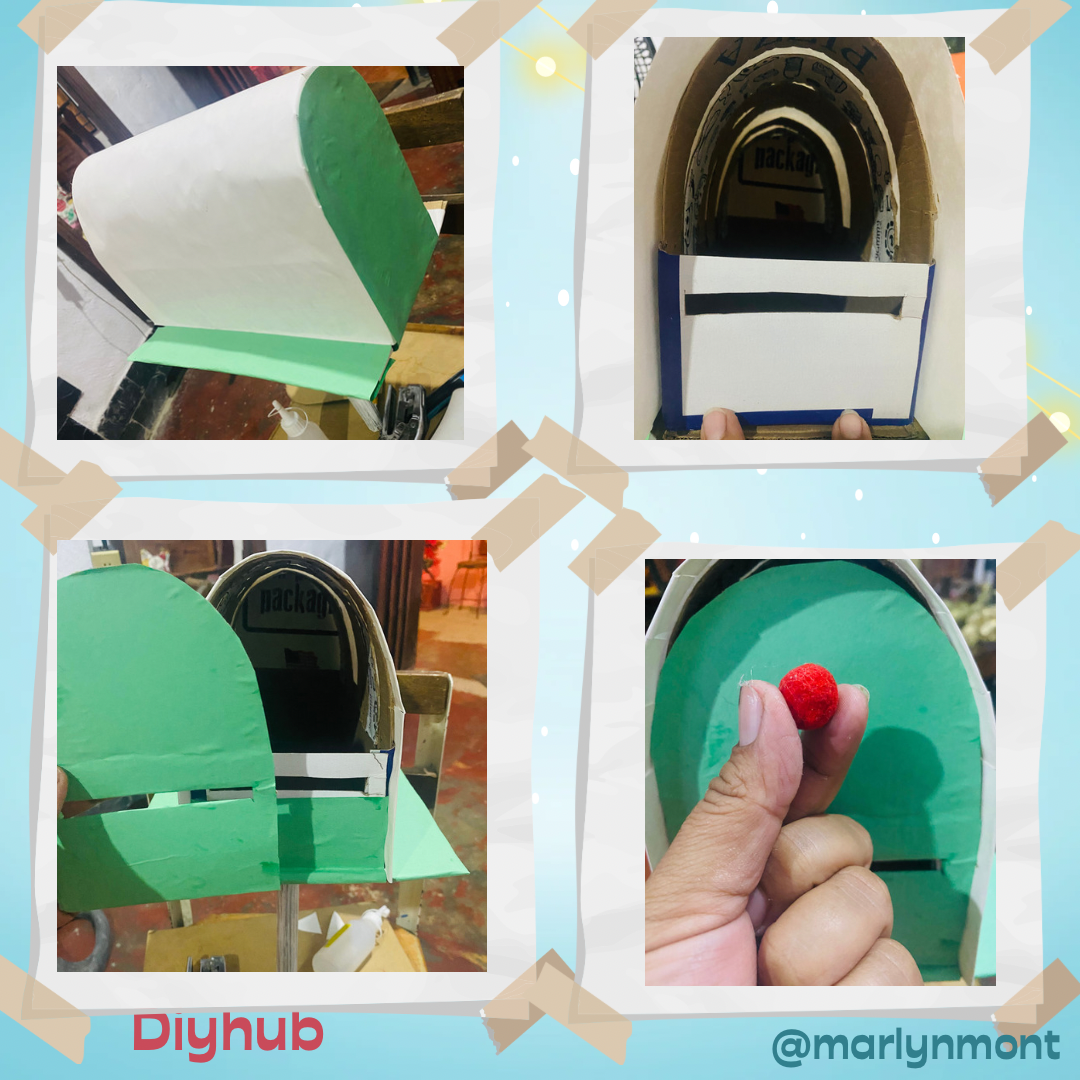
Para que se sostenga la compuerta del Buzon voy a dejar un sobresaliente de la cartulina que le pegué en la parte superior éste lo voy a hacer doblando el borde para que quede un poco resistente y así quede decorativo.
Como no logré conseguir pintura al frío roja, busque entre mis cosas de costura y conseguí una tela roja, está la pegue con silicone por todo el alrededor del buzon, el resto lo pinté con pintura verde, mi hija menor se entusiasmo mucho al ver cómo estaba quedando y me quito el pincel para ser ella la que pintara el buzon, Ema está muy emocionada en terminarlo para poder meter su carta 🥰
In order for the Mailbox gate to hold up, I am going to leave a protrusion of the cardboard that I glued on the upper part. I am going to do this by folding the edge so that it is a little resistant and thus remains decorative.
Since I couldn't get red cold paint, I searched through my sewing things and found a red fabric, I glued it with silicone all around the mailbox, the rest I painted with green paint, my youngest daughter was very excited to see how I was staying and I took off the brush to be the one to paint the mailbox, Ema is very excited to finish it so she can put her letter in 🥰
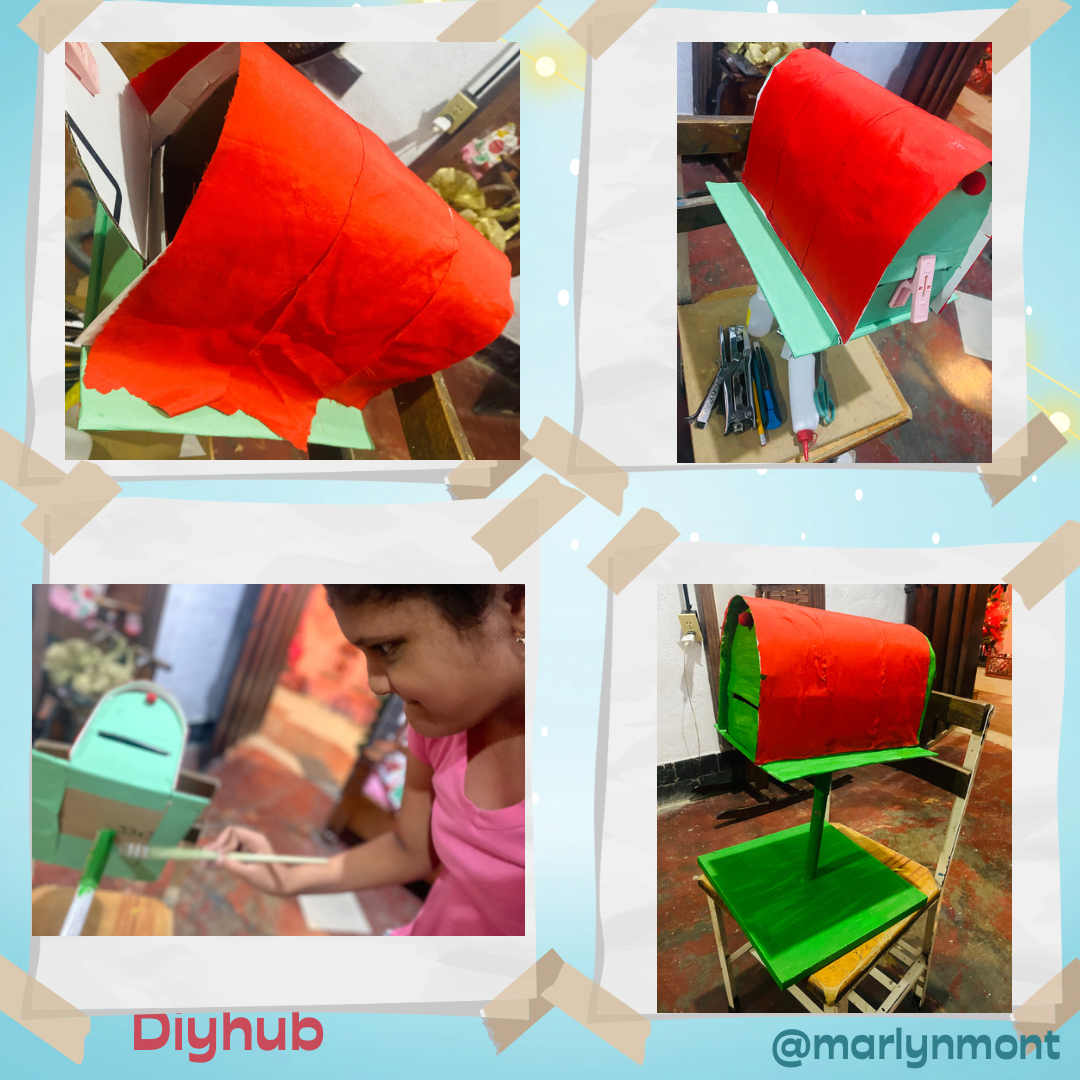
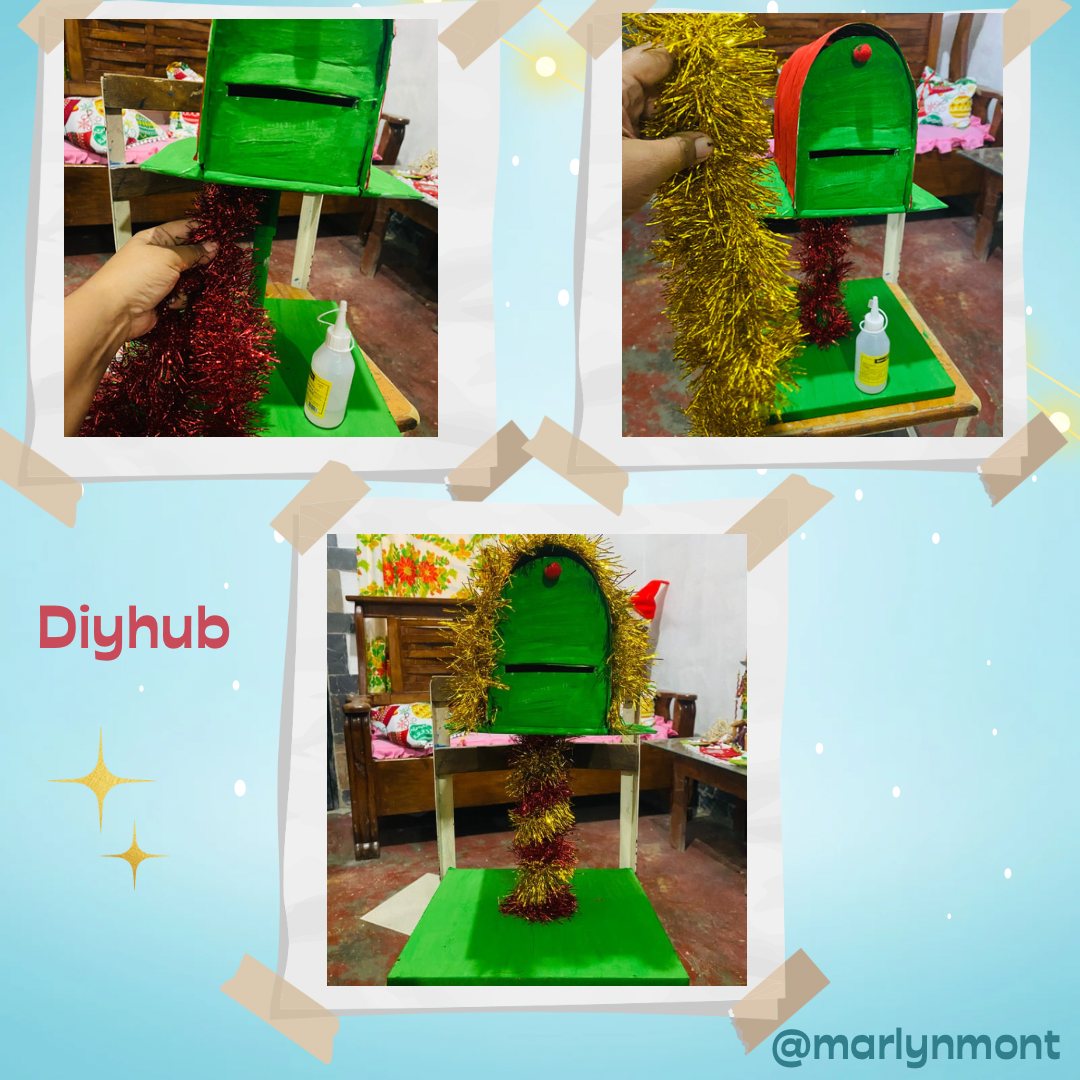
Para el siguiente paso lo vamos a decorar, esto va a gusto y disposición de cada quien, en mi caso lo decoré con unas guirnaldas que compré hace unos días , quiero colocarle alguna otra decoración pero aún no sé qué colocarle 🤔
For the next step we are going to decorate it, this is up to each person's taste and disposition, in my case I decorated it with some garlands that I bought a few days ago, I want to put some other decoration on it but I still don't know what to put on it 🤔
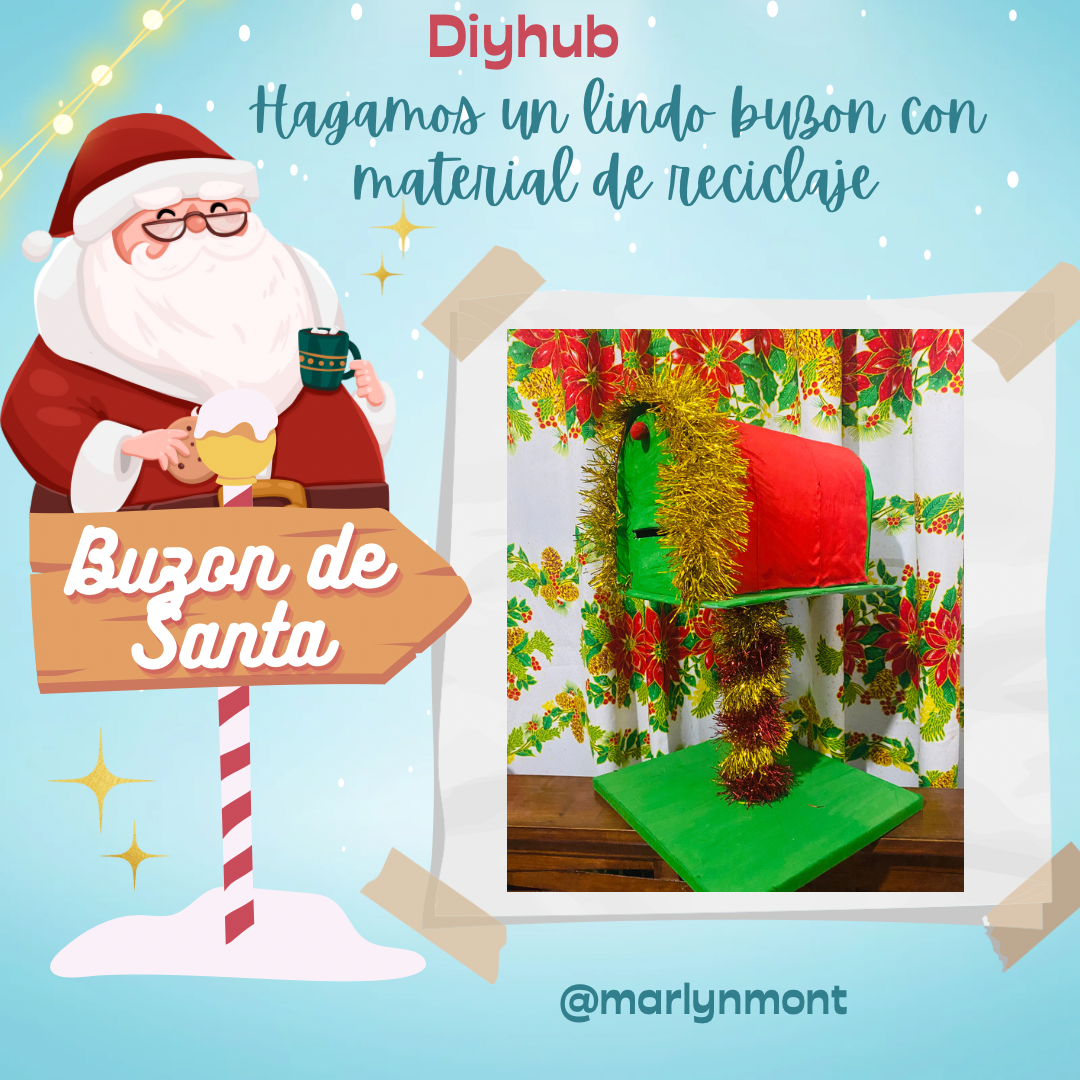
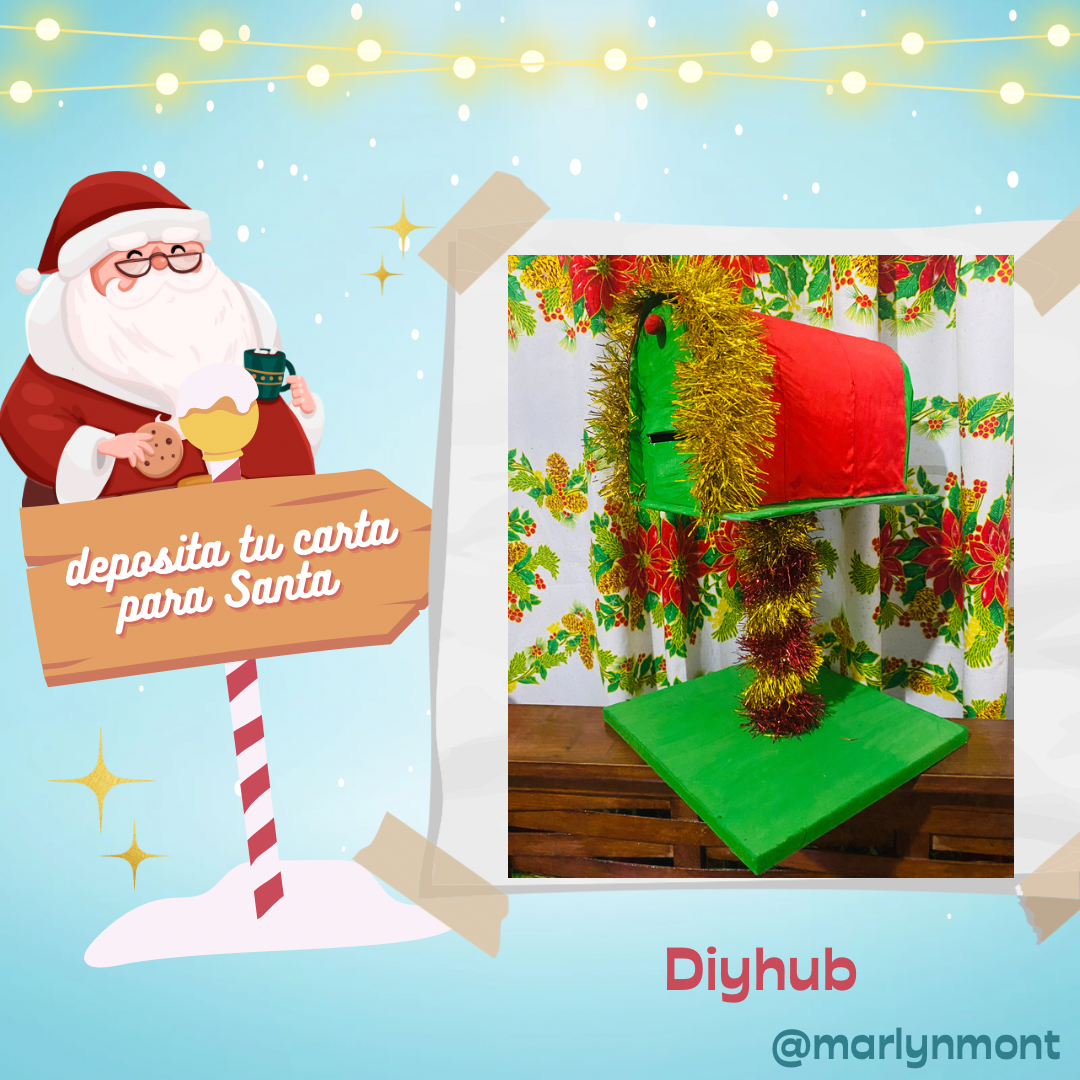
Aquí les muestro el resultado final, ya tenemos Listoo el buzon para colocarle las cartas a Santa, 🧑🎄
Here I show you the final result, we now have the mailbox ready to place the letters to Santa, 🧑🎄
Espero les haya gustado esta idea para hacer un lindo buzon decorativo, estoy muy agradecida por que hayas visitado mi publicación, me despido deseándoles muchos éxitos y bendiciones 🥰
I hope you liked this idea to make a nice decorative mailbox, I am very grateful that you have visited my publication, I say goodbye wishing you many successes and blessings 🥰

🎄🎄🎄🎄🧑🎄🎄🎄🎄🎄
Santa's mailbox turned out very nice, we now have an option to deposit our letters at Christmas 🥰🤗😘
That's right friend, thanks for commenting 😊
🤗🥰