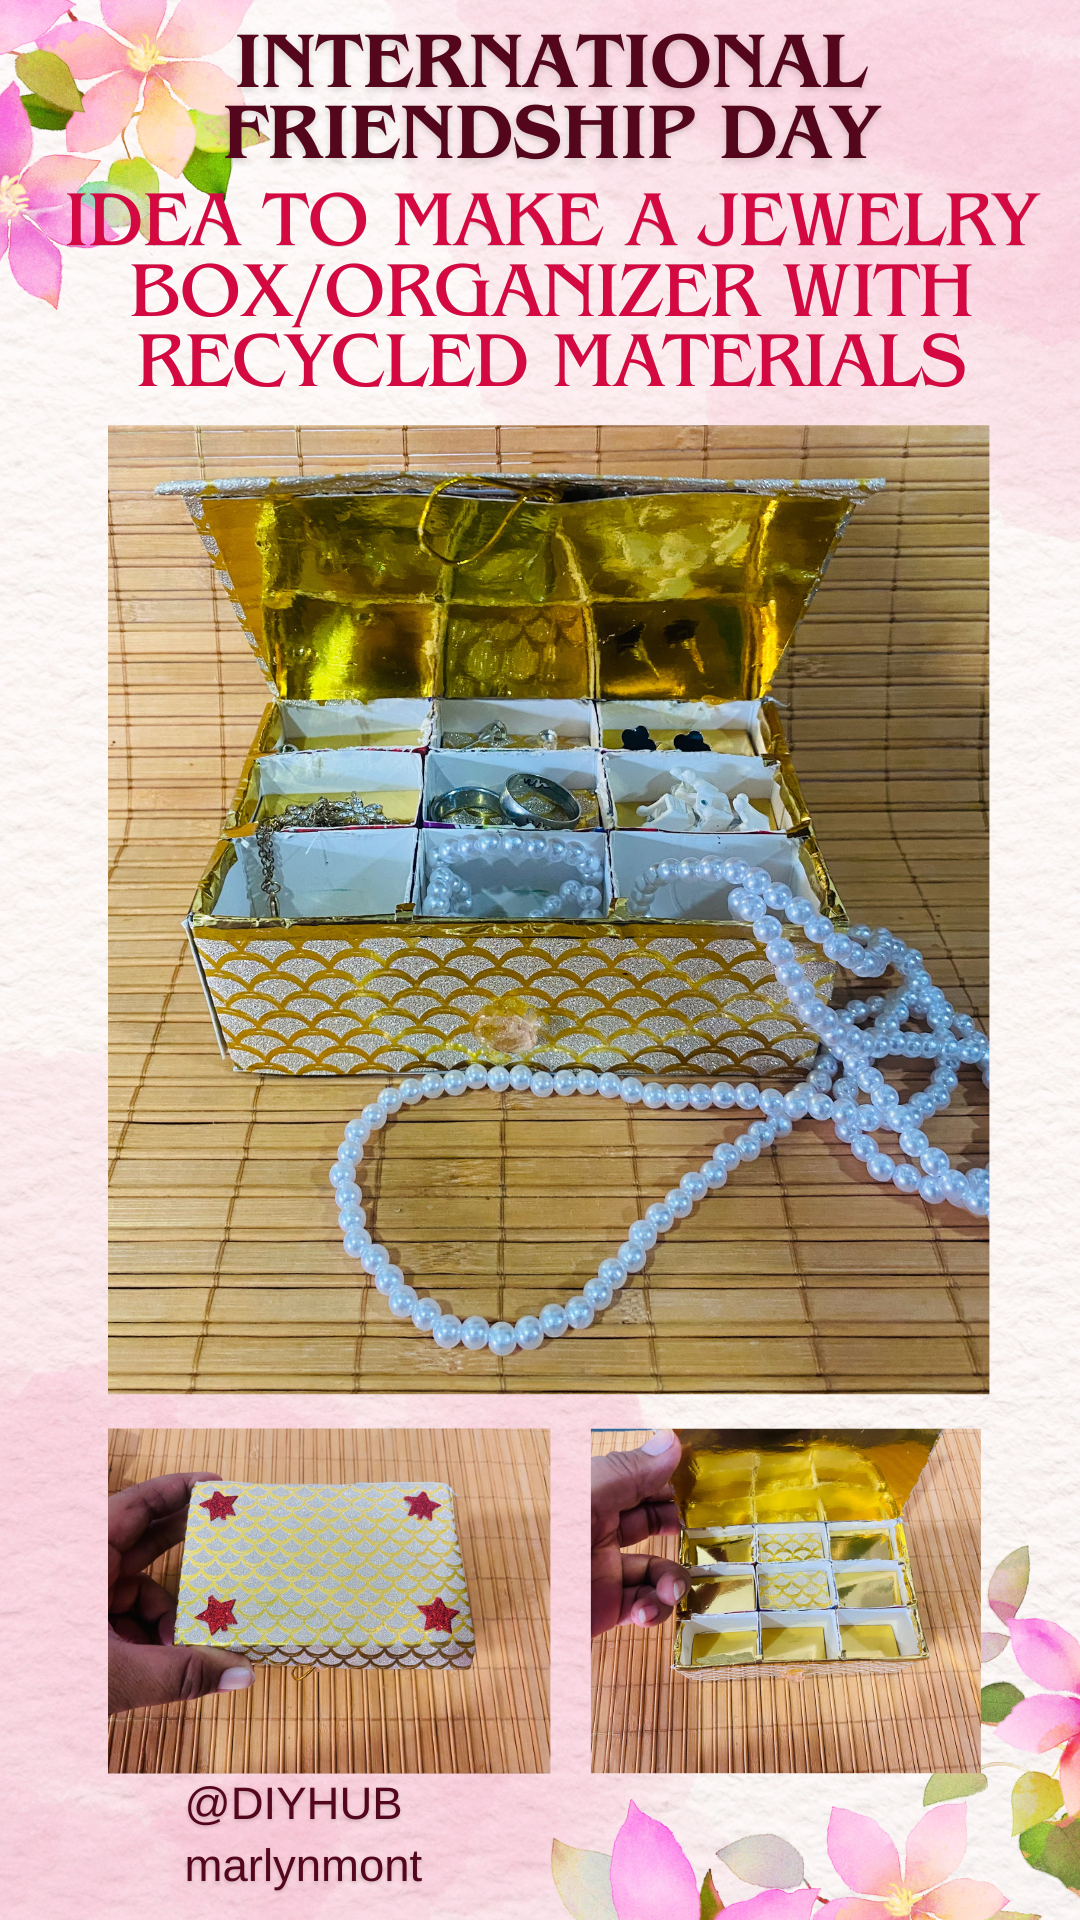
Let's celebrate Friendship Day by giving a gift made with your own hands // Idea to make a jewelry box/organizer with recycled materials
Happy day dear friends of DIYHUB, this is my participation for the contest “International Friendship Day”, and it is a pleasure to share with you part of my work which I do with a lot of love, I hope you have a wonderful day 🥰❤️
One of the best friends I have had throughout my life is my second sister. She is my confidant, my advisor, my great ally, and even though we are already adults and each of us has a family and we live separately, we still get along very well, and today I want to take advantage of this Contest and the occasion to give her a nice gift since her birthday is coming up, exactly on August 4th.
I think that all of us girls always have our clothes or jewelry lying around our home, it is difficult to organize them, for days a great idea had been flying around in my head to make a nice organizer, and to be able to gather all those accessories that we like so much and avoid them getting lost, so I got to work and made this nice and practical Jewelry Organizer Box to give as a gift on Friendship Day, come and I will show you how I did it:
Feliz día queridos amigos de DIYHUB, esta es mi participación para el concurso “International Friendship Day”, Y es un gusto compartir con ustedes parte de mis trabajos los cuales los hago con mucho amor, Espero tengan un maravilloso día 🥰❤️
Una de las mejores amigas que he tenido a lo largo de mi vida es mi segunda hermana, Ella es mi confidente, mi consejera, mi gran aliada, y a pesar de qué ya estamos adultas y cada una tenemos familia y vivimos por separado nos seguimos llevando muy bien , y hoy quiero aprovechar este Concurso y la ocasión para hacerle un lindo obsequio ya que se acerca su cumpleaños, exactamente el 4 de agosto.
Creo que todas las chicas siempre tenemos tirado por todo nuestro hogar nuestras prendas o joyas, es difícil organizarlas, desde hace días revoloteaba en mi cabeza una gran idea para hacer un lindo organizador, y lograr juntar todos esos accesorios que tanto nos gustan y evitar que se pierdan, así que me puse manos a la obra y realicé este lindo y practico Joyero Organizador para obsequiar en el día de la amistad, ven y te muestro como lo hice:
➿➿➿➿💎💍💎➿➿➿➿
MATERIALS
MATERIALES
Friendship is one of the most beautiful gifts that life can give us, and life is more bearable if you have friends, and with our friends life can be more fun, happier, more exciting, I have many friends but today I want to dedicate this post to my dear sister, since we were little we have been very close, we have lived through difficult situations and we have faced them together, even though I have another older sister with my second sister things are very different, she is my confidant, my companion, my ally and even my accomplice.
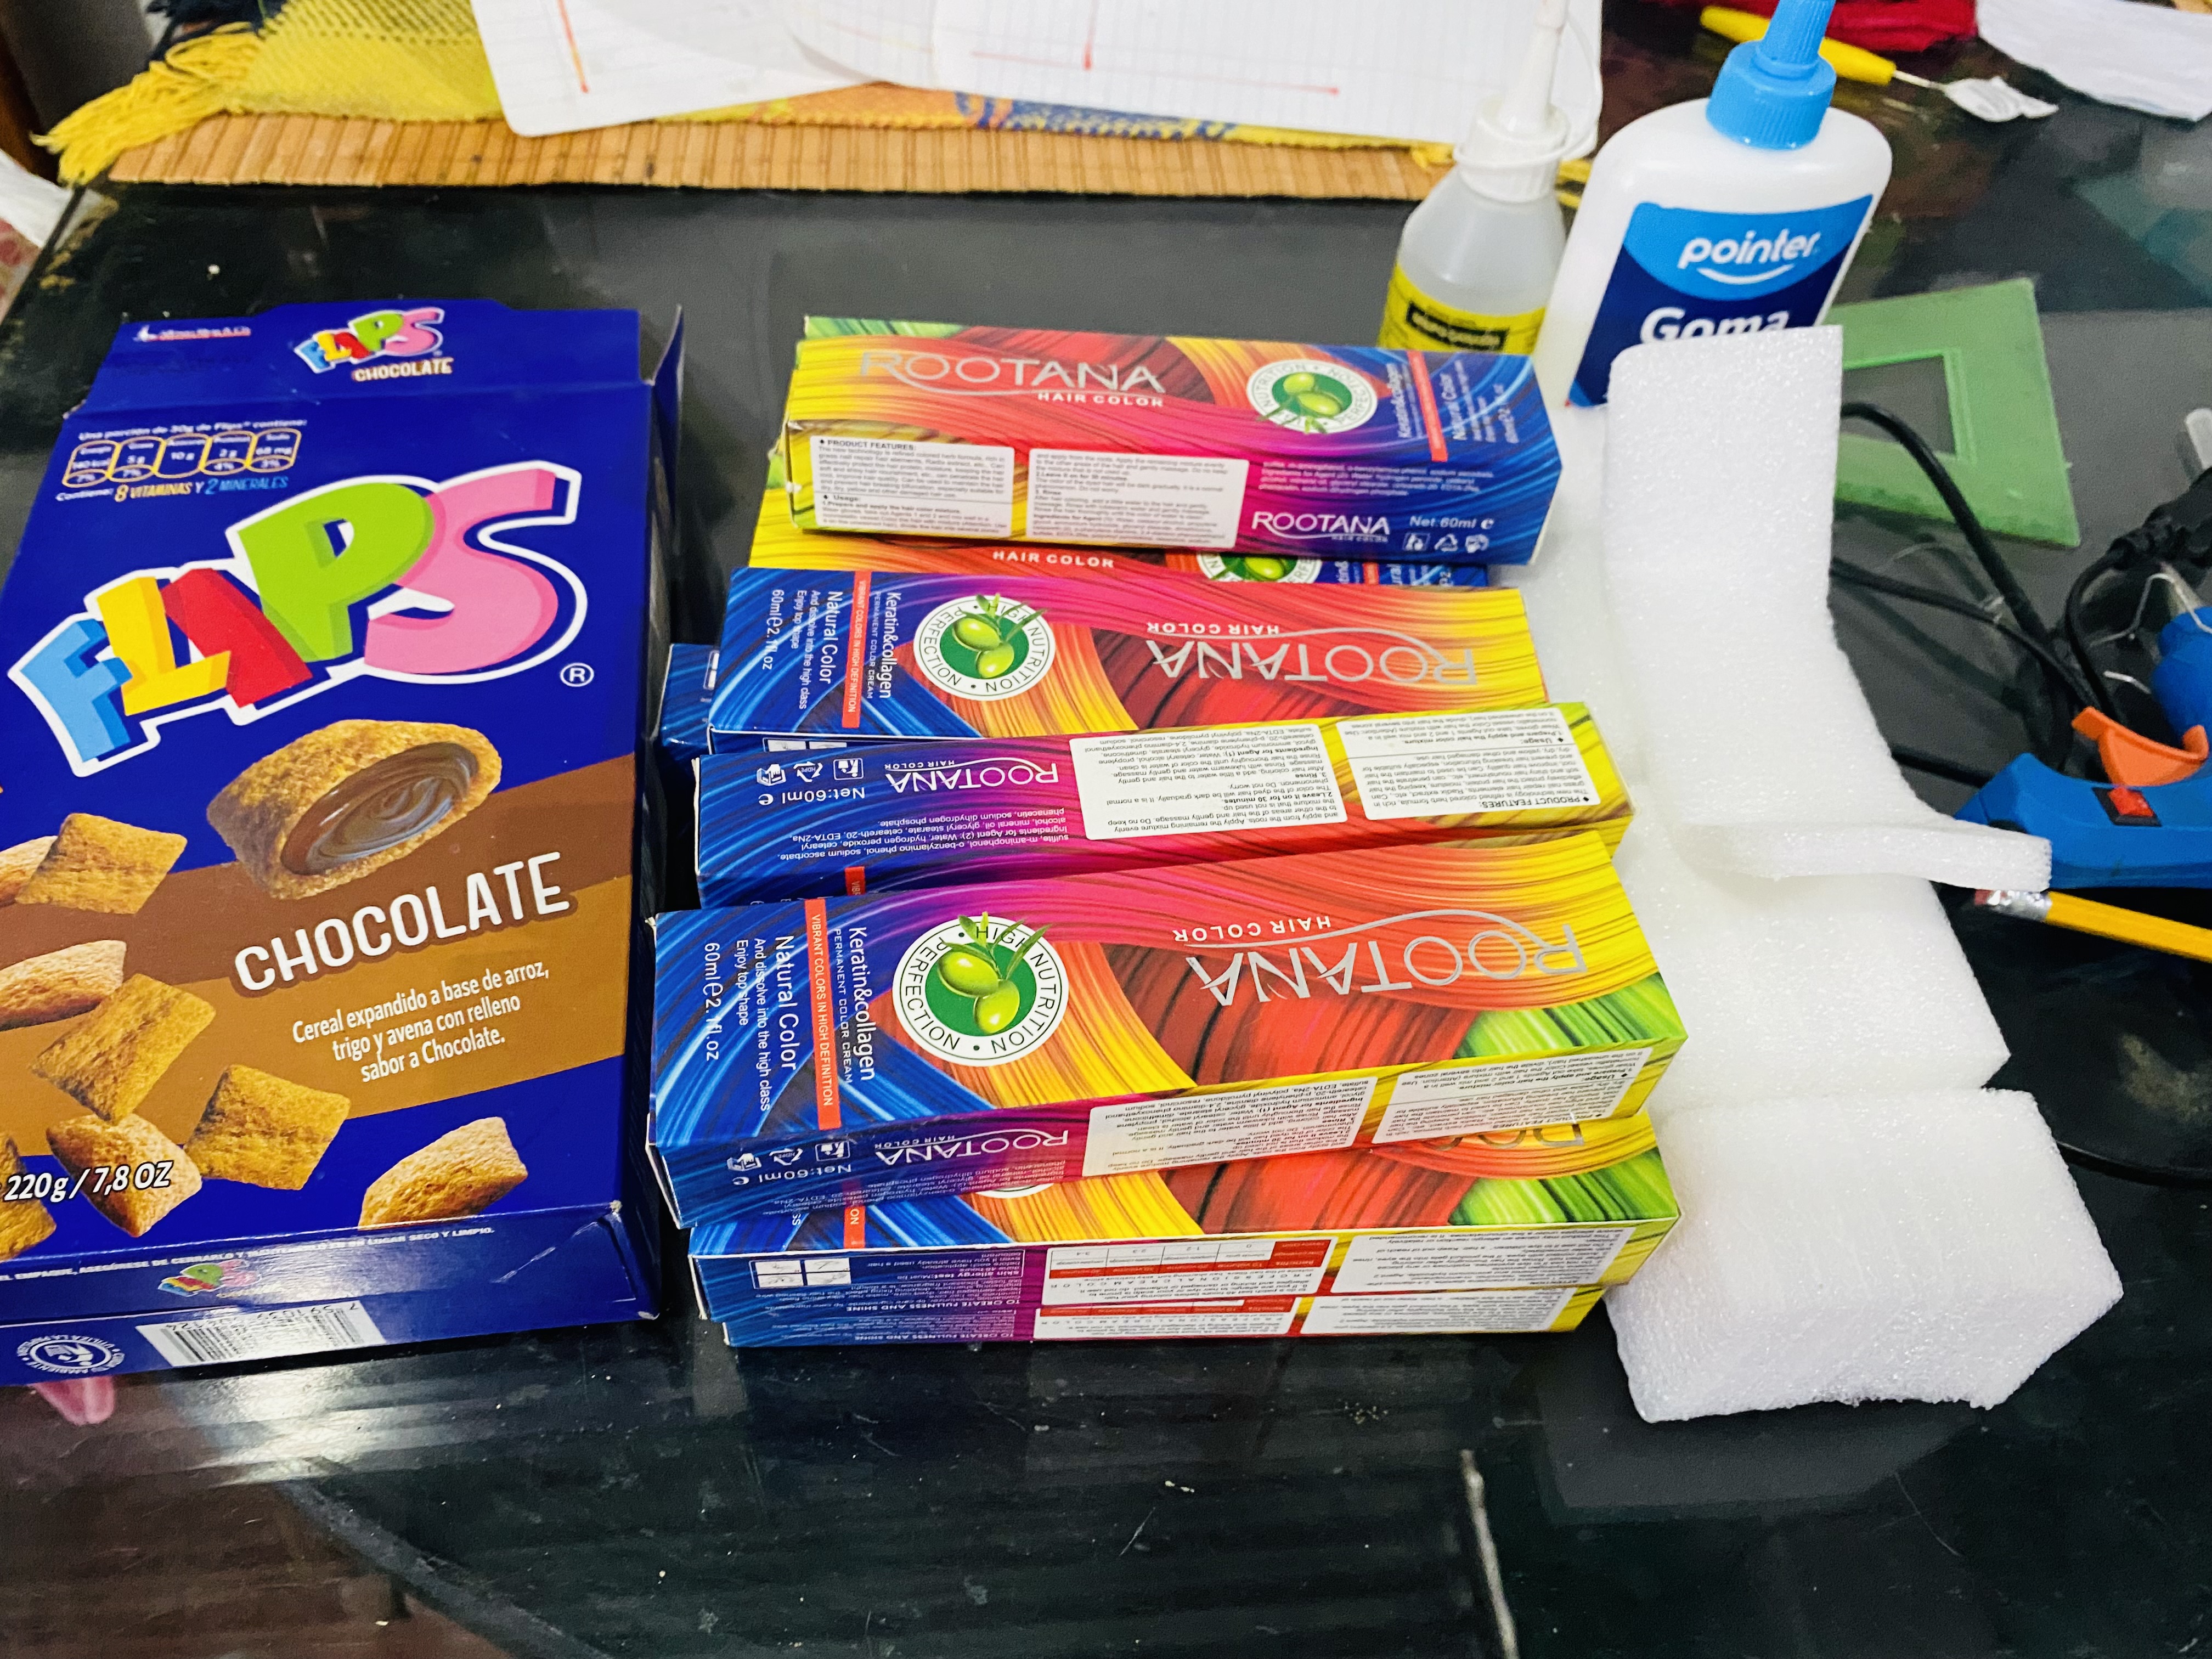
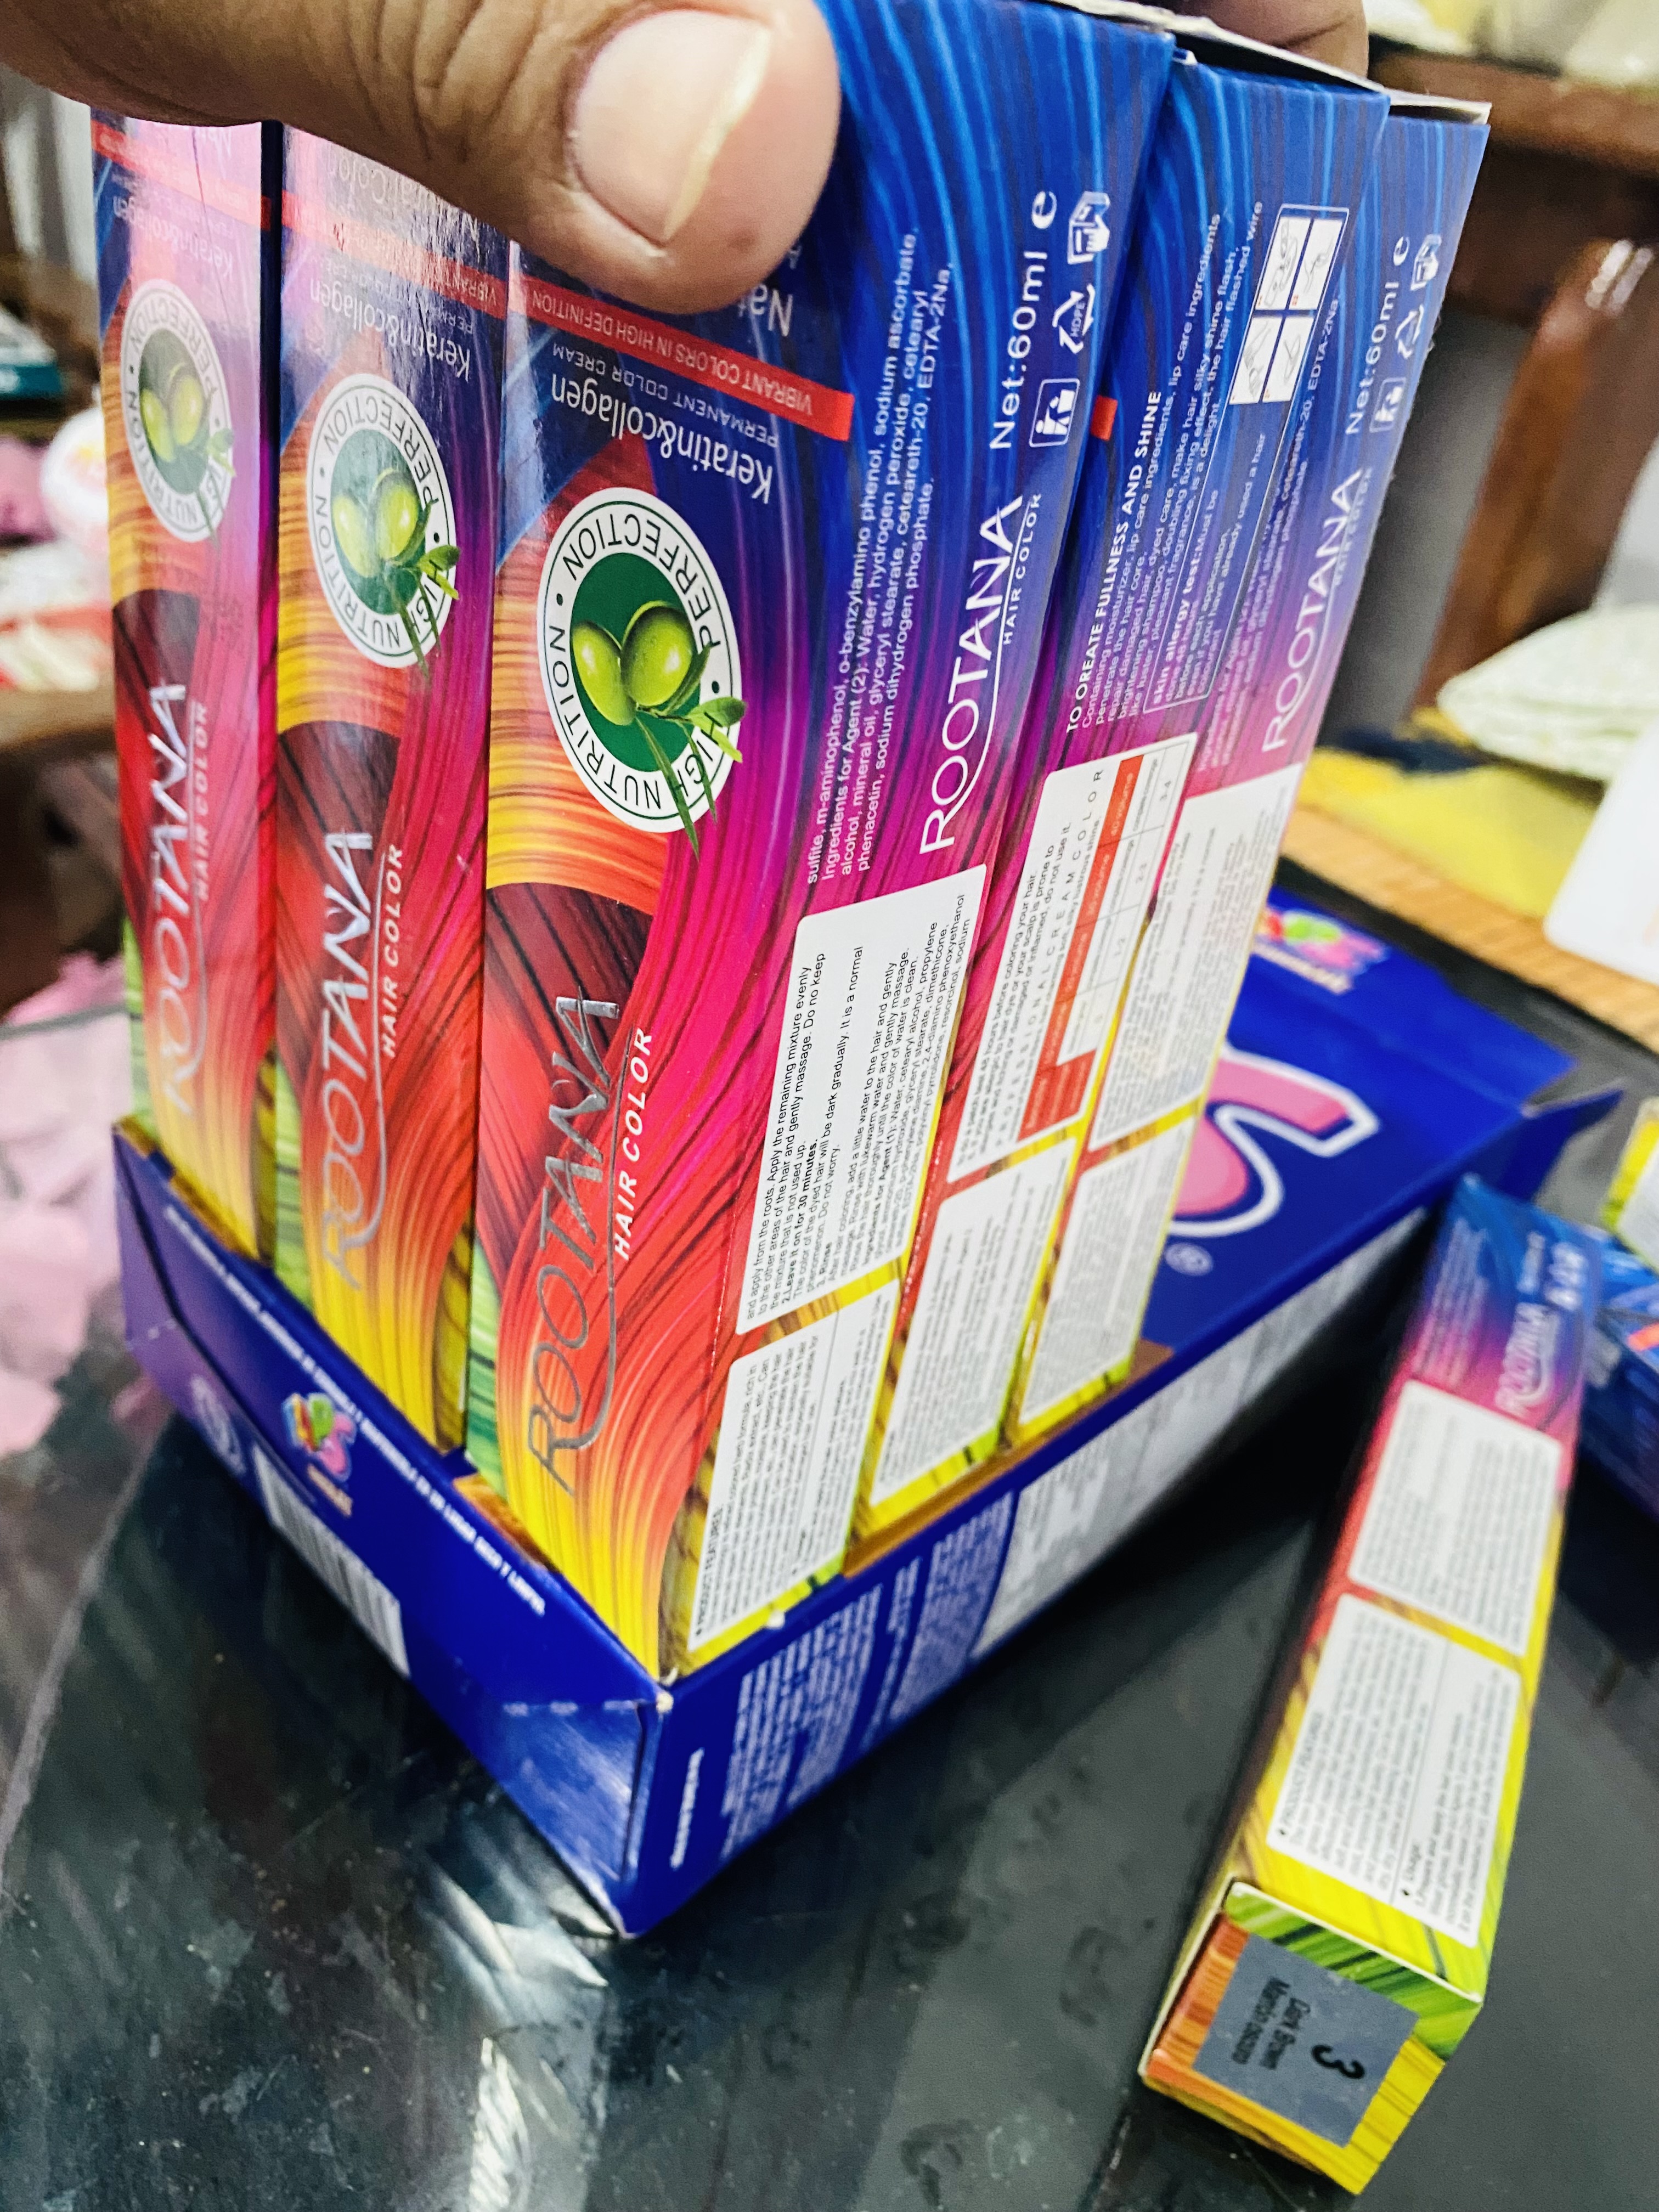
For some time now I have been collecting the boxes where the hair dyes come from, for a few days now a great idea has crossed my mind to do with these boxes, my sister's birthday is approaching, so I thought of materializing this idea, my sister loves clothes, everything that is earrings, chains, bracelets etc. and the times I have gone to her house I have realized that she always has them scattered throughout her home, and I think that the same thing happens to all women, for this reason I wanted to design a nice jewelry organizer for her so that she can have all her accessories at hand.
The materials for this jewelry box are easy to get, here is the list of the materials I used:
- Cardboard boxes
- Decorative cardboard
- Silicone
- foam
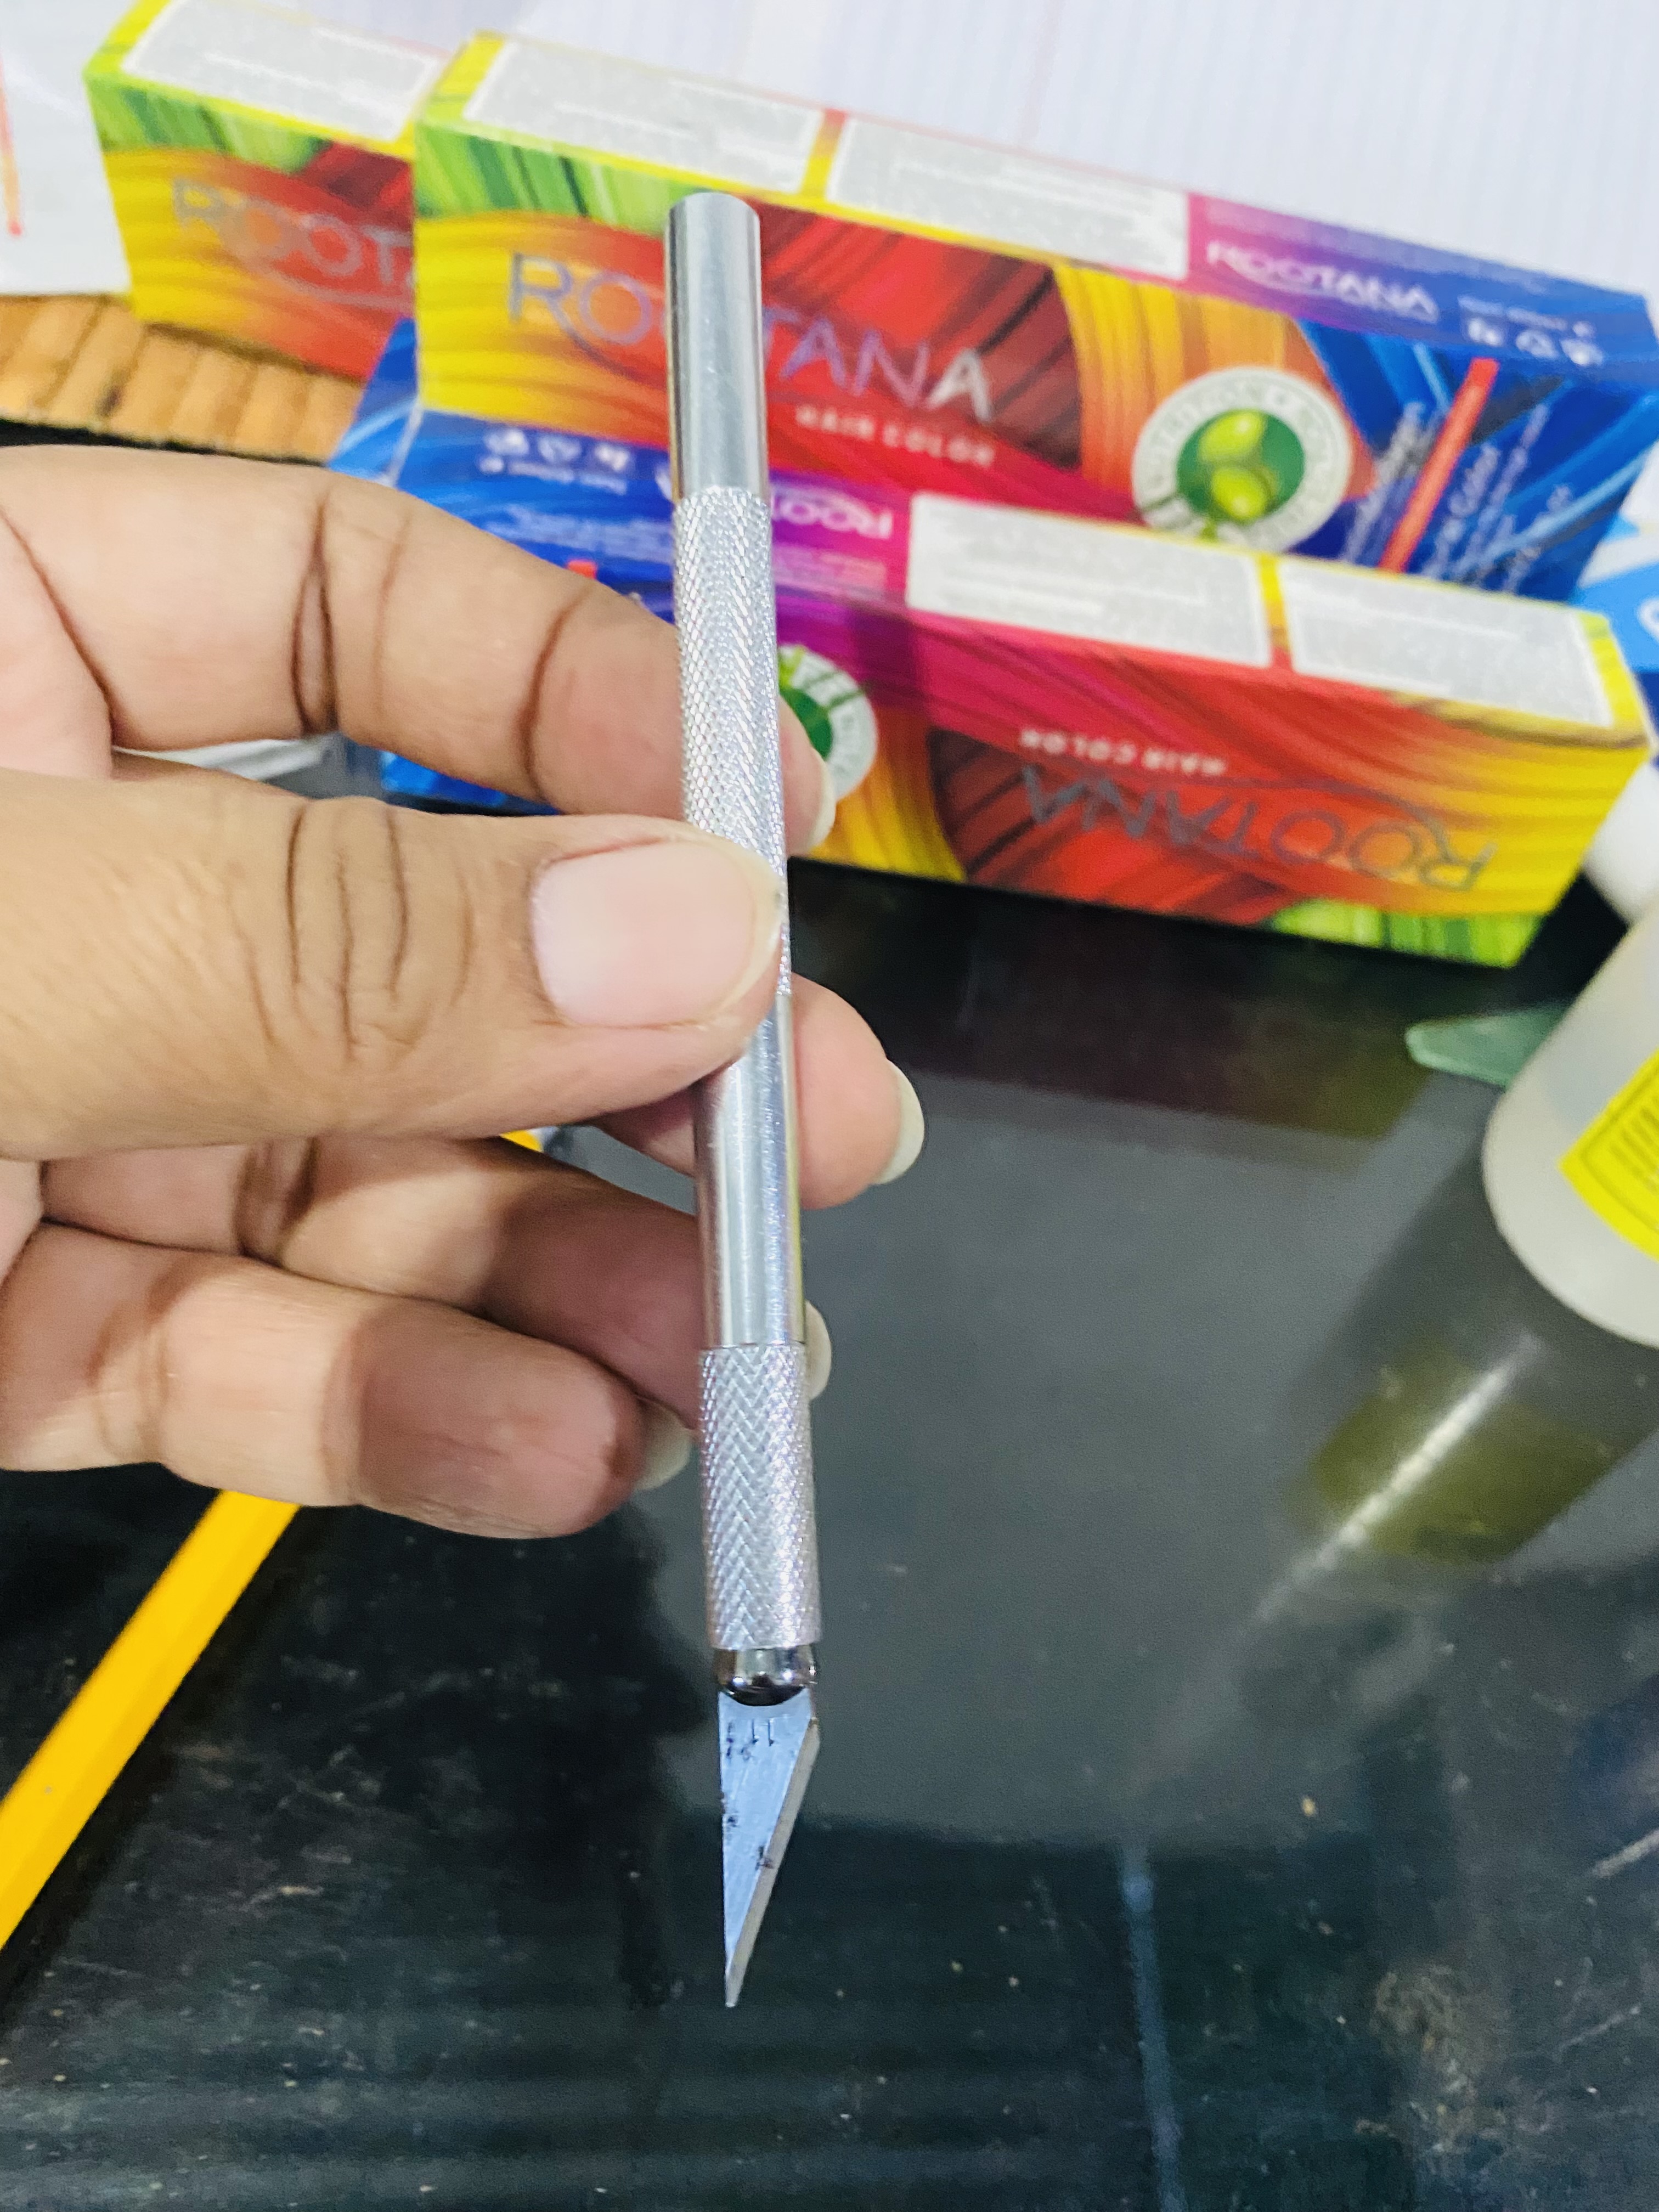
- Precision sharpener
- Scissors
- Ruler
La amistad es uno de los regalos más bonitos que la vida nos puede dar, y es que la vida es más llevadera si tienes amistades y es que con nuestras amistades la vida puede ser más divertida, más alegre, más emocionante, yo tengo muchas amistades pero hoy quiero dedicarle este post a mi querida hermana, desde pequeñas hemos sido muy unidas, hemos vivido situaciones difíciles y las hemos enfrentado juntas, a pesar de qué tengo otra hermana mayor con mi segunda hermana las cosas son muy diferentes, ella es mi confidente, mi compañera, mi aliada y hasta mi cómplice.
Desde hace un tiempo he estado recolectando las cajas donde vienen los tintes para el cabello, desde hace unos días me ha pasado por la mente una gran idea para hacer con estas cajas, ya se acerca el cumpleaños de mi hermana, así que pensé en materializar esta idea, mi hermana le encantan las prendas, todo lo que es zarcillos, cadenas pulseras etc. y las veces que he ido a su casa me he dado cuenta que siempre las tiene regadas por todo su hogar, y es que creo que todas las mujeres nos sucede lo mismo, por este motivo quise diseñarle un Lindo joyero organizador y que así pueda tener todos sus accesorios a la mano.
Los materiales para este joyero son fáciles de conseguir, aquí te dejo la lista de los materiales que utilicé:
- Cajas de cartón
- Cartulina decorativa
- silicone
- goma espuma
- exacto de precisión
- tijeras
- regla
➿➿➿➿💎💍💎➿➿➿➿
STEP BY STEP
PASO A PASO
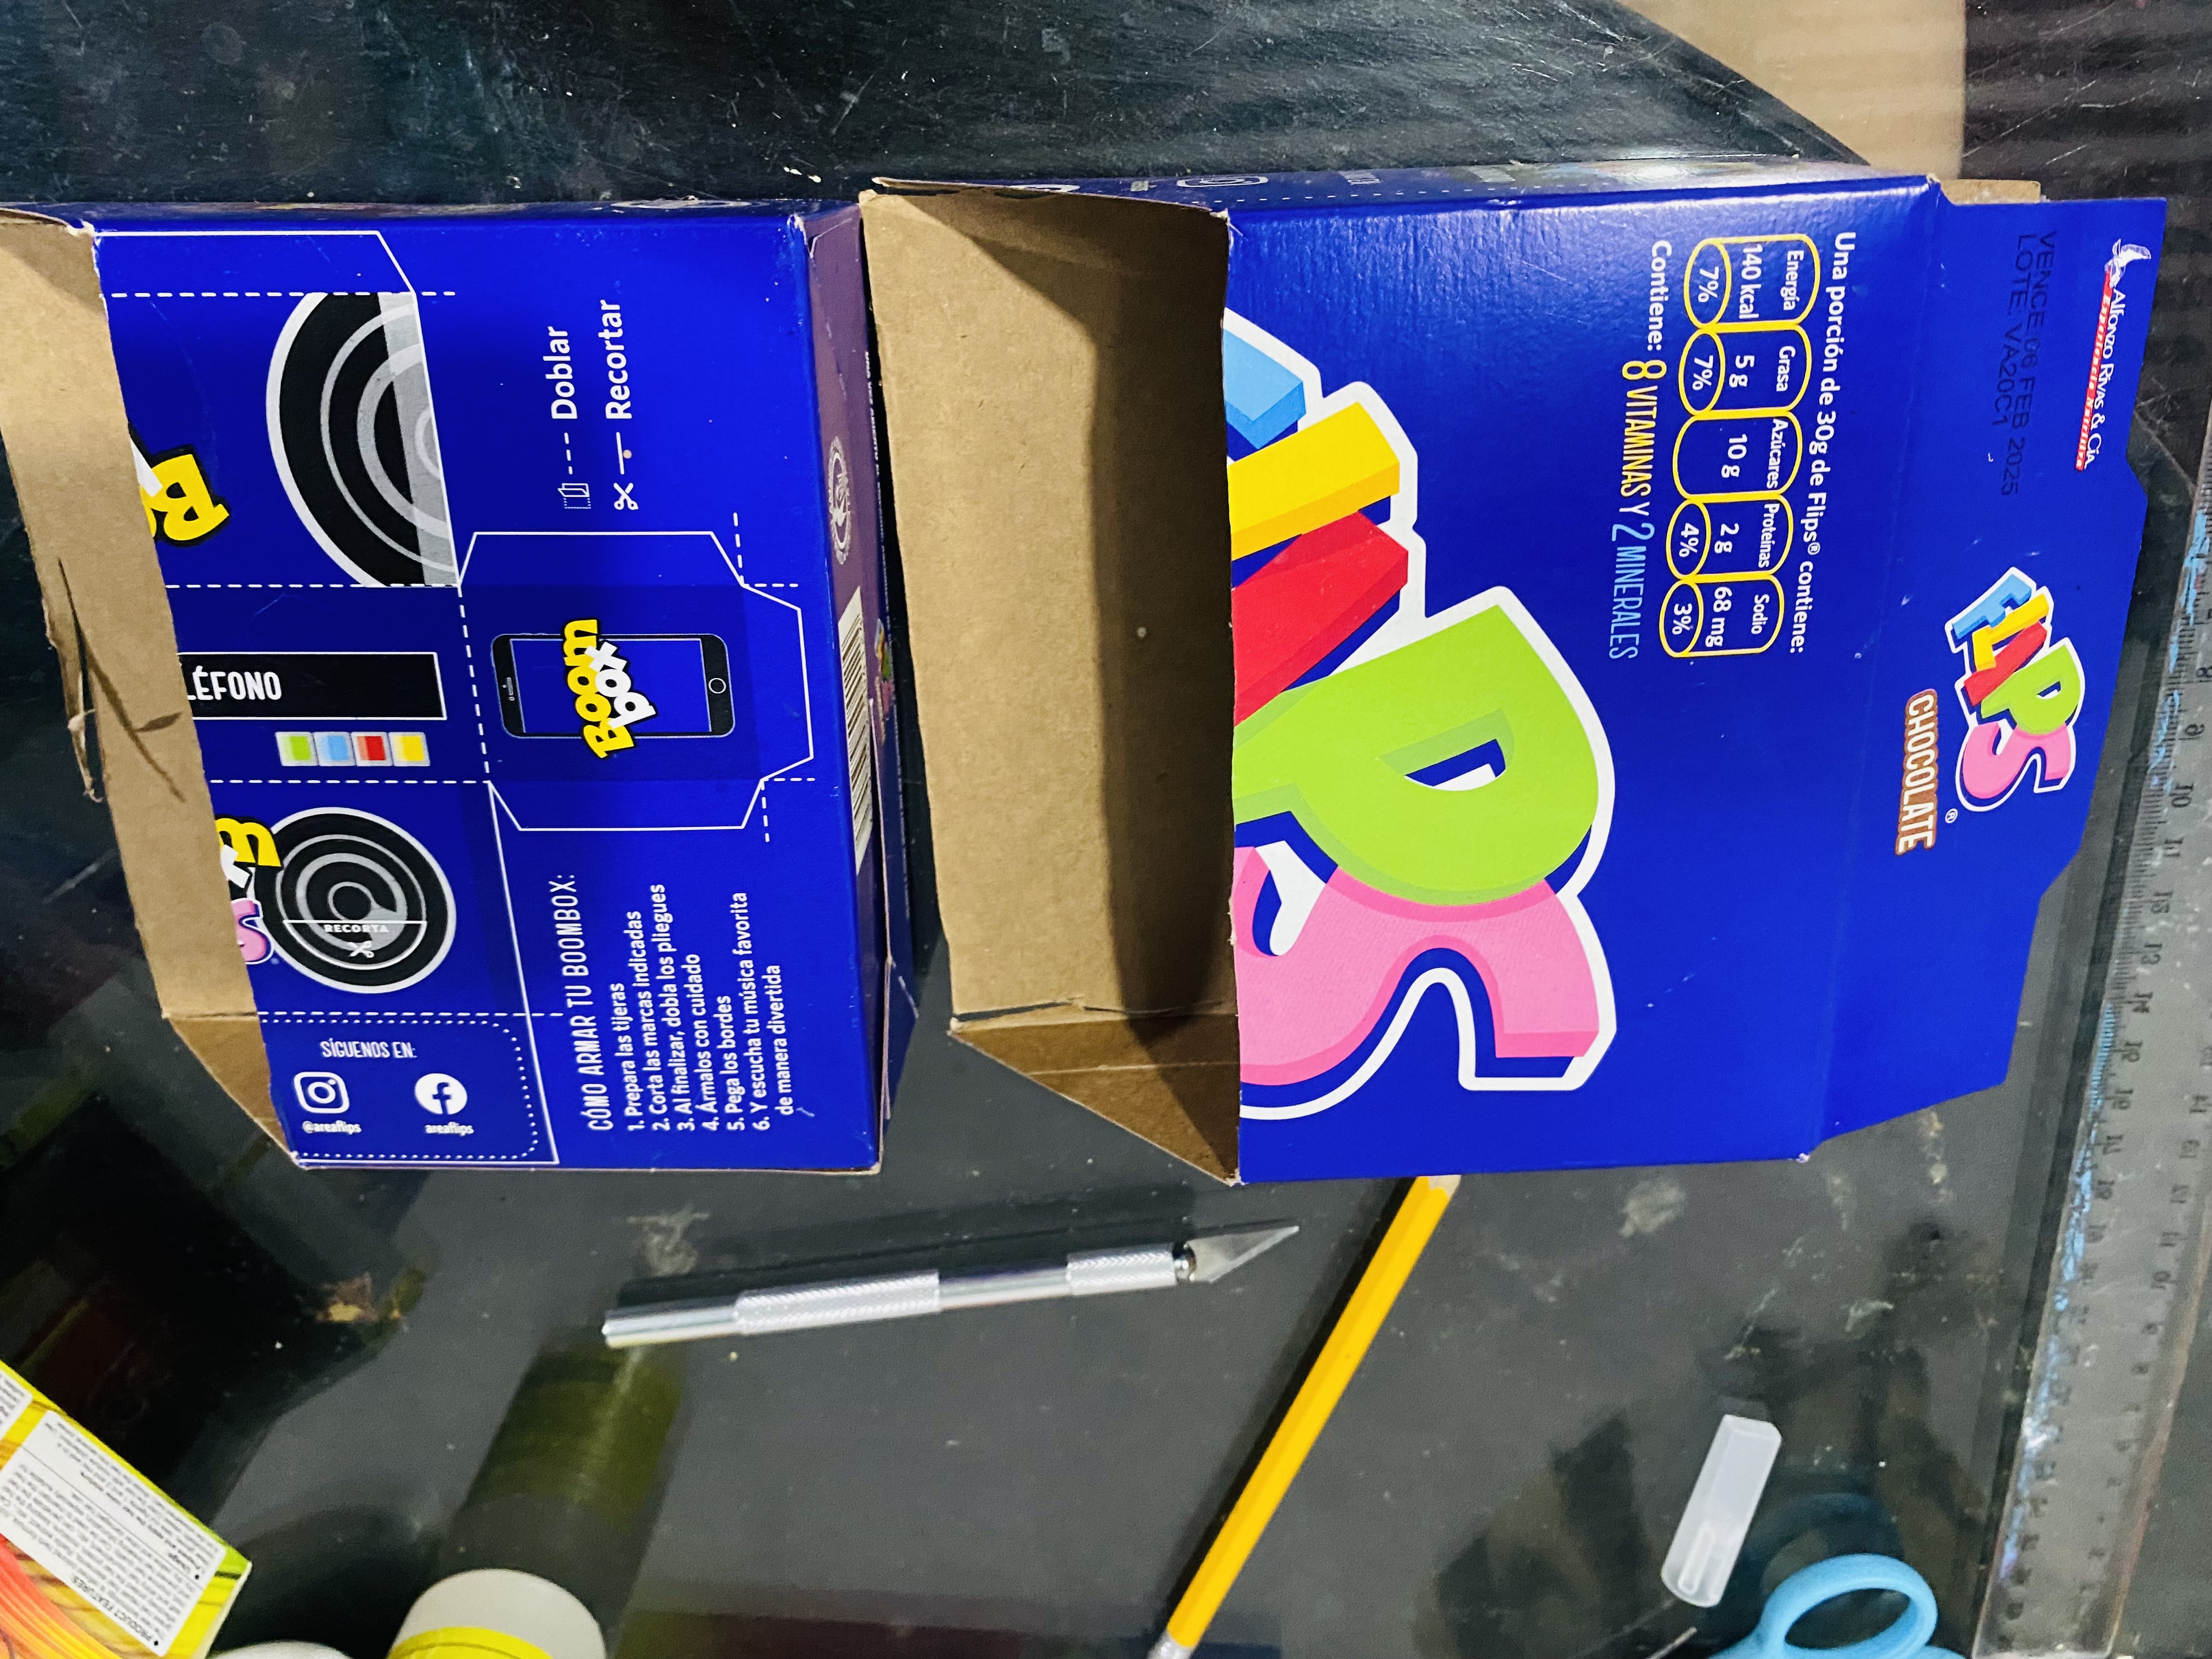
For the guide base of my jewelry box I am going to use a cereal box, my main idea is to place several boxes of dye inside it to make several divisions and be able to place many jewels inside this organizer, in total three boxes fit wide and I am going to use three boxes long, the measurements will be 9 cm wide vertically, 13.5 cm wide horizontally, and 4.8 cm high.
Para la base guía de mi joyero voy a utilizar una caja de cereal, mi idea principal es colocar varias cajas de tinte dentro de esta para hacerle varias divisiones y poder colocar muchas joyas dentro de este organizador, en total caben tres cajas de ancho y voy a utilizar tres cajas de largo las medidas serán 9 cm de ancho en forma vertical, 13, 5 cm de ancho en forma horizontal, de alto serán 4,8 cm.
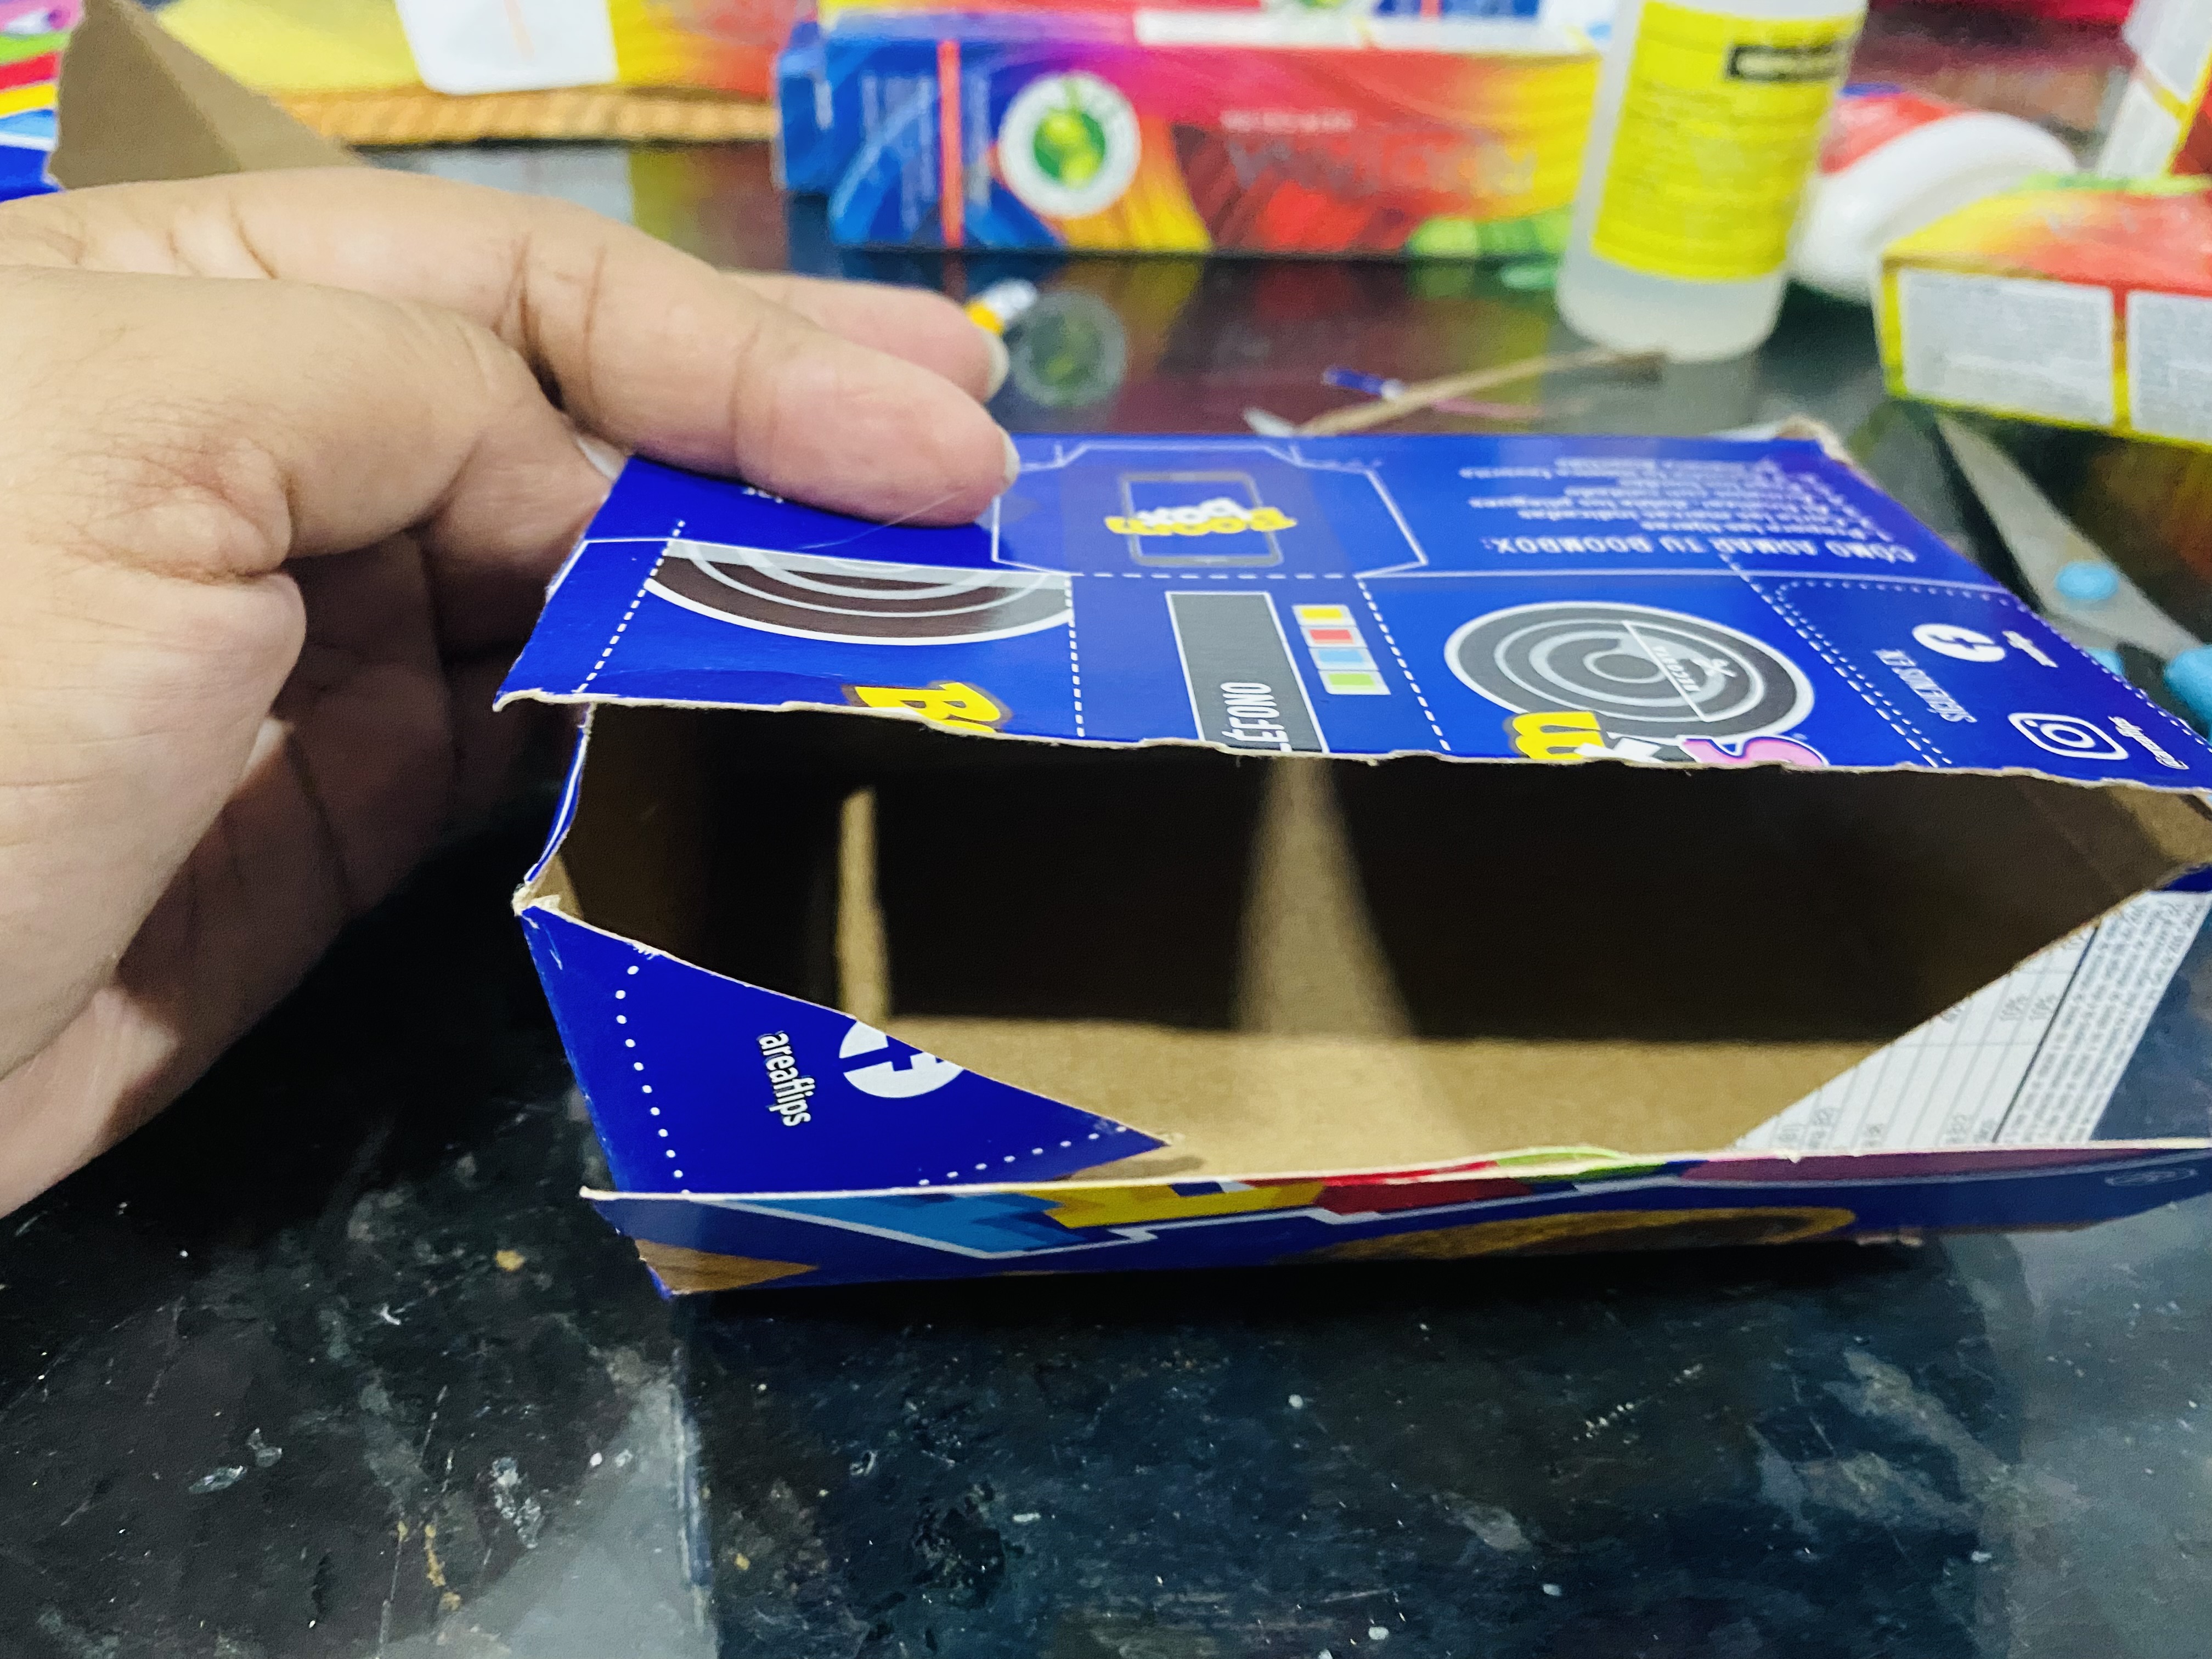
We will start by cutting the cereal box, we will leave the width of the box since it is a small box and 3 complete boxes of dye fit in it, for the length we will measure 9 cm, we will cut to that measurement with a precision ruler, on the sides we will cut diagonally like making a kind of triangle and on the bottom side we will leave the excess to cover the front of our box, I tried to cut in a way that I get two organizers for now I will only show one later I will make one for myself since I loved this idea.
Comenzaremos cortando la caja de cereal, dejaremos el ancho de la caja ya que es una caja pequeña y caben completas 3 cajas de tinte, para el largo vamos a medir 9 cm, vamos a cortar en esa medida con un exacto de precisión, en los laterales cortamos en forma diagonal como haciendo especie de un triángulo y por el lado de abajo vamos a dejar el excedente para que cubra el frente de nuestra caja, yo traté de cortar de manera que me salgan dos organizadores por ahora mostrar sólo uno más adelante haré uno para mí ya que me encantó esta idea.
 |  |
|---|---|
 |  |
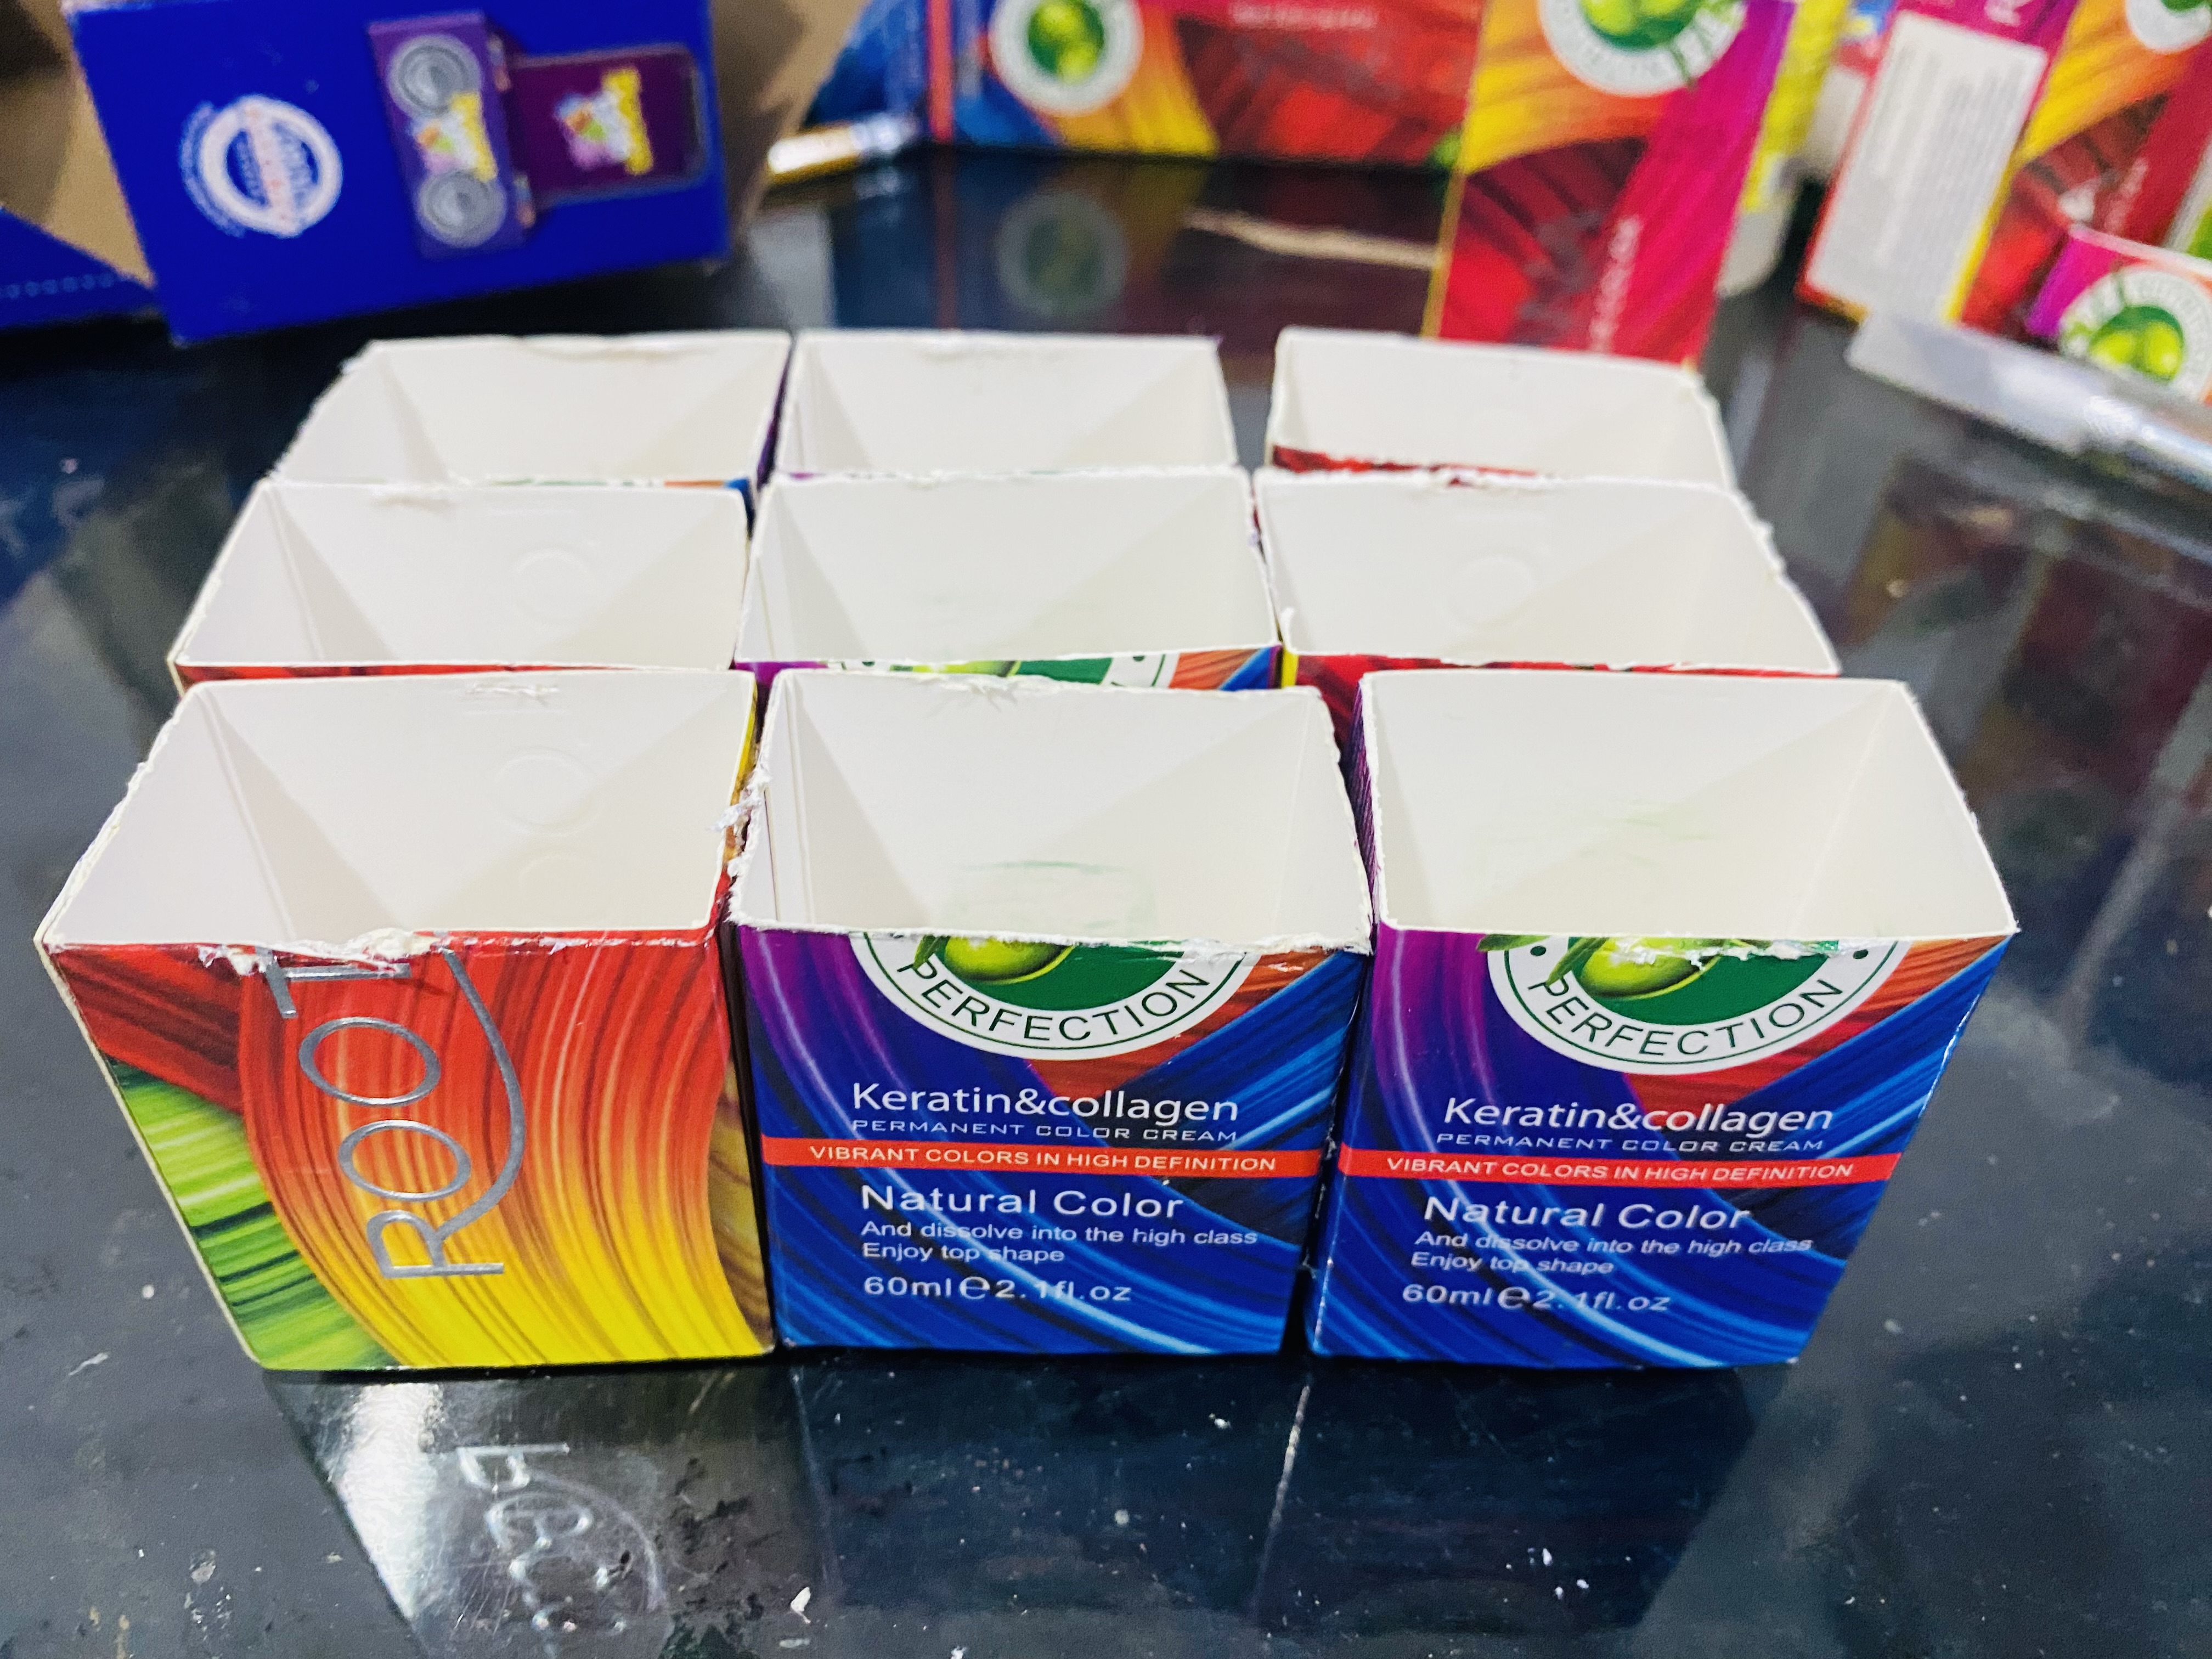
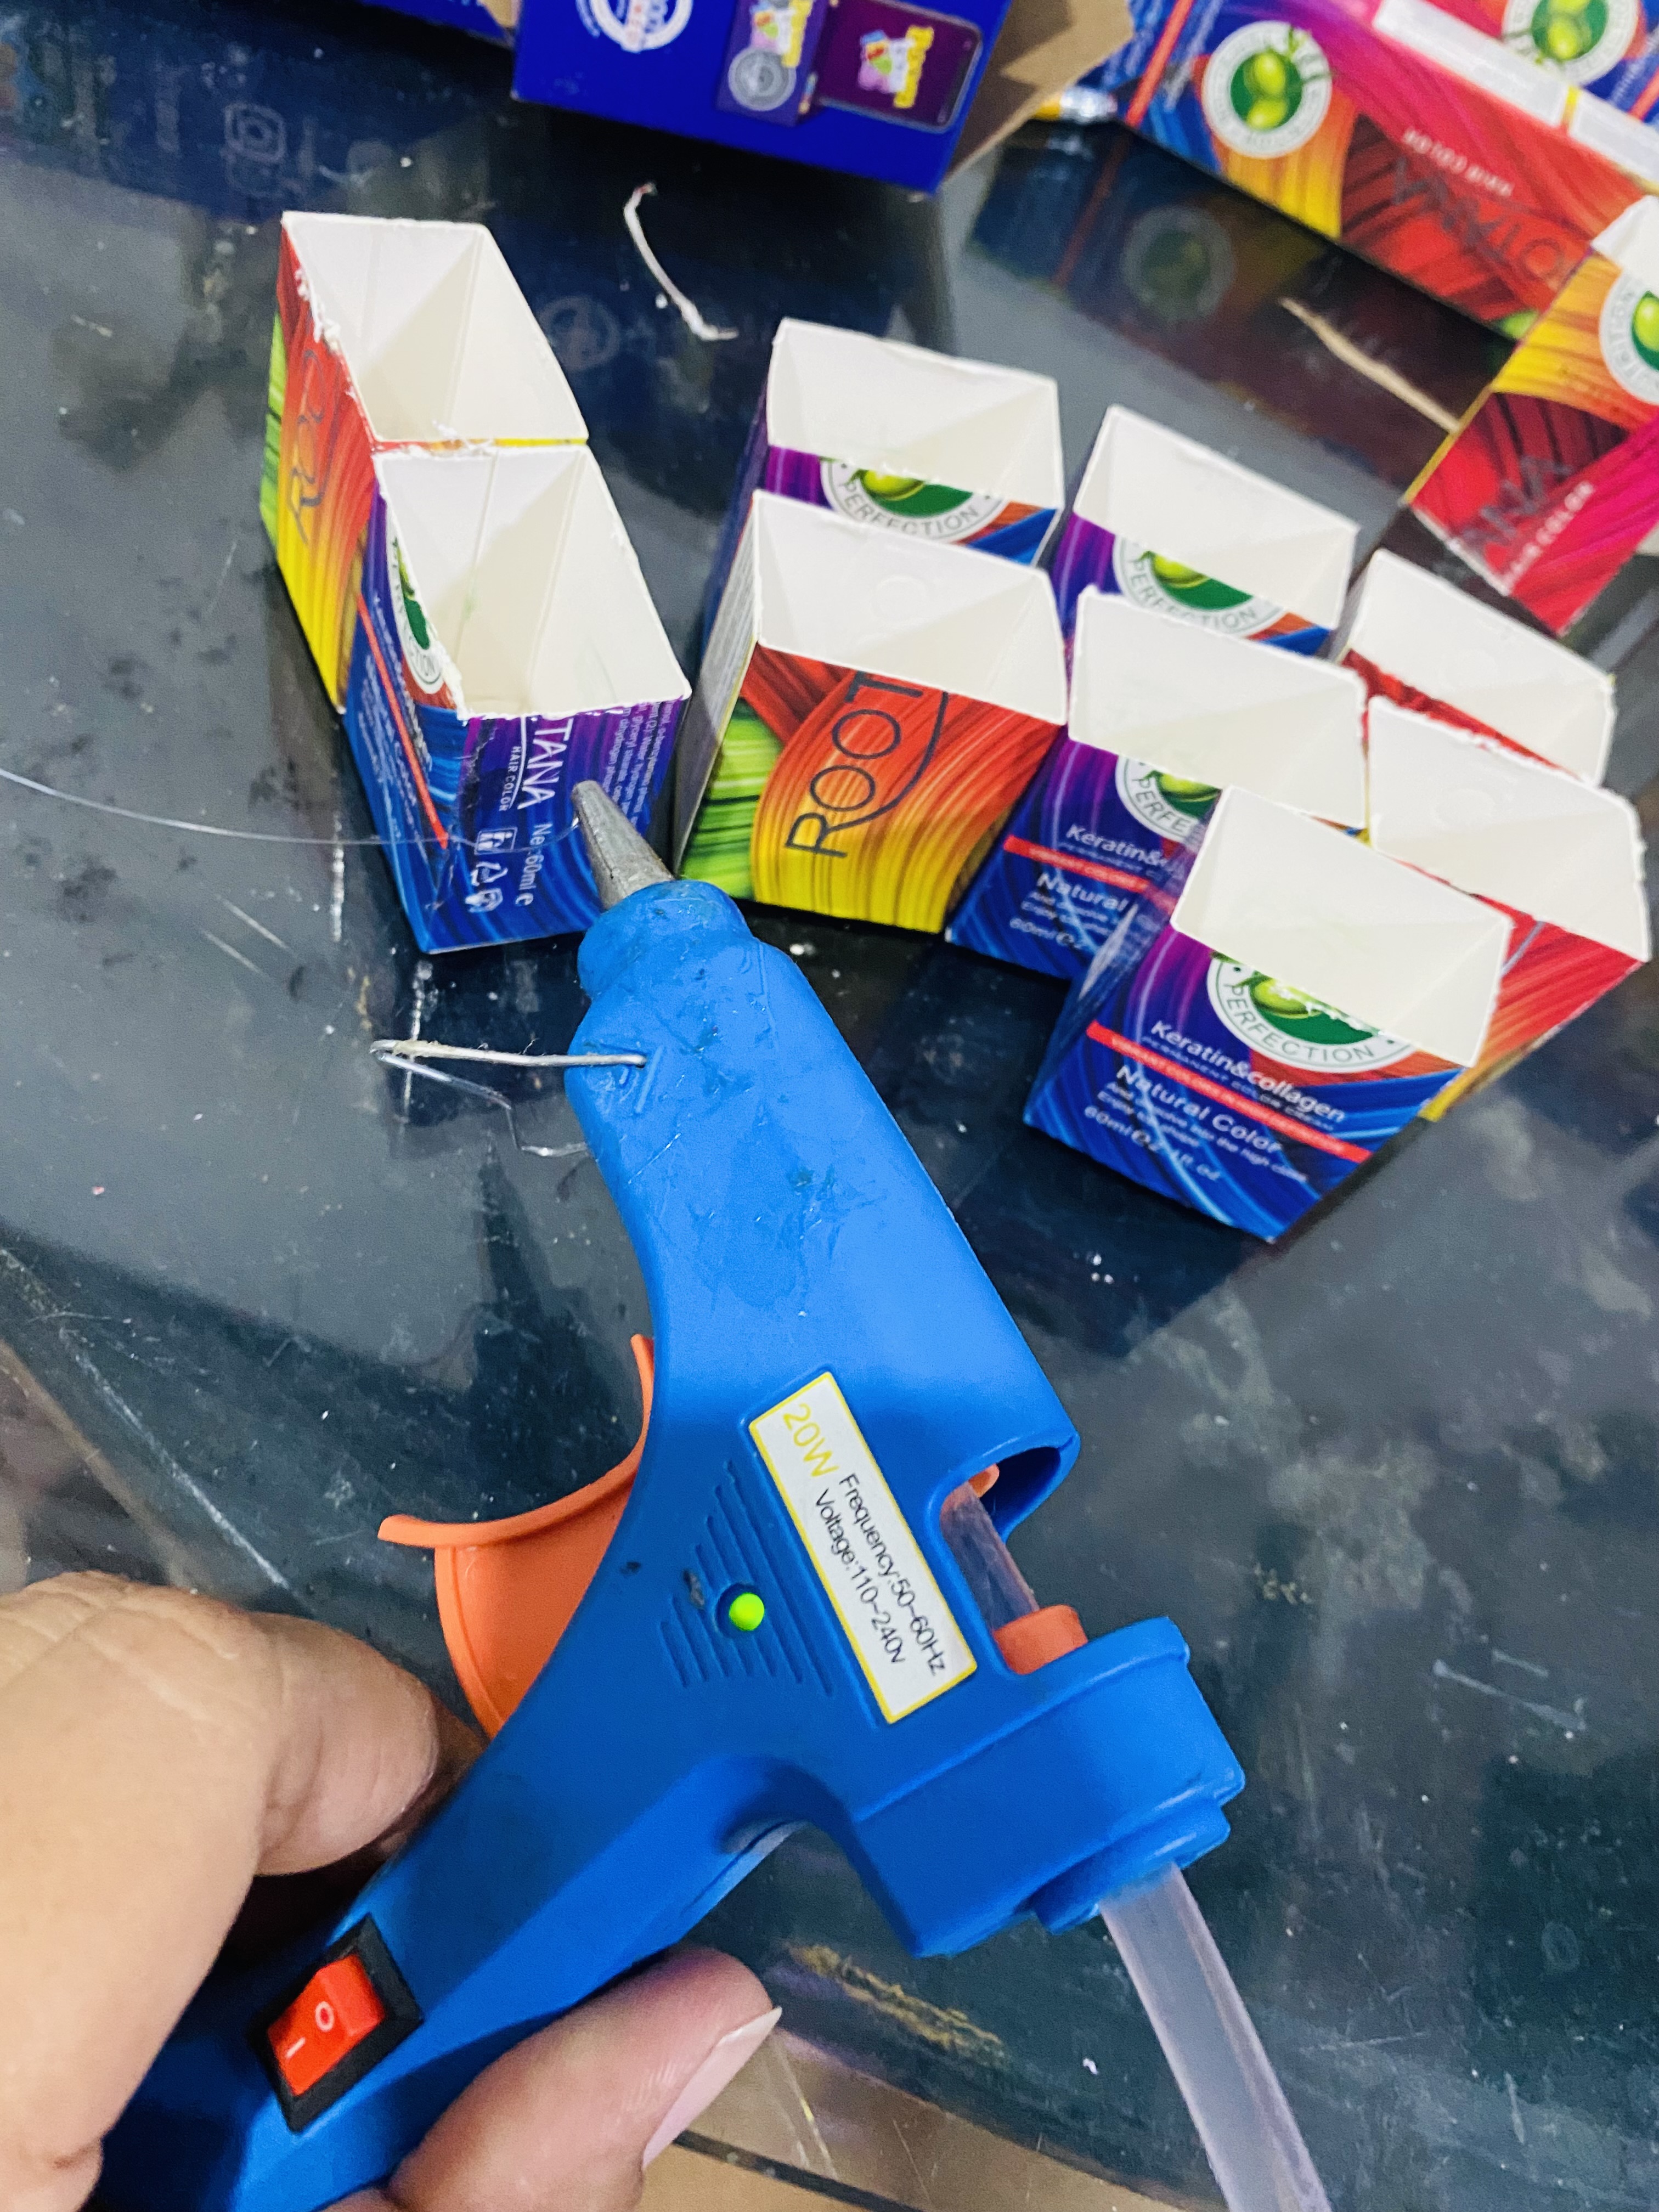
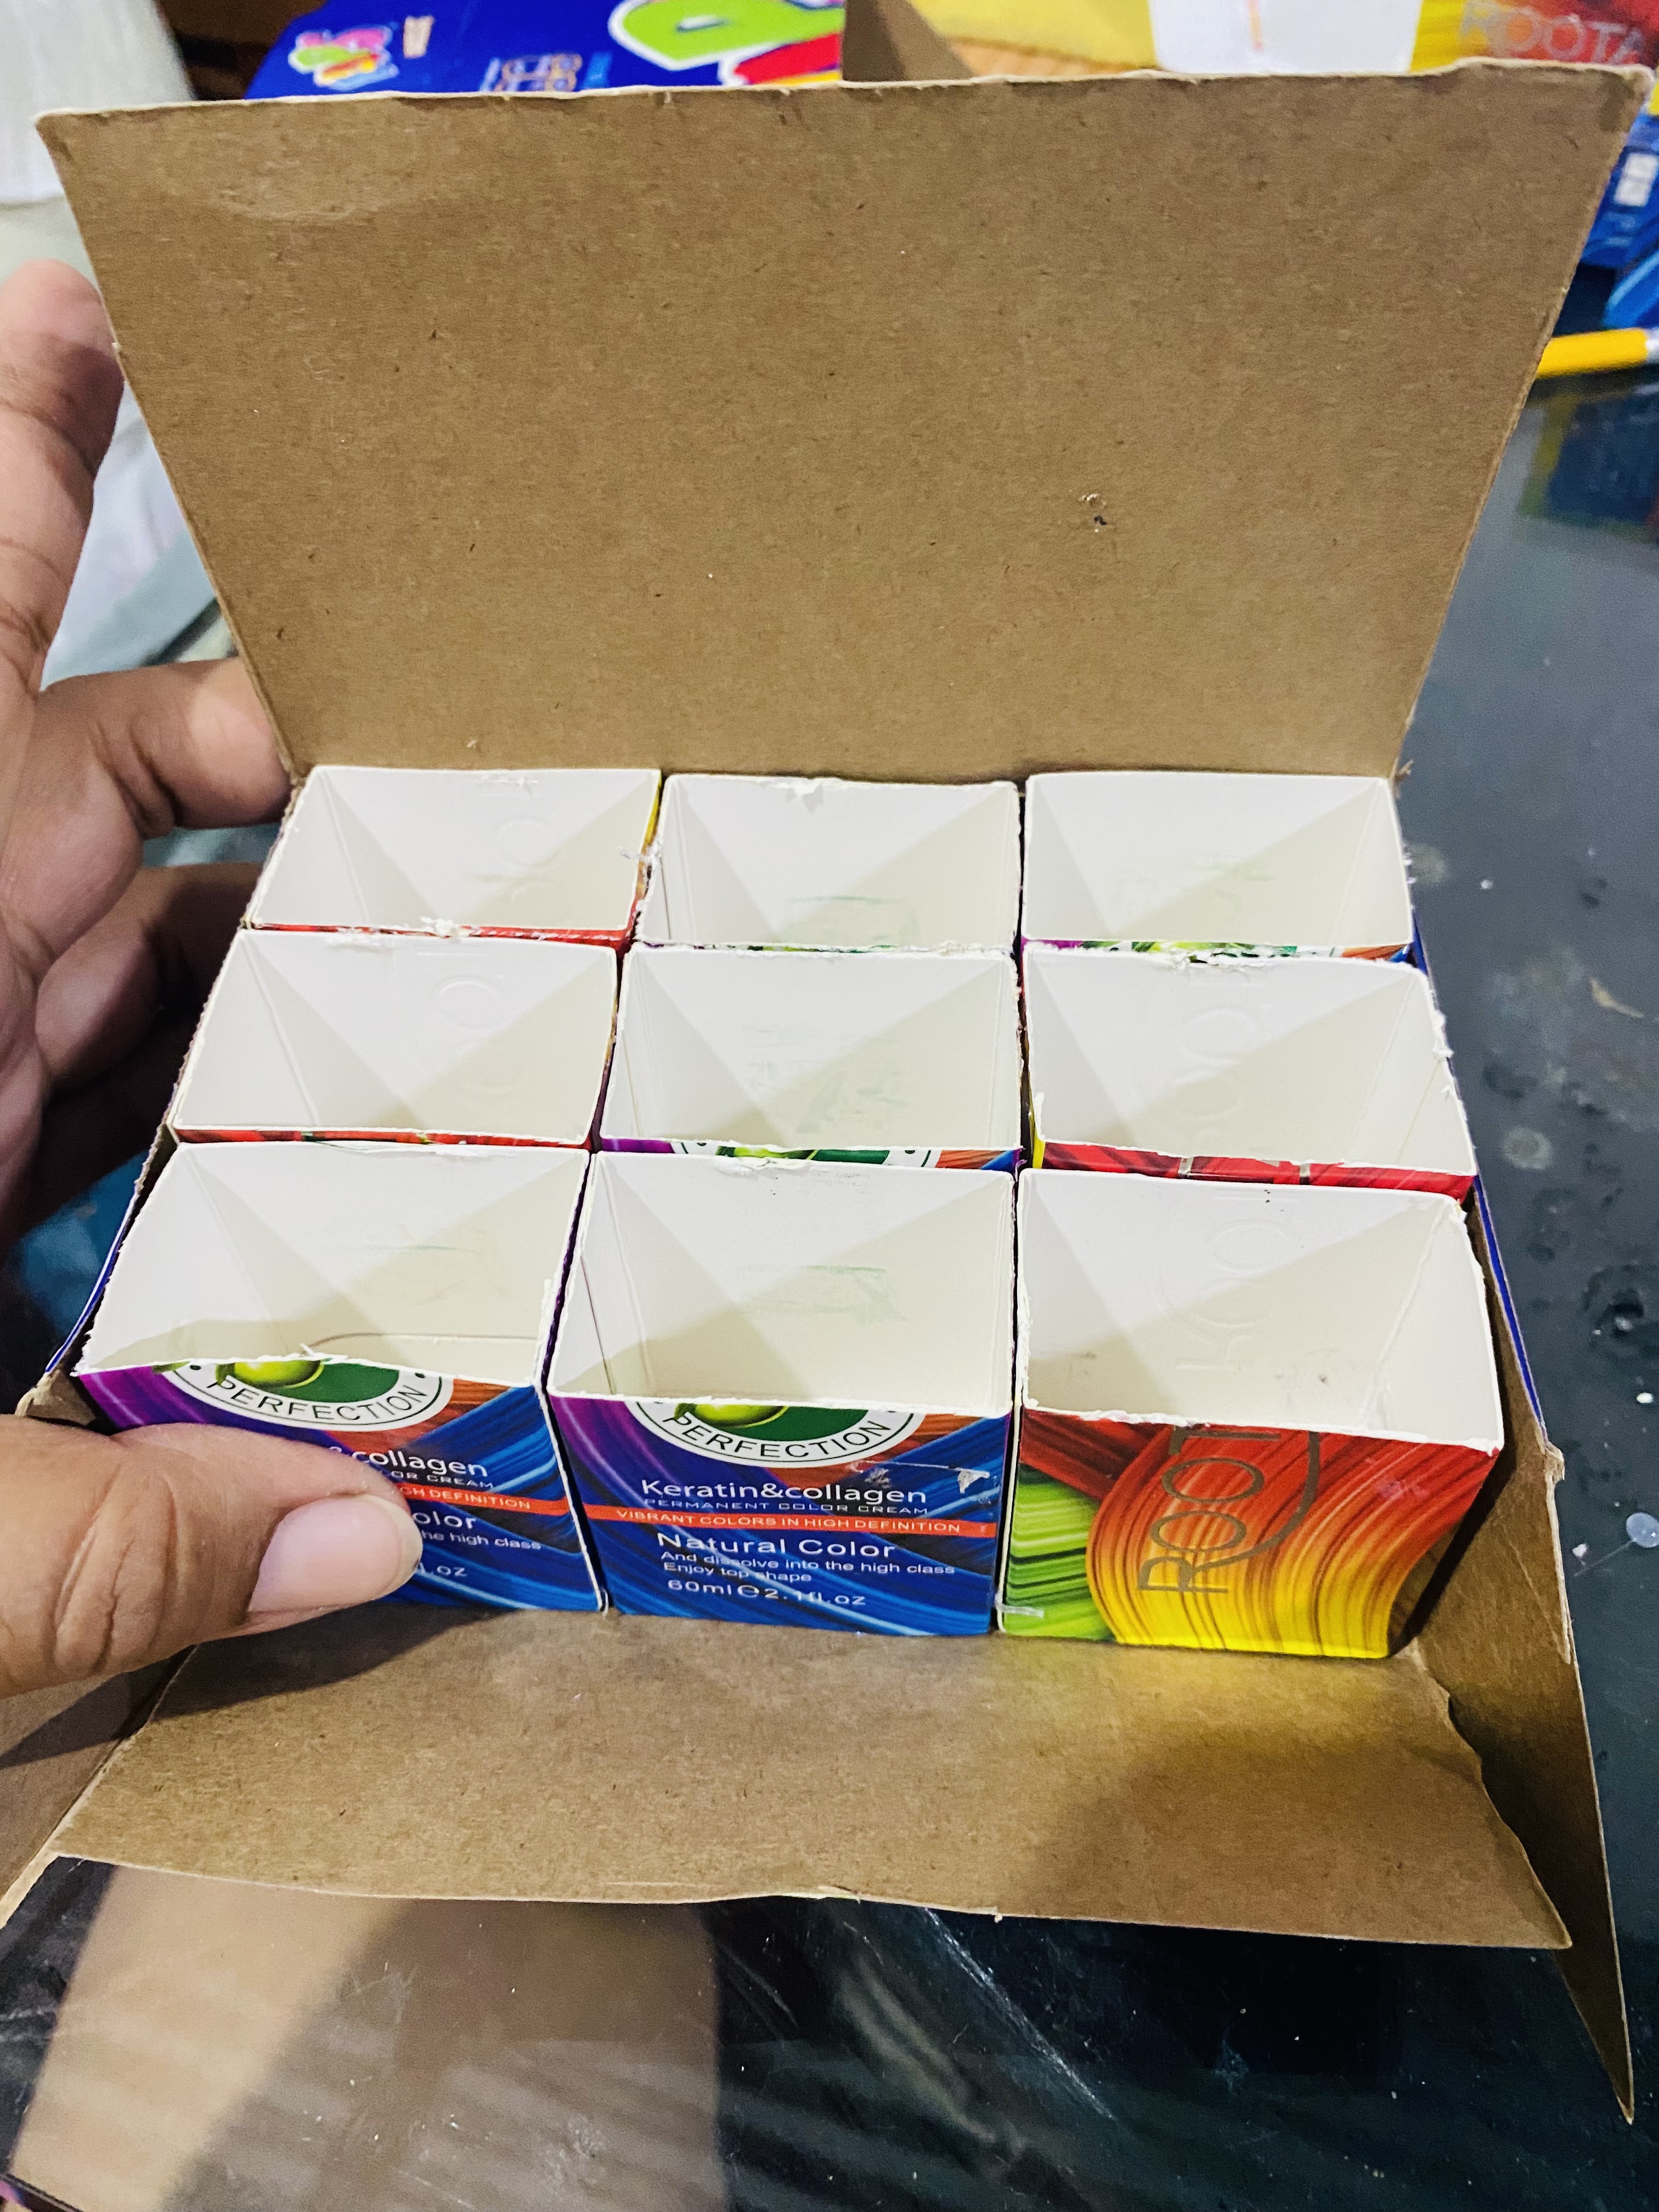
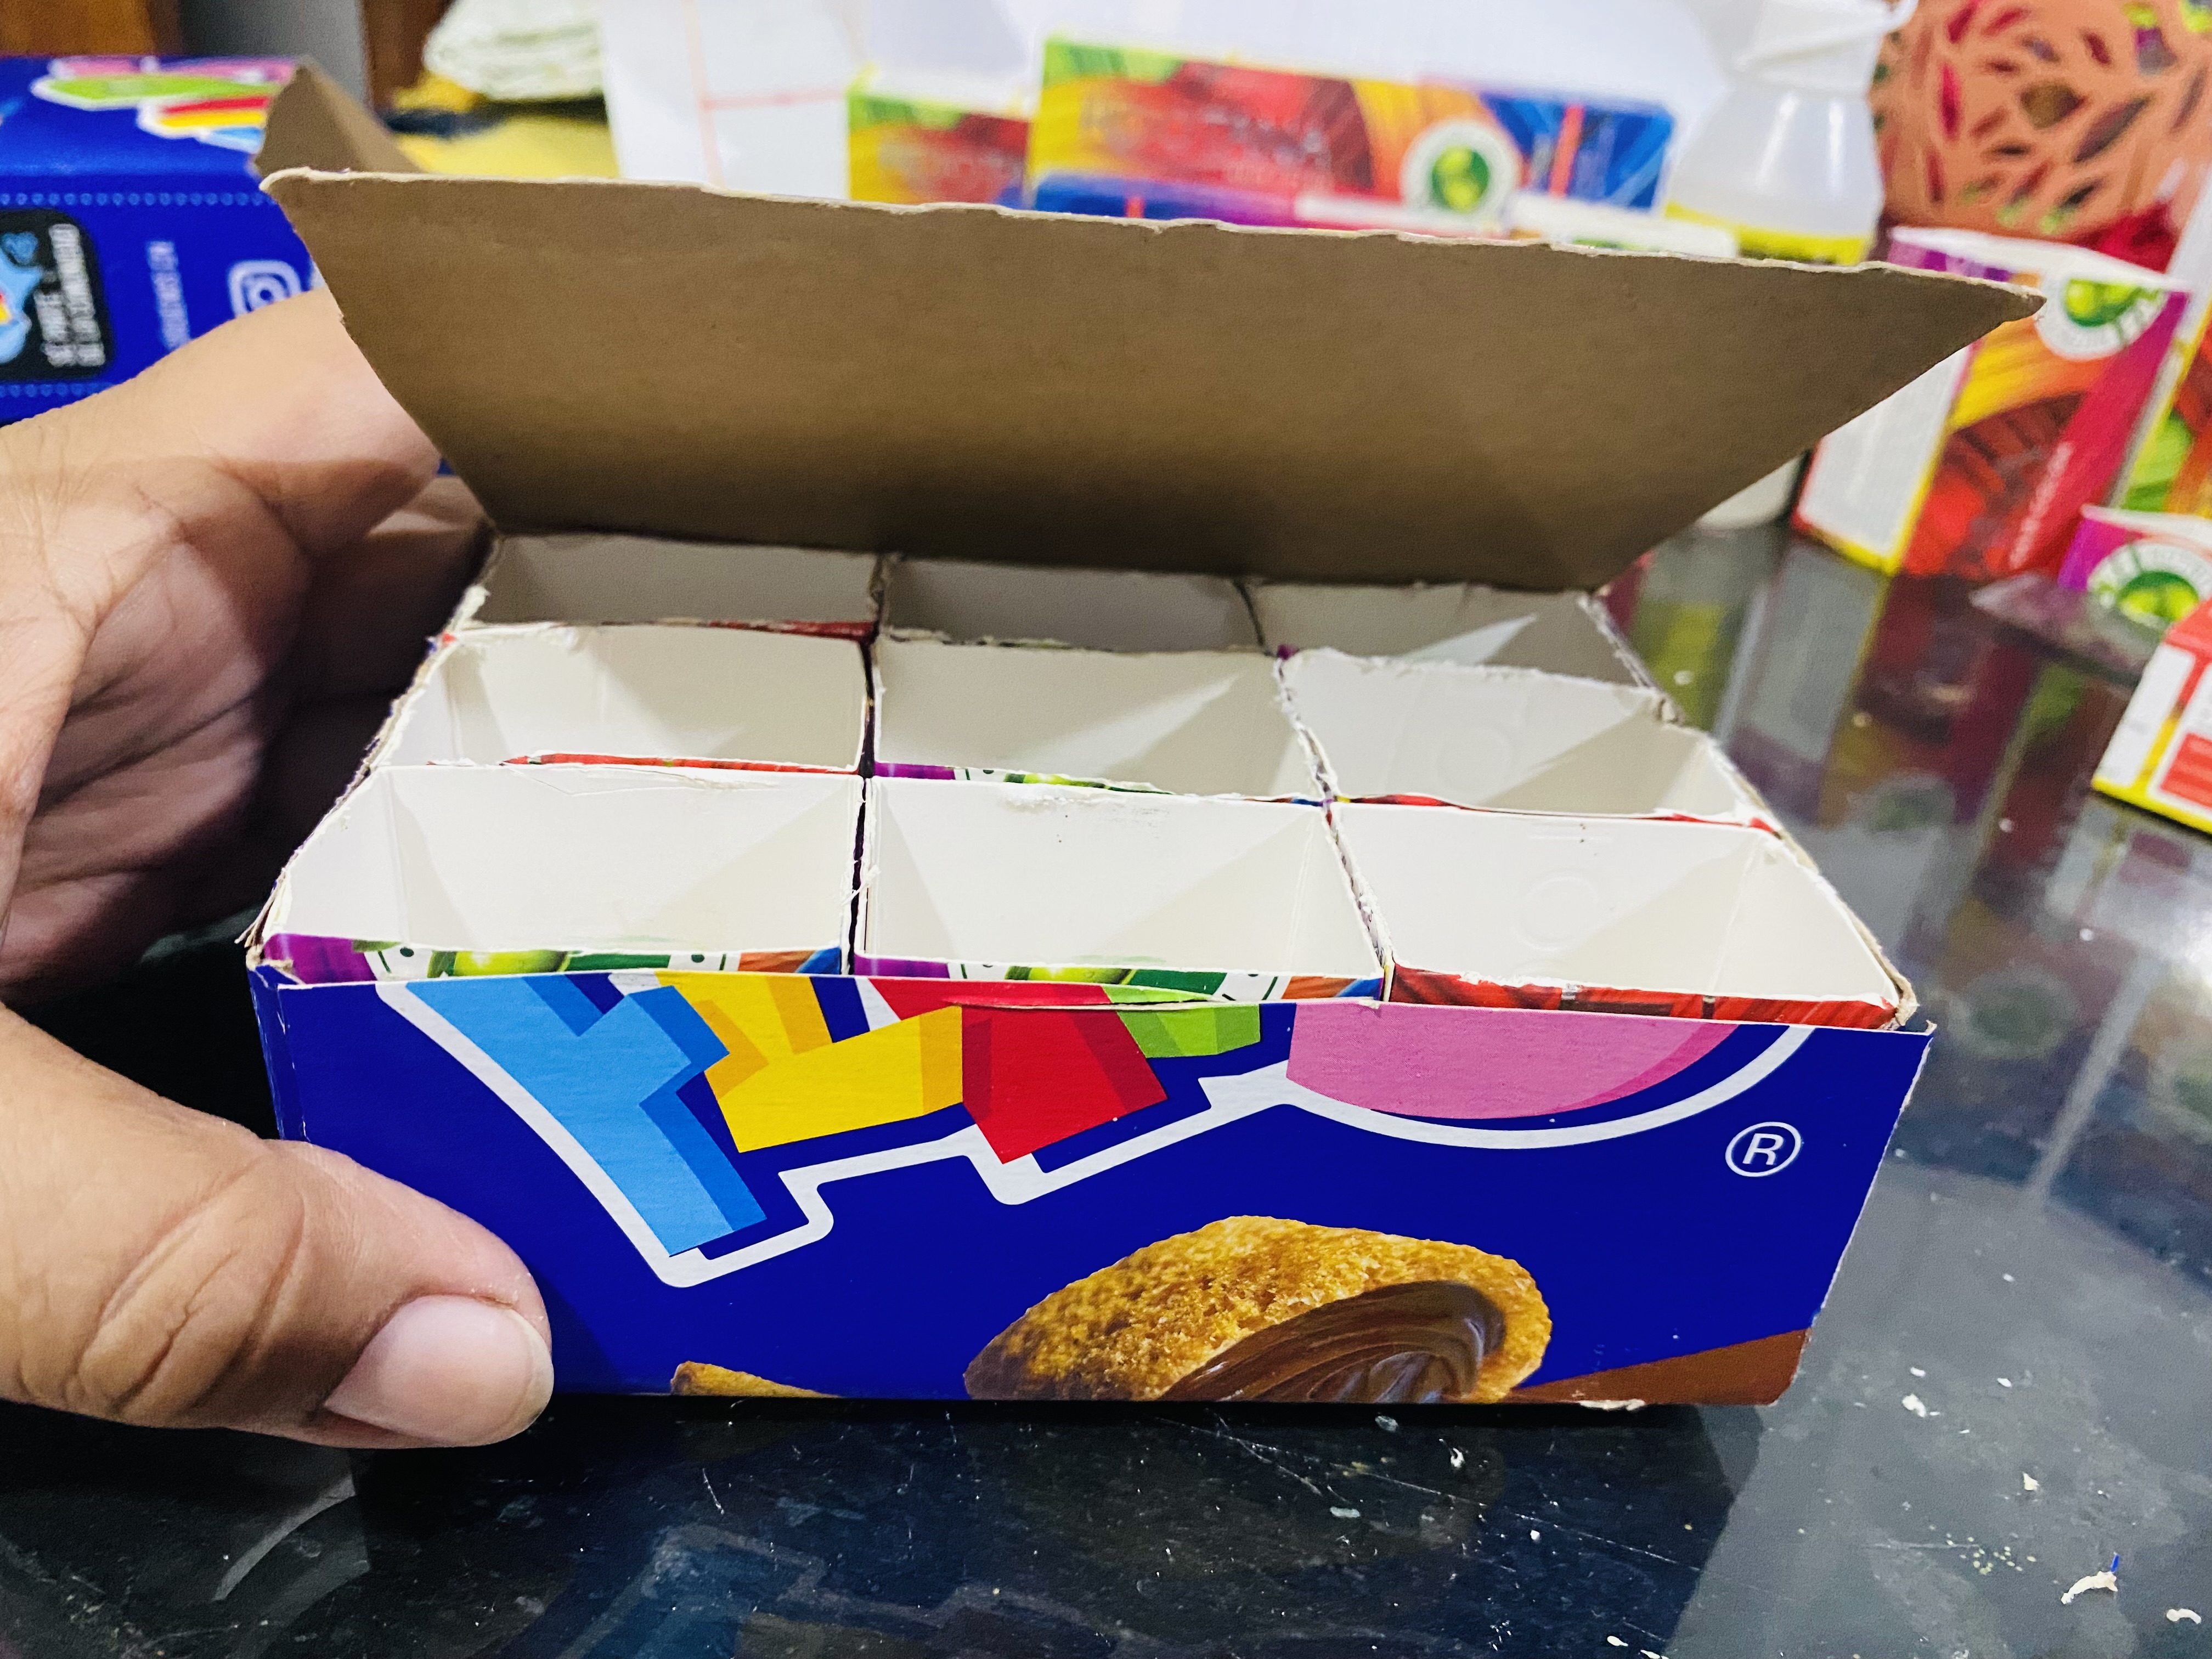
In this step we are going to cut the dye boxes, we are going to mark them from one end 4.8 cm which is the height measurement of the cereal box, with one box I have enough for 3 divisions but I will only use the ones at the ends, when I have them all ready I am going to join them by gluing them with Silicon and then I will glue them inside my cereal box making sure they are well glued, then we glue all the edges of the cereal box to assemble our organizer
En este paso vamos a cortar las cajas de tinte, estas les vamos a marcar desde un extremo 4,8 cm que es la medida de altura que tiene la caja de cereal, con una caja me sale para 3 divisiones pero yo utilizaré sólo las de los extremos, al tenerlas todas listas las voy a unir pegándolas con Silicon y luego las pego adentro de mi caja de cereal fijándome bien que queden bien pegadas, luego pegamos todas las orillas de la caja de cereal para ir armando nuestro organizador
 |  |
|---|---|
 |  |
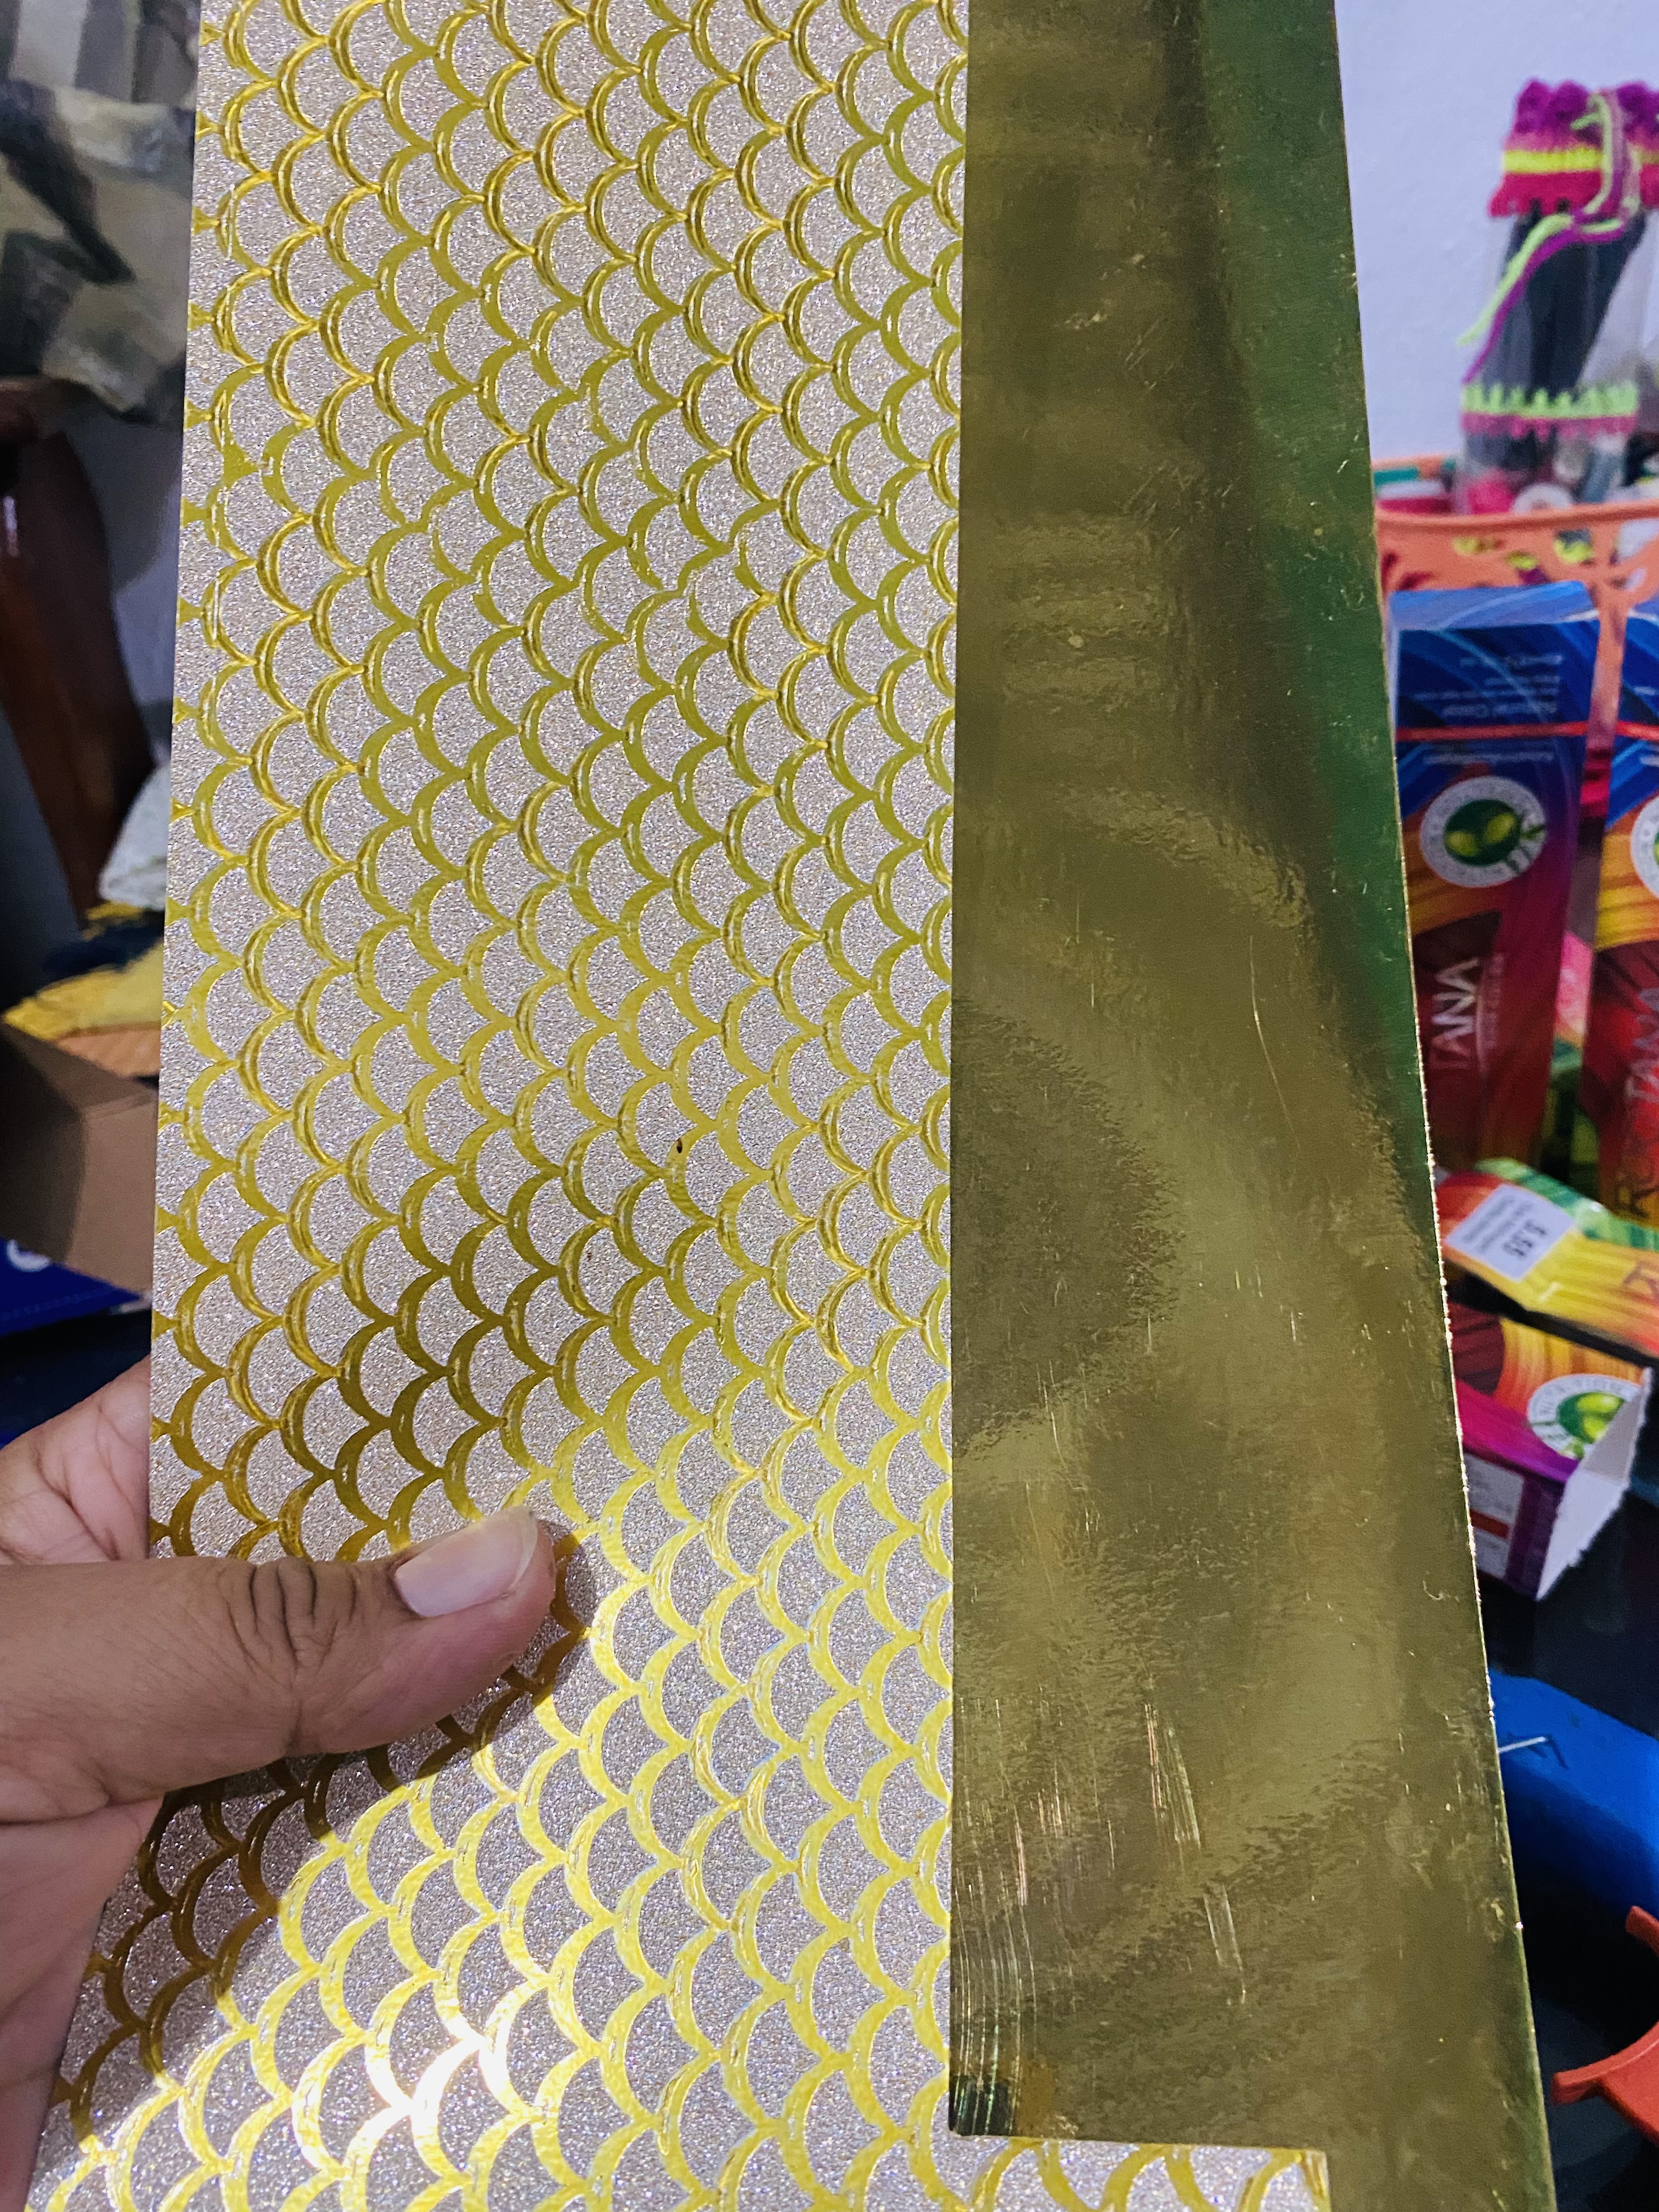
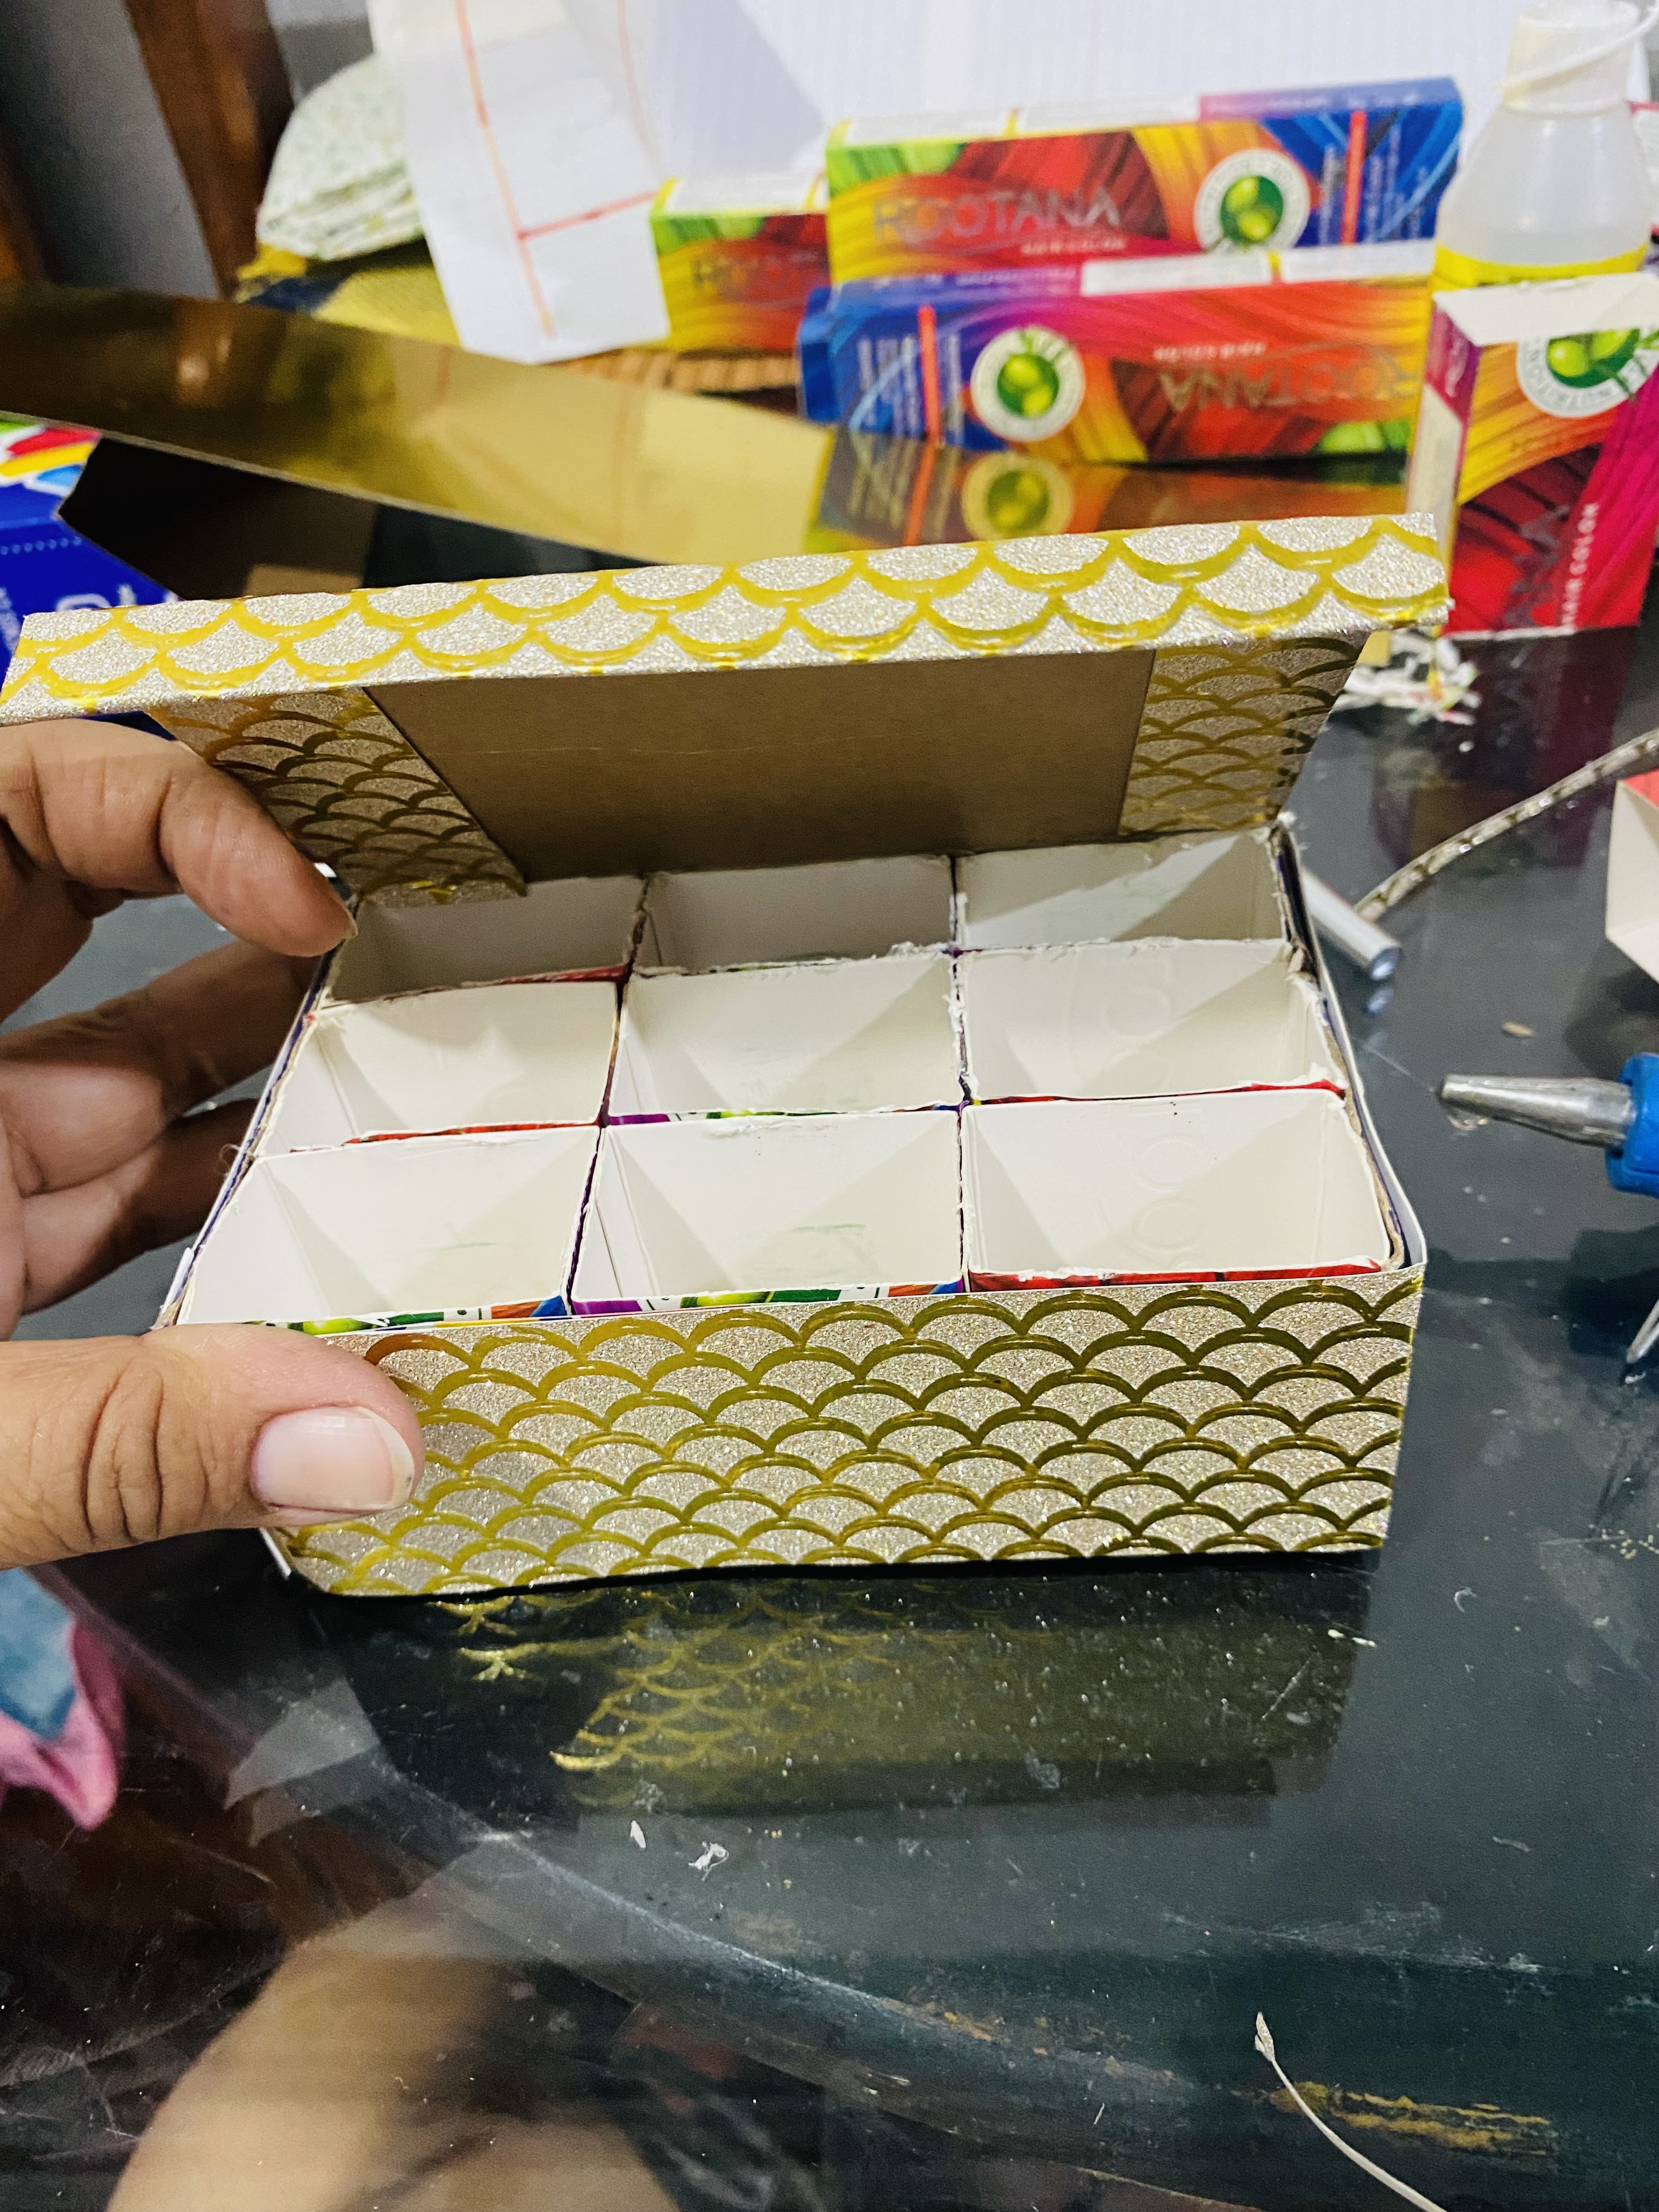
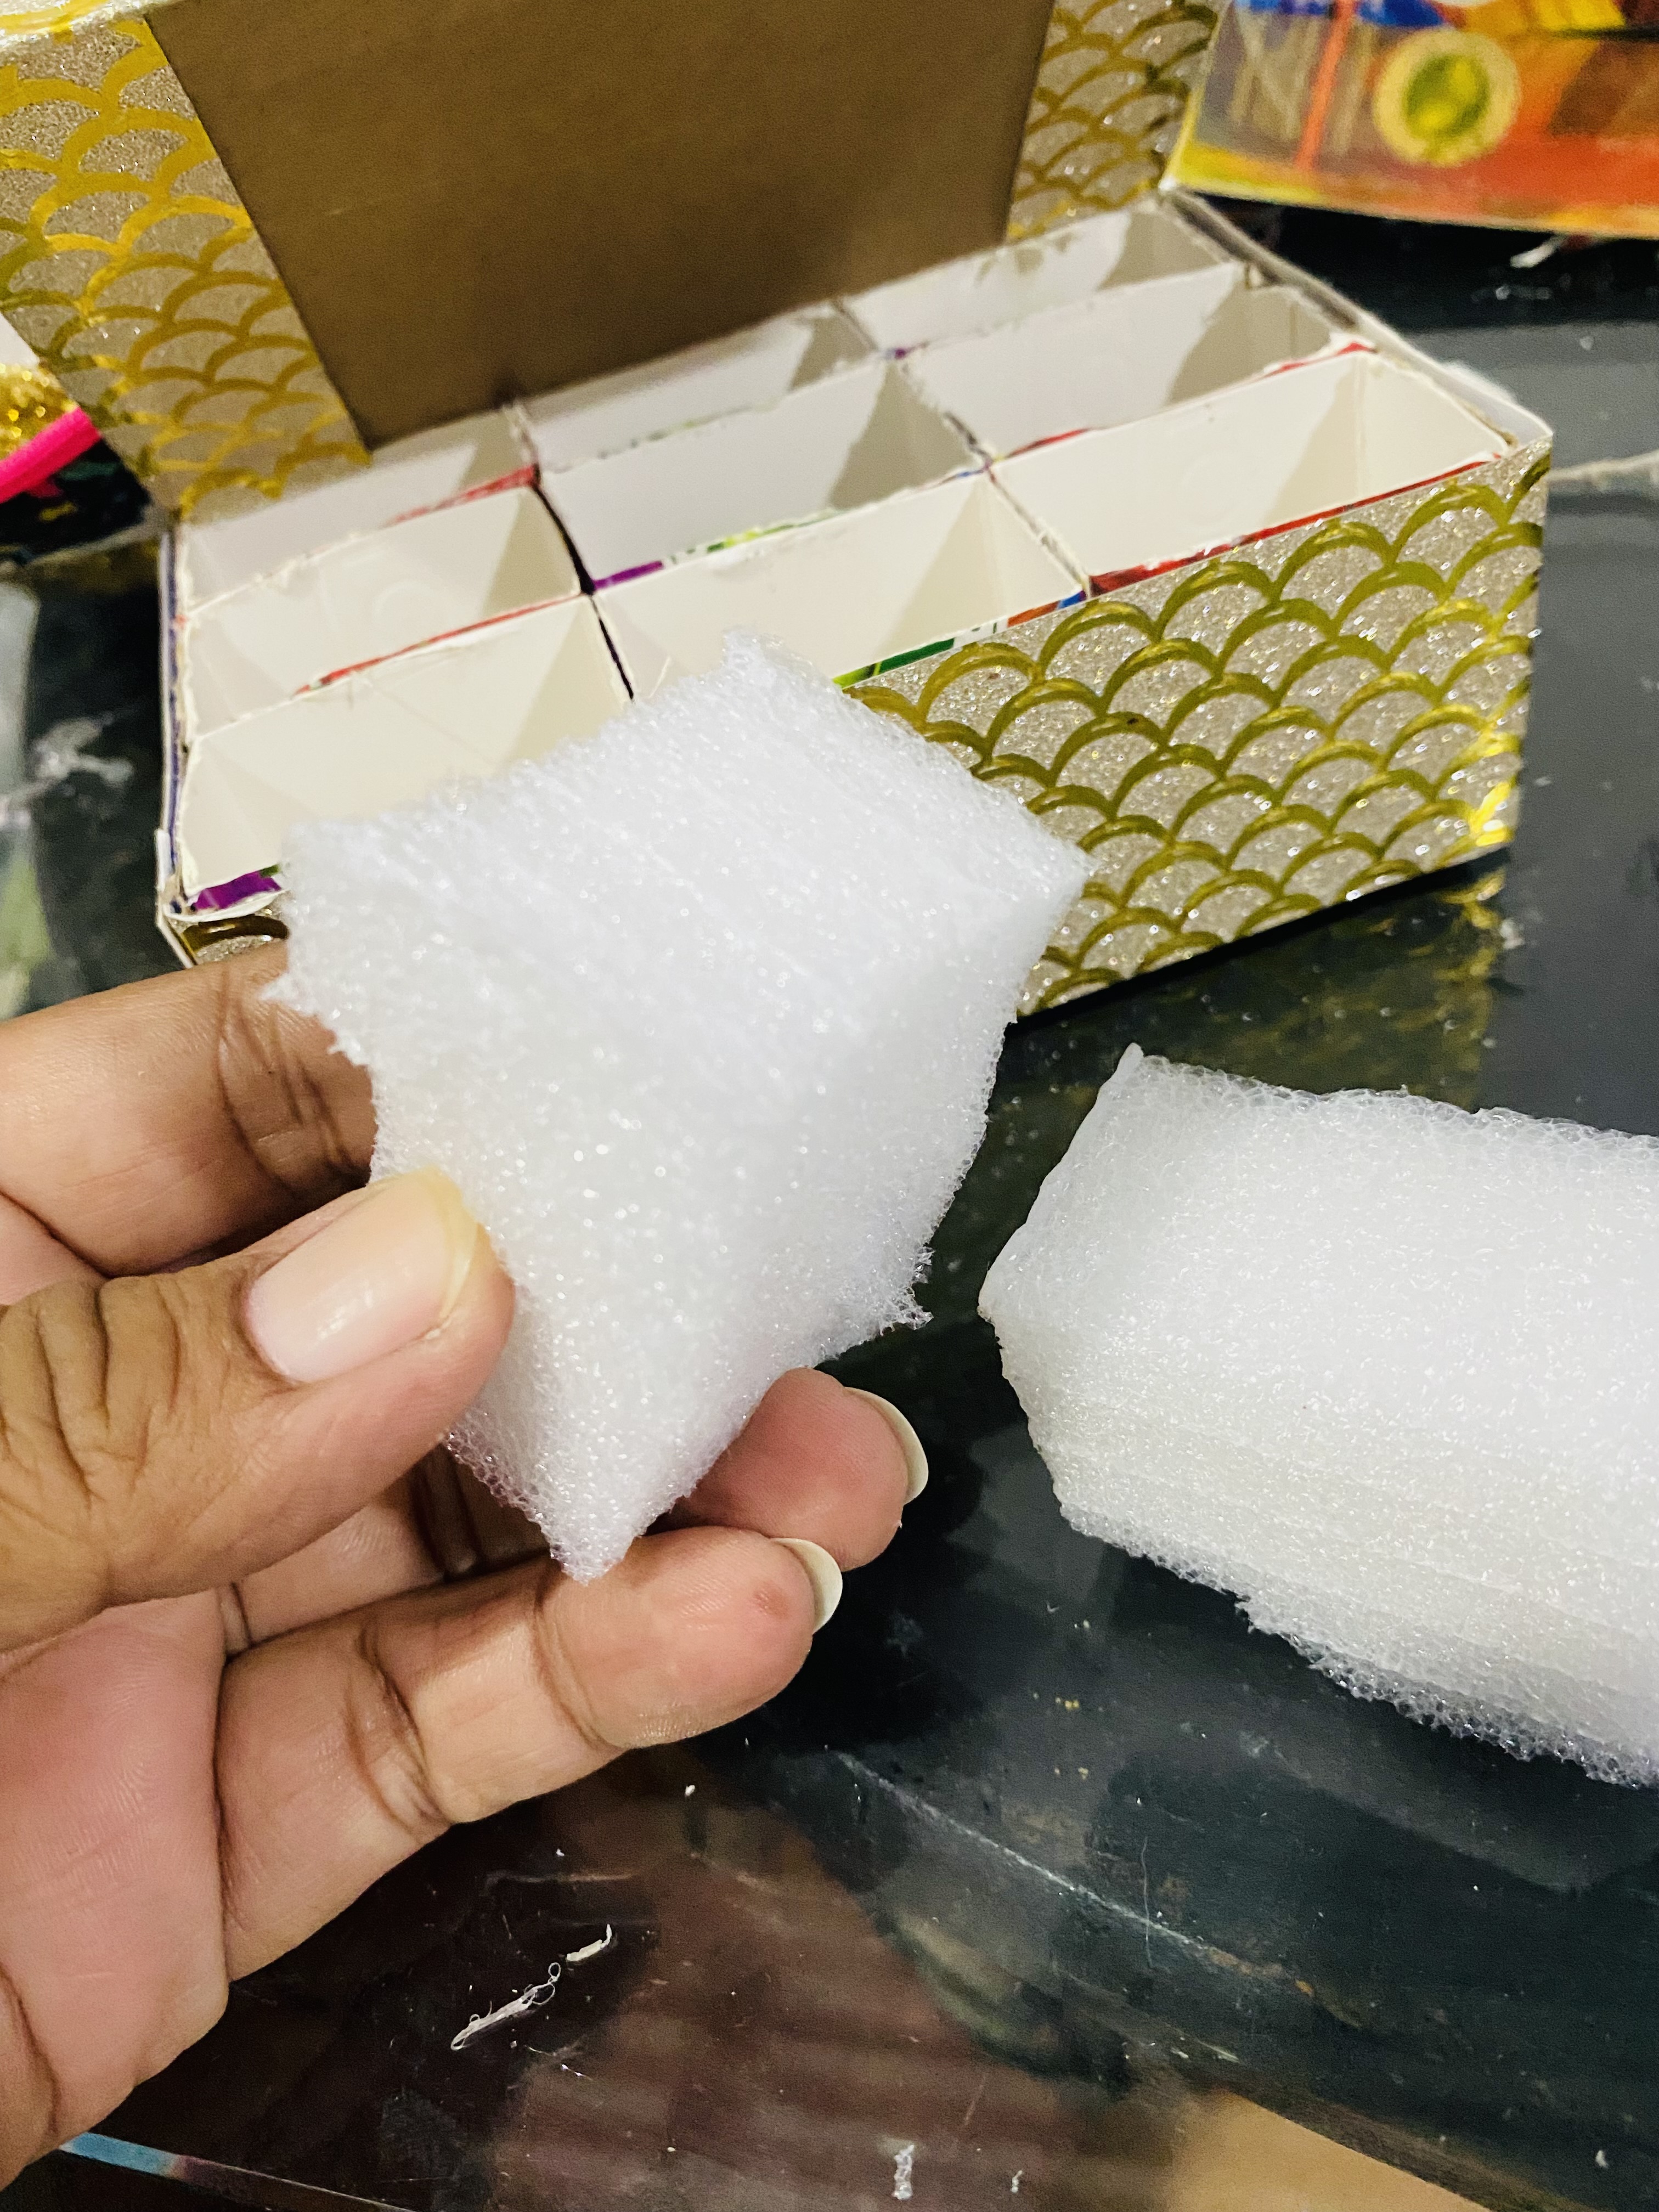
Once our organizer is assembled, we will begin with the decoration. I am going to use some cardboard that I had left over from another craft. These cardboards are gold and I think they are very beautiful and appropriate for this jewelry box. Since I only have scraps of cardboard, I am going to cut the necessary ones to cover all the sides and I will glue them with hot silicone so that they stick quickly.
I will also put a little foam rubber in several of the divisions so that they are high and I can place earrings and we can have easy access to take them out. In the front divisions, I will leave them a little wavy so that I can place necklaces or clothes that take up more space.
Una vez armado nuestro organizador vamos a comenzar con la decoración, yo voy a utilizar unas cartulinas que me sobraron de otra manualidad, estas cartulinas son doradas y me parecen muy hermosas y apropiadas para este joyero, como tengo sólo retazos de las cartulinas voy a cortar los necesarios para cubrir todos los lados y voy pegando con Silicon caliente para que se peguen rápido
También le colocaré en varias de las divisiones un poco de goma espuma para que queden altos y se puedan colocar zarcillos y que podamos tener el acceso fácil para sacarlos, En las divisiones delanteras las dejaré un poco ondas para que pueda colocar collares o prendas que ocupen más espacio.
 |  |
|---|---|
 |  |
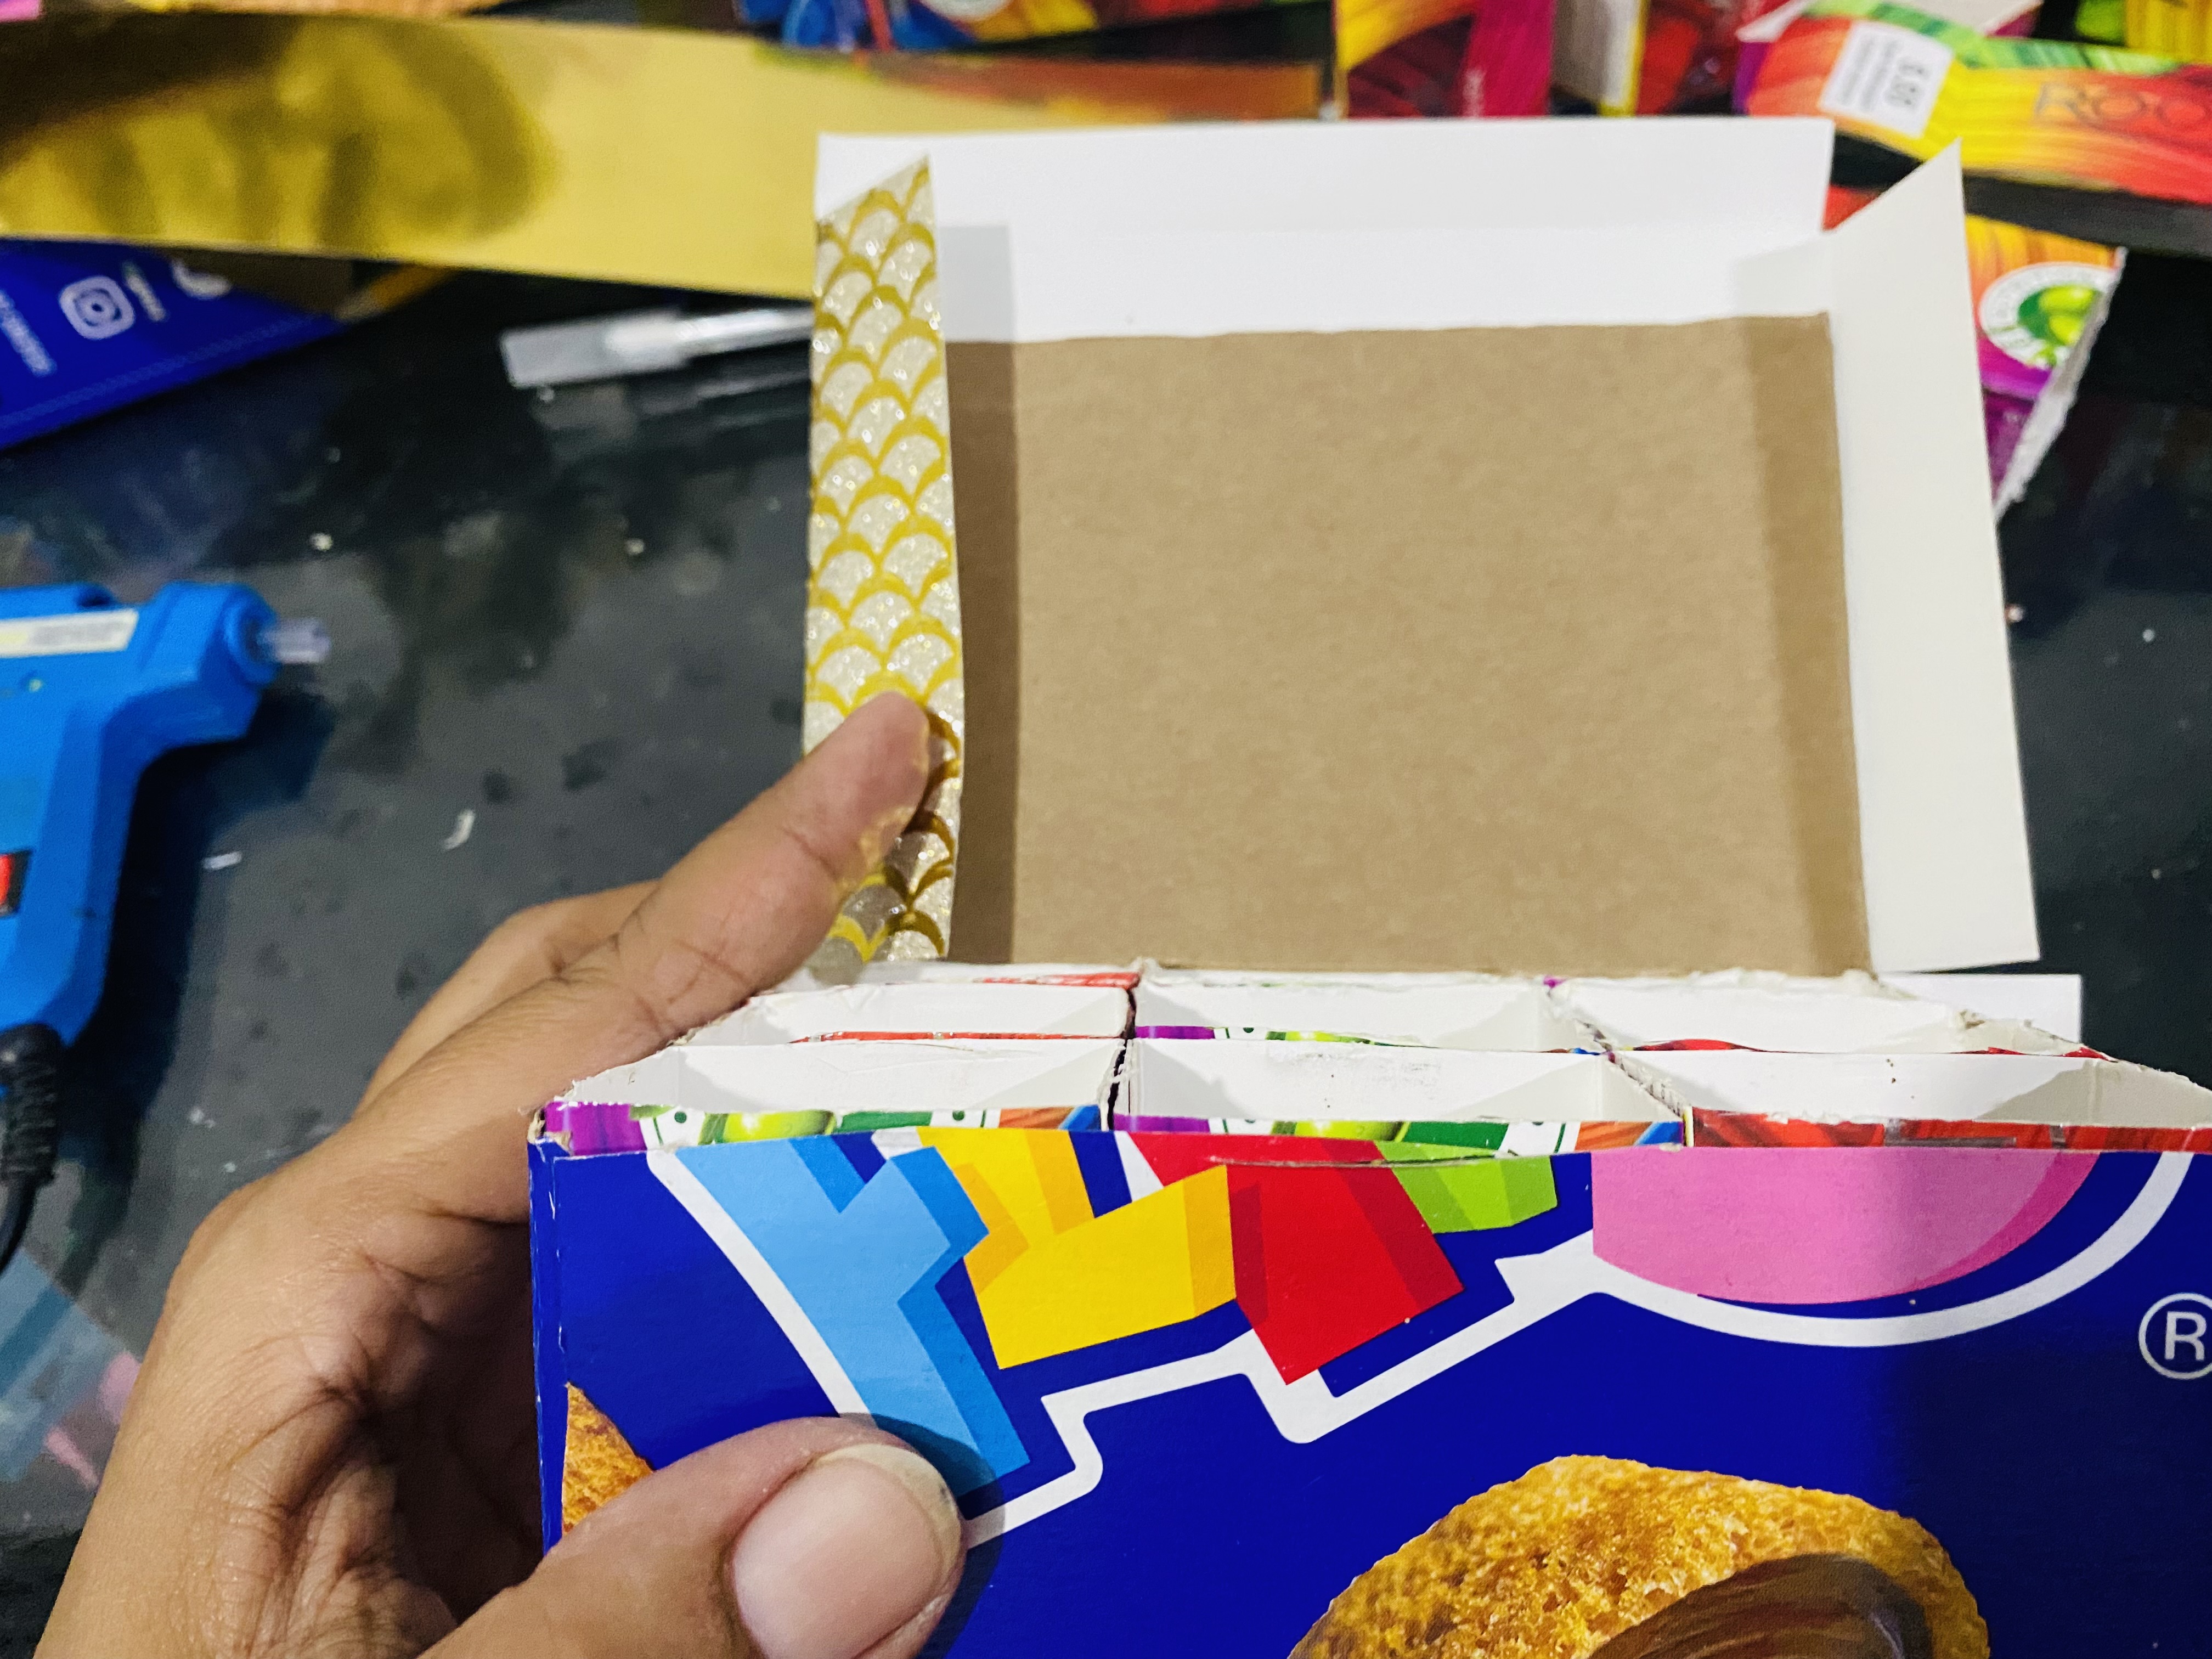
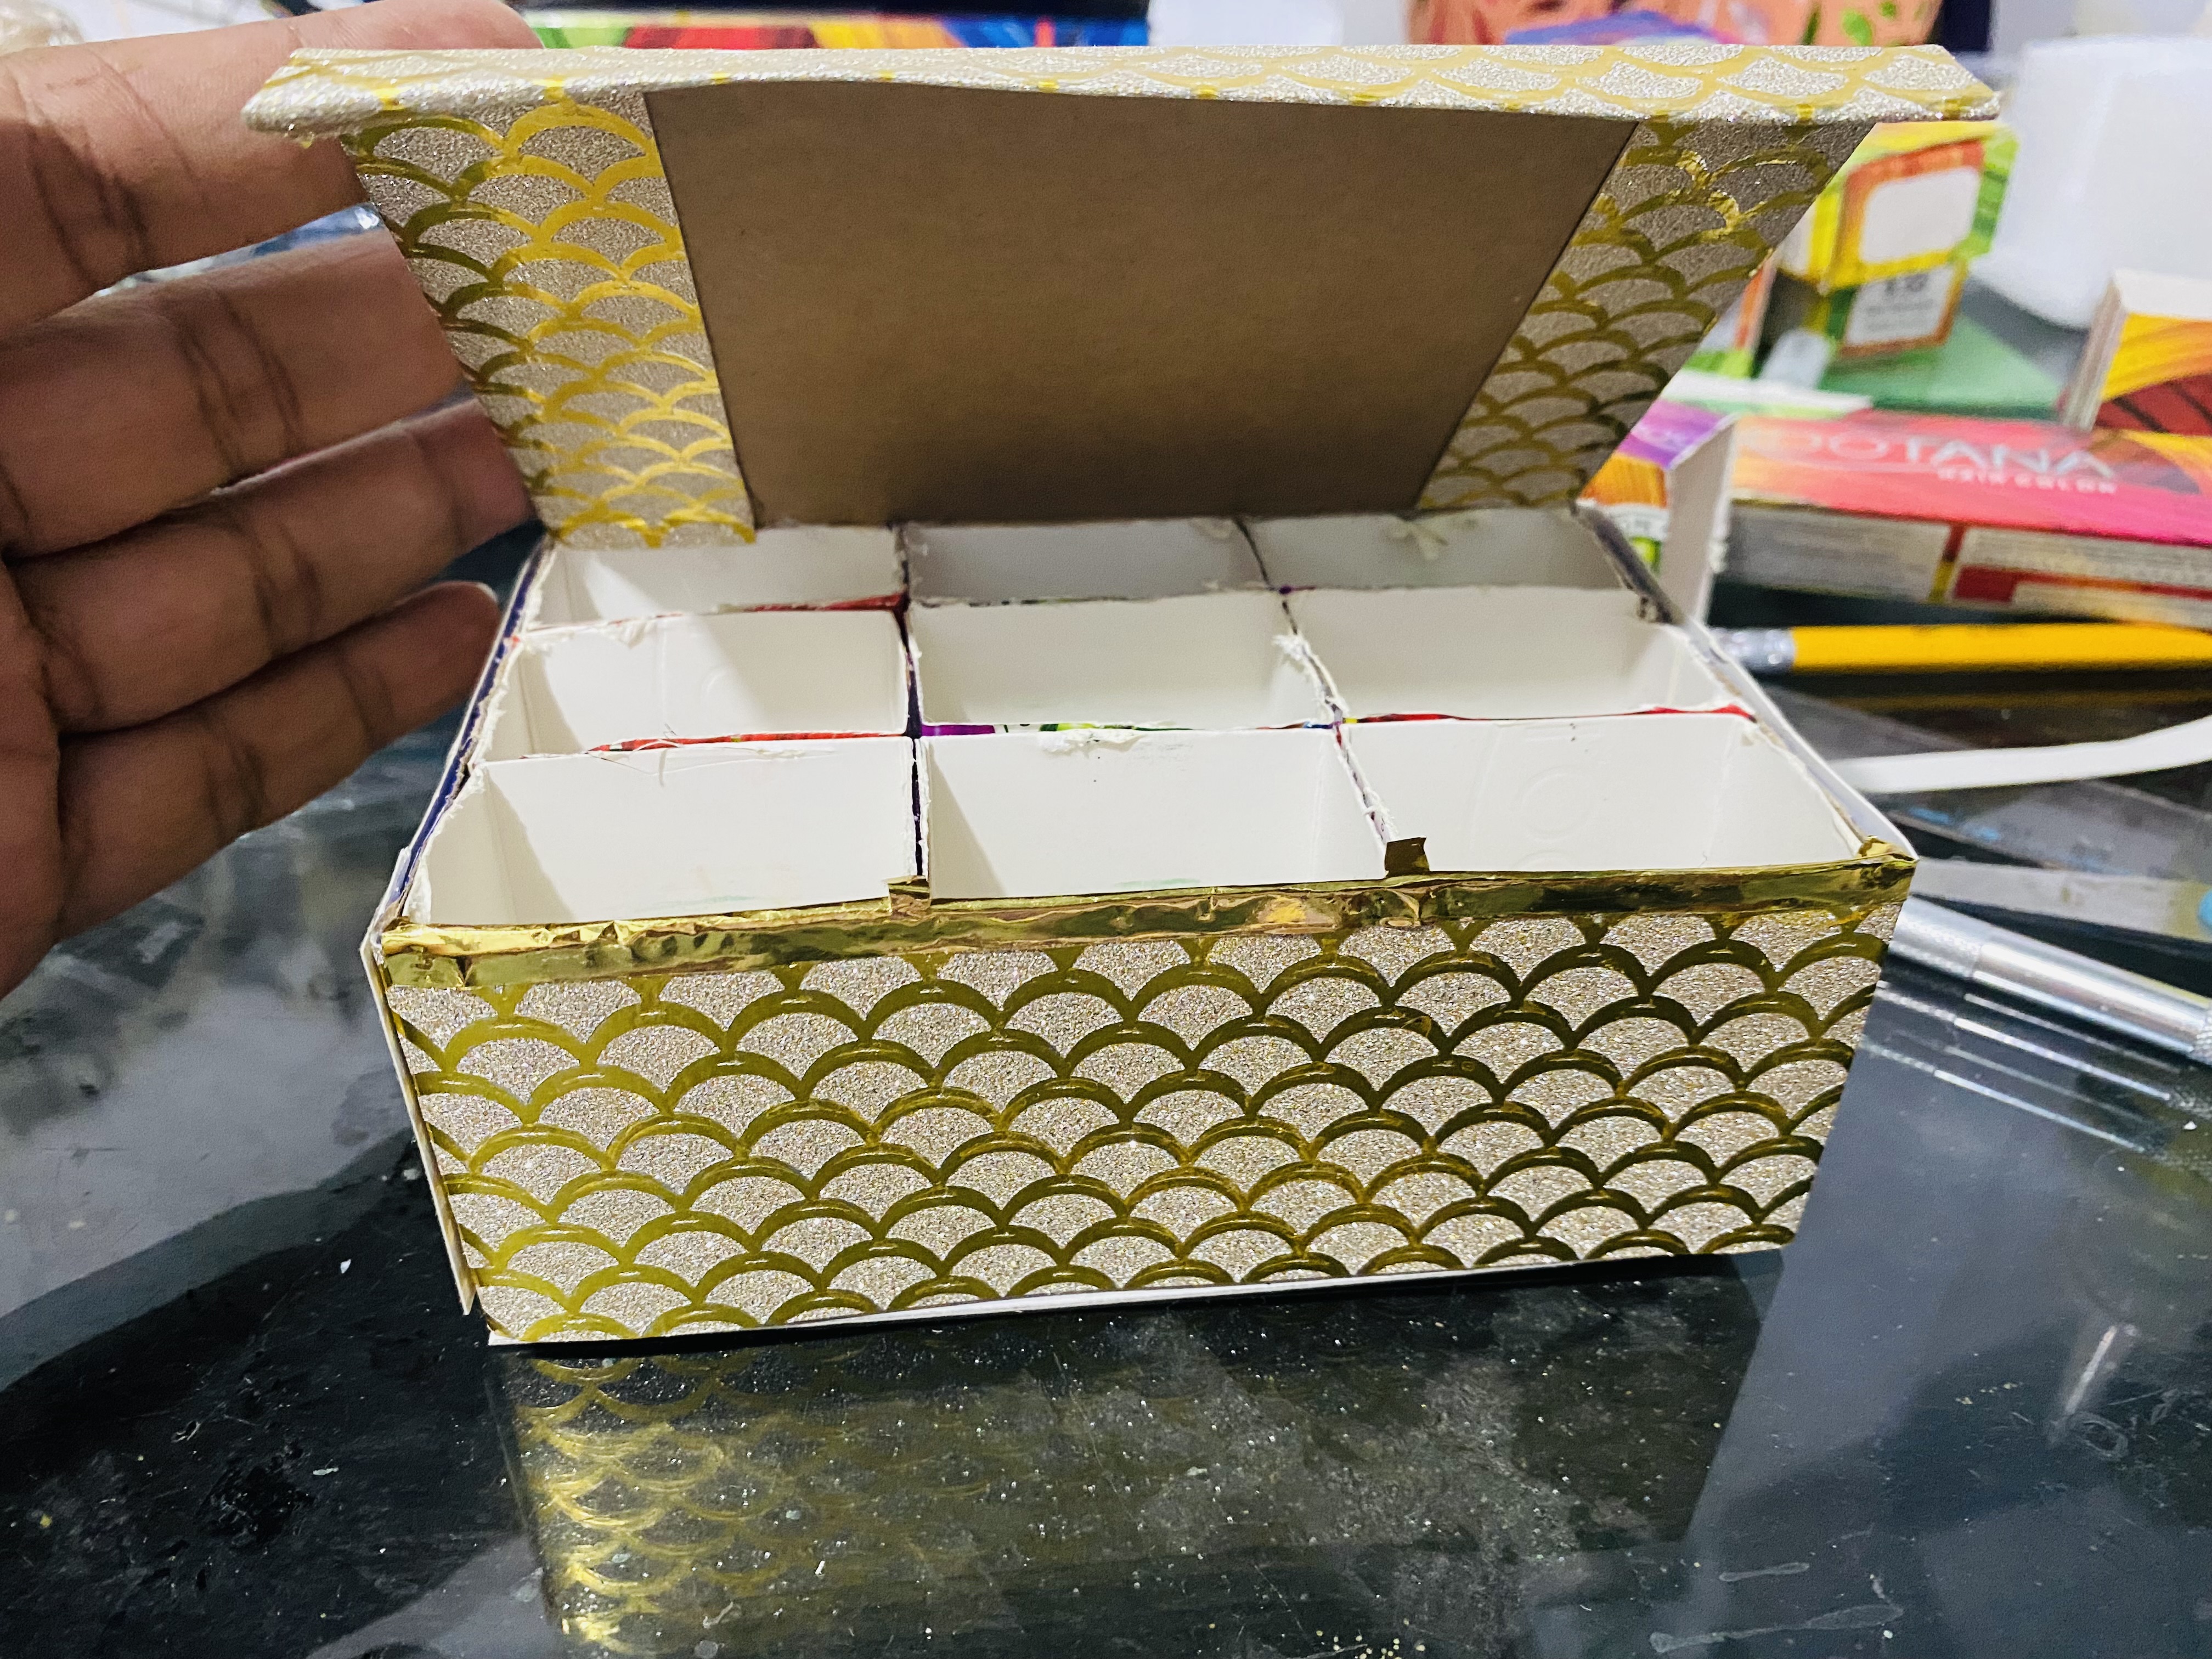
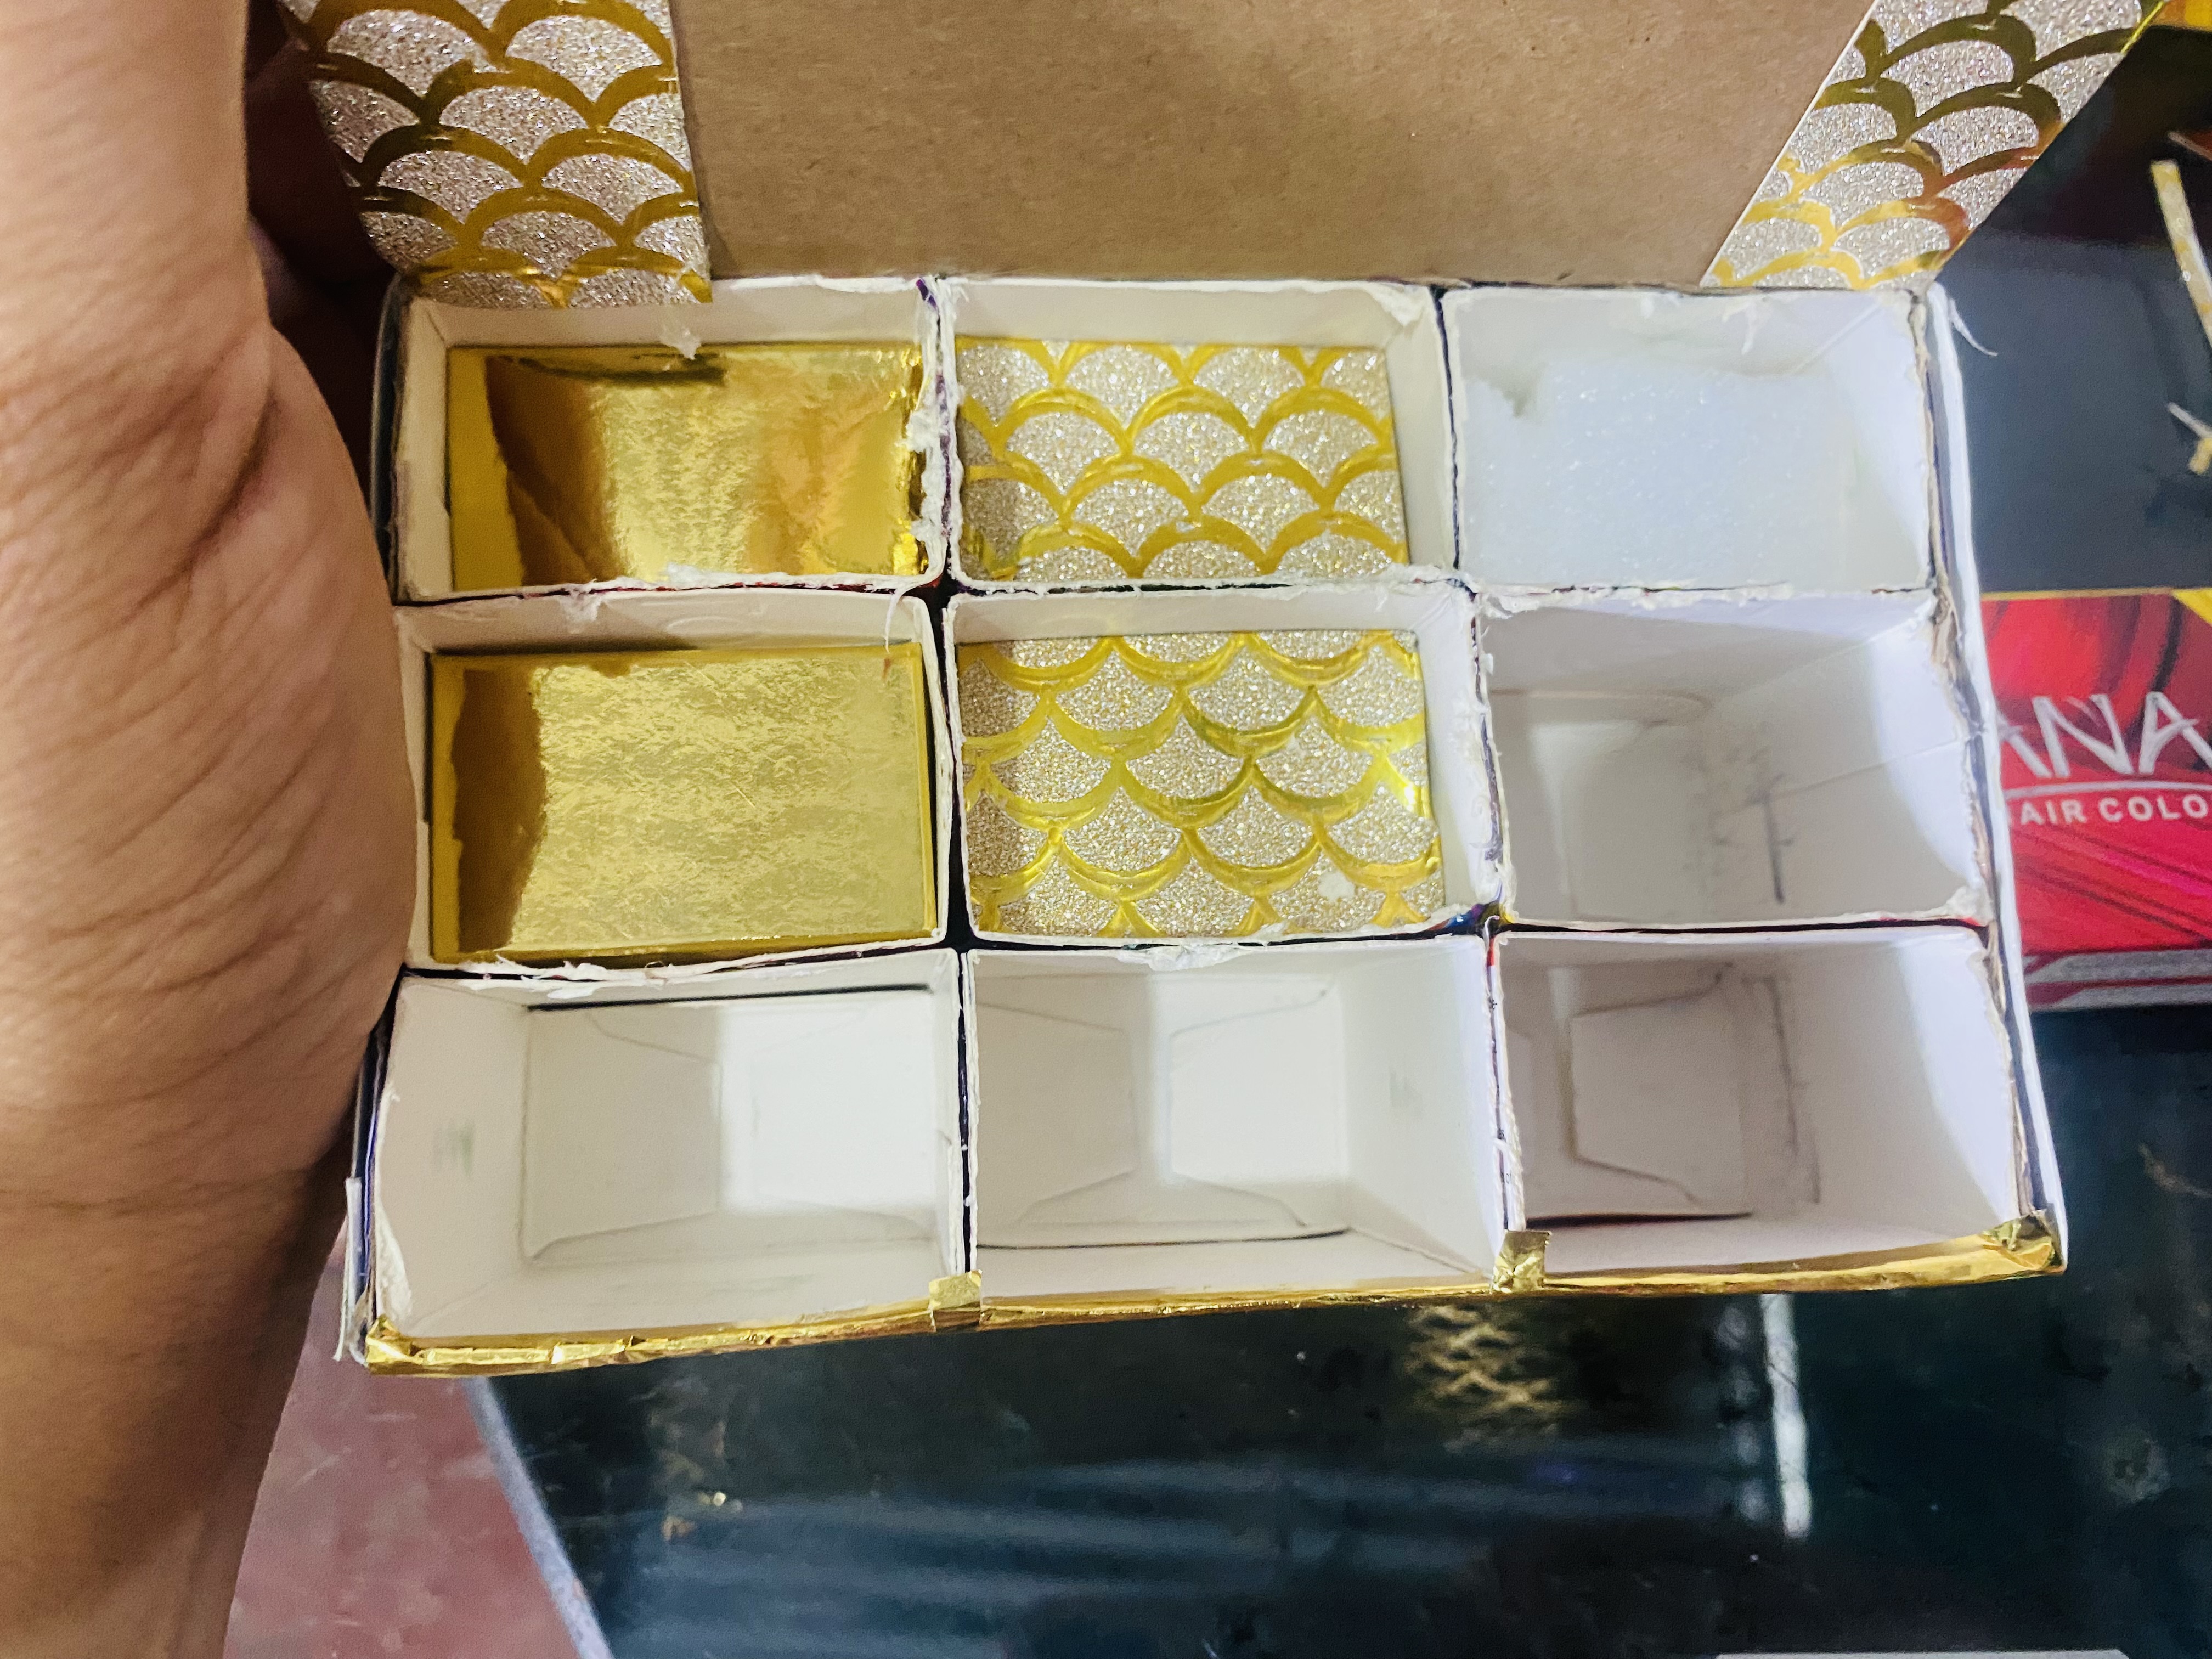
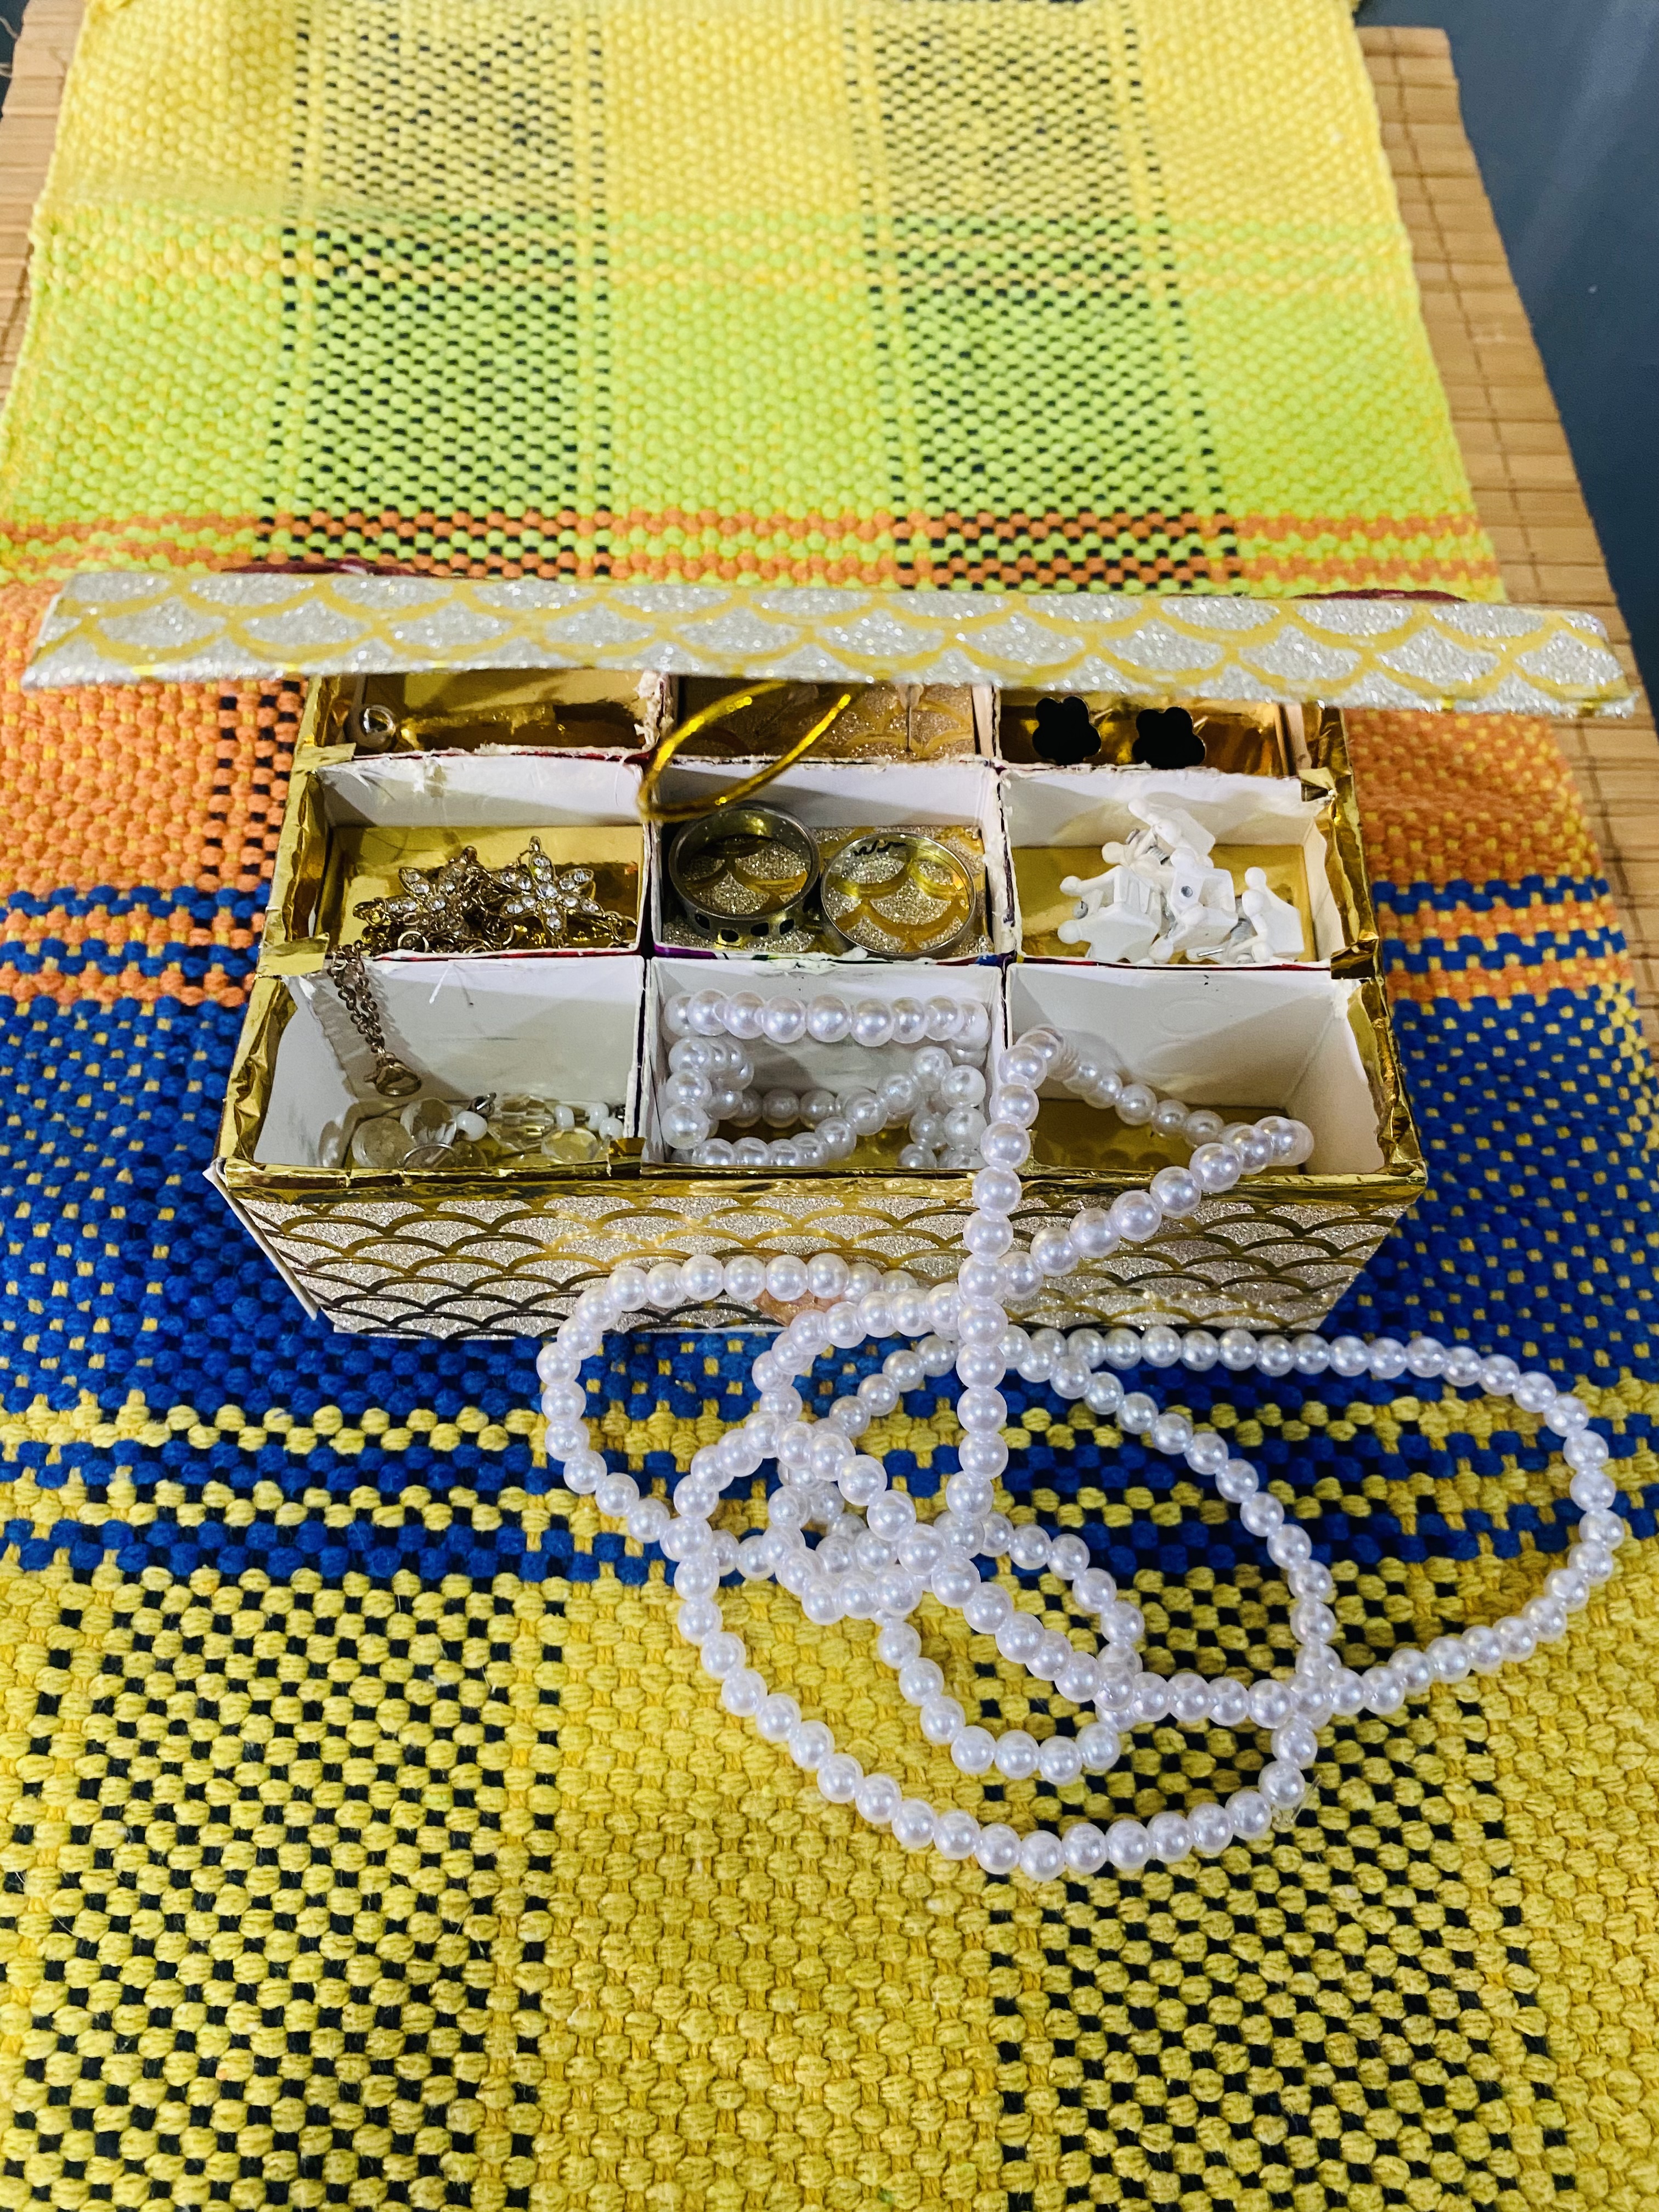
For the next step we are going to place all the necessary decorations to make our jewelry organizer look prettier. I glued some edges with gold paper so that the colors of the dye boxes cannot be seen. I also made small squares with tabs to place inside each division.
Para el siguiente paso vamos a colocarle todas las decoraciones necesarias para que quede más bonito nuestro joyero organizador, con papel dorado le pegué en algunas orillas para que no se vean los colores de las cajas de tinte, también le hice pequeños cuadraditos con pestañas para colocarle adentro de cada división
 |  |
|---|---|
 |  |
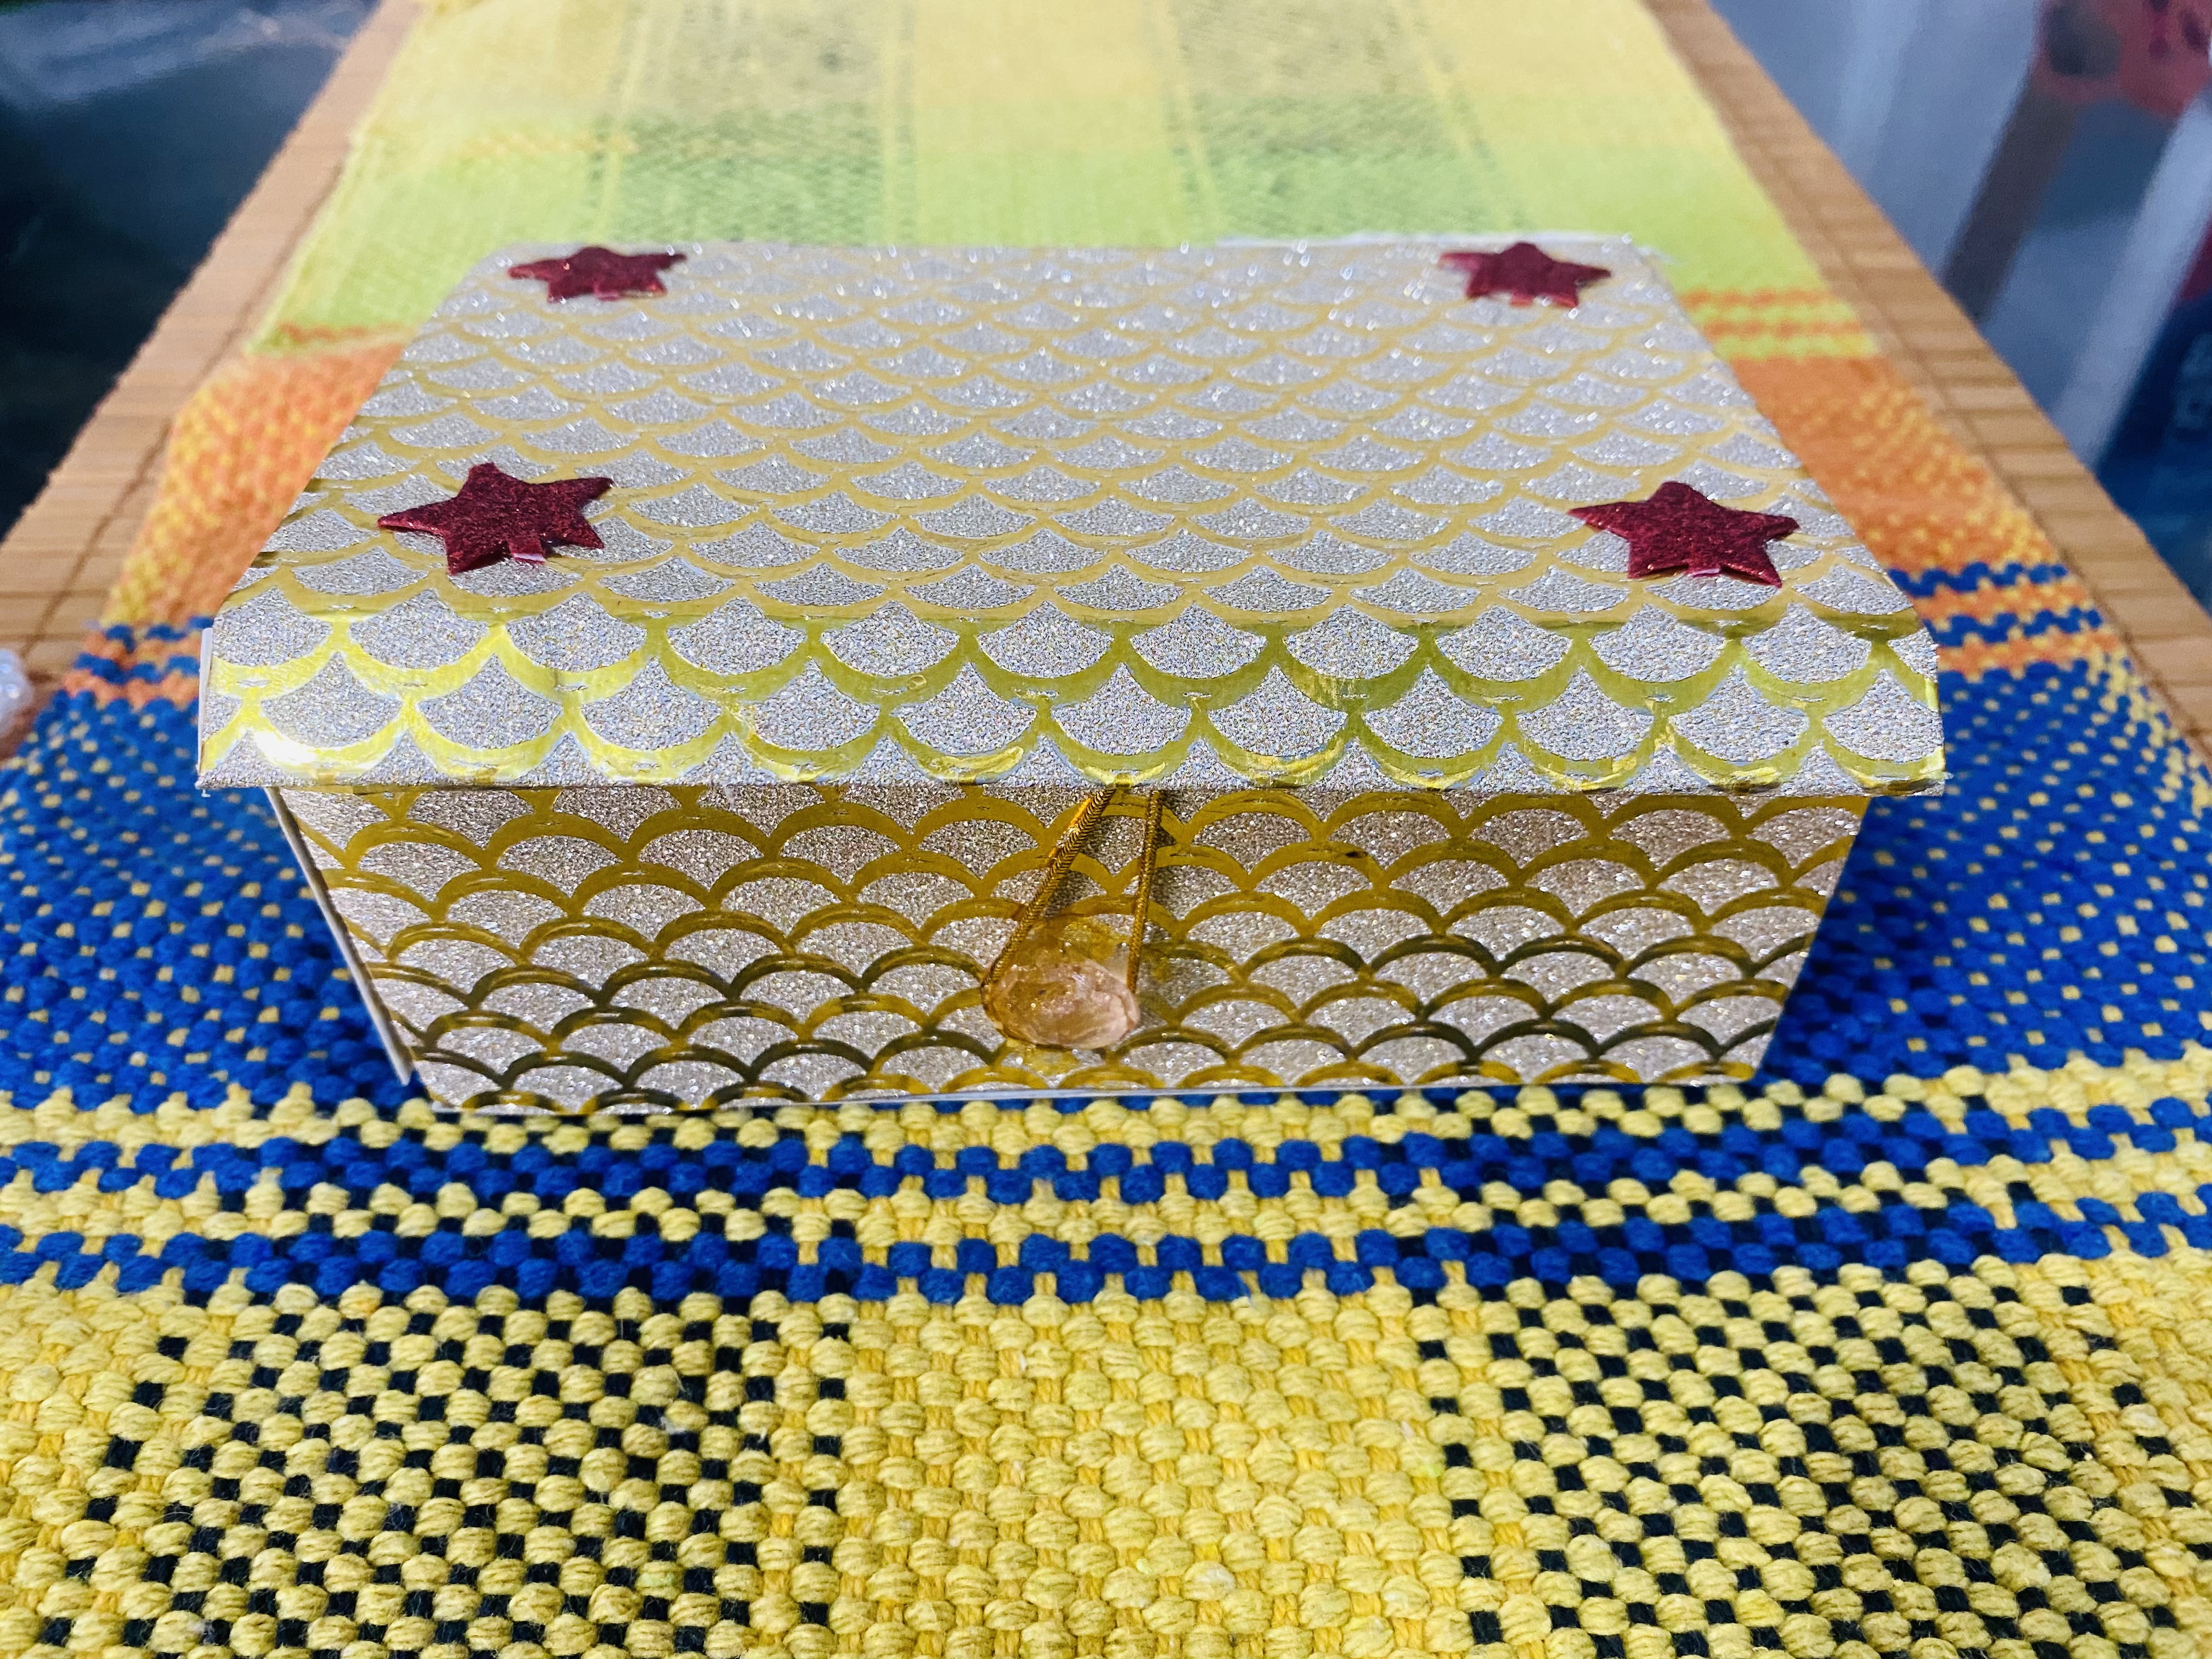
The decoration will be to everyone's taste. I put a small piece of gold elastic on the lid, glued it to the inside with silicone and put gold cardboard on top. I also put a pink diamond-like stone that I found among my things, this will be to close the lid of the organizer, and I put some red stars on the outside and this beautiful and practical jewelry organizer is ready.
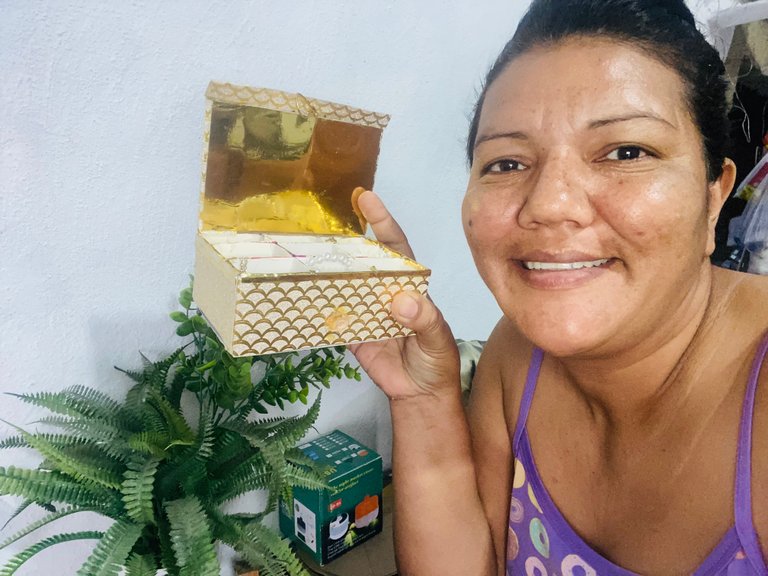
I hope my sister likes this nice gift. Luckily, I have a few days left before her birthday to be able to buy her some accessories and put them inside, and proudly give her this great gift made with my own hands.
La decoración será a gusto de cada quien, en la tapa le coloqué un trocito de goma elástica dorada, se la pegué en la parte interna con Silicon y le puse cartulina dorada encima, también le coloqué una piedrita como diamante rosado que conseguí entre mis cosas, esta será para poder cerrar la tapa del organizador, y le coloqué unas estrellas rojas por la parte de afuera y así ya está listo este lindo y práctico joyero organizador.
Espero que a mi hermana le guste este lindo obsequio, por suerte me quedan algunos días antes de su cumpleaños para poder comprarle algunos accesorios y colocárselos adentro, y darle con orgullo este gran obsequio hecho con mis propias manos.
 |  |
|---|
Friendship Day is a perfect occasion to celebrate the ties that unite us with our loved ones, and what better gift than something that you have made with your own hands, I am sure that person will be very happy to receive that great gift that you made with love, I really liked this organizer, soon I will make one for myself and organize all my jewelry, I hope you liked it too, I say goodbye wishing you many successes and blessings, until another opportunity 🥰💎❤️
El día de la amistad es una ocasión perfecta para celebrar los lazos que nos unen con nuestros seres queridos, y qué mejor obsequio que algo que lo hayas fabricado con tus propias manos, estoy segura que esa persona estará muy feliz de recibir ese gran obsequio que fabricaste con amor , Este organizador me gustó muchísimo , pronto haré uno para mí y organizare todas mis joyas, espero que a ustedes también les haya gustado, me despido deseándoles muchos éxitos y bendiciones, hasta otra oportunidad 🥰💎❤️
➿➿➿➿💎💍💎➿➿➿➿
Congratulations, you received an ecency upvote through the curator @ahmedhayat. Keep spreading love through ecency
Thank you 🥰
The final result is so breathtaking, its amazing how you came up with this creative idea, I'm sure your sister would be do happy to receive this jewellery box.
In a few days I will give it to her, I hope my sister likes it 😊, thanks for commenting friend 🥰
Wow, picking all those boxes and recycling them to something beautiful is really creative of you. Well done dear and now your sister can have her jewelry all packed.
That's right, my friend, you will now have your organizer. Thanks for commenting 🥰
This is a beautiful gift for your second sister. You've done a good job. Well done
Thank you 🥰
Congratulations @marlynmont! You have completed the following achievement on the Hive blockchain And have been rewarded with New badge(s)
Your next payout target is 2000 HP.
The unit is Hive Power equivalent because post and comment rewards can be split into HP and HBD
You can view your badges on your board and compare yourself to others in the Ranking
If you no longer want to receive notifications, reply to this comment with the word
STOPCheck out our last posts:
Wow I love this
This is so fine
Thank you 😊
Awwwn 🥰 I so much love the outcome of the craft, turning ordinary materials into a jewelry box kudos to you. 🥰
Thank you 🥰