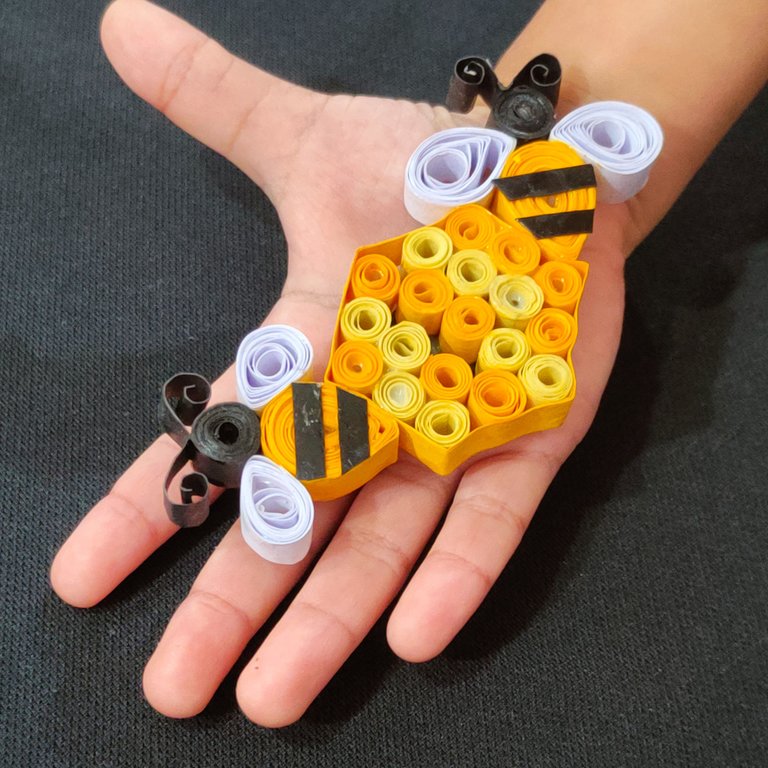
🇪🇸/🇺🇲 Magnetic refrigerator ornament with a bee theme. 🌻🐝

Bienvenidos || Welcome

Feliz jueves mis estimados amigos y lectores, algo que recuerdo con mucho cariño es mi inicio en hive, cuando me dedicaba hacer manualidades 🥰 hoy por hoy por falta de tiempo rara vez tengo la dicha de relajarme y hacer manualidades sin embargo con la próxima llegada de los 2 años de mi hija más pequeña siento que poco a poco ella es más independiente y yo tengo un poco más de tiempo así que debido a ello hoy estoy aquí participando en el concurso de la comunidad @diyhub con su temática de abejitas 🐝🍯 la cual me parece de lo más tierna ✨ si aún no saben cuál es aquí les dejo el link para que ase animen a participar aún están a tiempo ☺️ para esta actividad utilice los siguientes materiales:
Happy Thursday my dear friends and readers, something I remember very fondly is my start in hive, when I dedicated myself to making crafts 🥰 today for lack of time I rarely have the joy of relaxing and making crafts however with the upcoming arrival of the 2 years of my youngest daughter I feel that little by little she is more independent and I have a little more time so because of that today I am here participating in the @diyhub community contest with their bee theme 🐝🍯 which I find the cutest ✨ if you still don't know what it is here is the link to encourage you to participate you still have time ☺️ for this activity use the following materials:
Materiales || Materials
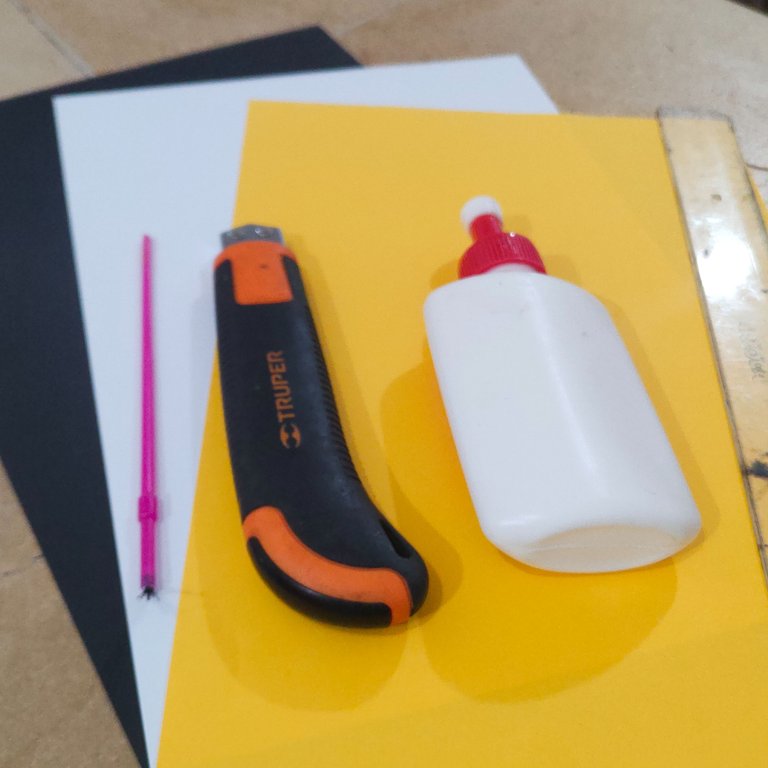
✅ Hojas de color amarillo, negro y blanco.
✅ Stilettos.
✅ Regla.
✅ Goma blanca.
✅ Herramienta artesanal para trabajar filigrana.
✅ Imán.
✅ Yellow, black and white leaves.
✅ Stilettos.
✅ Ruler.
✅ White rubber.
✅ Craft tool for filigree work.
✅ Imán.
Materiales || Materials
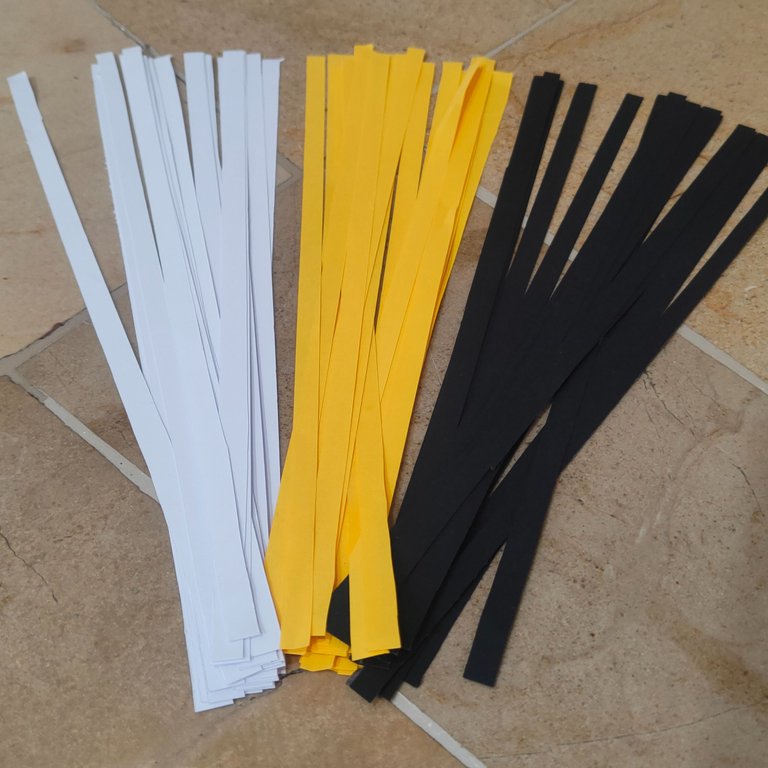
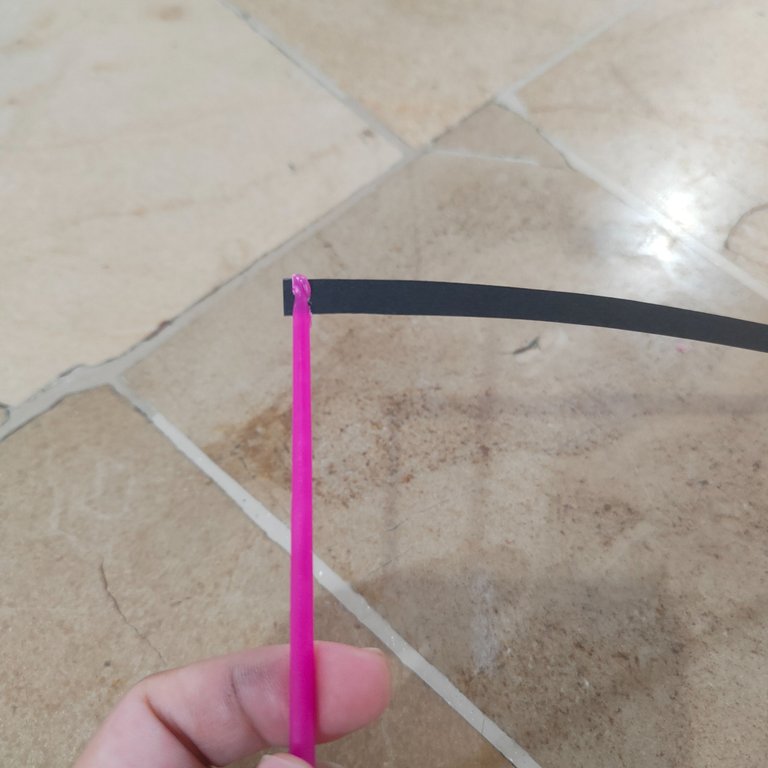
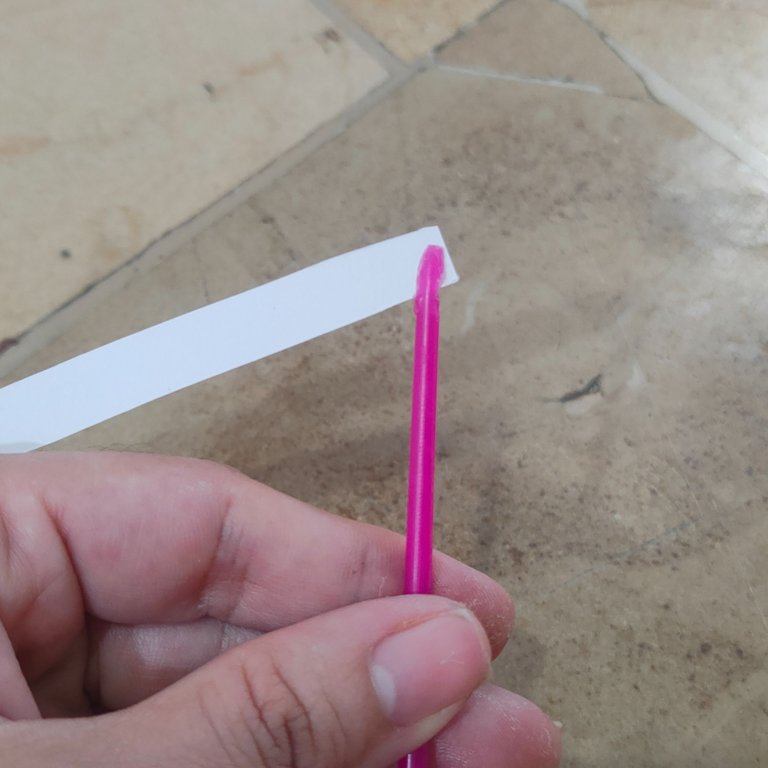
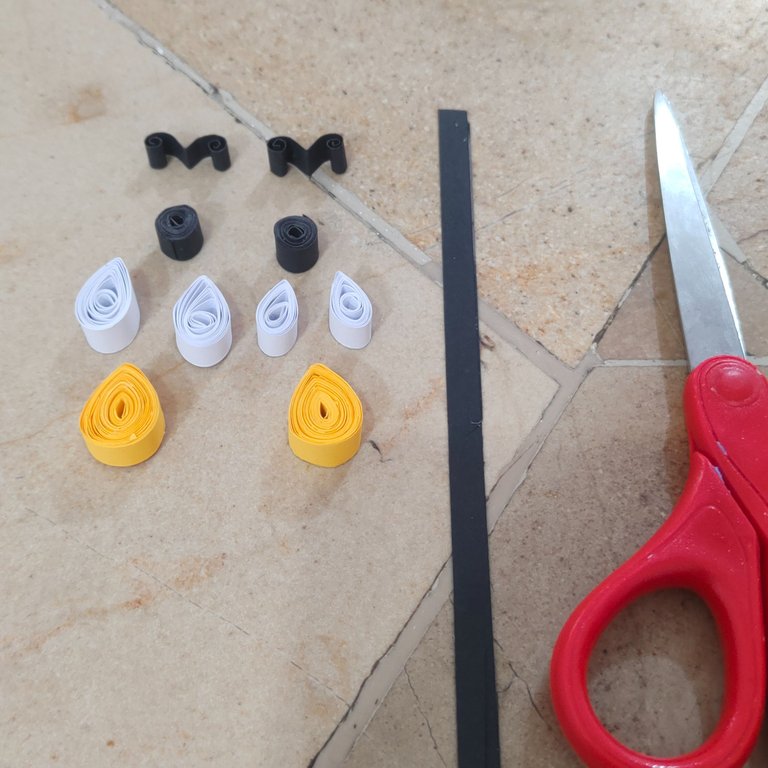
✅ Paso 1. Lo primero que hice fue tomar mis hojas de colores y con la reglas y el stiletto comencé a cortar hoja por hoja tratando que todas las tiras fuesen similar en cuanto su grosor, debo aclarar que estás tiras para trabajar filigrana las comercializan y hace el trabajo sea más sencillo, sin embargo de esta forma también pueden obtener las tiras.
✅ Step 1. The first thing I did was to take my colored sheets and with the rulers and the stiletto I began to cut sheet by sheet trying that all the strips were similar in thickness, I must clarify that these strips to work filigree commercialize them and makes the work easier, however in this way you can also get the strips.

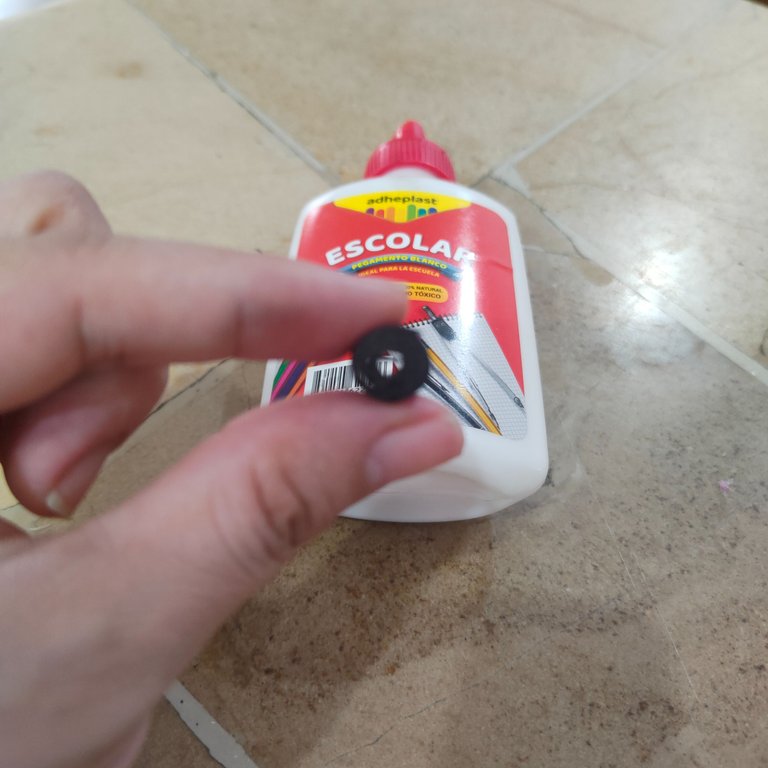
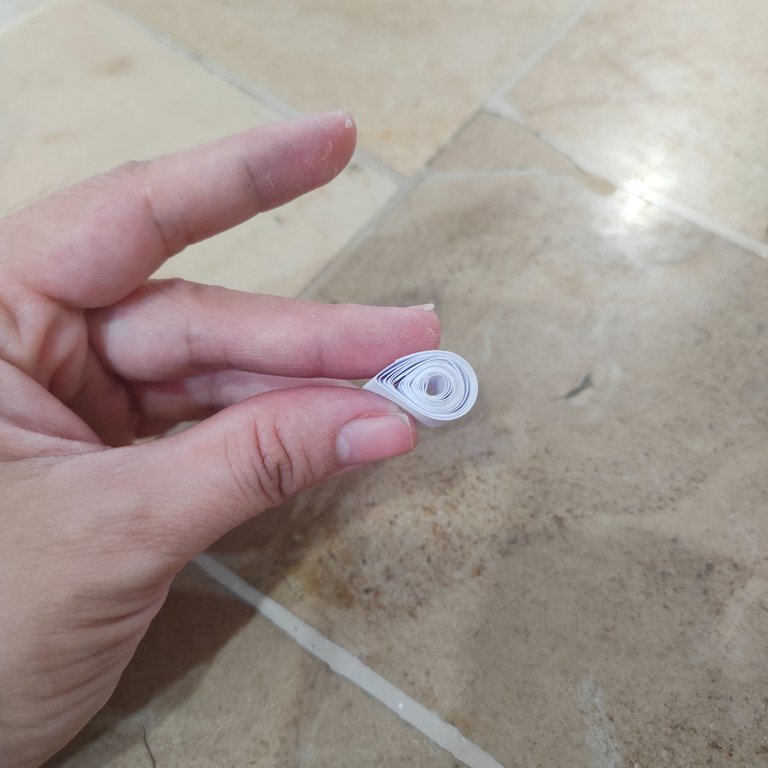
✅ Paso 2. Una vez que las tiras están lista comencé por hacer lo que sería la cabeza de la abeja y para ello ocupe una sola tira una vez que enrolle la misma con un mínima cantidad de goma o pega blanca sellé.
✅ Step 2. Once the strips are ready I started by making what would be the head of the bee and for this I used only one strip once I rolled it with a minimum amount of glue or white glue I sealed.

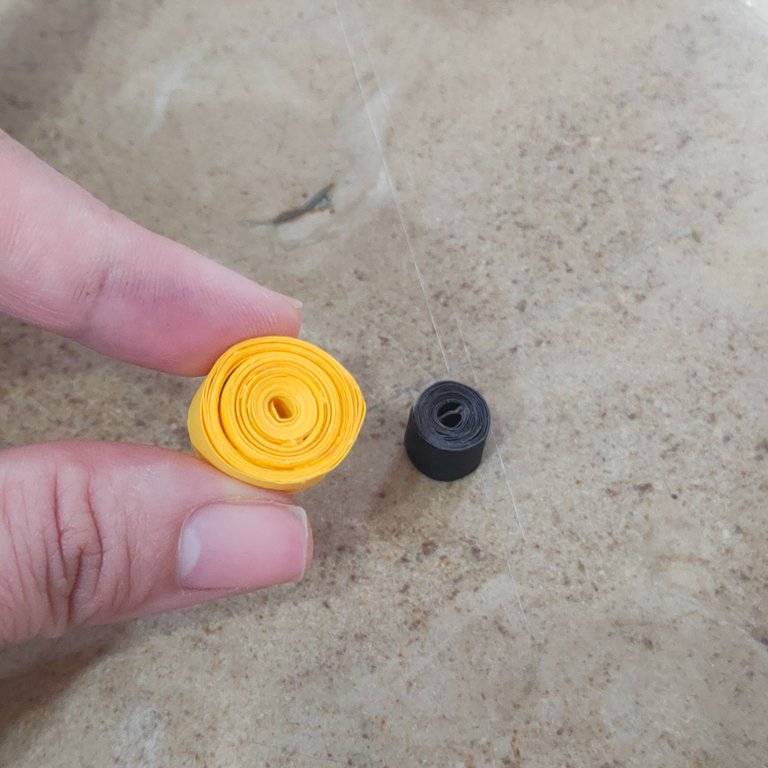
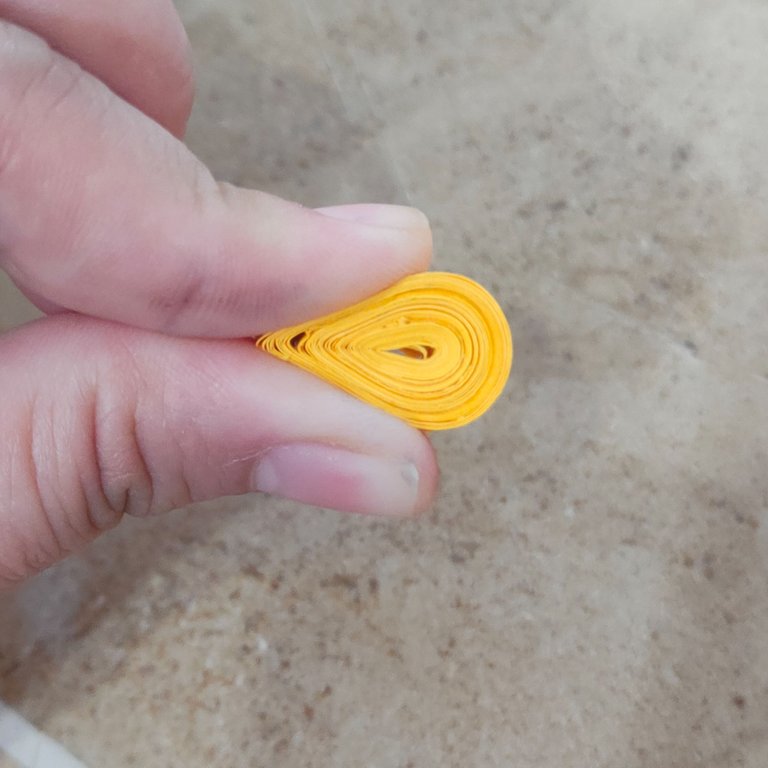
✅ Paso 3. Lo siguiente era realizar el cuerpo de la abejita por lo que utilice 3 tiras amarillas uniendo estás previamente con goma o pega blanca en sus extremos y dejando secar, posteriores enrollar y sellas con goma o pega blanca, para así finalizar dándole forma de gota de agua con los dedos.
✅ Step 3. Next was to make the body of the little bee, so I used 3 yellow strips previously joining them with white glue at the ends and let them dry, then rolled and sealed with white glue, to finish giving it the shape of a drop of water with my fingers.

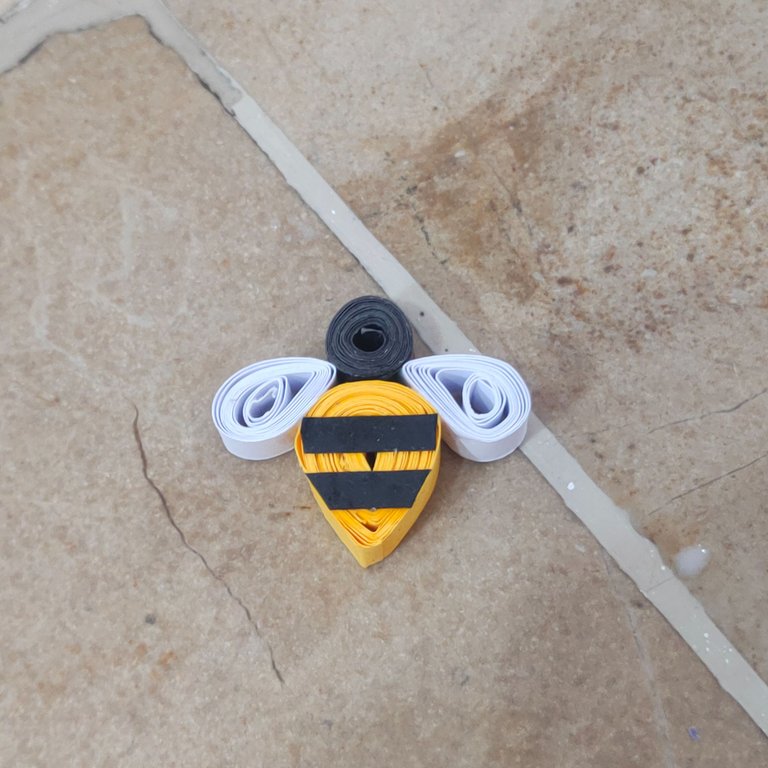
✅ Paso 4. Lo siguiente a realizar eran las alitas de la abejita por lo que ocuparía para cada ala, 1 tira y media, de igual forma enrolle pero dejando más holgada la estructura, para que al darle forma fue la misma distinta a la del cuerpo en cuanto forma.
✅ Step 4. The next thing to make were the wings of the little bee so I would occupy for each wing, 1 and a half strips, in the same way I rolled but leaving the structure looser, so that when shaping it was the same different from the body in terms of shape.

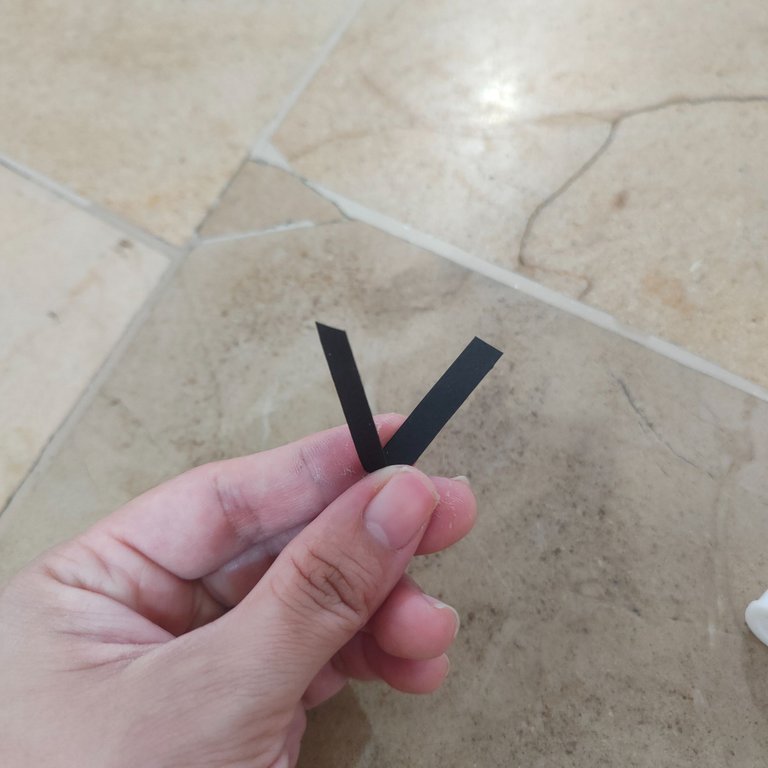
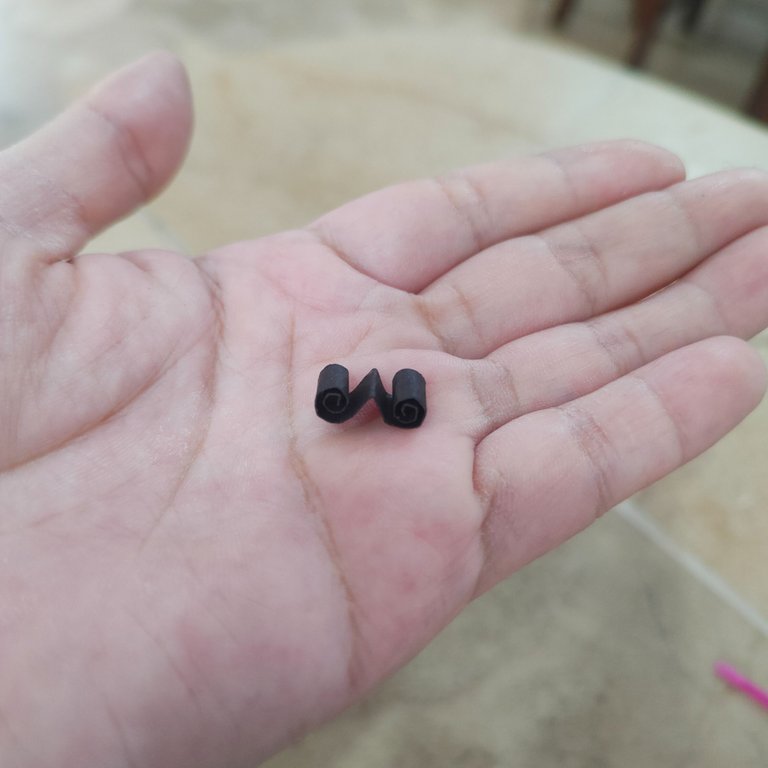
✅ Paso 5. Para las antenistas las hice con las tiras negras cortando y doblando por la mita la estructura y finalmente enrollando ambas puntas.
✅ Step 5. For the antennae I made them with the black strips by cutting and folding the structure in half and finally rolling both ends.
✅ Paso 6. Para esta actividad quise realizar 2 abejitas por lo que hice estrictas suficientes para 2 abejitas. 🐝🥰
✅ Step 6. For this activity I wanted to make 2 little bees so I made strictly enough for 2 little bees. 🐝🥰
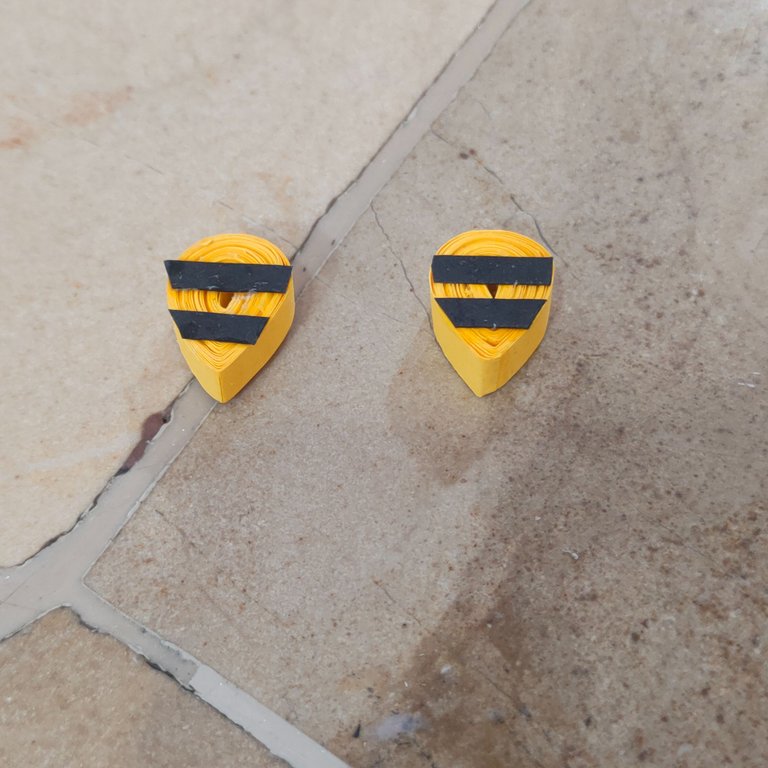
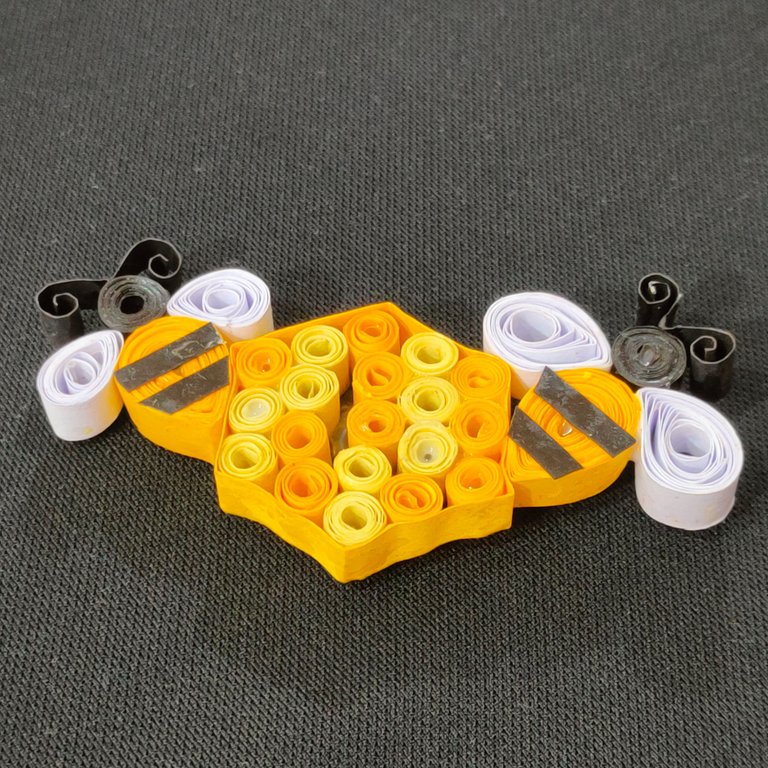
✅ Paso 7. Seguidamente con la goma o pega blanca procedí a fijar las rayitas que caracterizan el cuerpo de las abejita en la estructura amarilla, así como pegar cada una de las piezas antes realizadas tomando así forma de abejita las piezas de filigranas.
✅ Step 7. Then with the white glue I proceeded to fix the little stripes that characterize the body of the little bee on the yellow structure, as well as glue each of the pieces previously made, thus taking the shape of a little bee, the filigree pieces.
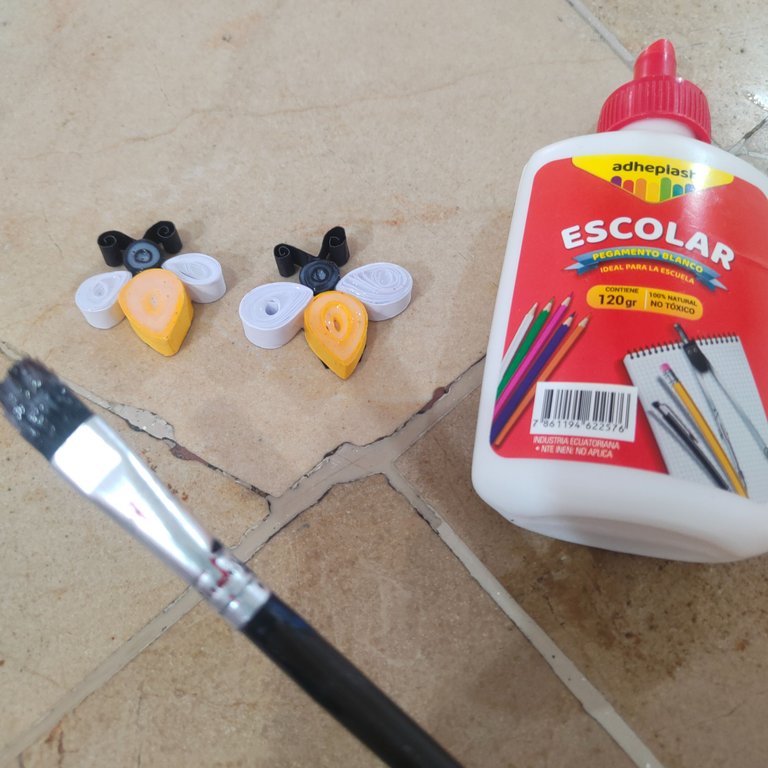
✅ Paso 8. para mayor durabilidad y resistencia aplique en toda la figura de abejitas goma o pega blanca.
✅ Step 8. for greater durability and strength, apply white glue to the entire bumblebee figure.
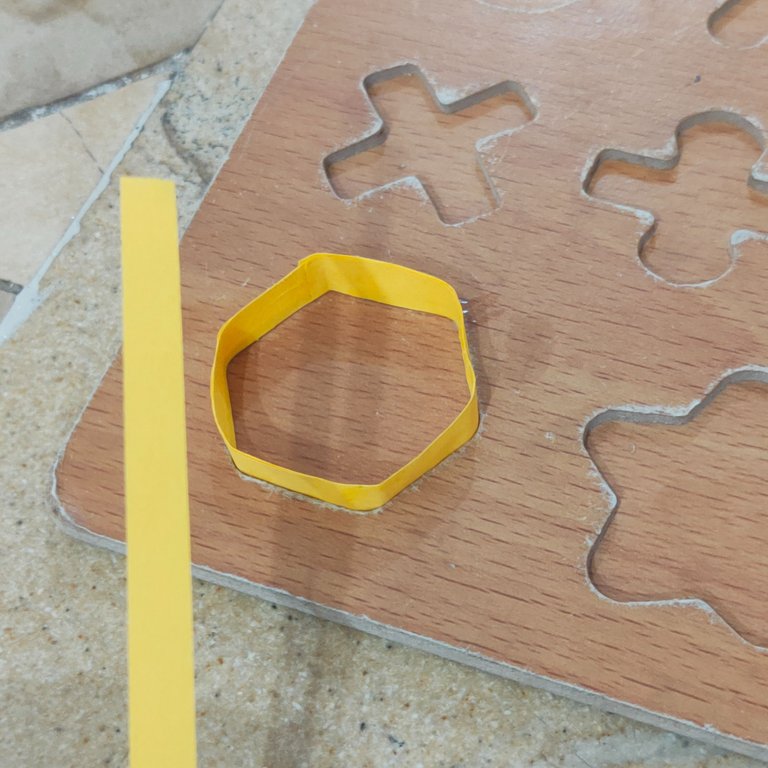
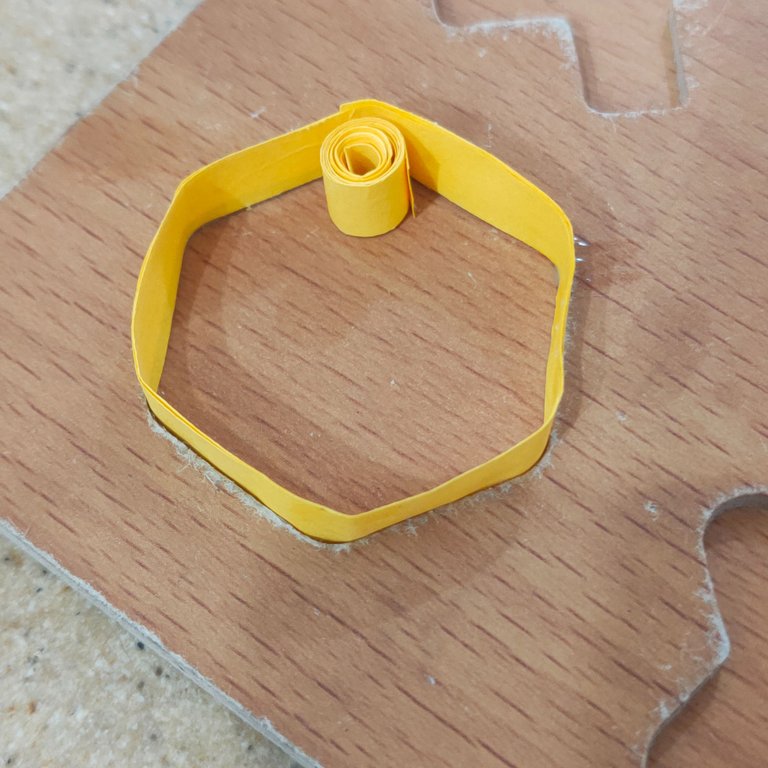
✅ Paso 9. Mientras las abejitas secaban procedí a realizar un hexágono con la ayuda de uno delos juegos didácticos de mis hija 😂 hay que ser prácticos jejejeje la verdad esto fue de mucha ayuda como guía.
✅ Step 9. While the bees were drying I proceeded to make a hexagon with the help of one of my daughter's didactic games 😂 you have to be practical hehehehehe this was really helpful as a guide.
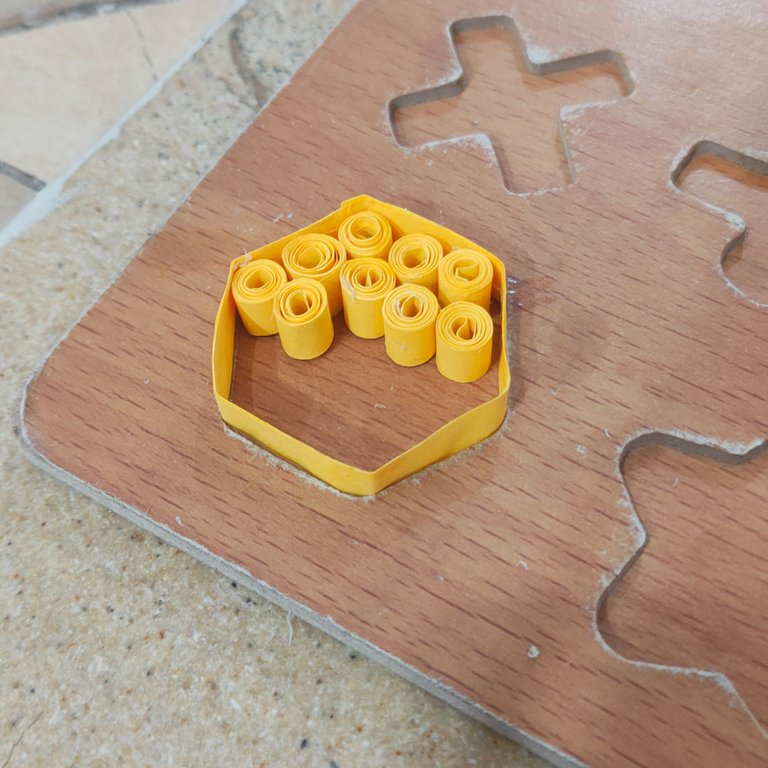
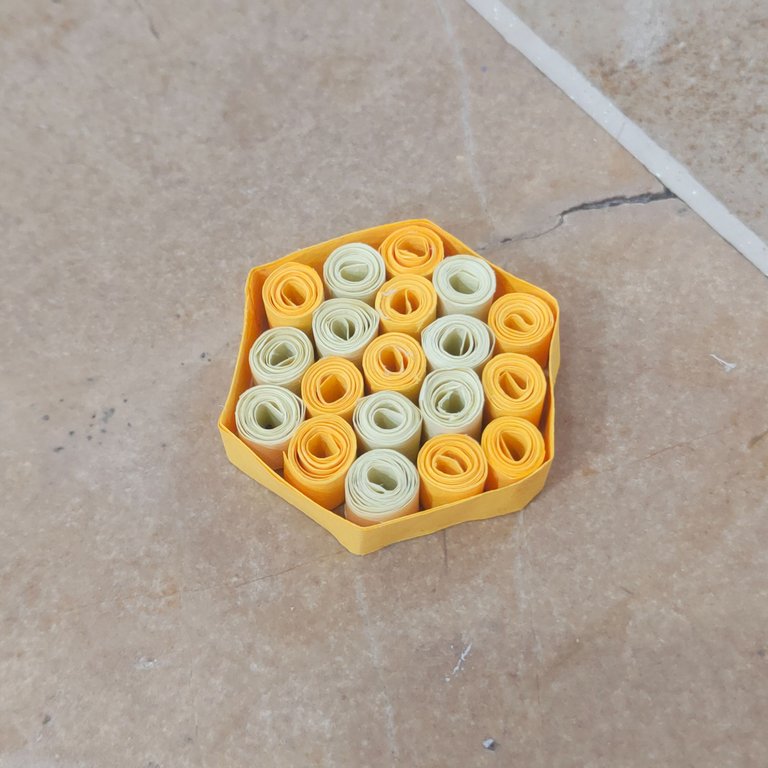
✅ Paso 10. Lo siguiente era rellenar el hexágono con figuritas circulares de filigranas todo iba de maravillas hasta que se me acabaron las tiras de color amarillo, fui a revisar si me quedan más pero para mí mala suerte esa era la última y es que estos son materiales que quedaron de aquella época que hacía manualidades, por suerte quedaba 1 hoja amarilla de un tono más claro así que con ella trabaje no quise desechar la idea del hexágono y para que se viera mejor decidí intercalar los círculos del interior del hexágono.
✅ Step 10. Next was to fill the hexagon with filigree circular figurines everything was going great until I ran out of yellow strips, I went to check if I have more but for my bad luck that was the last one and these are materials that were left from that time I was doing crafts, luckily there was 1 yellow sheet of a lighter shade so I worked with it I did not want to discard the idea of the hexagon and to make it look better I decided to intersperse the circles inside the hexagon.
✅ Paso 11. Luego de posicionar los círculos de filigrana procedí a colocarle goma o pega blanca al igual que las figuras de abejitas, ya lo siguiente era dejar secar.
✅ Paso 11. Luego de posicionar los círculos de filigrana procedí a colocarle goma o pega blanca al igual que las figuras de abejitas, ya lo siguiente era dejar secar.
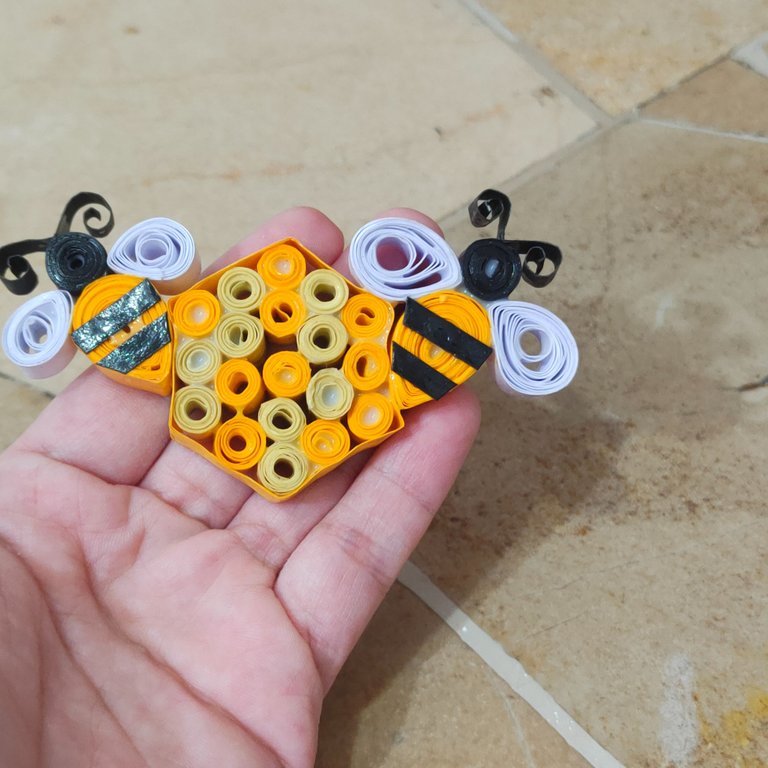
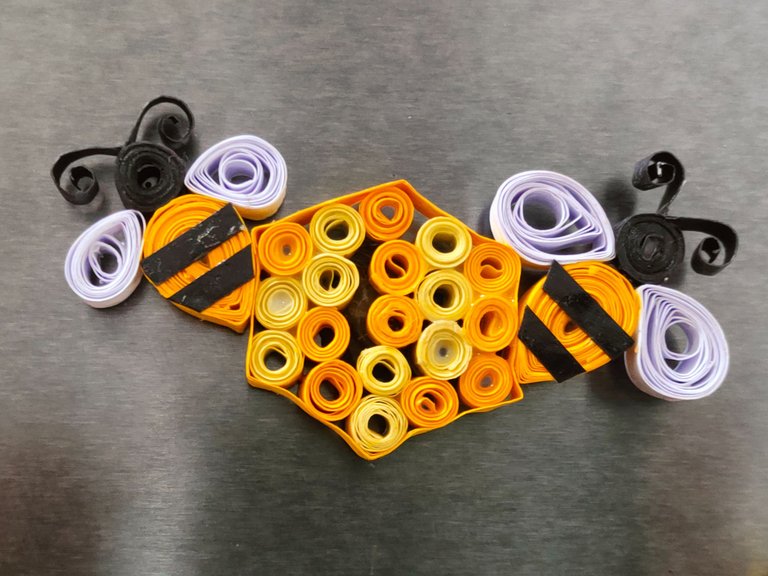
✅ Paso 12. La paciencia es una virtud que debo cultivas, aún no terminaban de secar las piezas cuando decidí unirlas para que secara ya estando las 3
✅ Step 12.Patience is a virtue that I must cultivate, the pieces had not yet finished drying when I decided to put them together to dry when the 3 pieces were already dry.
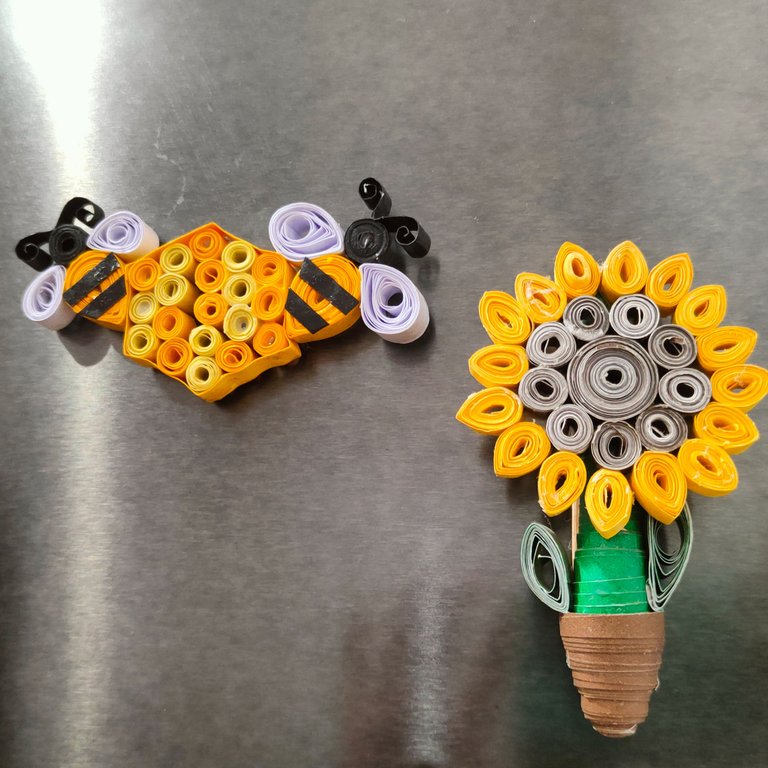
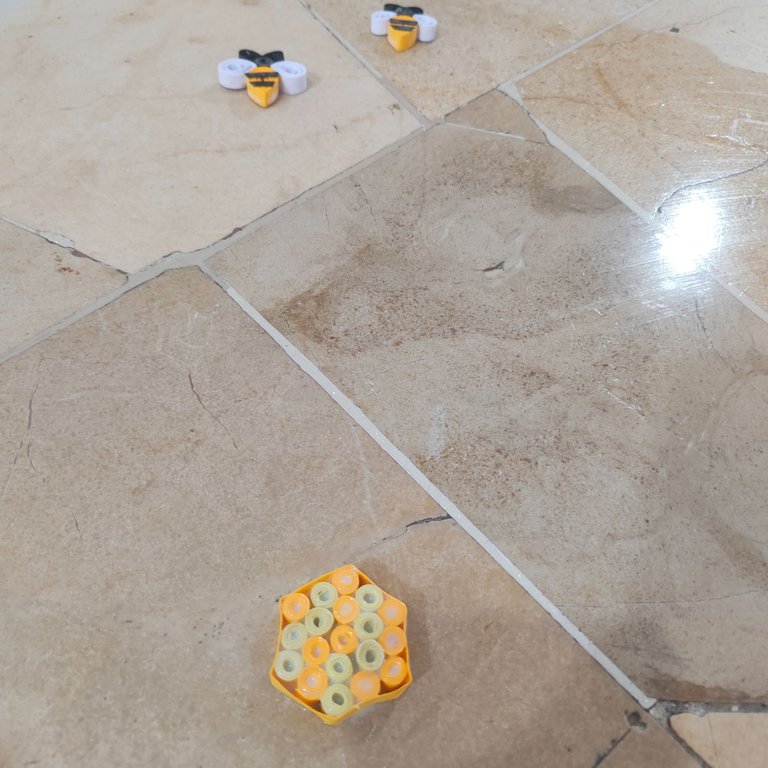
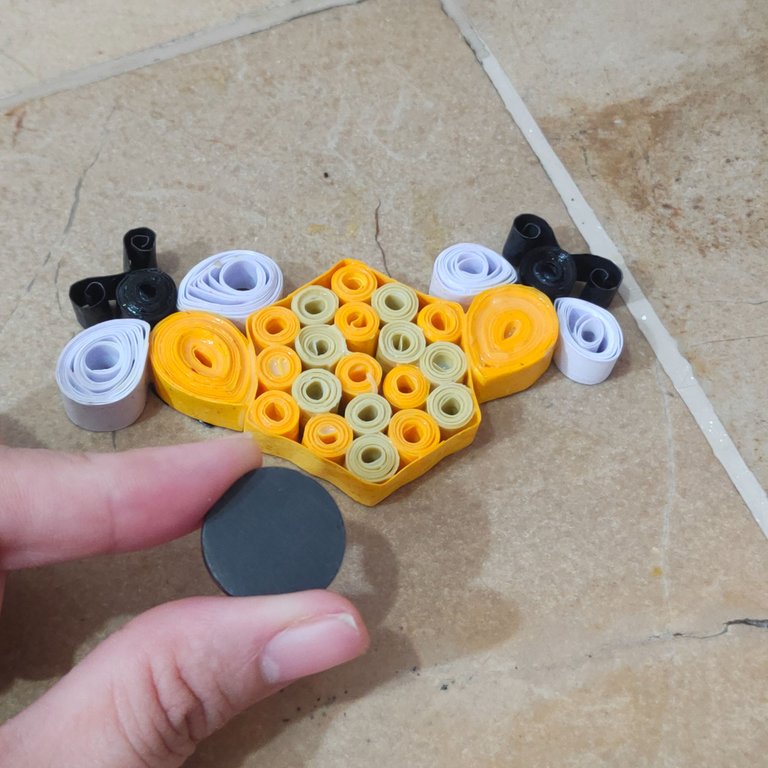
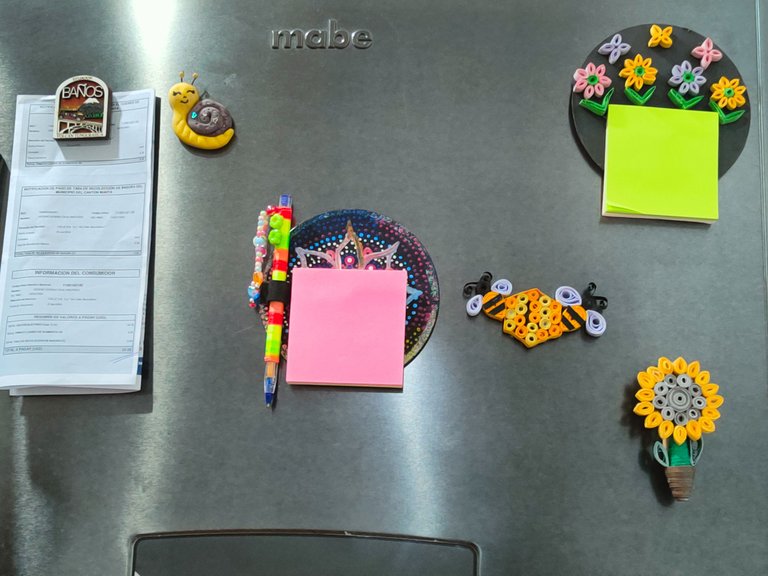
✅ Paso 13. Ya por último en la parte de atrás de la figura fije un imán, ya que desde un inicio quería que fuese un adorno para mi refrigerador donde hay otros adornos realizados con esta misma técnica.
✅ Step 13. Finally, on the back of the figure I attached a magnet, since from the beginning I wanted it to be an ornament for my refrigerator where there are other ornaments made with this same technique.
Resultado || Results
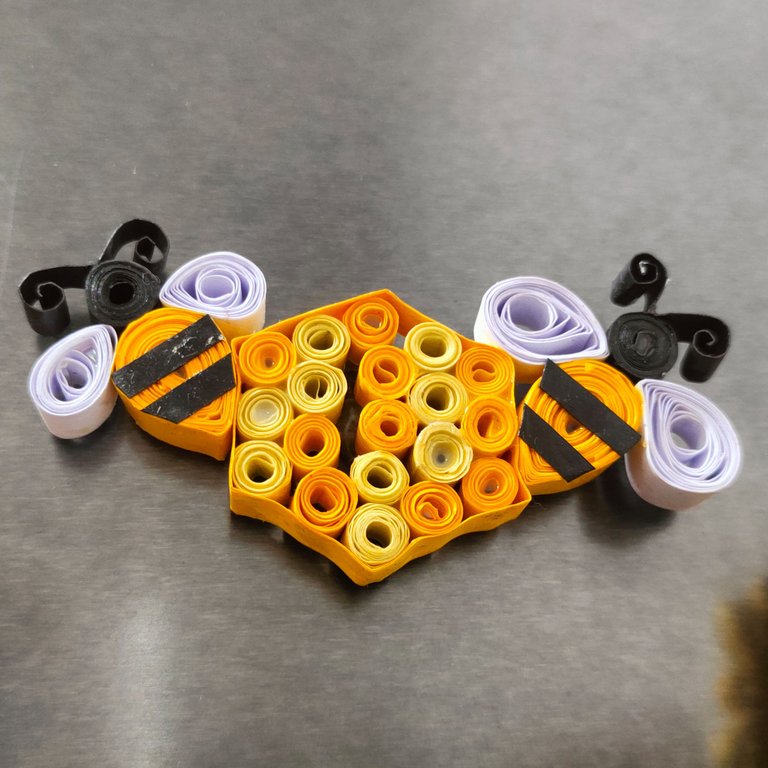
Sin duda me gustó mucho el resultado sin embargo debo admitir que me sentí muy fuera de forma en cuanto hacer manualidades ya que me llevo más tiempo de lo pensado ya que en épocas anteriores lo hubiera terminado más rápido 😅 pero bueno considero que es una buena manera de ir calentando motores para realizar más manualidades, agradezco a quienes llegaron hasta Qui por su valioso tiempo y tención así como su apoyo y comentarios esperando haya sido el contenido de su agrado me despido hasta una próxima oportunidad.
No doubt I really liked the result, however I must admit that I felt very out of shape in terms of making crafts because it took me longer than I thought because in previous times I would have finished it faster 😅 but well I think it's a good way to warm up engines to make more crafts, I thank those who came to Qui for their valuable time and attention as well as their support and comments hoping the content has been to your liking I say goodbye until next time.
La creatividad no tiene límite. || There is no limit to creativity. 🌻🌻🌻🐝🐝🐝
COMMUNITY DIYHUB.


🎥Imágenes y vídeo creados con: |Images and video created with: Youcut video| Giphy | Canva |
🇪🇸 Traducido con DeepL
Posted Using InLeo Alpha
Your refrigerator ornament is really cute. Would look great on them. Thank you for entering the contest. Good luck.
Yessssss, this technique is very cool thanks friends great contest.
Me encanta.... Se ve muy lindo y súper original 😊💖👏
Muchas gracias amiga me legra mucho saber que fue de tu agrado dese acá un cálido abrazo. ✨☺️
Pues te felicito, te quedo muy bonito, a mi me encanta el arte de la filigrana, se puede crear de todo, con mucha paciencia jiji, que bueno que lo intentaste, te salio muy bien, saludos.
Gracias amiga y concuerdo contigo la filigrana es un arte muy bonita tenía mucho tiempo sin hacer algo así gracias por tu calida visita amiga.
Está muy lindo el diseño y la idea de hacer lingas figuras para adornar el refrigerador, la verdad que en el tiempo que tengo trabajando la técnica no se me había ocurrido, jajajjaa, buen emprendimiento...
Gracias por participar en el concurso y dejarnos tu bonita creación @mili2801 😊
!discovery 35
Gracias amiga bella tus palabras son música para mis oidos ya que vos sos la mejor artesana en esta técnica amiga, gracias por tu calida visita y apoyo un abrazote mi linda.
This post was shared and voted inside the discord by the curators team of discovery-it
Join our Community and follow our Curation Trail
Discovery-it is also a Witness, vote for us here
Delegate to us for passive income. Check our 80% fee-back Program
Gracias por el apoyo estimados amigos.
que lindo, quedo genial!
--
How nice, it looked great!
Gracias guapa!!!! ✨🥰
😃Pero qué lindo trabajo @mili2801, me pareció superinteresante, las técnicas artesanales que utilizaste, me parecen una gran idea, para iniciar y crear grandes y creativas obras de arte. Quede fascinada. Gracias por compartir.🤗
Muchas gracias guapa me alegra mucho que fuese de tu agrado tenía mucho tiempo sin ponerla en práctica 😅 me alegra volver a realizar manualidades desde acá un cálido abrazo gracias por tu calida visita y comentarios. ✨🌻🐝
Encantada mi querida amiga, es todo un gusto.🙂
¡Un fuerte abrazo!!, y todo el éxito, me alegra que estés retomando todo ese potencial artístico tan bonito.💞💙
Indeed, this is extremely beautiful. You sure did a nice job and am overwhelmed with the outcome. Kudos ma'am 👍