[ES-EN] Origami Contest x DIYHUB - Flapping dragon
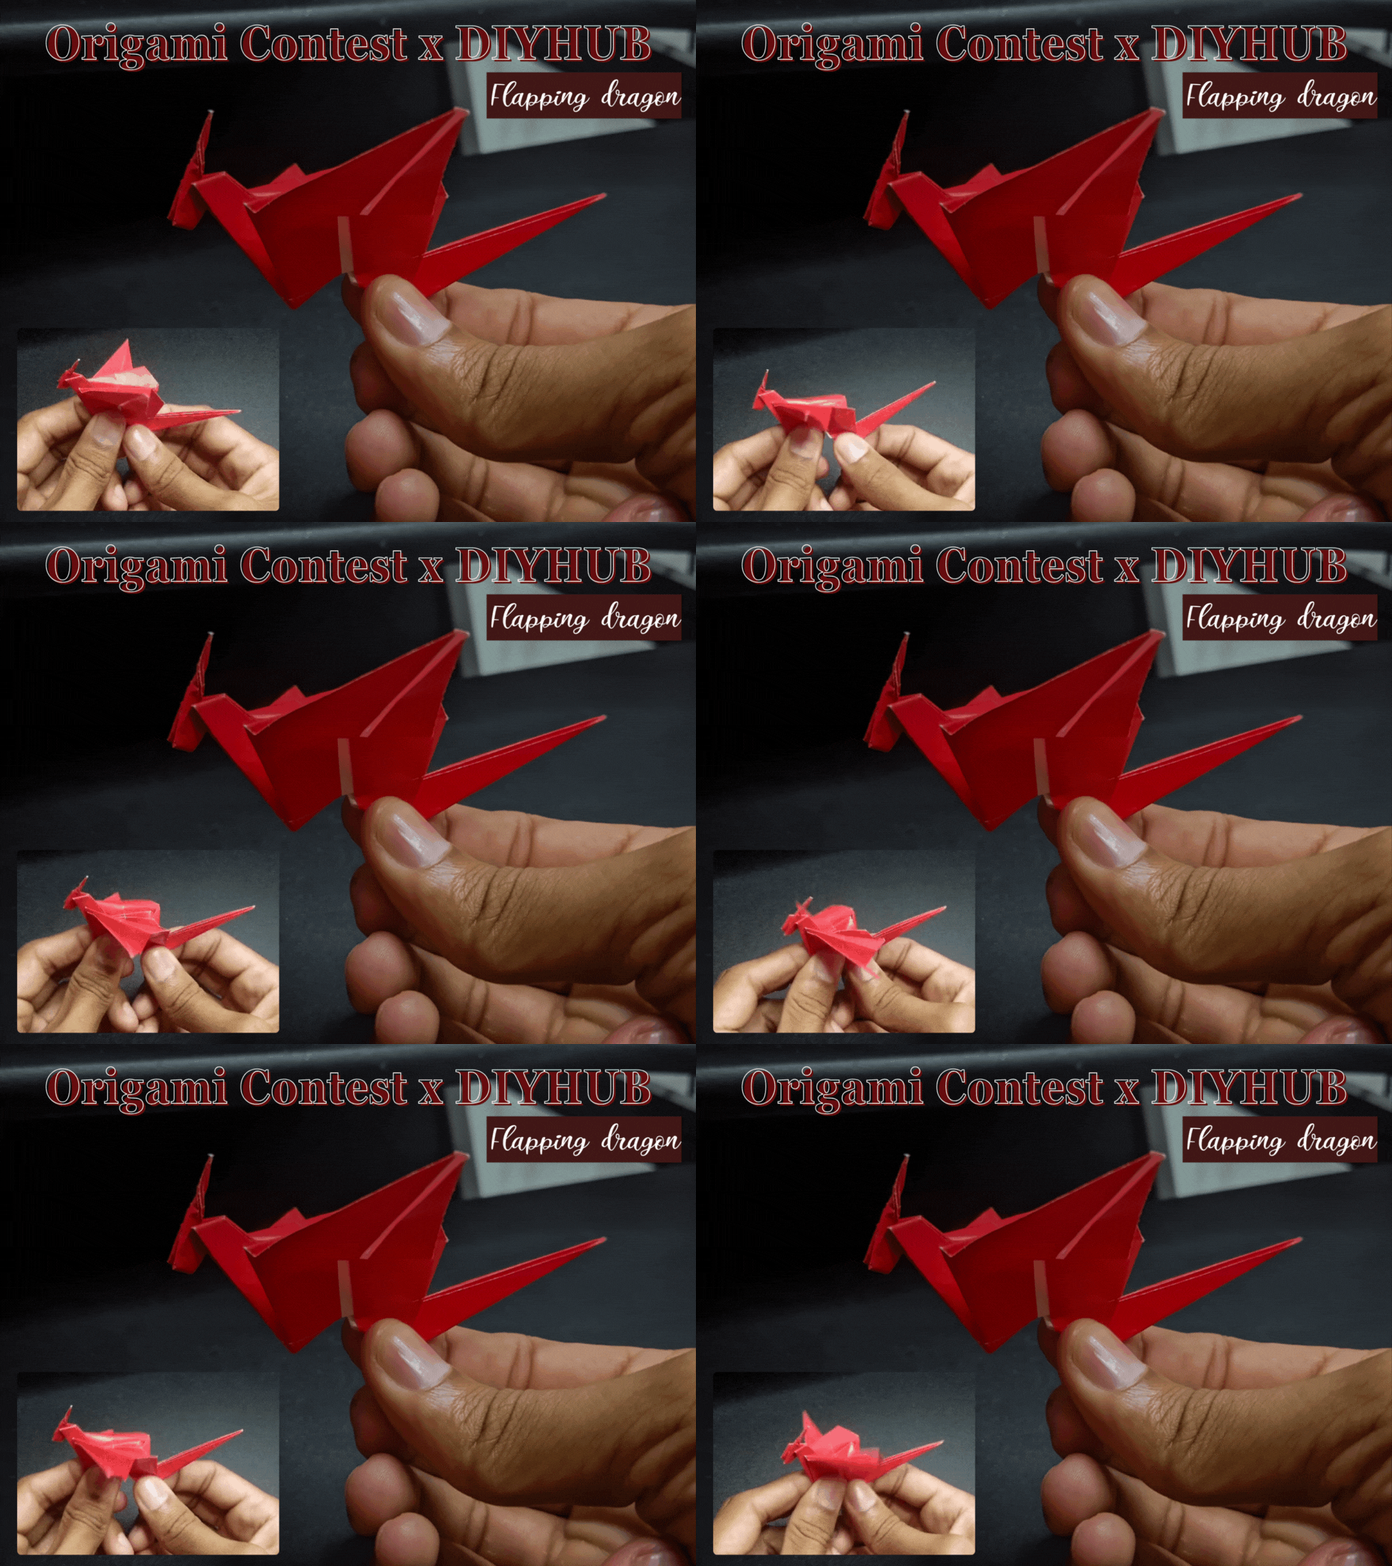
Hola amigos de esta comunidad, en esta ocasión les traigo mi participación en el concurso de @diyhub con un origami muy bonito, se trata de un dragón volador y les he traído el paso a paso de cómo lo hice.
Hello friends of this community, on this occasion I bring you my participation in the @diyhub contest with a very beautiful origami, it is a flying dragon and I have brought you the step by step of how I did it.
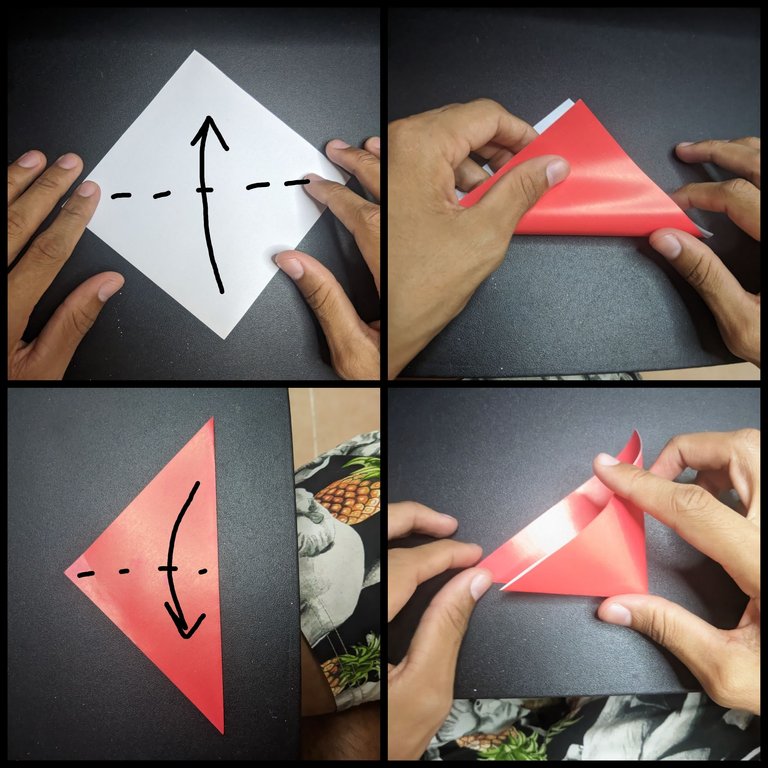
Para este origami utilicé papel lustrillo de color rojo, ustedes usen el que prefieran. Con una tijera y una regla recorté mi papel en un cuadrado perfecto de 5 x 5 pulgadas e hice los dobleces en sí misma como les muestro en esta fotografía.
For this origami I used red glossy paper, you can use the one you prefer. With scissors and a ruler I cut my paper into a perfect 5 x 5 inch square and made the folds on itself as I show you in this photograph.
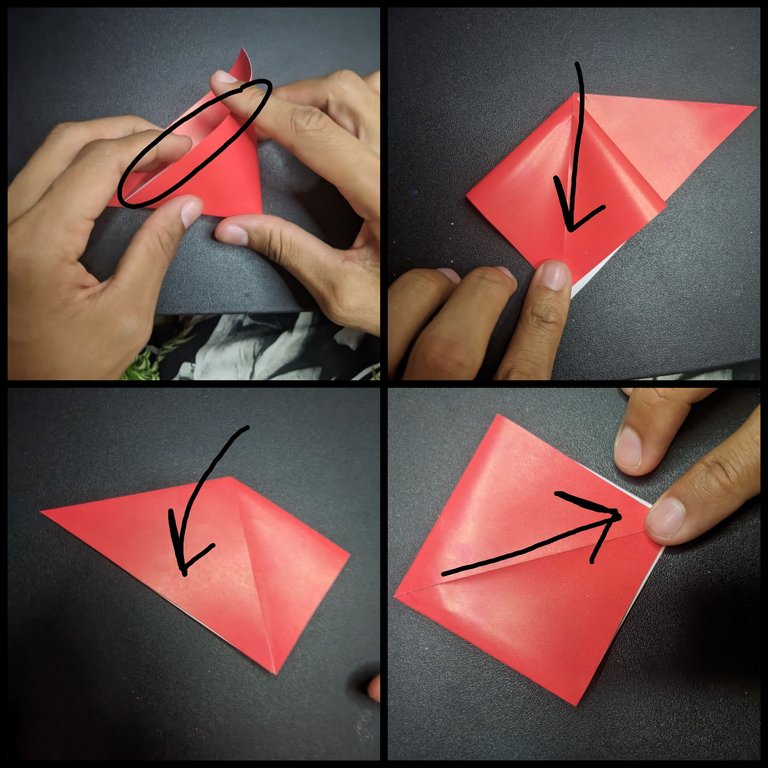
Luego abrí el papel en forma de triángulo para doblarlo sobre sí mismo y repetí el proceso en el otro lado hasta obtener un triángulo con pico arriba.
Then I opened the paper in the shape of a triangle to fold it on itself and repeated the process on the other side until I obtained a triangle with a peak at the top.
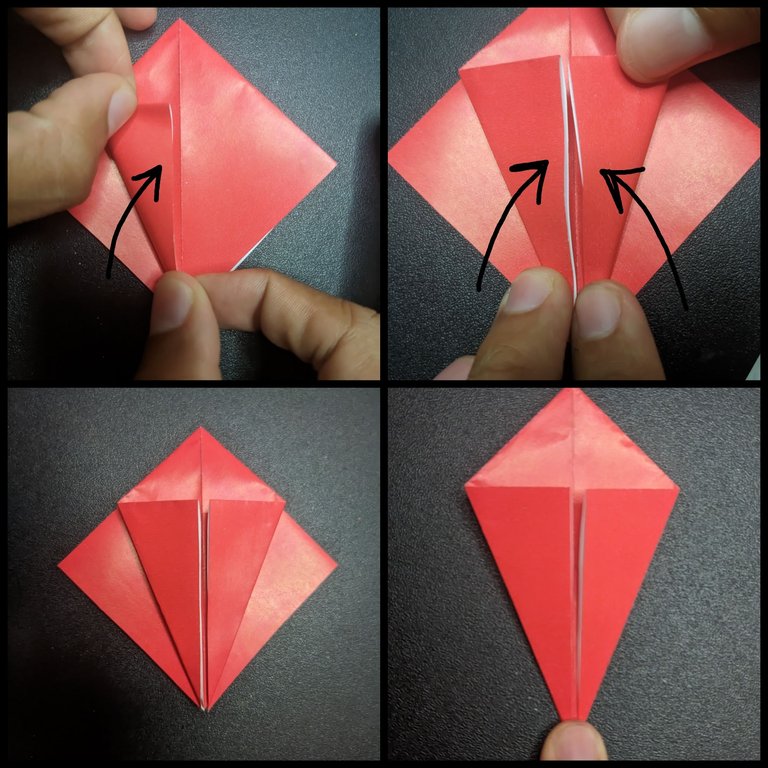
Después doblé mi figura como les muestro acá, en ambos lados.
Then I folded my figure as I show you here, on both sides.
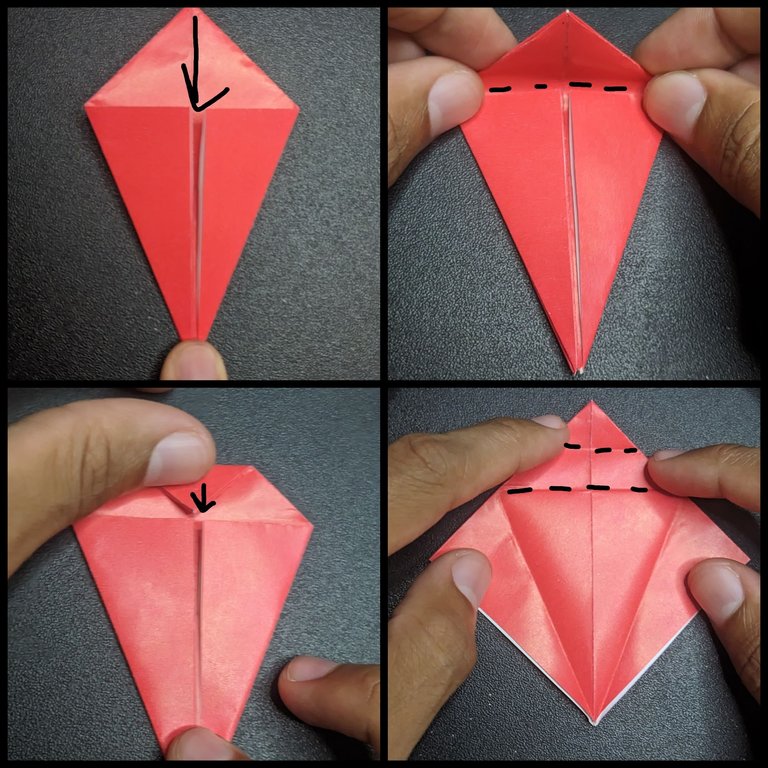
El pico que queda por encima de nuestra figura la doblaremos dos veces por ambas caras del papel, dos veces como se muestra en la imagen.
We will fold the peak that is above our figure twice on both sides of the paper as shown in the image.
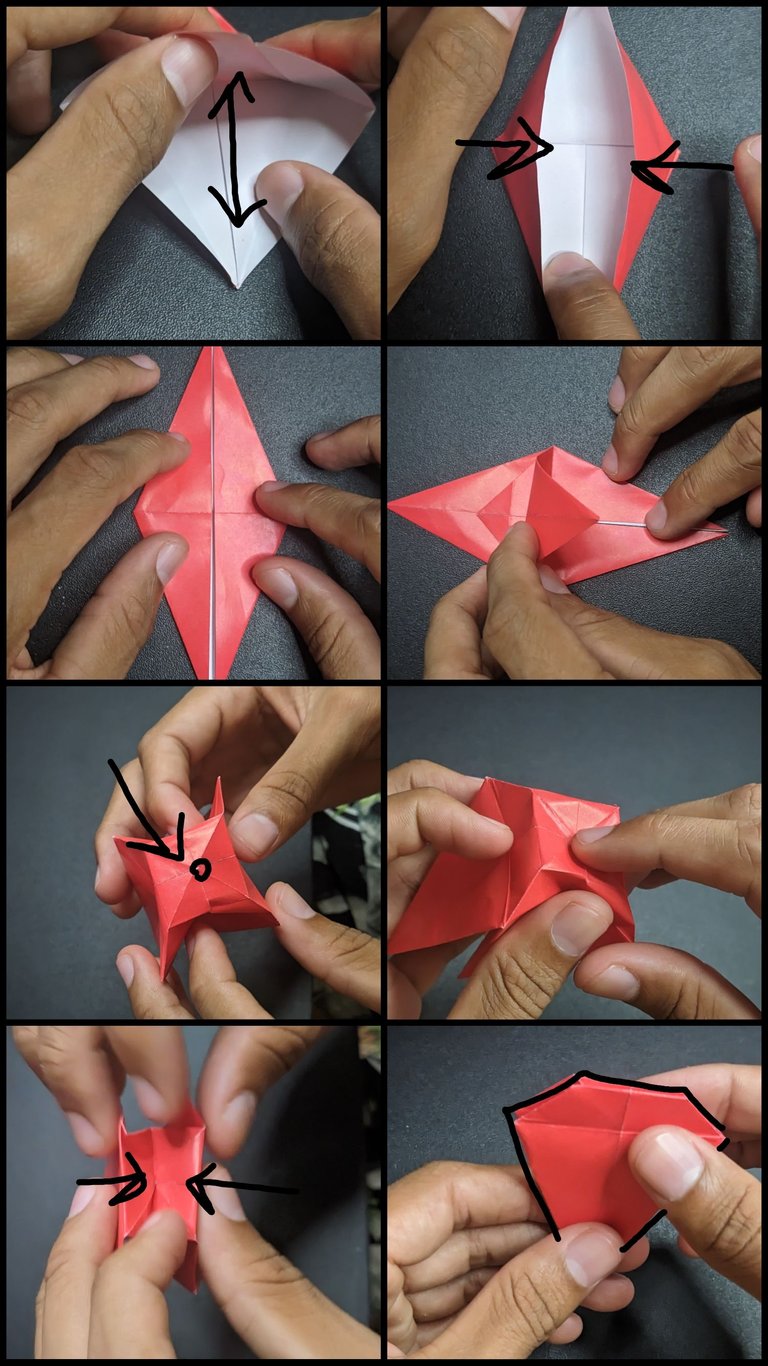
Después vamos a abrir en el medio hasta el primer dobles del papel como se muestra en la imagen, este creará un cuadrito en la parte superior de nuestro papel al abrirlo, y esta parte es la más delicada a que hay que hundir ese recuadro hacia adentro de sí.
Then we are going to open in the middle until the first fold of the paper as shown in the image, this will create a small square in the upper part of our paper when we open it, and this part is the most delicate to which we have to sink that square inwards of himself.
Abrimos en sí mismo esta nueva figura en forma de diamante para empezar a dar la primera forma del dragón, su cabeza. Doblando hasta la mitad y luego en diagonal de una de las puntas que será la cabeza del dragón.
We open this new diamond-shaped figure in itself to begin to give the first shape of the dragon, its head. Folding halfway and then diagonally from one of the points that will be the head of the dragon.
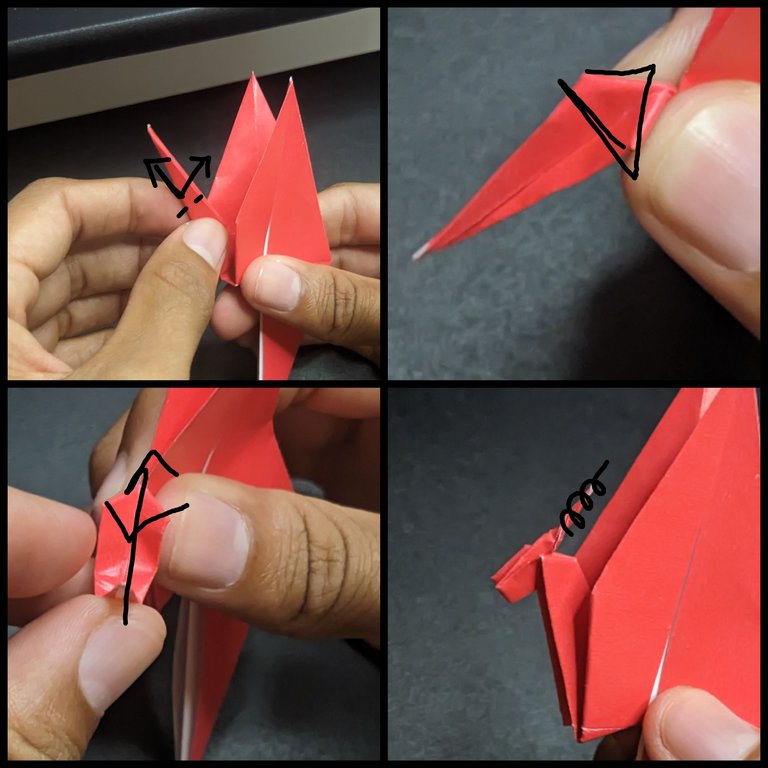
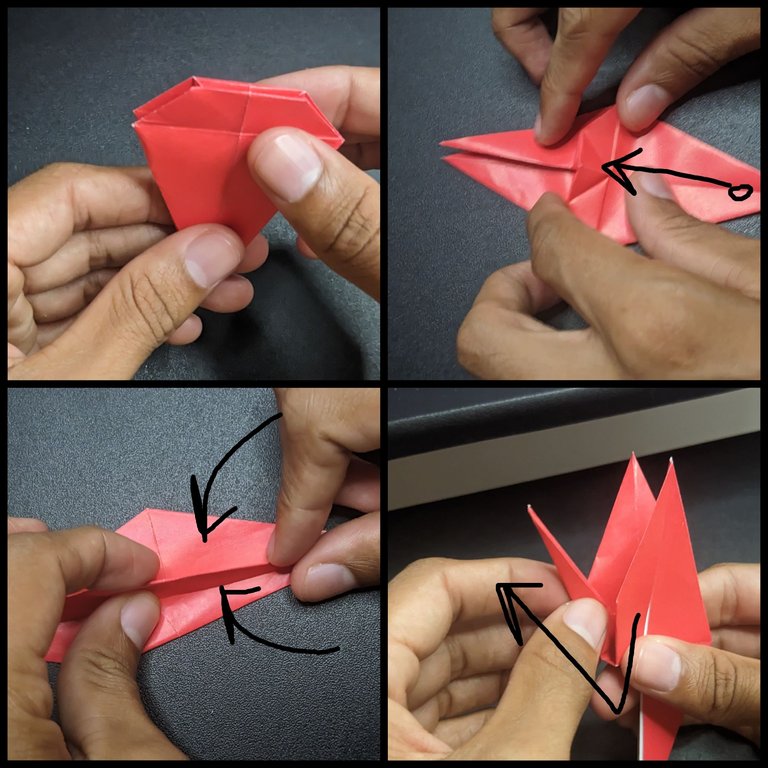
Como mencioné anteriormente debemos doblar hacía la diagonal y luego meter el papel sobre sí mismo, para que nos quede un punta al final que enrrollaremos como el cuerno de la cabeza del dragón.
As I mentioned before, we must fold diagonally and then tuck the paper over itself, so that we have a point at the end that we will roll up like the horn of the dragon's head.
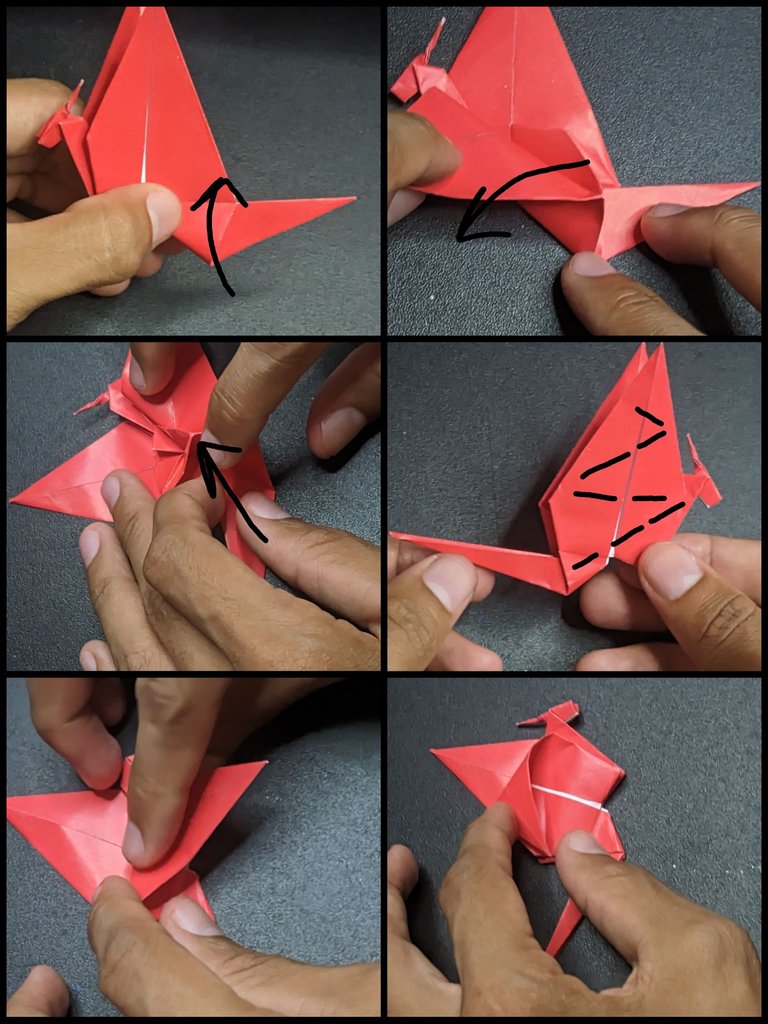
Ya con esta figura y la cabeza del dragón completada, sólo debemos abrir en sí misma la parte de la cola para doblar la parte interna que le dará la movilidad a las alas del dragón, y estas últimas las doblaremos en zig zag y de esta forma lograremos nuestro dragón de origami.
Now with this figure and the head of the dragon completed, we only have to open the part of the tail itself to fold the internal part that will give mobility to the dragon's wings, and we will fold the latter in a zig zag and in this way we will achieve our origami dragon.
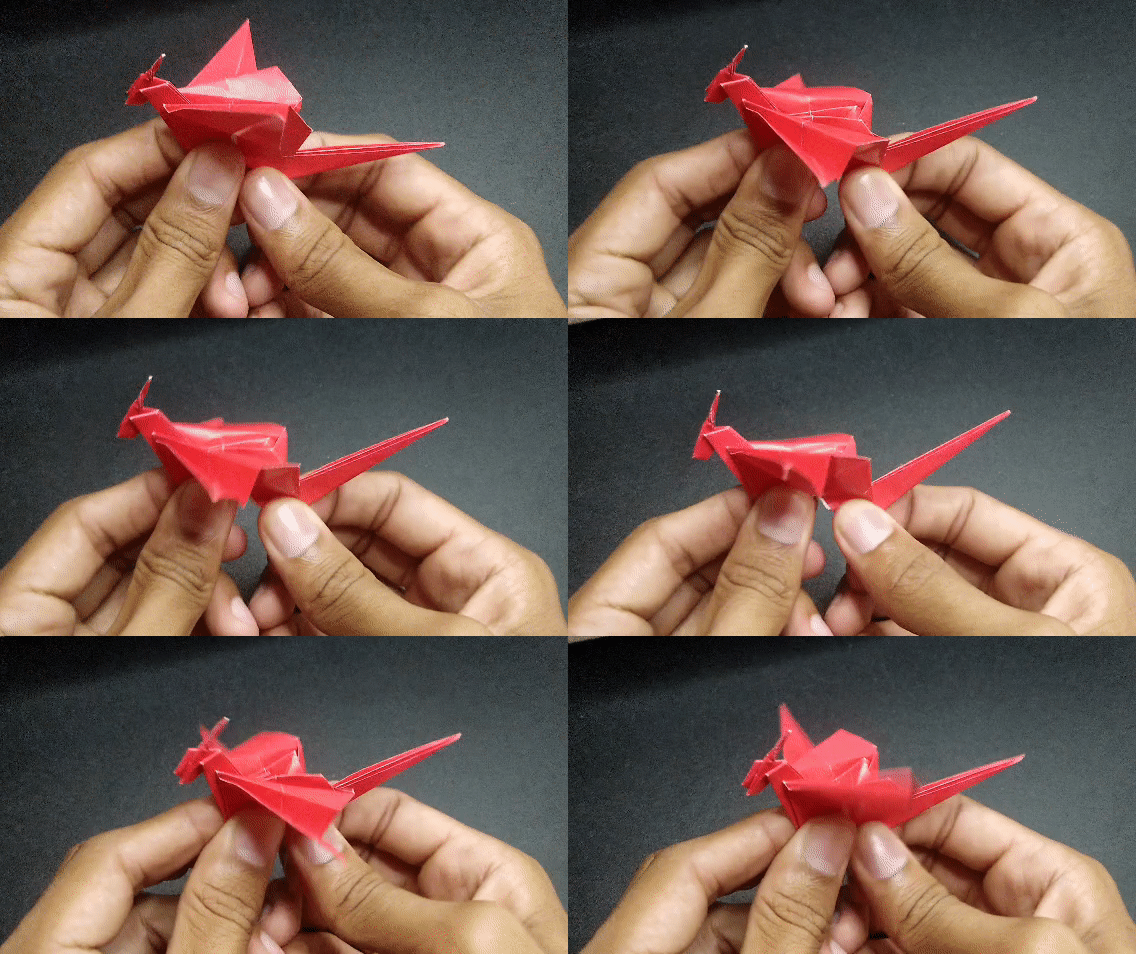
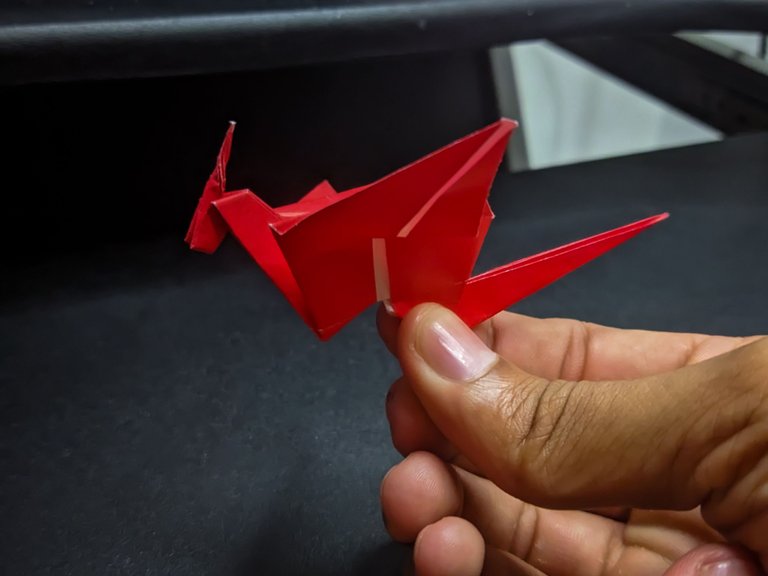
Y este fue el resultado final, admito que practiqué un poco antes con un tutorial hasta lograr sacar esta figura, aunque este fue mi segundo intento porque es bastante fácil después que lo haces una primera vez. Espero que les haya gustado mi entrada y el paso a paso.
And this was the final result, I admit that I practiced a little before with a tutorial until I managed to get this figure, although this was my second attempt because it is quite easy after you do it the first time. I hope you liked my entry and the step by step.
El material acá presentado es de mi autoría. Todas las fotos las tomé con mi Moto G9 Play, la portada la edité con Canva mientras que los collages fueron creados en PicsArt, la traducción en Google Translate.
The material presented here is my own. All the photos were taken with my Moto G9 Play, the cover was edited with Canva while the collages were created in PicsArt, the translation in Google Translate.
Se ve súper tierno 😍 de verdad que me gustó mucho!
Verdad que si eh? Me gustó mucho hacerlob
!DIY
Excellent piece of origami, good participation in the contest, good luck....
Thank you, I am motivated to do many more.
Te quedó demasiado bien, el hecho de que mueva las alas le da el toque.
La paciencia y concentración es la clave amigo
Hermoso.. éxitos!
Gracias fue un poco complicado pero no imposible
Nada es imposible mientras se tengas las ganas .. 😉✨🎉
Wow this is really nice. I kinda got lost while following the directions.
This post has been selected by the Hive Learners Community team and will receive support from the lazypanda. Kindly click on the banner to visit our community and check out our Discord channel here.
If you really liked it, I can get you the step by step that I used for this post.
Que bello te quedó amigo
Gracias, me agradó mucho hacerlo realmente
I like the way it looks and by moving the wings, it looks even better. Thanks for sharing.
thank you, I'm glad you like it so much
Assalamualaikum friend hope you are very well and having a nice healthy day. In our city paddy fields or different places we see this grasshopper like you were trying to jump from the body by holding hands. It's a really lively little video. I love that every step of yours keeps me fascinated. You are good at making beautiful origami. I always wish you and your family the best. Also, I pray that the creativity of your skills amazes me, that the creator will give you the patience to create such art and better things. Thank you so much for presenting such a wonderful me. You have re-introduced the grasshopper of our country that I saw as a child. Or even when I go home, I see rice fields. Love and respect to you, stay well my friend
I am grateful and moved by your words, and thank you very much for valuing my work, it was not easy but not impossible