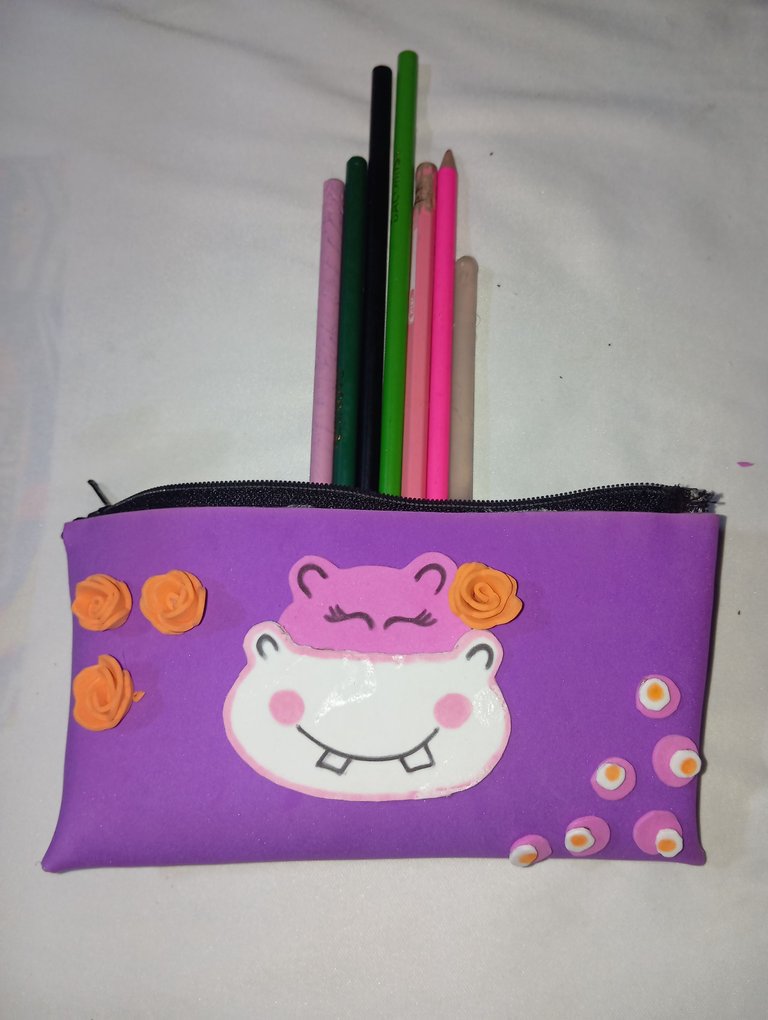
Mi participación en el concurso: Cartuchera de hipopótamo | My participation in the contest: Hippo pencil case
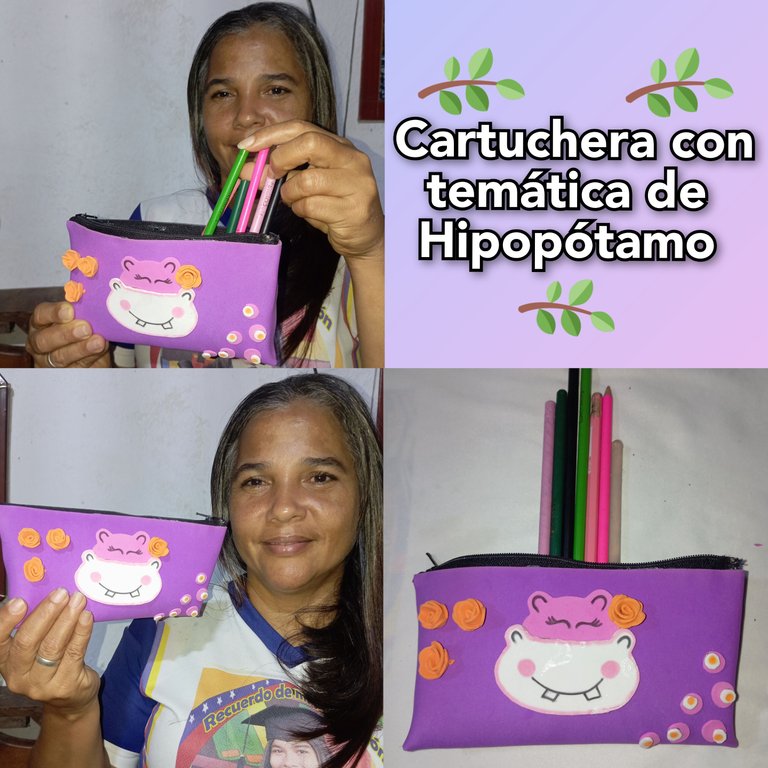
Hola buenas noches tengan todos los amigos presentes de la comunidad hivediy , Dios les bendiga a todos , un abrazo caluroso desde la distancia , hoy me encuentro feliz de formar parte de este nuevo concurso de regreso a clases con cartucheras , les cuento que es algo que me gusta , porque tengo una sobrina la cual siempre está pendiente de mis manualidades, le obsequio todo lo que hago , me ayuda en todo , les quiero compartir una cartuchera sencilla con temática de hipopótamo, unos animales súper grandes pero que son llamativos a la vez
Hello good evening to all friends of the hivediy community, God bless you all, a warm hug from afar, today I am happy to be part of this new back to school contest with pencil cases, I tell you that it is something I like, because I have a niece who is always aware of my crafts, I give her everything I do, she helps me in everything, I want to share a simple pencil case with hippo theme, some super big animals but that are striking at the same time.
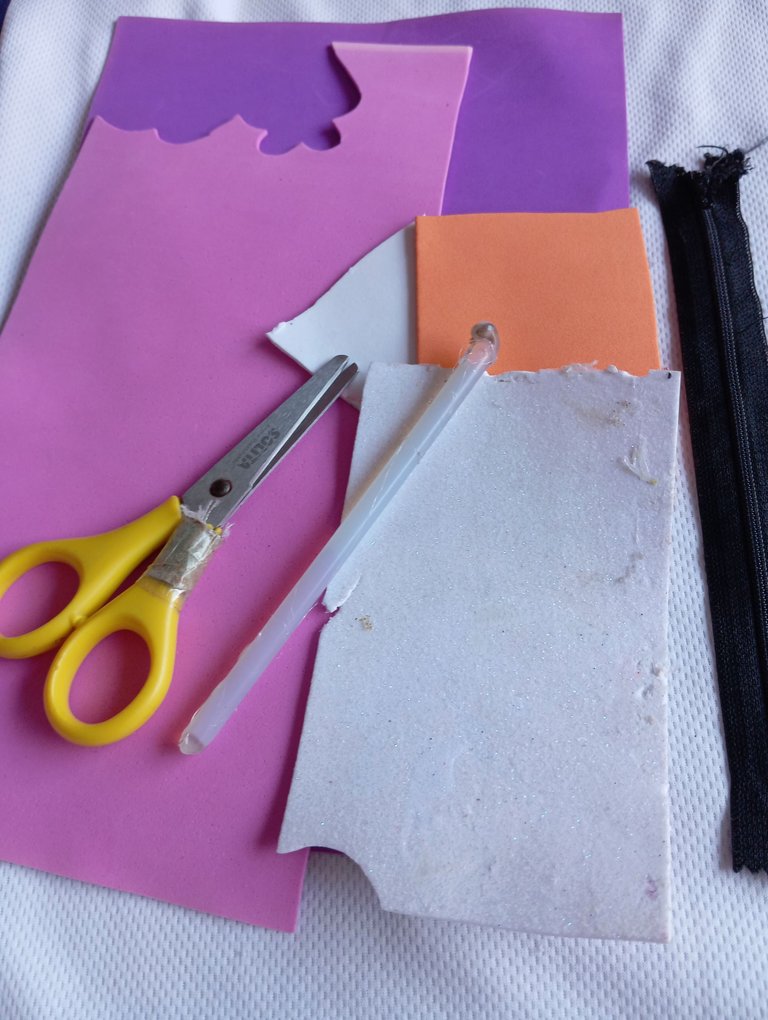
Materiales para realizar una cartuchera de hipopótamo :
-Foamis
-Cierre
-Silicon
-Tijera
Materials to make a hippo pencil case:
-Foamis
-Zipper
-Silicon
-Scissors
Pasos para realizar nuestra cartuchera escolar :
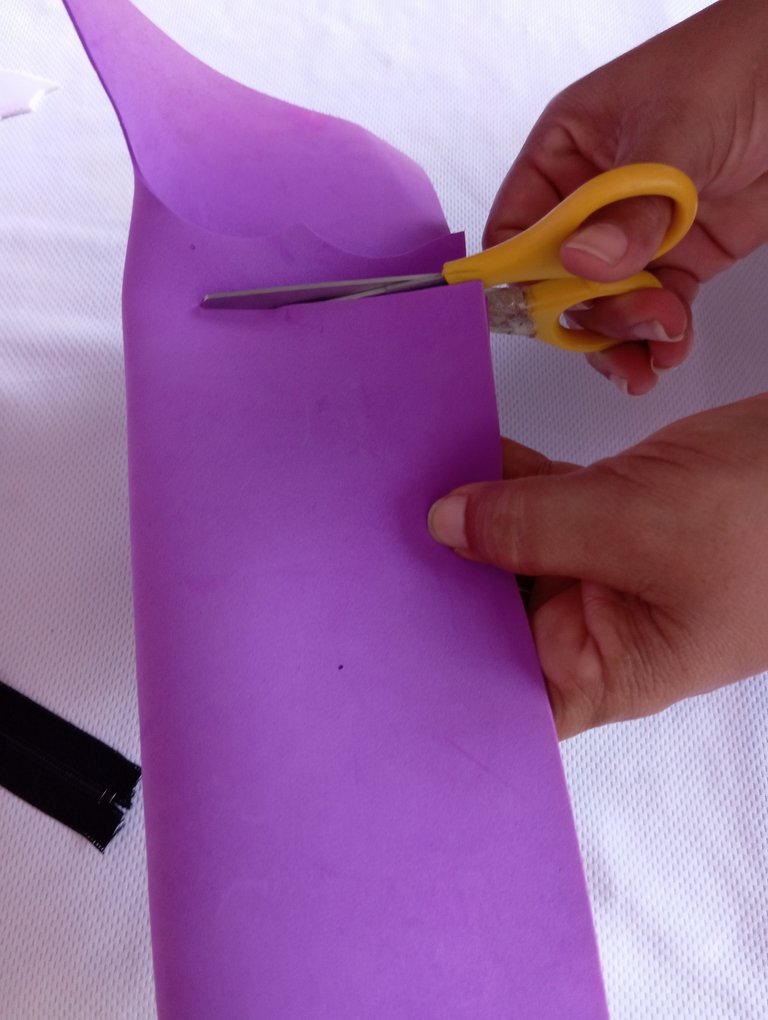
Primer paso : comenzaremos tomando nuestro foamis en dos , recortaremos dos dedos de ancho, luego en la parte de los lados lo recortaremos tipo redondo de modo que al abrir lo quede la parte de abajo moldeada amigos , tan sencillo como lo ven doblamos , reducimos el foamis de tamaño y moldeamos la parte de abajo
Steps to make our school pencil case:
First step: we will begin by taking our foamis in two, we will cut two fingers wide, then in the part of the sides we will cut it round type so that when we open it the bottom part is molded friends, as simple as you see it we fold it, we reduce the foamis of size and we mold the bottom part.
Segundo paso : en este segundo paso vamos abrir el foamis bien estirado , colocaremos a continuación el cierre plástico , en un borde añadimos silicón y lo pegamos , este será el primer paso
Second step: in this second step we will open the foamis well stretched, then we will place the plastic closure, on one edge we add silicone and glue it, this will be the first step.
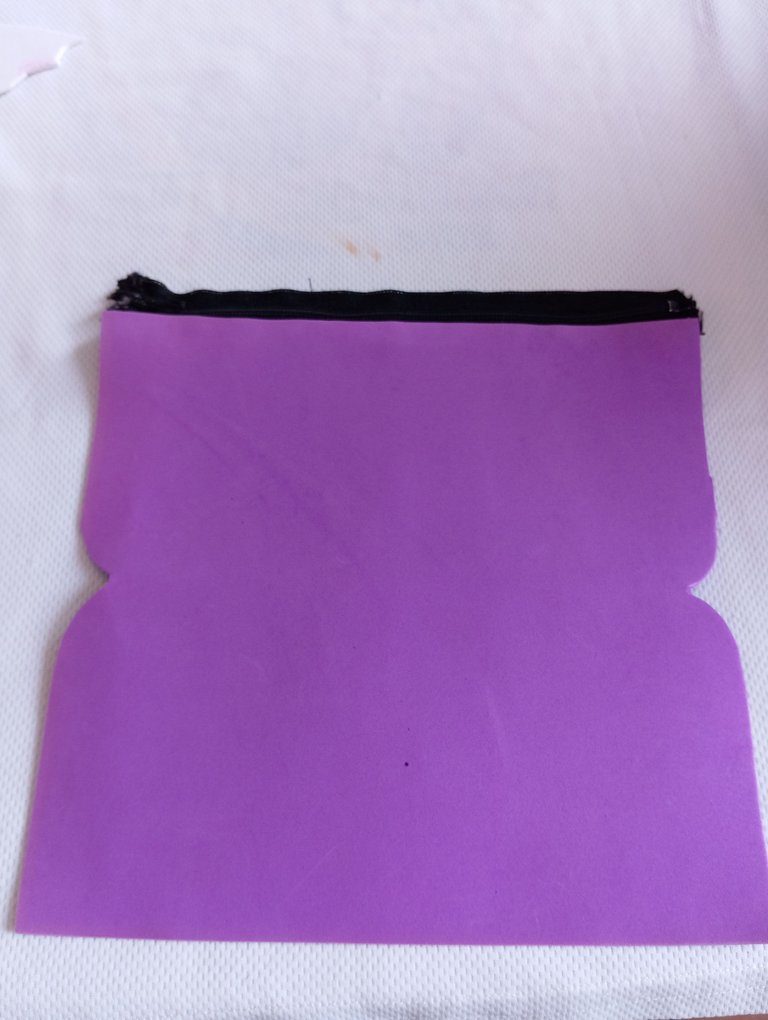
Tercer paso : luego vamos a continuar pegando el otro borde al otro lado del cierre , agregamos silicón , y pegamos borde de foamis con borde de cierre
Third step: then we will continue gluing the other edge on the other side of the zipper, add silicone, and glue the edge of the foamis with the edge of the zipper.
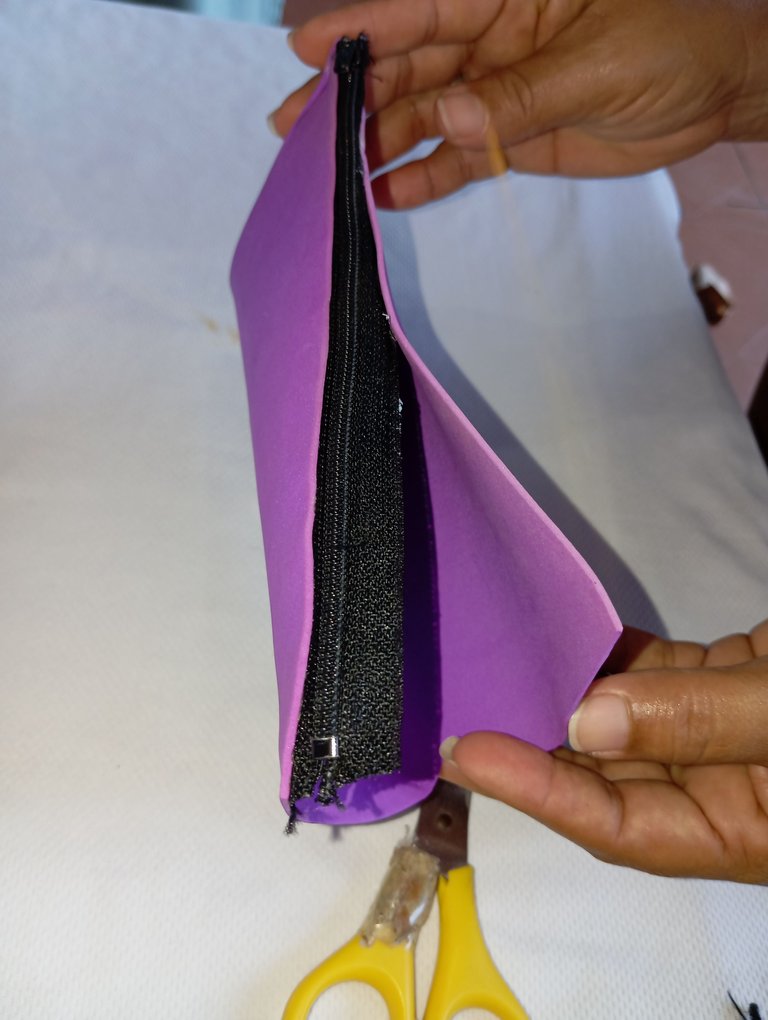
Cuarto paso : luego en nuestro cuarto paso vamos a agregar silicón en los bordes de la cartuchera y pegaremos llevando hacia atrás hasta para que queden moldeadas y no pegadas afiladas
Fourth step : then in our fourth step we are going to add silicone on the edges of the pencil case and we will glue taking backwards until they are molded and not glued sharp.
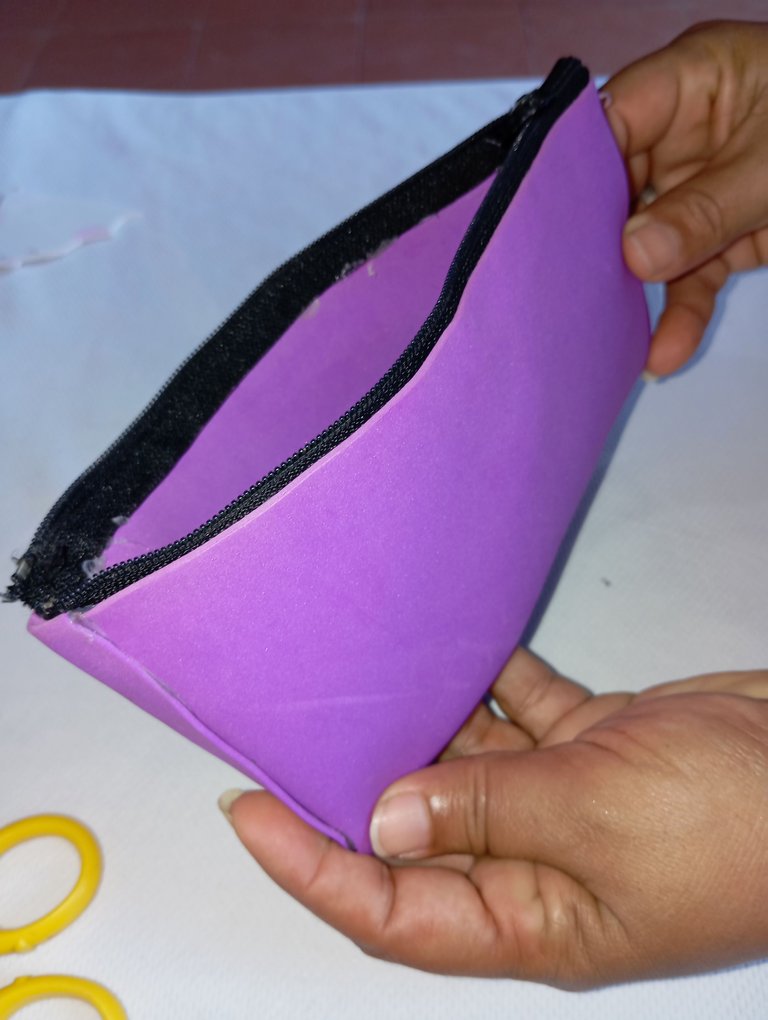
Quinto paso : en nuestro paso ,vamos a realizar un patrón con el tema a trabajar , una hipopótamo, la dibujaremos en un recorte , lo dividimos y comenzamos a marcar en los colores deseados de nuestro hipopótamo , para la parte de la trompa color blanco , para la parte de arriba rosado , luego continuaremos recortando nuestras piezas que marcamos
Fifth step: in our step, we will make a pattern with the theme to work, a hippopotamus, we will draw it in a cutout, we divide it and begin to mark in the desired colors of our hippo, for the part of the trunk white color, for the top pink, then we will continue cutting our pieces that we marked.
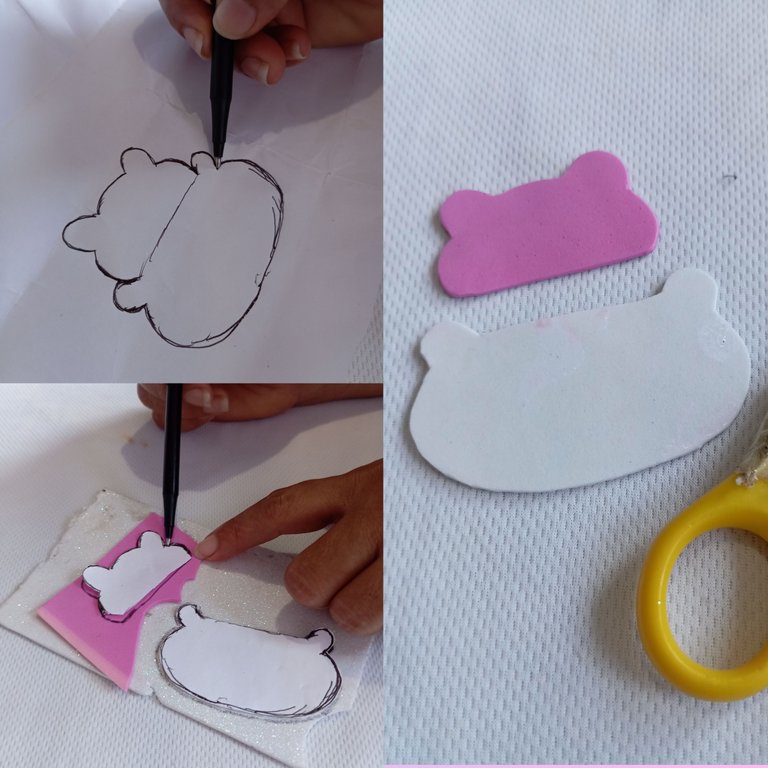
Sexto paso : tomaremos las piezas de el rostro de el hipopótamo y lo pegaremos , la parte del rostro arriba de la trompa en todo el centro
Sixth step: we will take the pieces of the face of the hippopotamus and we will glue it, the part of the face above the trunk in the center.
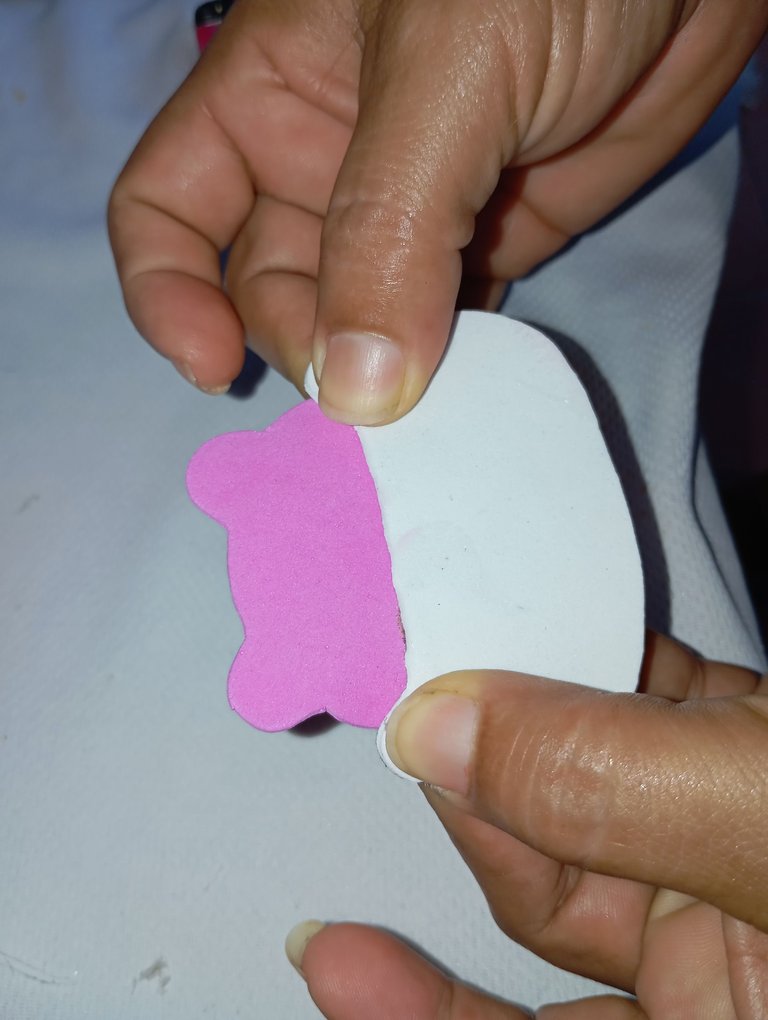
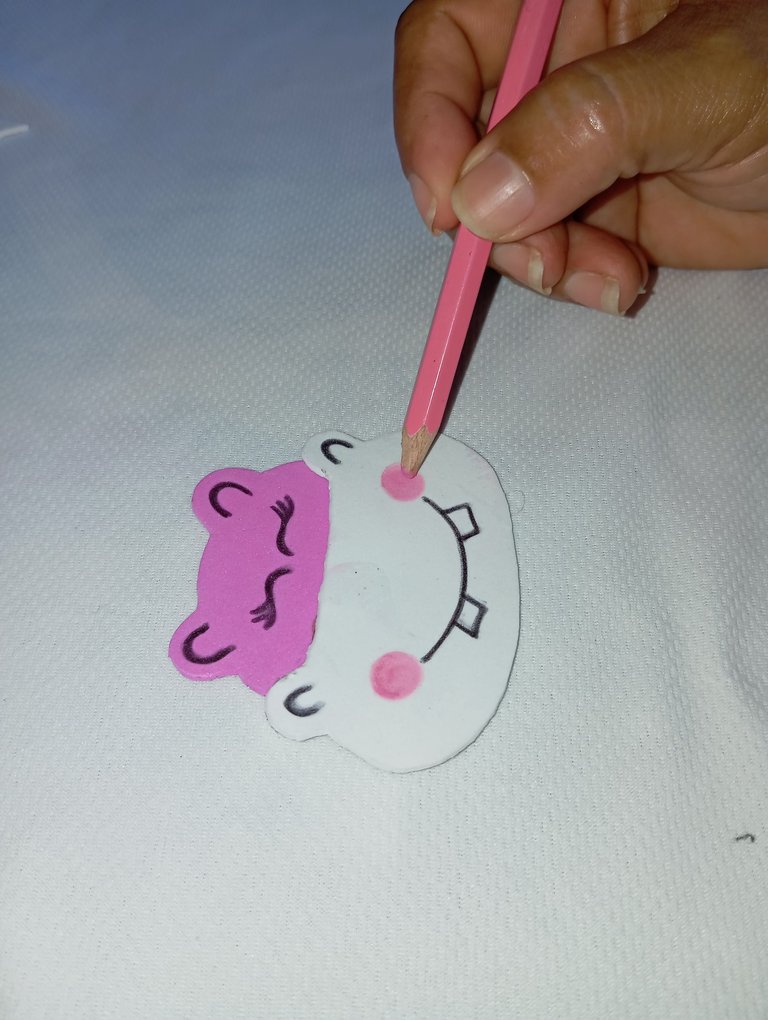
Séptimo paso : con un lápiz color negro , dibujaremos las siluetas de las orejas , los ojos los dibuje tipo cerrado que solo se vieran sus pestañas , dibujé su enorme sonrisa con unos enormes dientes al frente , sus cachetes los pinté rosado sonrojados
Seventh step: with a black pencil, we will draw the silhouettes of the ears, the eyes I drew them closed so that only his eyelashes could be seen, I drew his huge smile with huge teeth in front, his cheeks I painted them blushed pink.
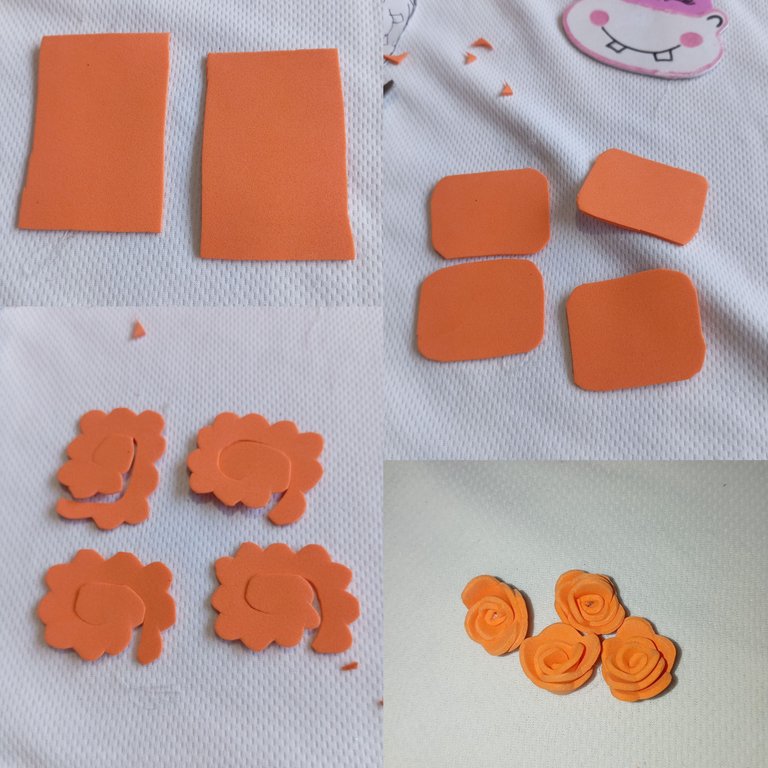
Octavo paso : tomaremos dos tiras , las dividiremos en dos cada una , un total de cuatro cuadros , recortamos el foamis en tipo espiral , moldear hemos sus bordes tipo arco redondo , luego agregamos silicón en la punta y comenzamos a enrollar hasta realizar una linda rosa , en total realicé cuatro mini rosas
Eighth step: we will take two strips, we will divide them in two each one, a total of four squares, we cut the foamis in spiral type, mold the edges in a round arch type, then we add silicone in the tip and we begin to roll up to make a pretty rose, in total I made four mini roses.
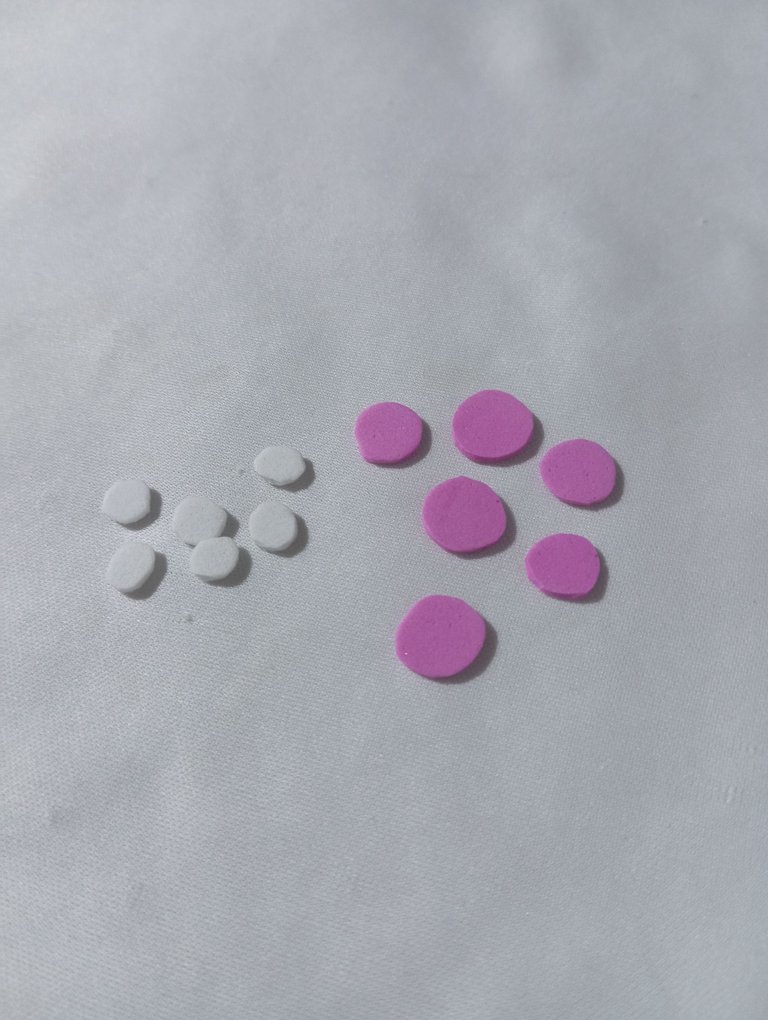
Noveno paso : adicional recorte unos círculos o lunares rosadas y blancas para decorar la otra esquina
Ninth step: additional cut out some circles or pink and white polka dots to decorate the other corner.
Décimo paso : tomé mis decoraciones y adorne la cartuchera, en el centro pegué el hipopótamo, en una esquina las rosas , y la otra esquina los lunares , finalizando de esta manera mi decoración
Tenth step: I took my decorations and decorated the pencil case, in the center I glued the hippopotamus, in one corner the roses, and in the other corner the polka dots, finishing this way my decoration
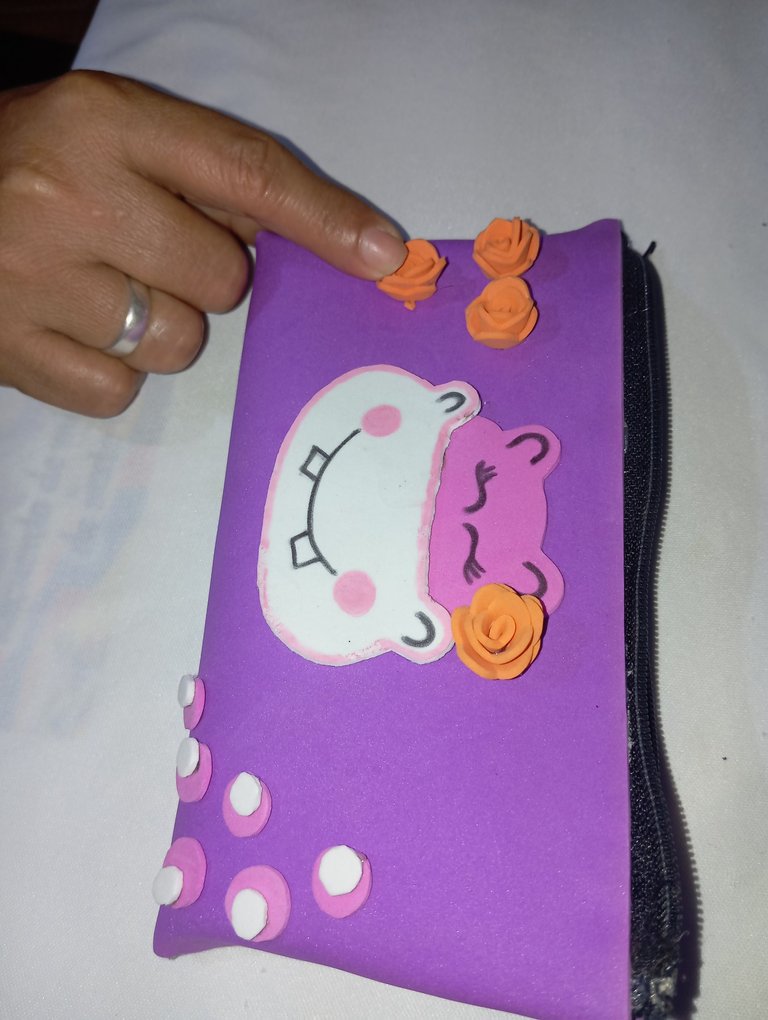
De esta manera realicé mi linda cartuchera con temática de hipopótamo, para que nuestras niñas vayan felices a estudiar , se sientan a la moda en todo momento a su gusto , antes de terminar le hago la invitación a las amigas @egarysv @yagelybr @josdelmi que participen y nos enseñen un tutorial, saludos y bendiciones
In this way I made my cute hippo themed pencil case, so that our girls go happy to study, feel fashionable at all times to your liking, before finishing I invite friends @egarysv @yagelybr @josdelmi to participate and teach us a tutorial, greetings and blessings.
Quedó muy bonita. Me encanta ese color 😍 se ve muy tierna. Hiciste un buen trabajo amiga. Suerte.
Que linda cartuchera 😍, intentaré seguir sus pasos y elaborar una para mi pequeña, gracias por compartir.
Está muy linda la cartuchera, los hipopótamos animados siempre son una buena opción para trabajar, te felicito
Hey, this hippo-themed pencil case is adorable and creative, perfect for young students who want to carry their school supplies in style. Keep up the great work.
@rameuris
https://inleo.io/threads/view/hive-130560/re-leothreads-2gja9gzjt
Un practico diseño hecho de foami, un paso a paso explicado de forma detallada gran trabajo, te deseo suerte.