Satha Toledo / Splinterlands Art Contest - Week 319 / Eng- Esp
I'm here!

English
Greetings dear friends, I hope you are very well, it is a pleasure to be with you once again.
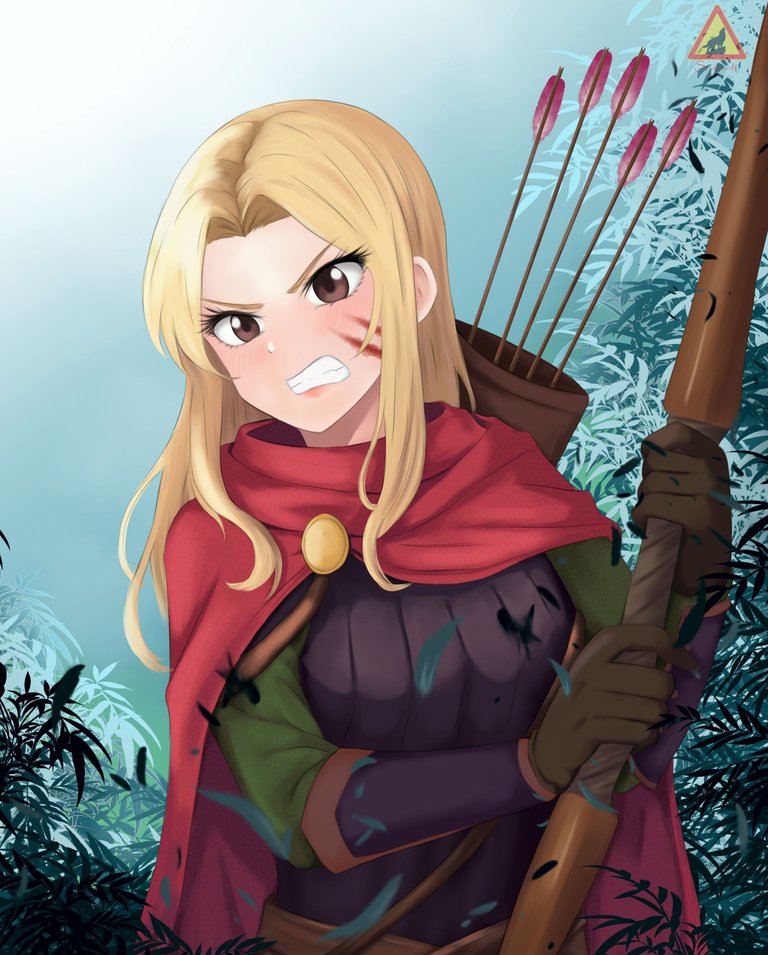
For my entry this week I bring you a character that I had a long time in the waiting list, I'm talking about Satha Toledo, I thought about making her coming out of the undergrowth of the forest a little angry straight to the battle, but now that she's ready it could also look like she's just trying to cross a dense vegetation... anyway we'll leave it to free interpretation.
This character looks very nice to me and I would like to draw it in other ways, even with other kind of clothes and experiment how it looks like.
Español
Saludos apreciados amigos, espero estén muy bien, es un gusto estar con ustedes una vez más.
Para mi entrada de esta semana les traigo un personaje que tenía muchísimo tiempo en la lista de espera, hablo de Satha Toledo, pensé en hacerla saliendo de la maleza del bosque un tanto enojada directo a la batalla, pero ahora que esta lista tambien podría verse como si solo esta intentando cruzar una densa vegetación... de cualquier forma lo dejaremos a libre interpretación.
Este personaje me resulta muy bonito y me gustaría dibujarlo de otras formas, incluso con otro tipo de ropa y experimentar que tal se ve.

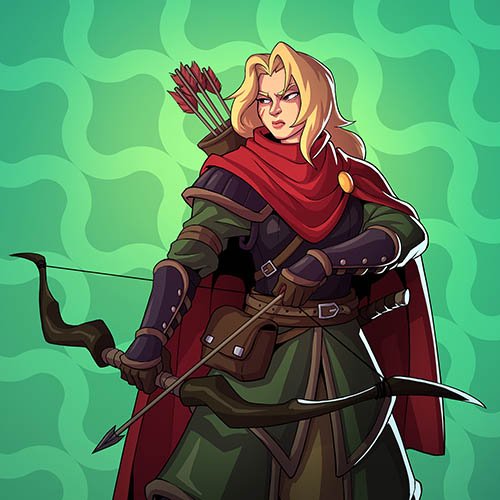
Reference

Process/Proceso
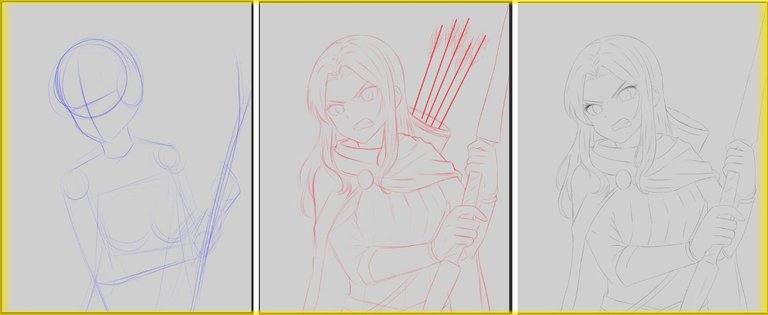
We start by drawing the shape and pose that our character will have.
The next step is to draw the sketch, in this step adjust the pose and proportions, I added the arrows only in the sketch later I plan to add them only with the color.
Finally we add the lineart in black color, in this step I gave some small retouches and I adjust some details of the sketch.
Iniciamos dibujando la forma y pose que tendrá nuestro personaje.
el siguiente paso es dibujar el boceto, en este paso ajuste la pose y proporciones, Agregue las flechas solo en el boceto posteriormente tengo pensado agregarlas solo con el color.
Finalmente agregamos el lineart en color negro, en este paso di unos pequeños retoques y acomode ciertos detalles del boceto.
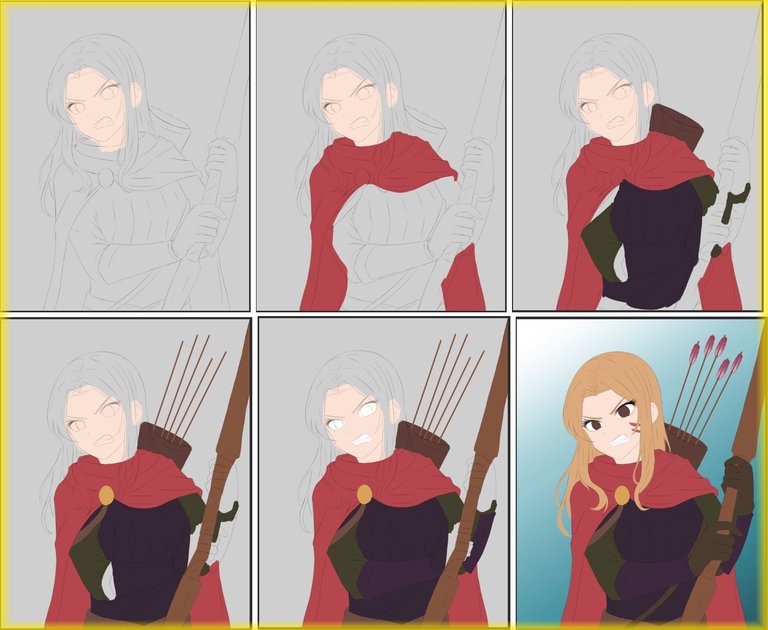
We added the base color, there were several layers of different colors, very similar to those of the reference.
We add the arrows only with color, to make these straight lines you only must press the capital key and select which direction you want the straight line, this trick works in many drawing programs I know that in Tool sai and Clip studio if it works.
With a special brush we add feathers to the arrows and edit the objects of the layer so that they look pink like those of the original character.
To finish this step we add a simple bi color background.
Agregamos el color base, fueron varias capas de colores diferentes, muy parecidas a las de la referencia.
agregamos las flechas solo con color, para hacer estas lineas rectas solo debes presionar la tecla mayúscula y seleccionar que dirección quieres la linea recta, este truco funciona en muchos programas de dibujo me consta que en Tool sai y Clip studio si funciona.
Con un pincel especial agregamos plumas a las flechas y editamos los objetos de la capa para que se vean de color rosa como las del personaje original.
Para finalizar este paso agregamos un fondo simple bi color.
We added the vegetation, this landscape I wanted to make it as monochromatic as possible, in blue tones, I made this veneration with a special brush.
Once the background is ready we continue with the skin, I used warm tones in almost all the character.
On his cheeks the character has some red marks, I'm not sure if they are wounds or just makeup, whatever this kind of details I find very beautiful. to achieve this I added these marks in the base color, but I feel that it would not integrate well so I decided to change them and make a special layer for them, then I applied the multiply effect. I usually use this effect a lot in my works.
In all the clothes the step is similar, first add the shadow and correct it with the base color, and finally use a lighter tone as a light, lately I'm applying the colors avoiding the blur tool, I still use it but in a very limited way.
Agregamos la vegetación, este paisaje quise hacerlo lo mas monocromático posible, en tonos azules, esta veneración la hice con un pincel especial.
una vez listo el fondo seguimos con la piel, use tonos cálidos en casi todo el personaje.
Sobre sus mejillas el personaje tiene unas marcas de color rojo, no estoy seguro si son heridas o solo maquillaje, sea lo que sea este tipo de detalles me parecen muy hermosos. para lograrlo agregue estas marcas en el color base, pero siento que no se integraría bien asi que decidí cambiarlas y hacer una capa especial para ellas, luego le aplique el efecto multiplicar. suelo usar muchísimo este efecto en mis obras.
En toda la ropa el paso es similar agregamos primero la sombra y corregimos con el color base, para finalmente usar un tono mas claro a modo de luz, últimamente estoy aplicando los colores evitando la herramienta difuminar, aun la uso pero de forma muy limitada.
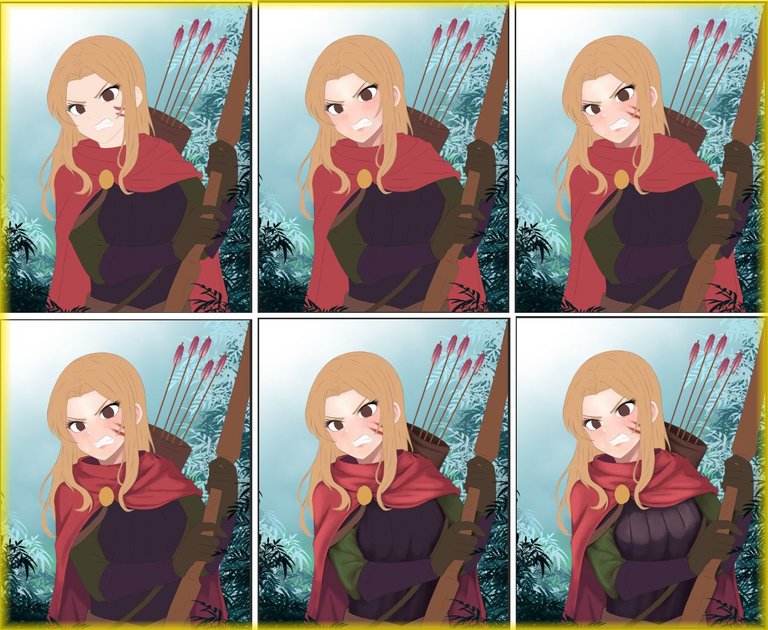
For the hair I only had to apply light tones to achieve the volume, even with this I thought it would look better if I applied darker areas.
I did the hair with a normal brush and some areas with the hair brush. anyway being an anime style character I didn't want to add much detail to the hair.
Para el cabello solo debía aplicar tonos claros y asi lograr el volumen, aun con esto pensé que se vería un mejor aplicando zonas aun mas oscuras.
el cabello lo hice con un pincel normal y algunas zonas con el pincel para cabello. de todas formas al ser un personaje con estilo anime no quería agregar mucho detalle al cabello.
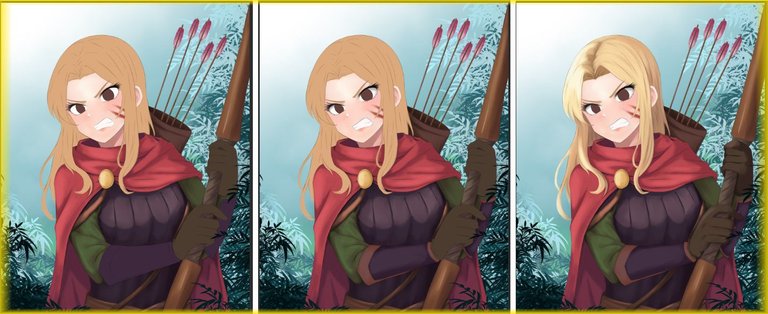
We finished adding more details. We finished the eyes of the character, which is the most important part of all.
On a top layer we applied a few leaf effects and changed to the monochromatic color of the background, with that we achieved the effect of moving leaves.
In spite of being a simple background, I think it expresses a lot of movement and the character integrates well with it.
Finalizamos agregando mas detalles. Terminamos los ojos del personaje, lo cual es la parte mas importante de todo.
En una capa superior aplicamos unos cuantos efectos de hojas y cambiamos al color monocromático del fondo, con eso logre el efecto de hojas en movimiento.
A pesar de ser un fondo algo simple, creo que expresa mucho movimiento y el personaje se integra bien con el.


If you don't play splinterlands yet you can join here!
Si aún no juegas splinterlands puedes unirte aquí!

Join here // Unete aqui

Friends we have reached the end, I hope you liked this week's illustration.
I really liked this character and I would like to draw it again in the future.
I would love to read your opinions in the comments box.
If you liked the content I encourage you to follow me, I publish very often illustrations like this and much more.
Until a new opportunity.
See you cowboys!
Amigos llegamos al final, Espero les haya gustado la ilustración de esta semana.
realmente me gusto mucho este personaje y quisiera dibujarlo otra vez en el futuro.
Me encantaría leer sus opiniones en la caja de comentarios.
Si te gusto el contenido te animo a que me sigas, publico muy seguido ilustraciones como esta y mucho mas.
Hasta una nueva oportunidad. Nos vemos vaqueros!
Tools:
- CLIP STUDIO
- Inspiroy H640 Pen Tablets
- Corel PHOTO-PAINT 2019
- www.deepl.com/translator
Nice drawing!
Brutal bro!
El personaje quedo bien integrado con el fondo y sus ojos le dan el alma y espíritu al personaje
Thanks for sharing! - @isaria

Congratulations @sephiwolf! You have completed the following achievement on the Hive blockchain And have been rewarded with New badge(s)
Your next target is to reach 95000 upvotes.
You can view your badges on your board and compare yourself to others in the Ranking
If you no longer want to receive notifications, reply to this comment with the word
STOPCheck out our last posts:
https://x.com/AlienArtHive/status/1857878305116139731
Great job on this Satha! I love the way you portrayed it and you are WAY more talented than I am (I am bad at stick figures)