🎨 {25/08/24} ✦ ✨ 🐝 🏮 Japanese “Shoji” Lamp with Bee Pattern 🏮 🐝 ✨ ✦ 🇪🇸 │ 🇺🇸
✦ [ T U T O R I A L ] Learn how to stamp paper with beautiful shapes quickly and easily to create lovely lamp panels! - Collage & Edition in FotoJet, photos by @Tesmoforia ✦


🇪🇸 ~ ¡Hola a todos!, esta es mi participación para el "DIYHub August Contest: World HONEY BEE Day" de la Comunidad DIYhub en conmemoración al Día Mundial de las Abejas, el concurso estará abierto hasta el 5 de Septiembre y les invito a leer todo lo referente al concurso y a cómo participar, ¡aún queda tiempo! ✨
🇺🇸 ~ Hello everyone!, this is my entry for the “DIYHub August Contest: World HONEY BEE Day” from the DIYhub Community in commemoration of World Honeybee Day, the contest will be open until September 5 and I invite you to read all about the contest and how to enter, there's still time! ✨
 |  |  |
|---|
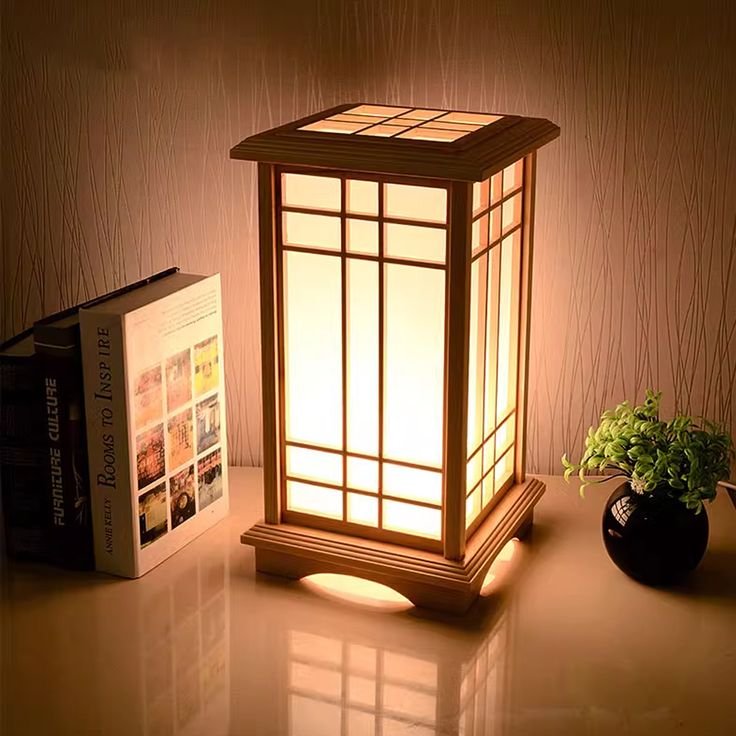
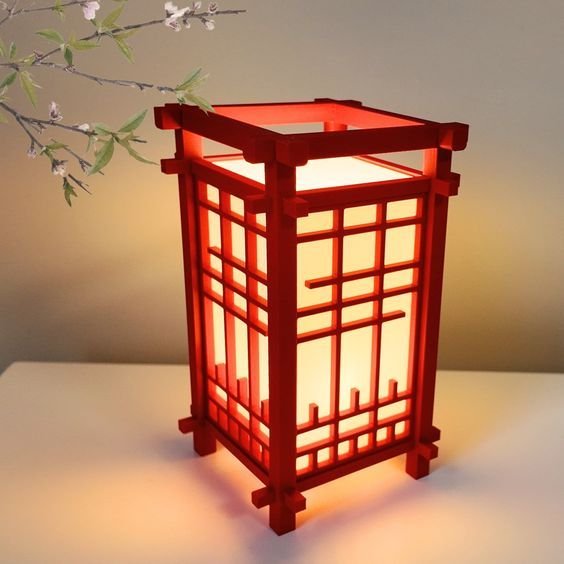
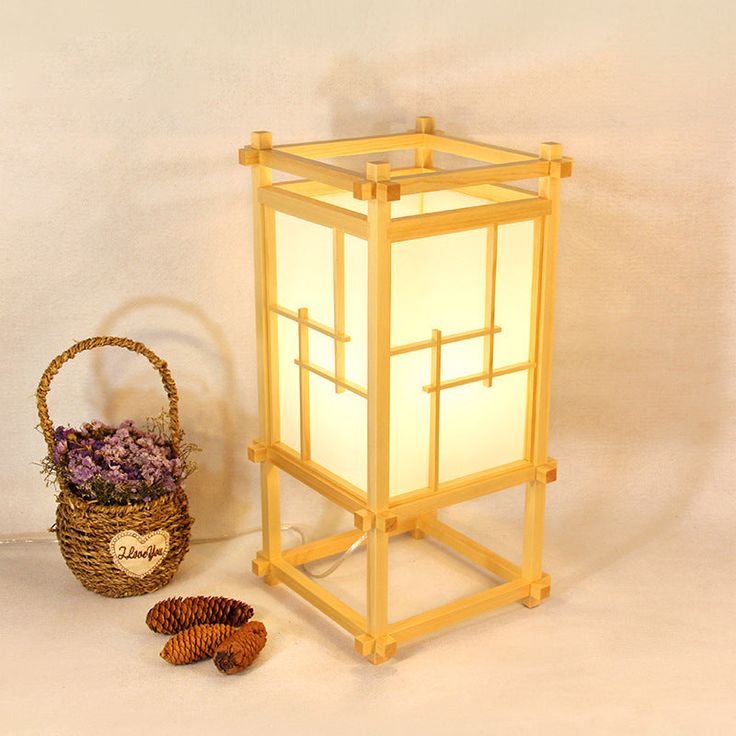
Para esta ocasión especial elabore 2 proyectos diferentes dentro de un mismo objetivo: Crear una lámpara tradicional japonesa de papel.
La estructura de la lámpara "Shoji" es una cosa y la preparación del papel otra diferente.
Por motivos de salud (estoy en reposo por una lesión) no pude preparar los cortes de la madera que tenía reservados para este proyecto pero en su lugar, improvisé con materiales reciclados y un poco mas de paciencia.
For this special occasion I developed 2 different projects within the same objective: Creating a traditional Japanese lamp out of paper.
The structure of the “Shoji” lamp is one thing and the preparation of the paper is another.
For health reasons (I am resting due to a back injury) I was not able to prepare the wood cuts I had reserved for this project but instead, I improvised with recycled materials and a little more patience.
 |
|---|
 |
La inspiración para este proyecto viene sobre que las abejas literalmente, son la luz del mundo, y que sin ellas toda la cadena trófica se vería catastróficamente alterada; mucho se ha hablado del tema y no redundaré, pero pienso en lo hermosos y frágiles que son estos pequeños seres y a la vez lo mucho que su existencia significa para la vida del planeta.
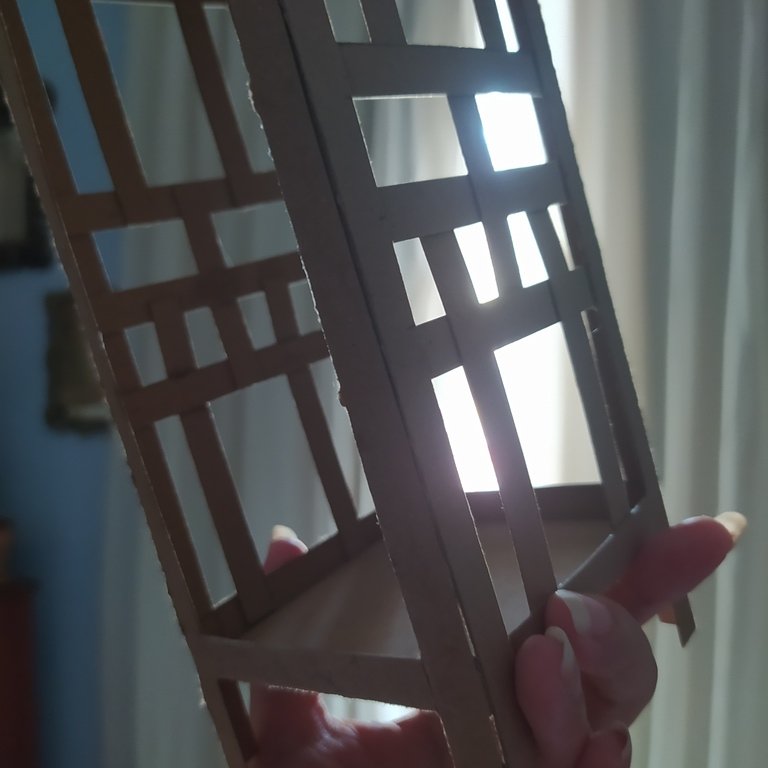
Hermosas y efímeras como la ilusión de la luz a través del delgado papel salpicado de colores.
The inspiration for this project comes from the fact that bees are literally the light of the world, and that without them the whole trophic chain would be catastrophically altered; much has been said about this subject and I will not repeat it, but I think of how beautiful and fragile these little beings are and at the same time how much their existence means for the life of the planet.
Beautiful and ephemeral as the illusion of light through thin paper splashed with colors.
✨ 🐝 Step by Step Tutorial: "How to create a Japanese Shoji lamp with recycled cardboard and paper" 🐝 ✨

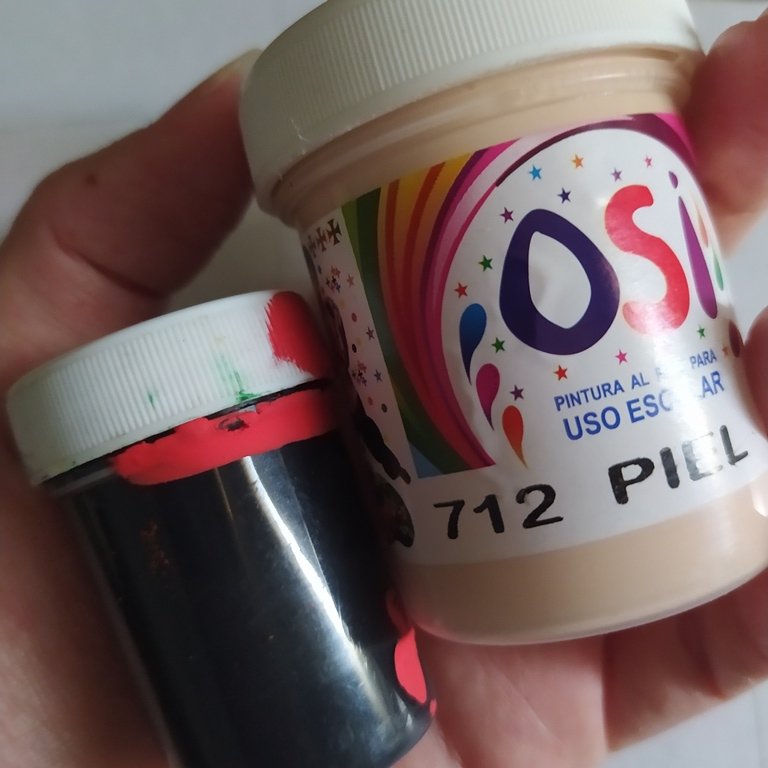
| 🇪🇸 ~ Las herramientas y materiales que necesitas para elaborar este proyecto son: Lápiz, regla, cinta métrica, borrador, tijeras, cutter, foami escolar, pegamento blanco, silicón frio, un pedacito de poliuretano, papel de reciclaje, cartulina de reciclaje, tinta o pintura de color oscuro, pintura roja, pintura dorada, un plato plano pequeño, pincel de paleta mediano, un pedacito de papel aluminio, y una unidad de luz de hada o una luz led. |
|---|
| 🇺🇸 ~ The tools and materials you need to make this project are: Pencil, ruler, tape measure, eraser, scissors, cutter, school foami, white glue, cold silicone, a piece of polyurethane, recycled paper, recycled cardboard, dark colored ink or paint, red paint, gold paint, a small flat plate, medium sized palette brush, a piece of aluminum foil, and a fairy light unit or LED light. |
 |  |
|---|---|
 |  |
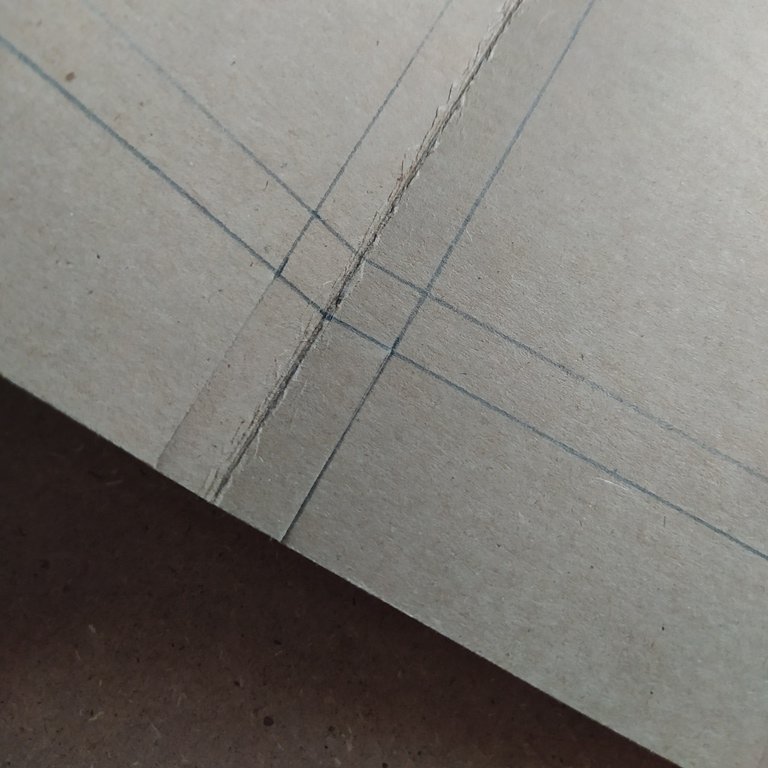 | 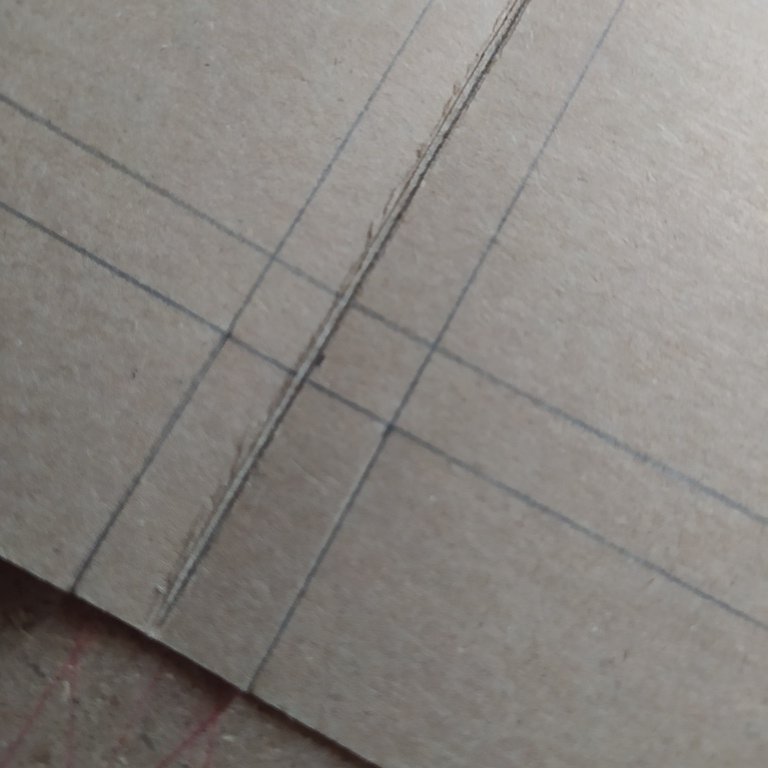 |
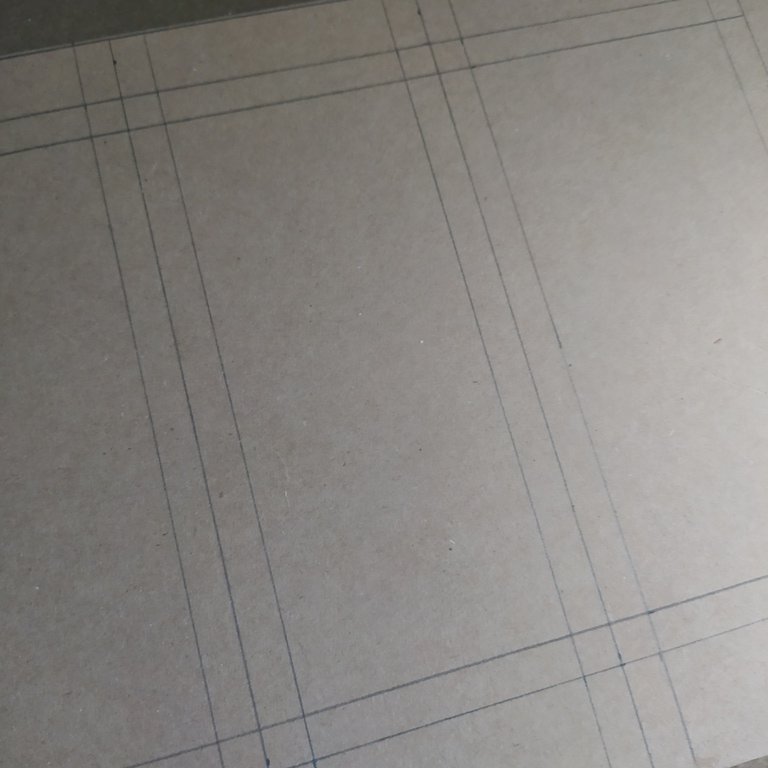
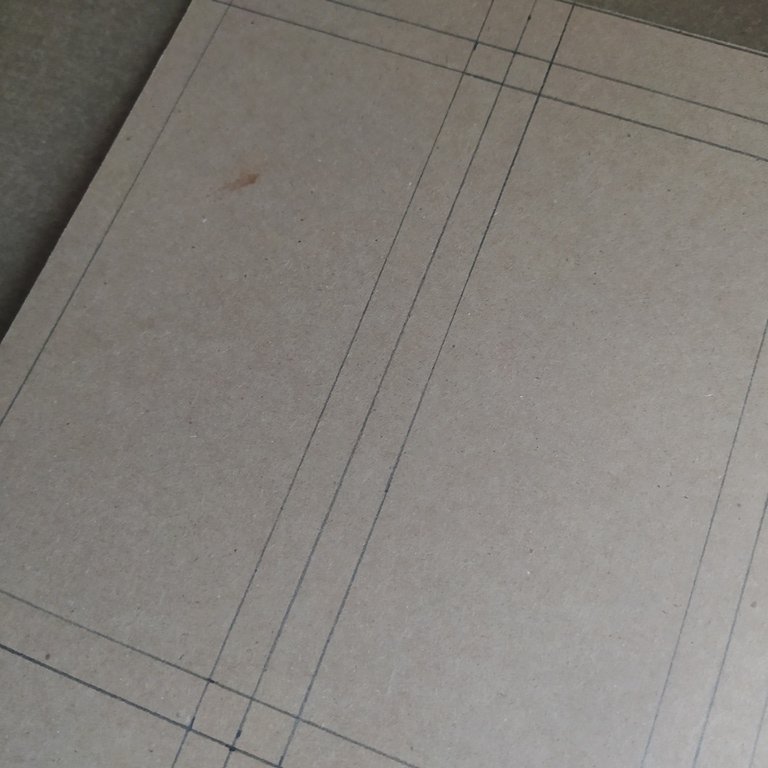
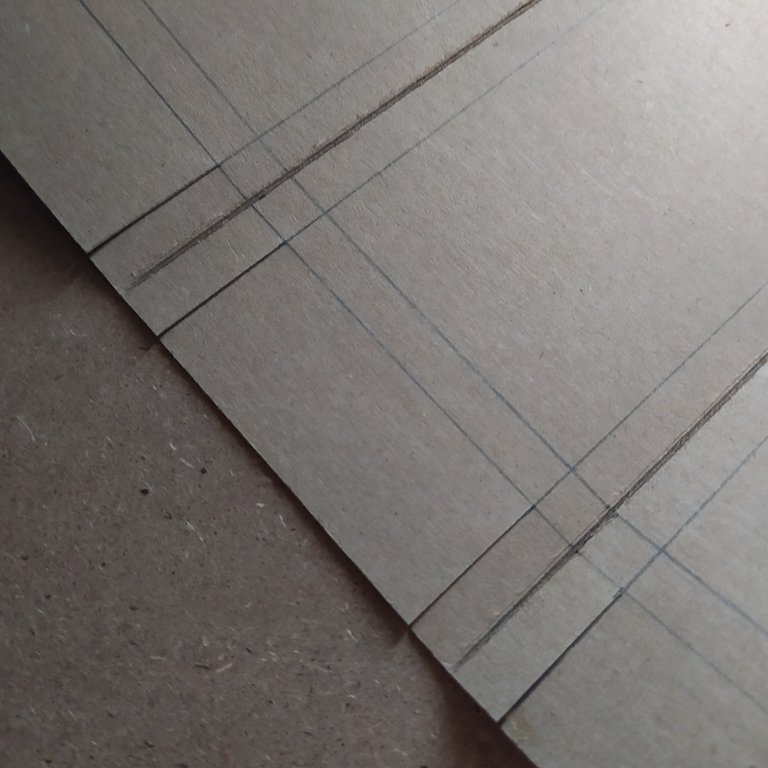
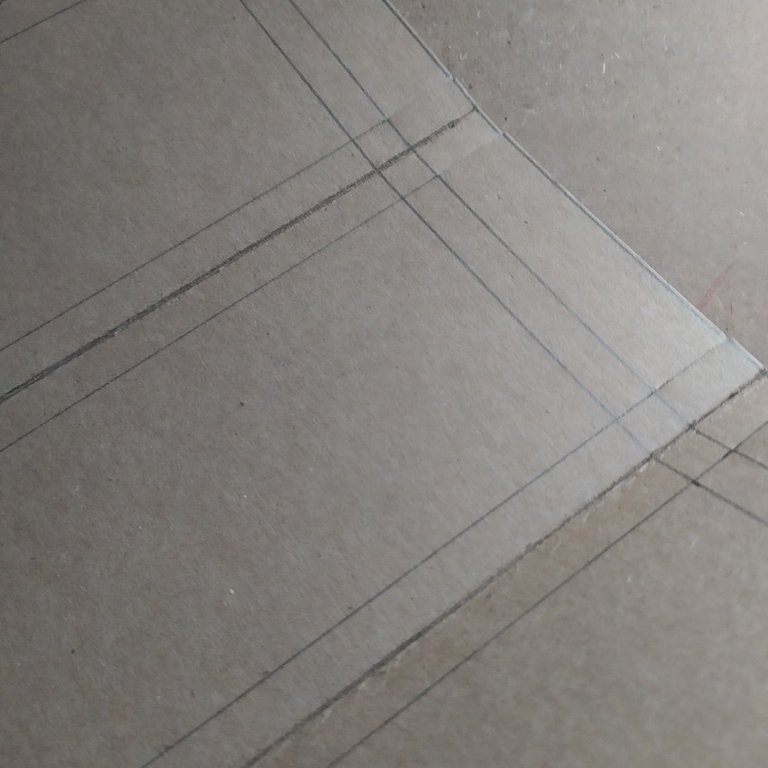
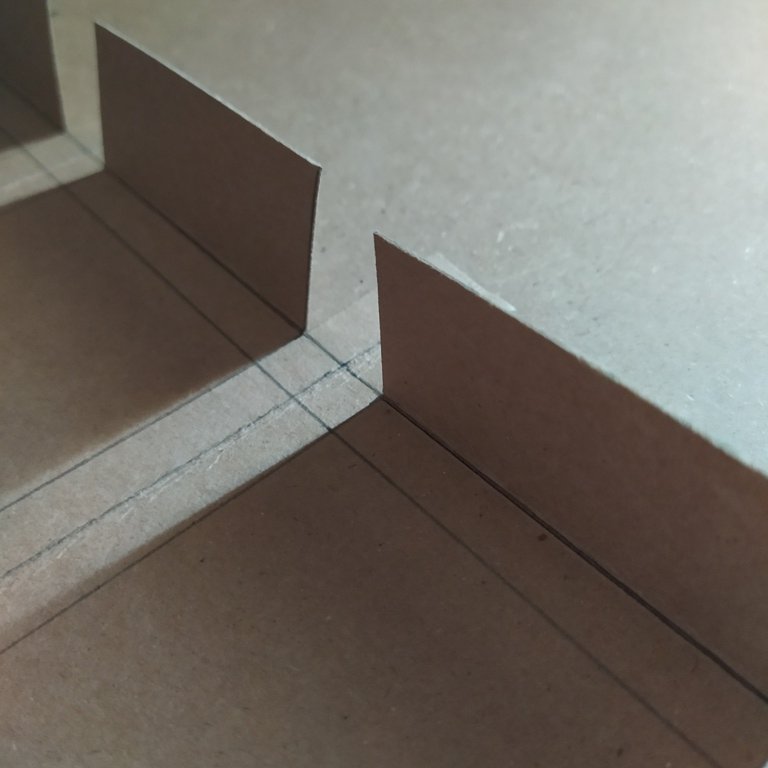
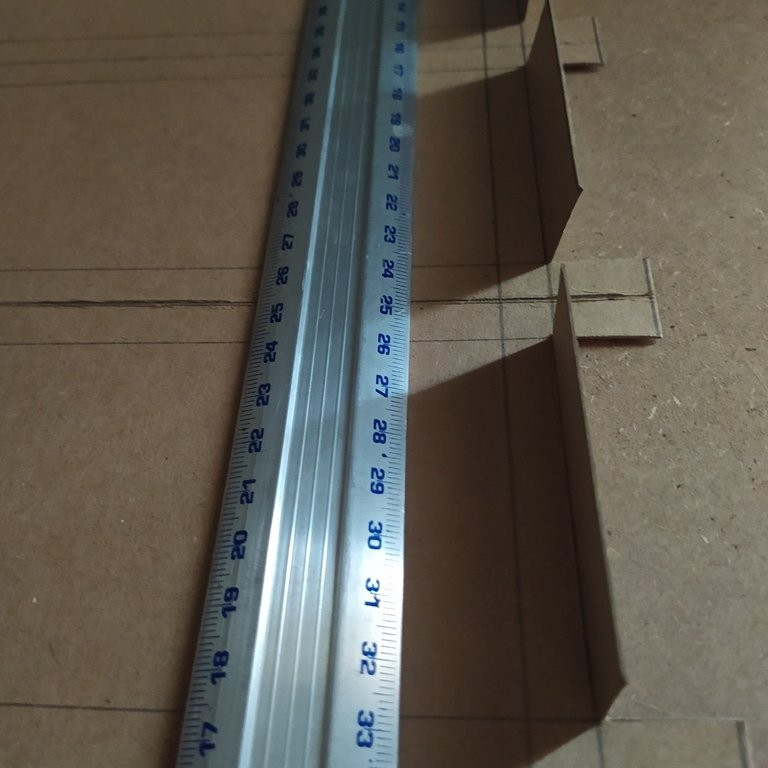
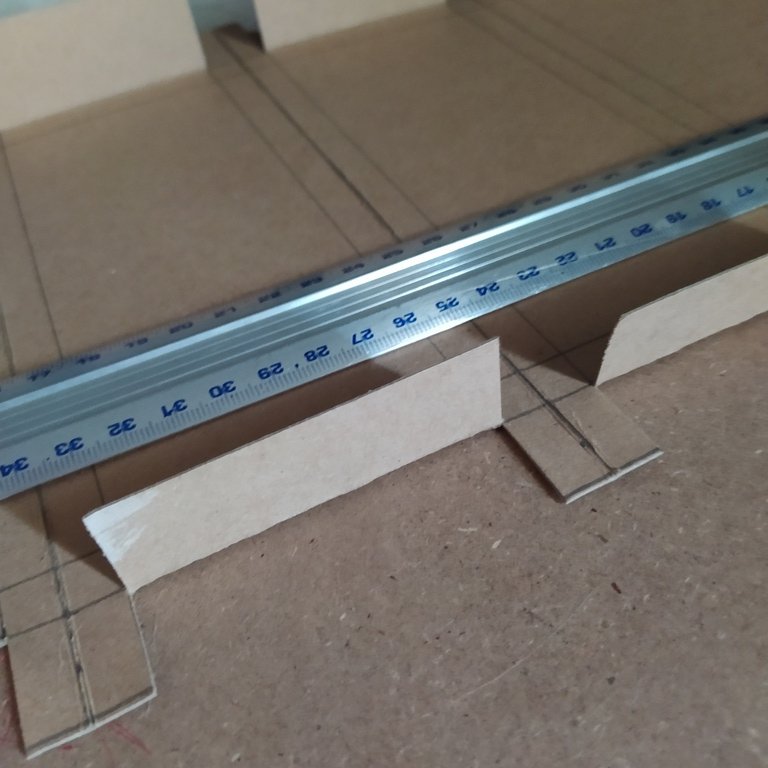
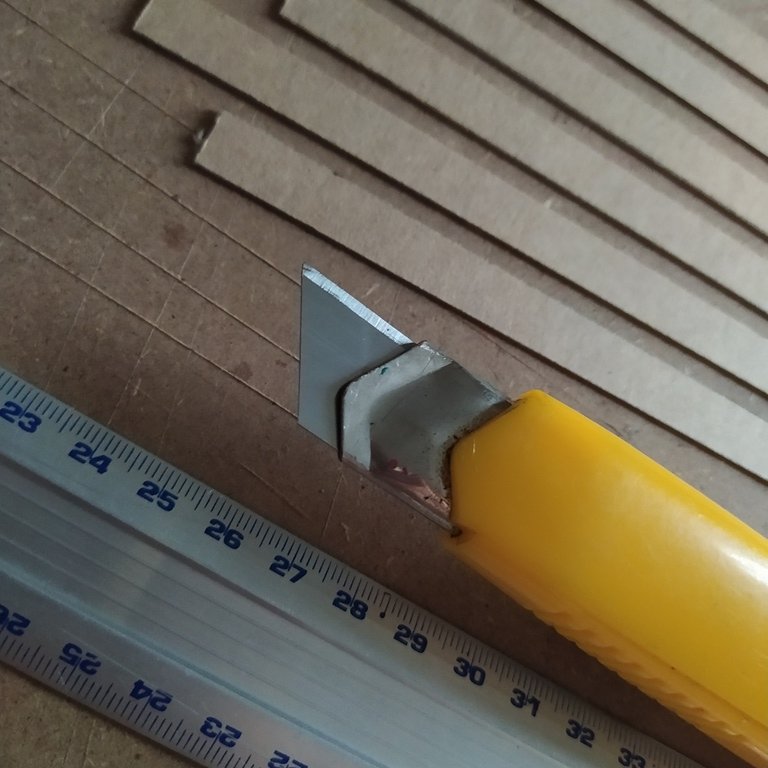
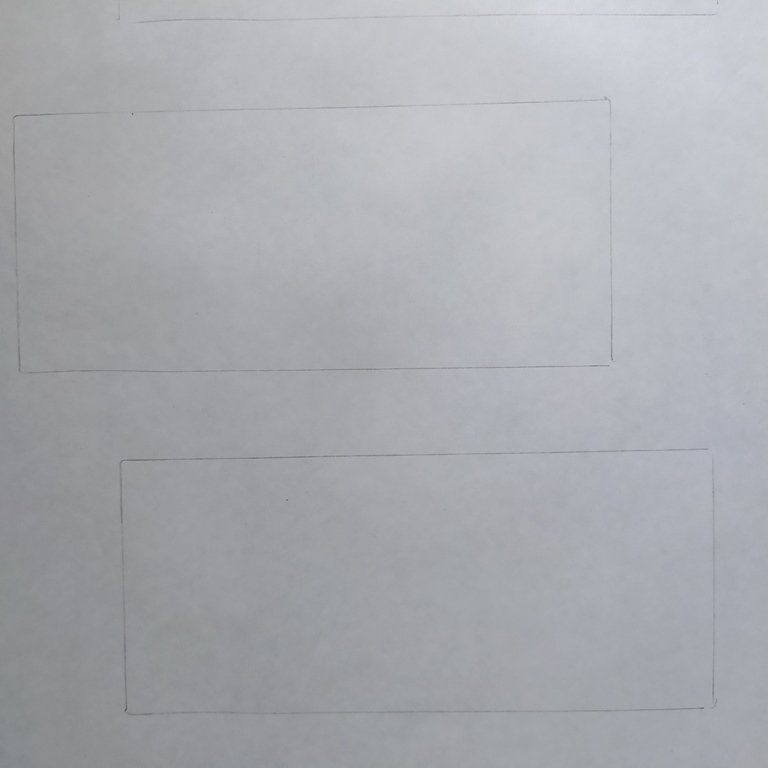
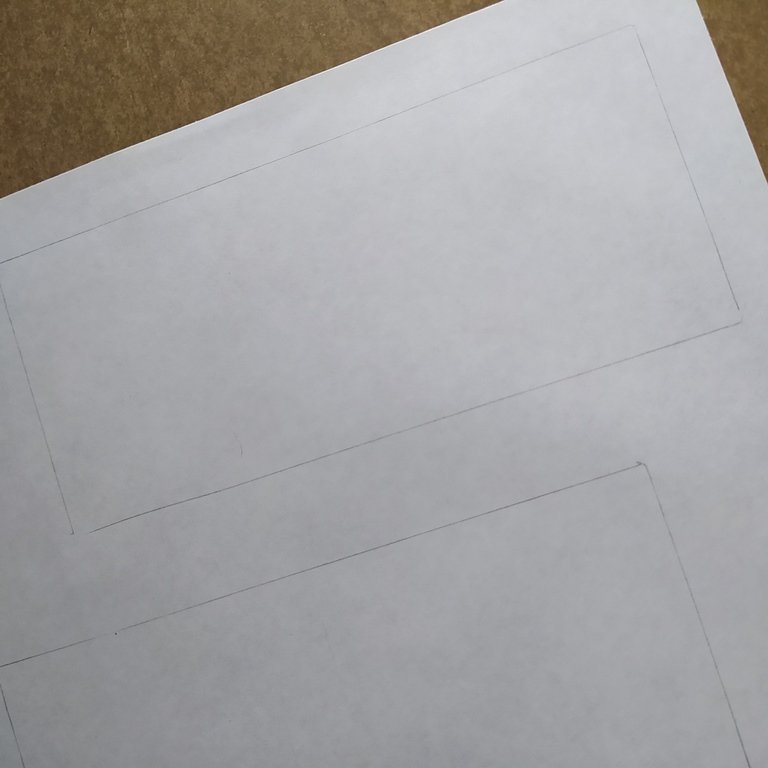
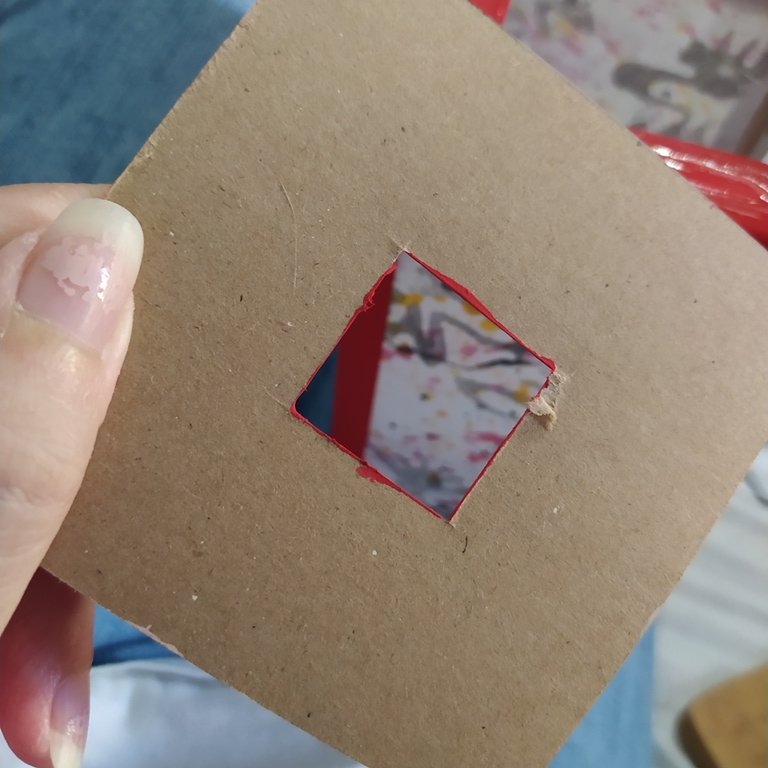
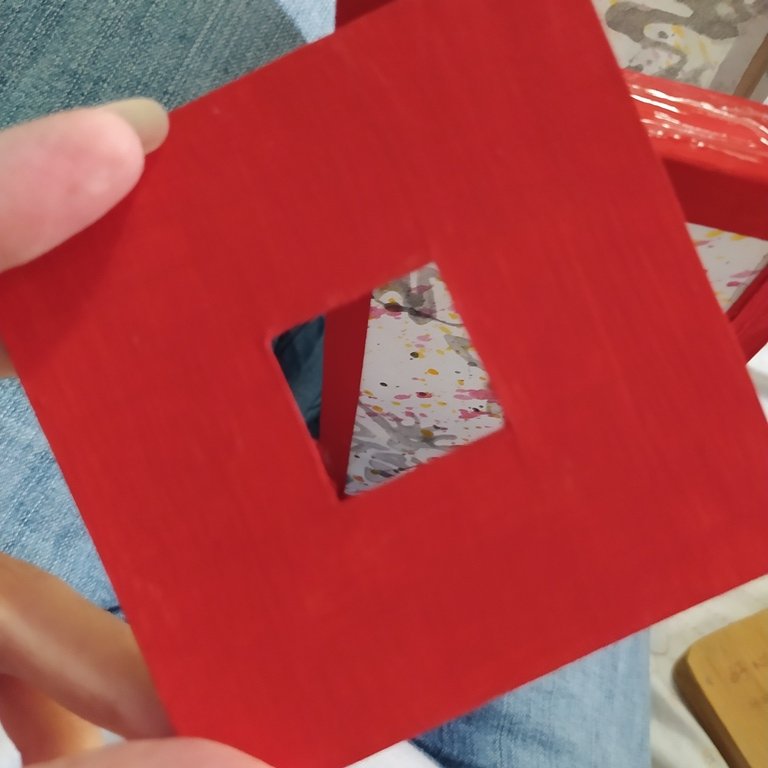
¡Busca lápiz y papel y anota las siguientes medidas!, toma el cartón de reciclaje y marca con calma con ayuda de la regla, 4 paneles 7 cm de ancho x 16 cm de largo, agregando 1 cm extra en cada uno de los lados de cada panel.
Get a pencil and paper and write down the following measurements!, take the recycled cardboard and calmly mark with the ruler, 4 panels 7 cm wide x 16 cm long, adding 1 cm extra on each side of each panel.
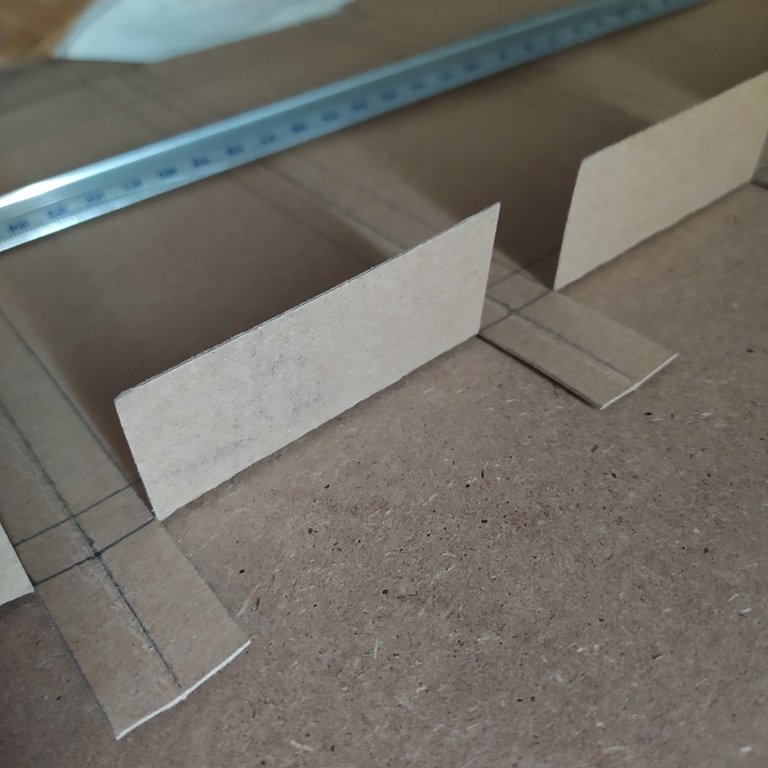
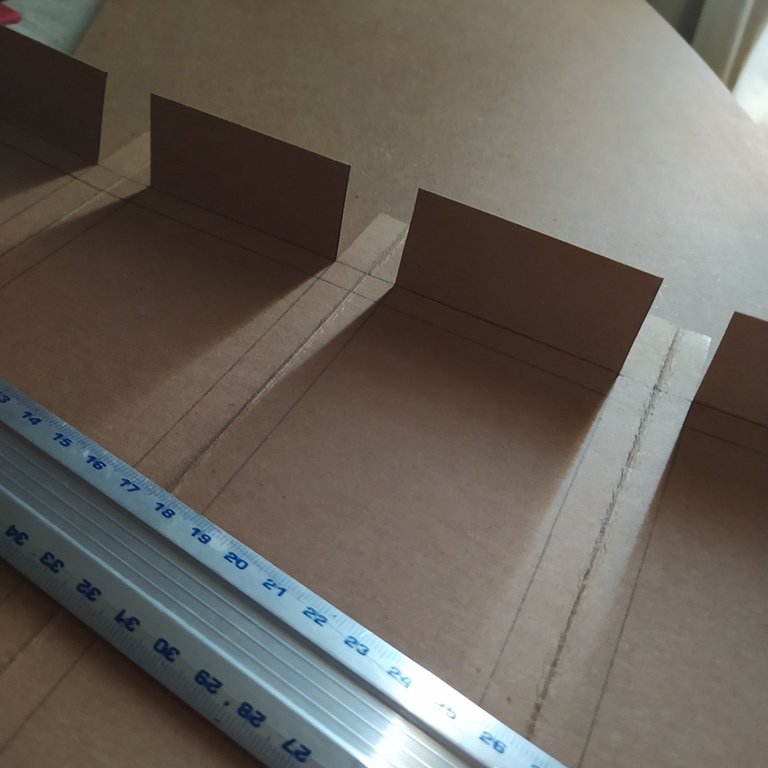
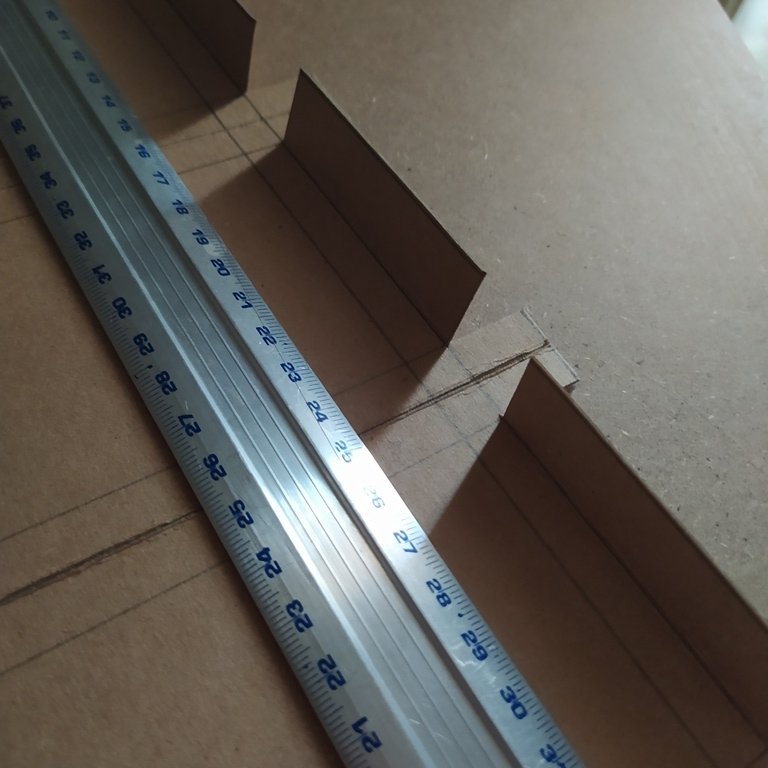
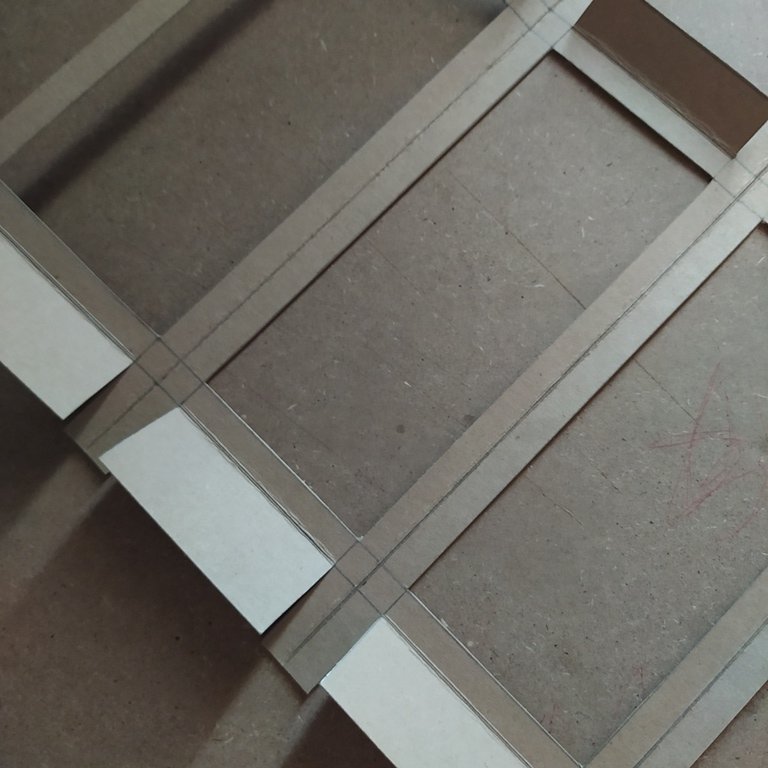
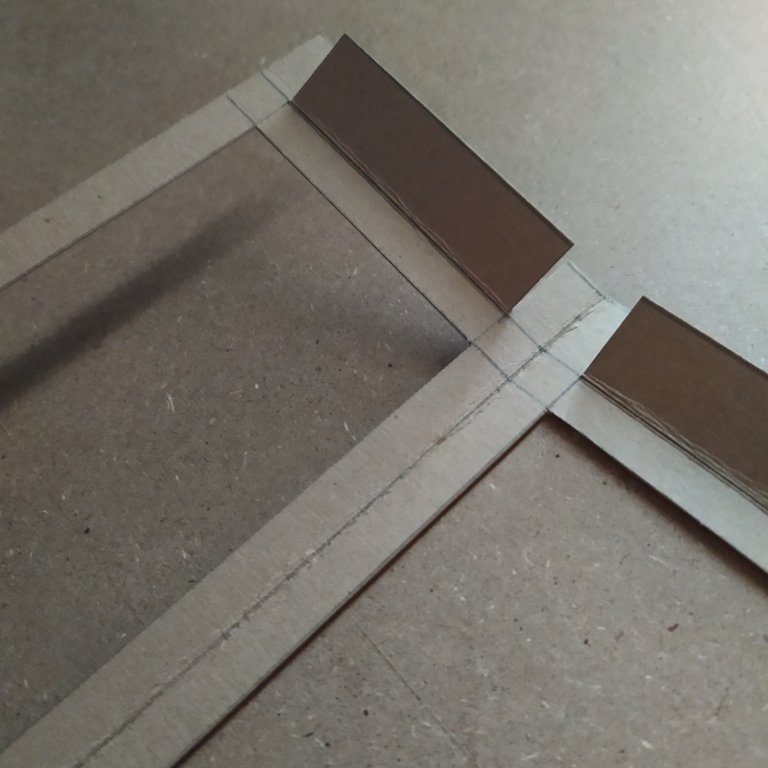
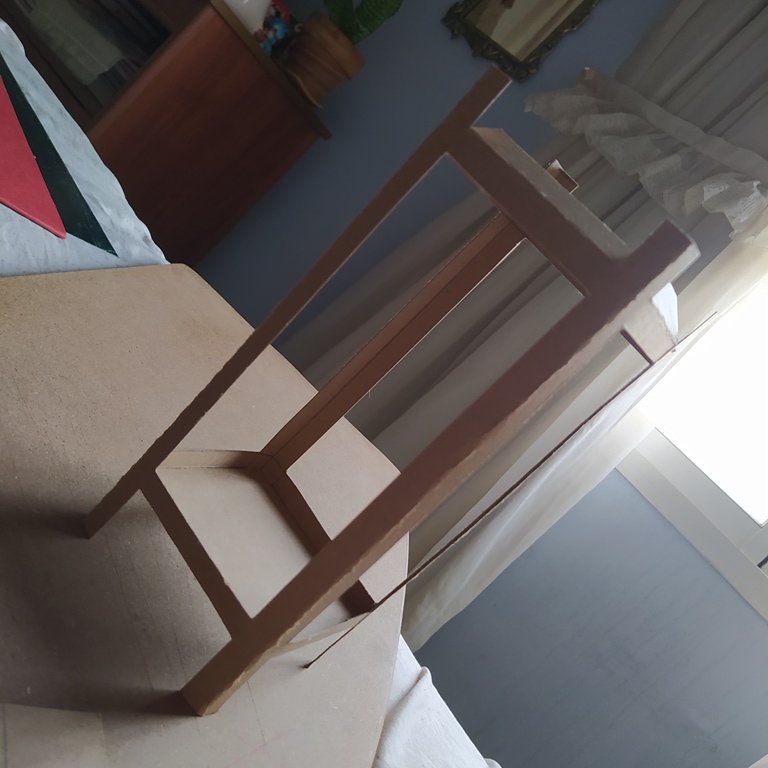
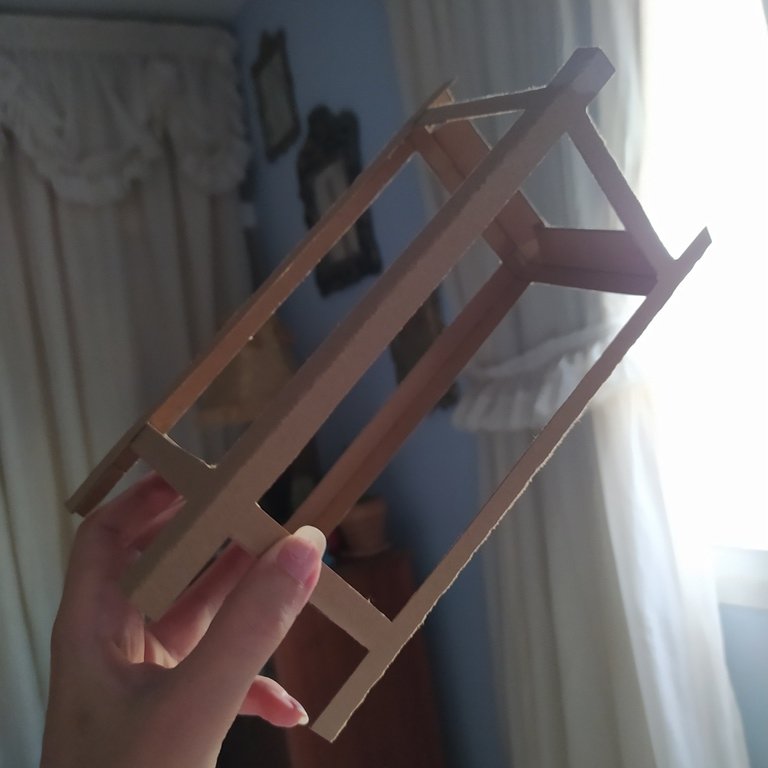
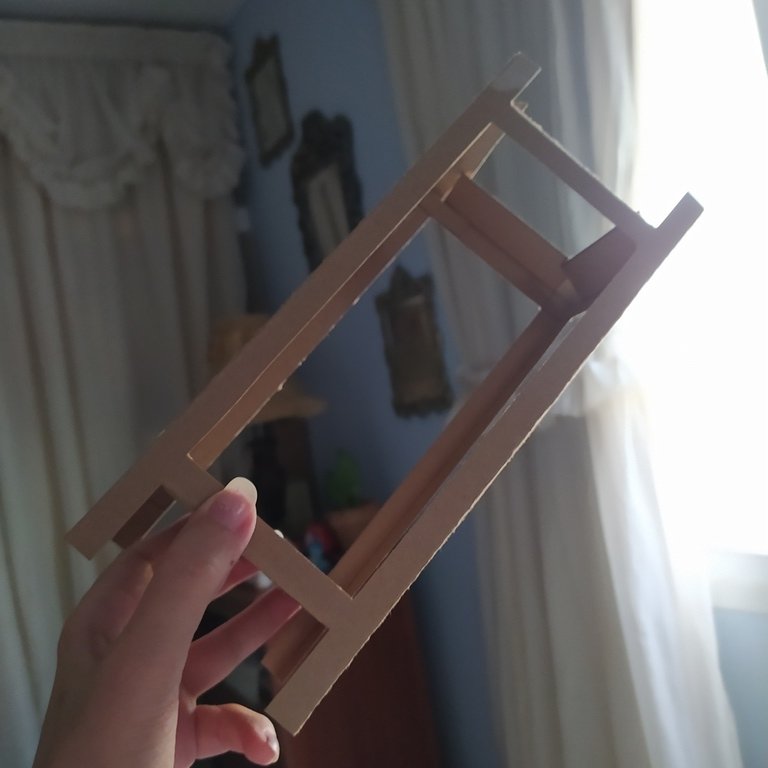
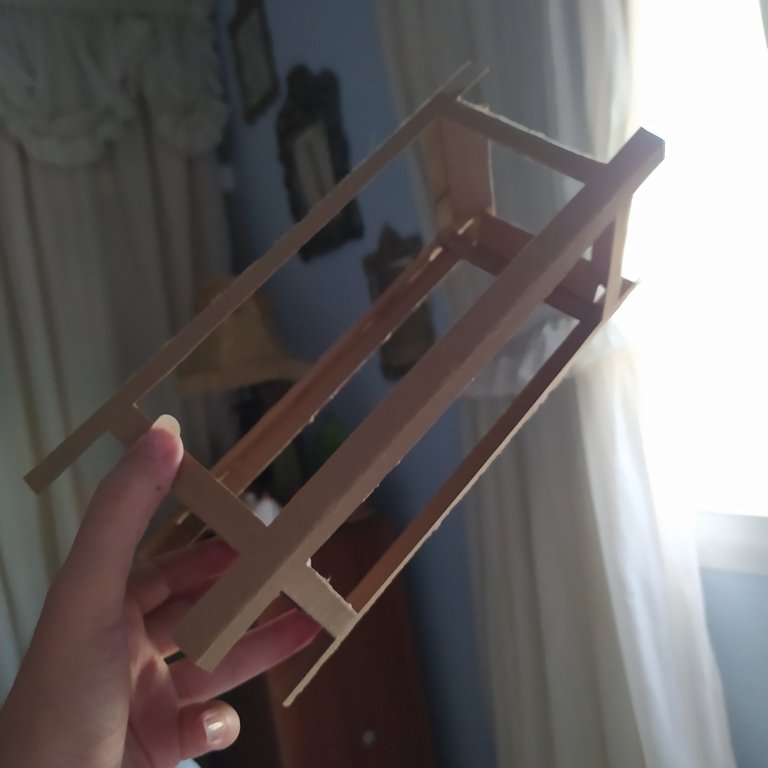
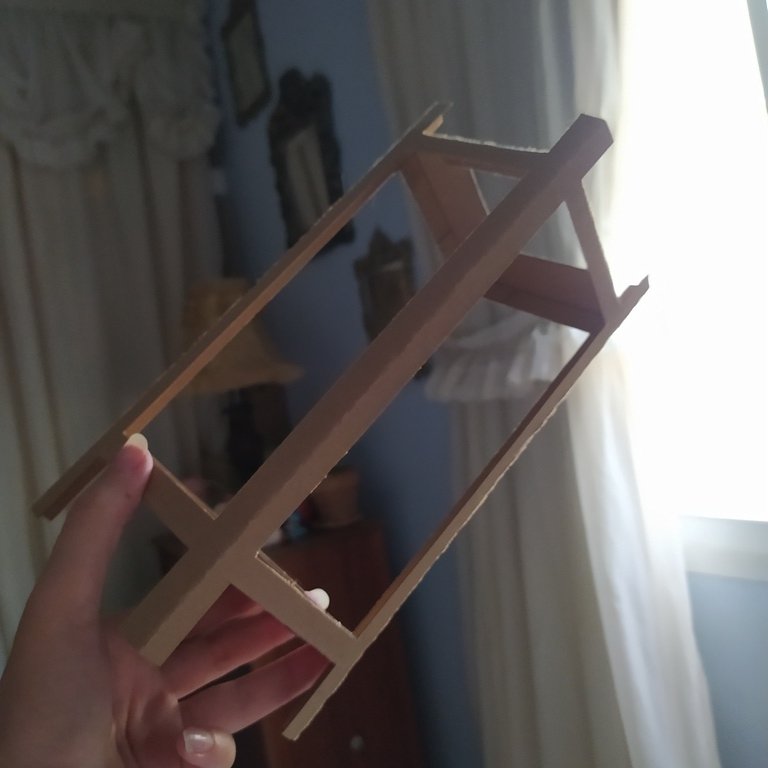
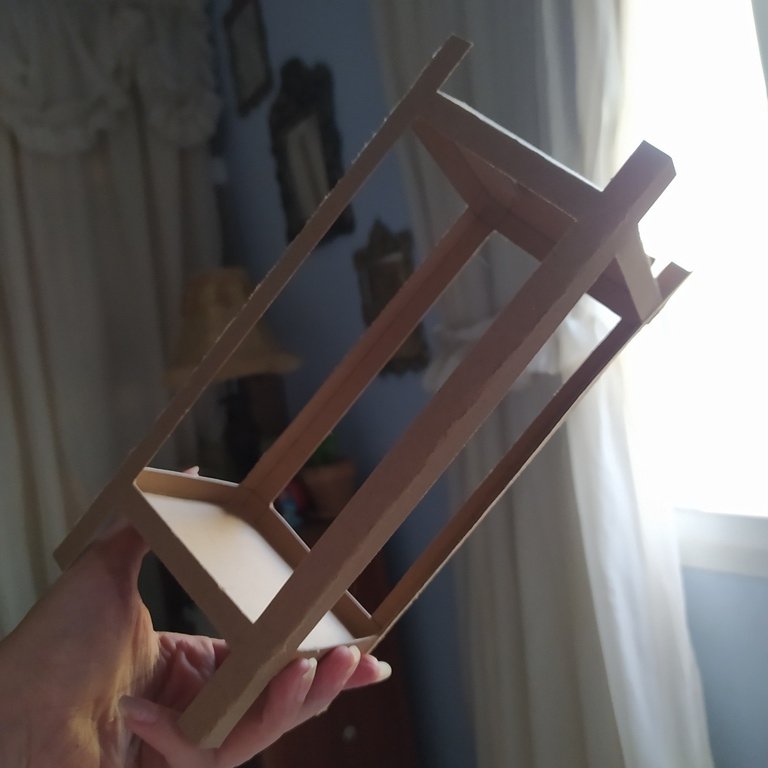
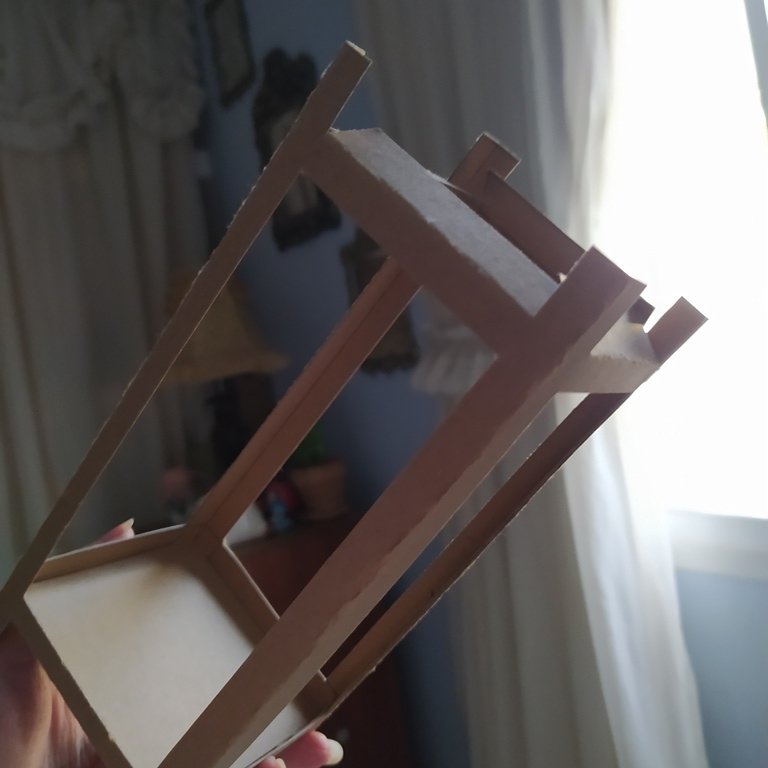
Suma a eso para la parte superior, una pequeña barra de 2 cm de alto en cada unión centrada entre cada panel; repite el mismo paso en la parte inferior de los paneles lo que serian las "patitas" de la linterna, una barra de 3 cm de largo (observa con cuidado las fotos guía).
Add to that for the upper part, a small 2 cm high bar at each joint centered between each panel; repeat the same step on the lower part of the panels what would be the “legs” of the lantern, a 3 cm long bar (carefully observe the guide photos).
 |  |  |
|---|---|---|
 |  |  |
 |  |  |
 |  |
|---|---|
 |  |
 |  |
 |  |
 |  |
 |  |
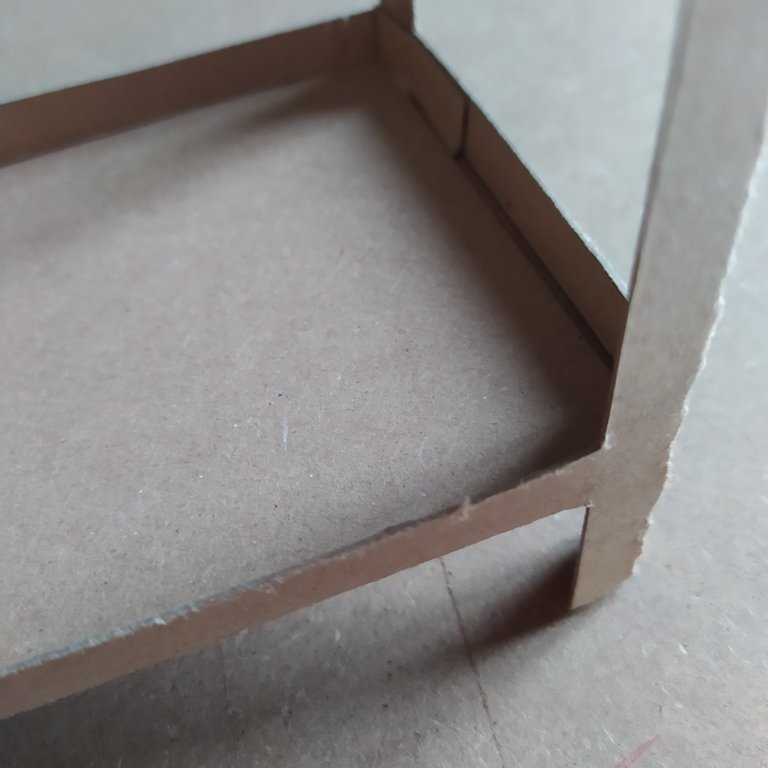
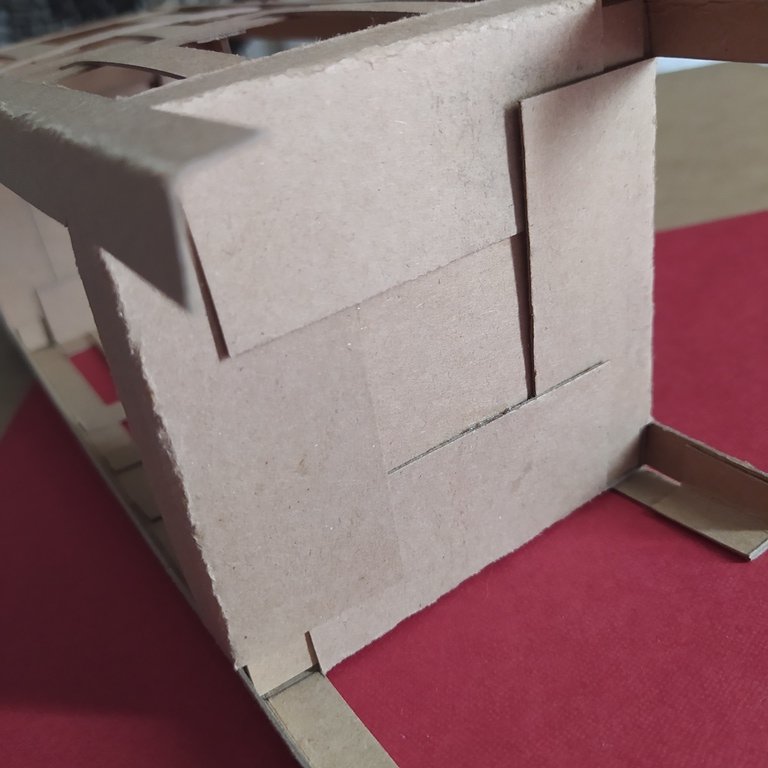
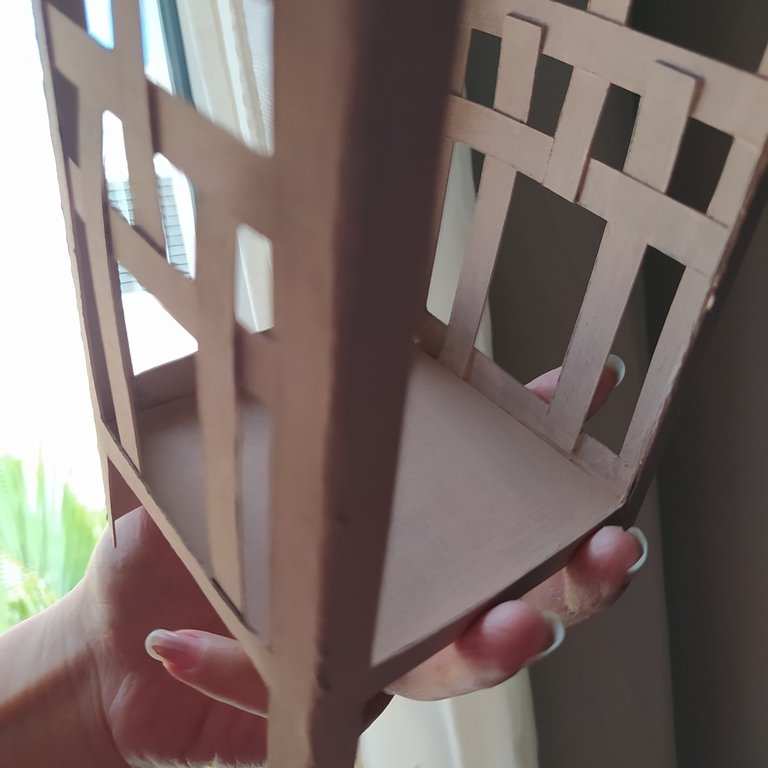
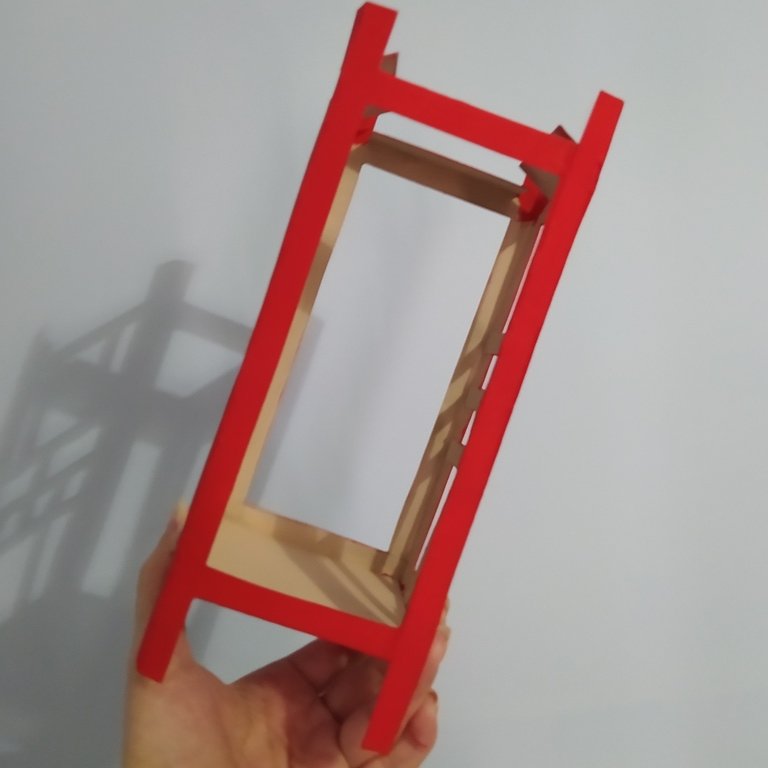
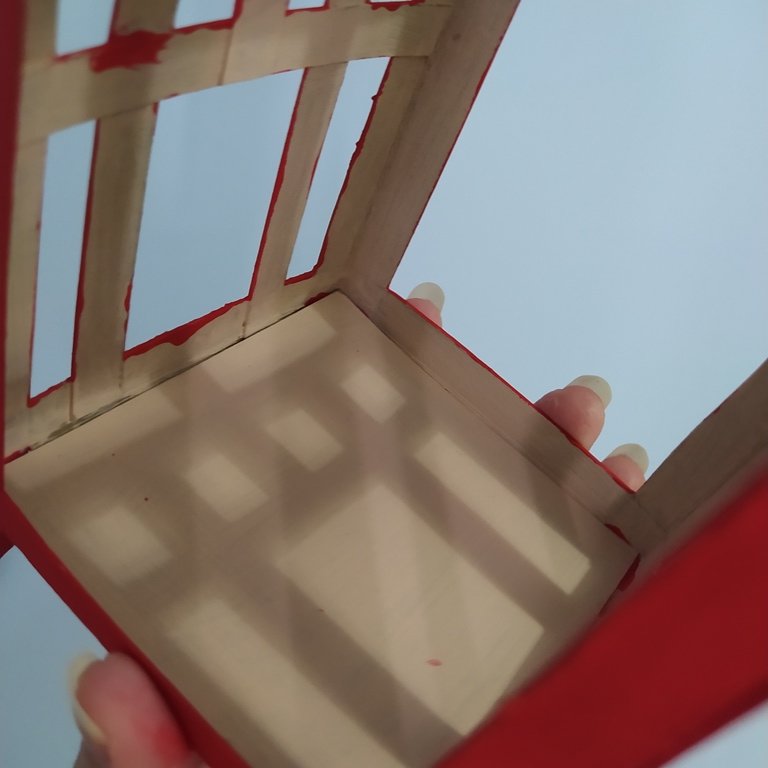
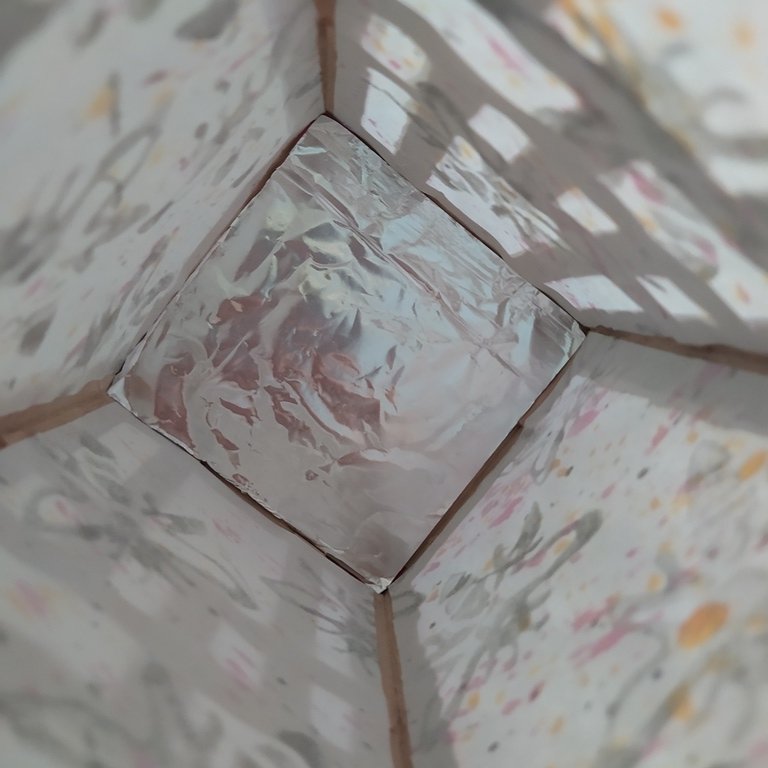
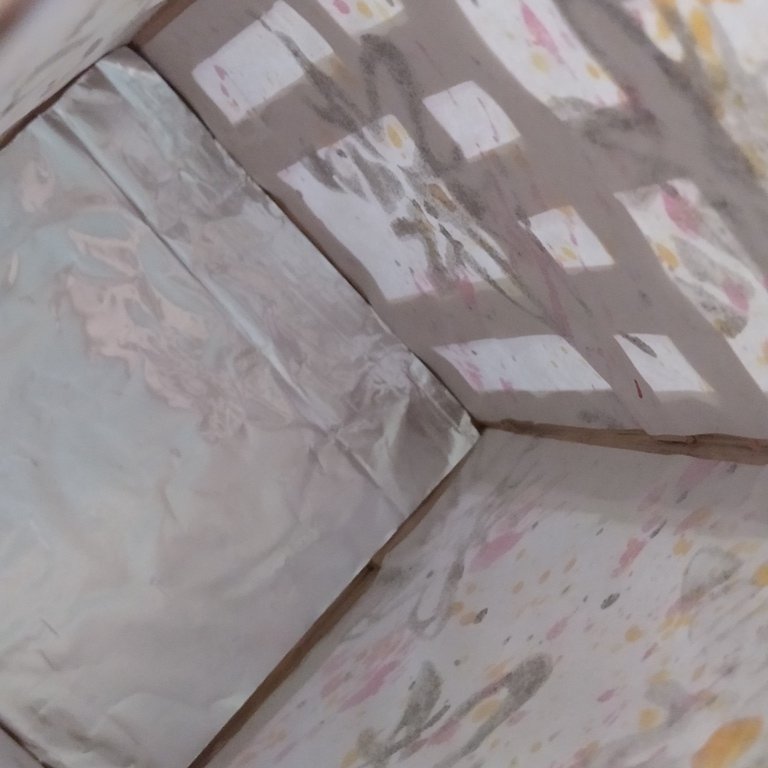
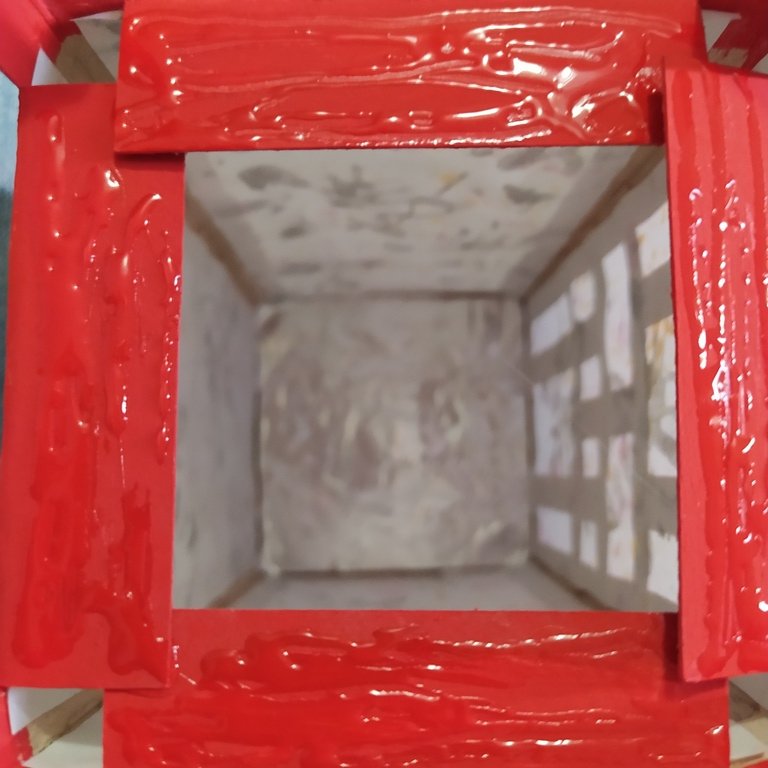
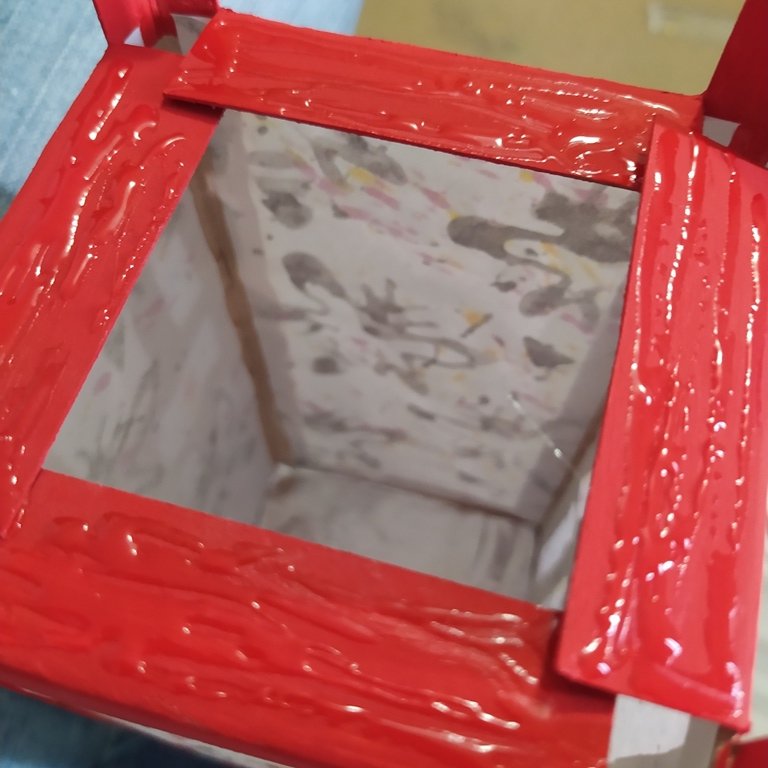
Una vez retirado el centro de cada panel, y doblado hacia dentro el excedente superior e inferior (techo y piso de la linterna), une con silicón frio solamente el piso de la lampara, deja el techo abierto por ahora. Recorta un cuadrado de 9 x 9 cm y pégalo con silicón frio en el interior de la linterna.
Once the center of each panel is removed, and the excess top and bottom (lantern roof and floor) are folded inward, cold silicone bond only the floor of the lantern, leave the roof open for now. Cut out a 9 x 9 cm square and glue it with cold silicone on the inside of the lantern.
 |  |  |
|---|---|---|
 |  |  |
 |  |  |
 |  |  |
 |  |  |
|---|---|---|
 |  |  |
 |  |  |
|---|---|---|
 |  |  |
 |  |  |
 |  |  |
 |  |  |
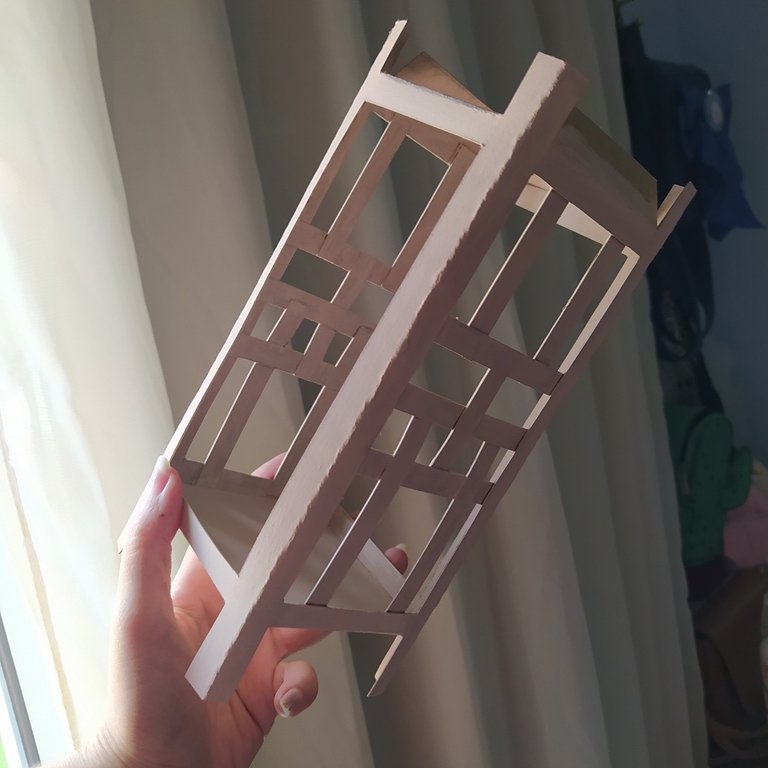 |  |  |
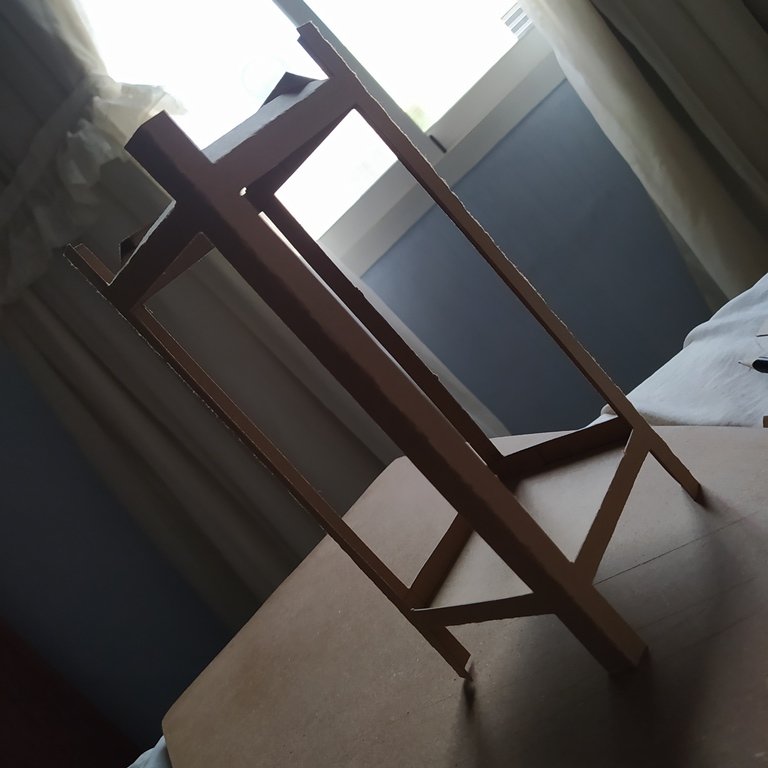
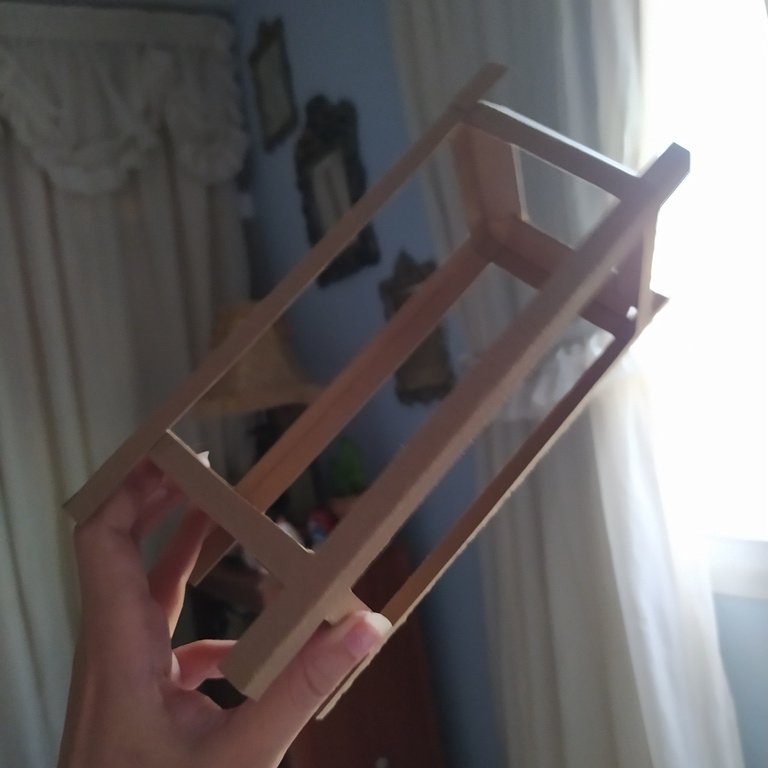
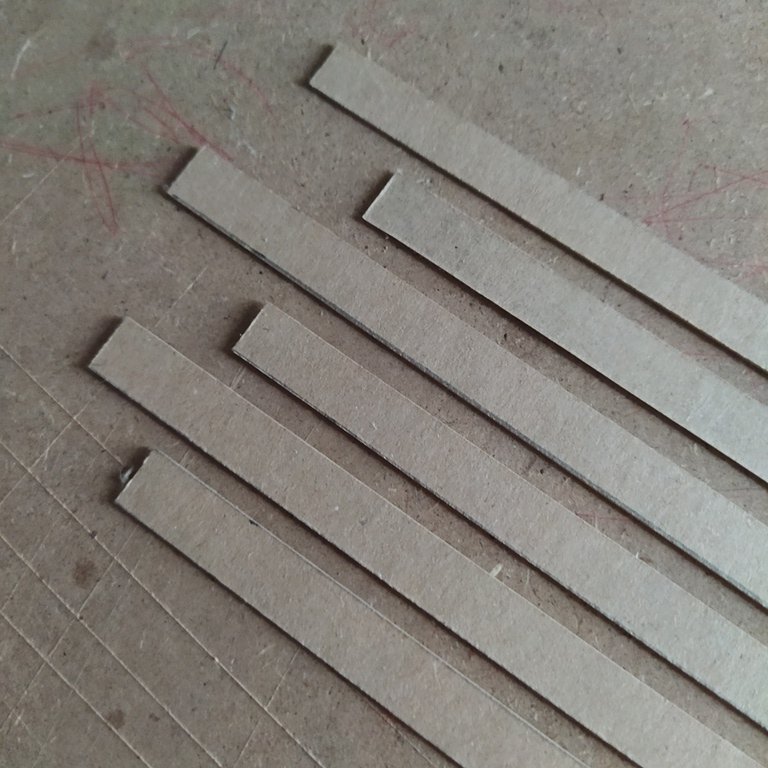
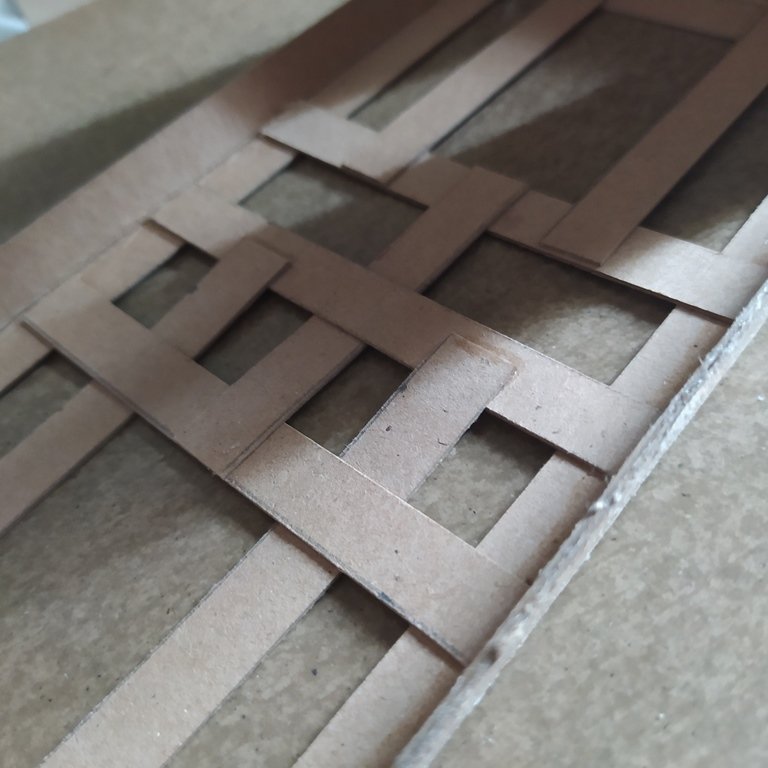
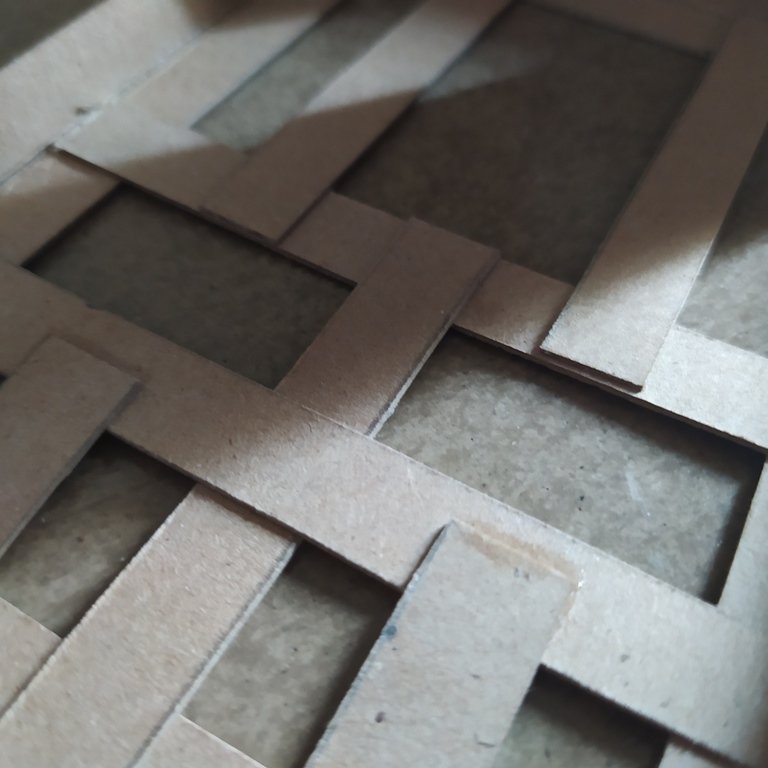
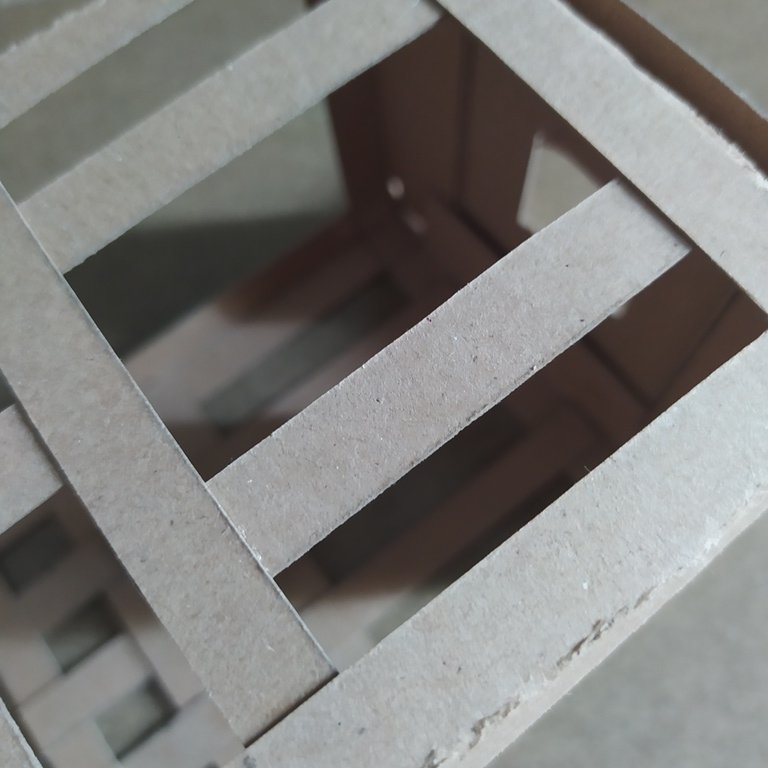
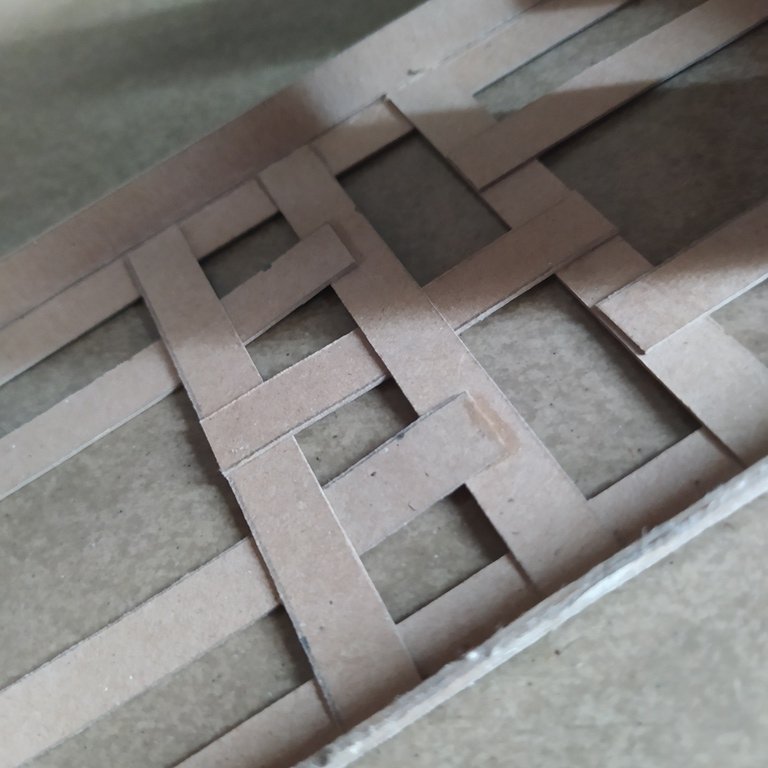
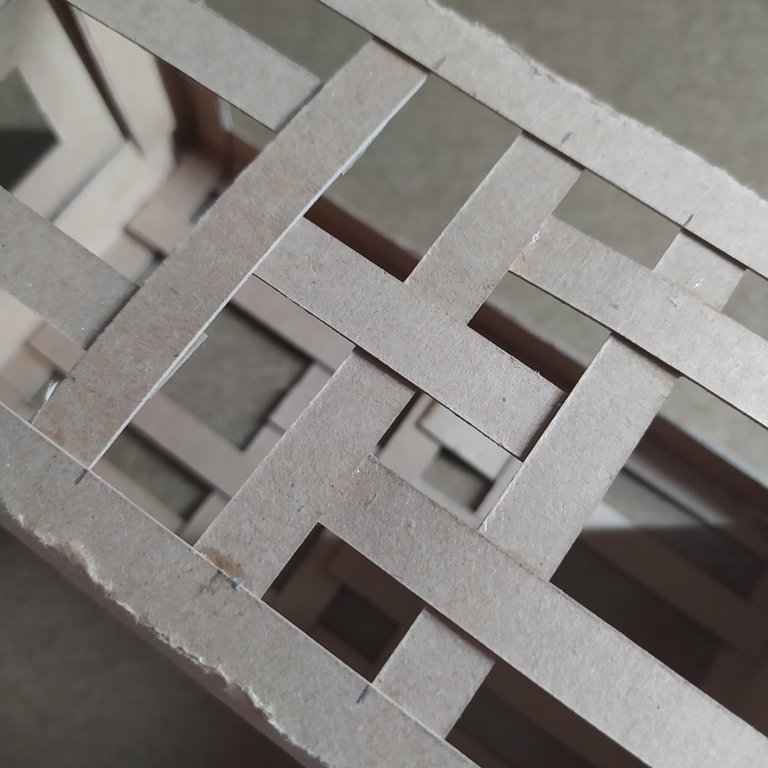
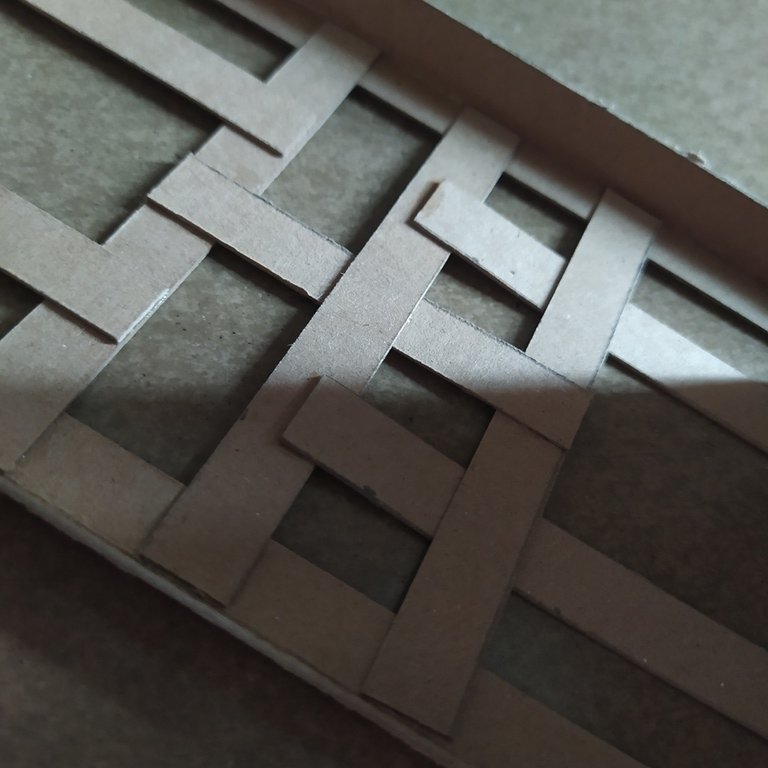
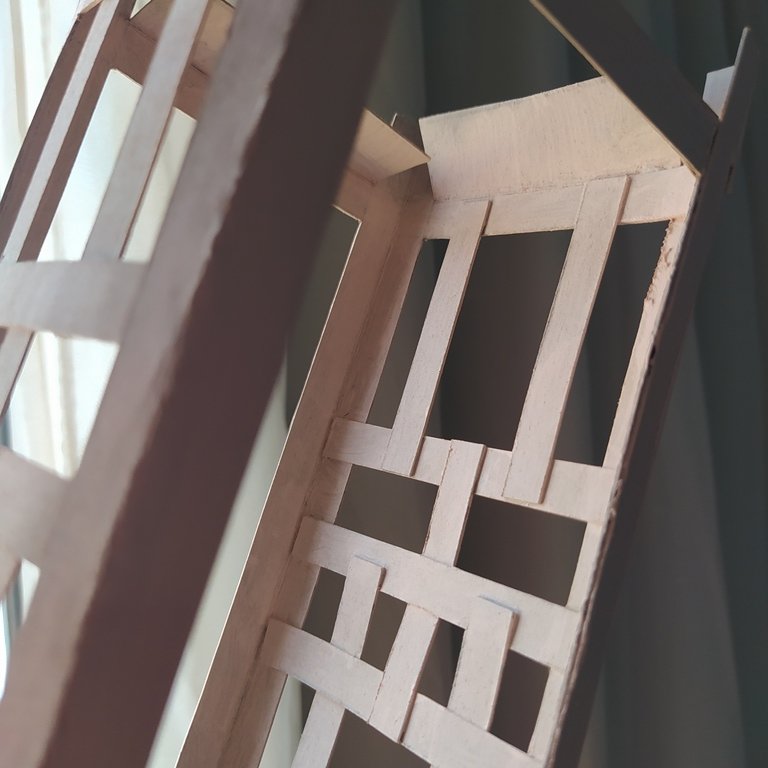
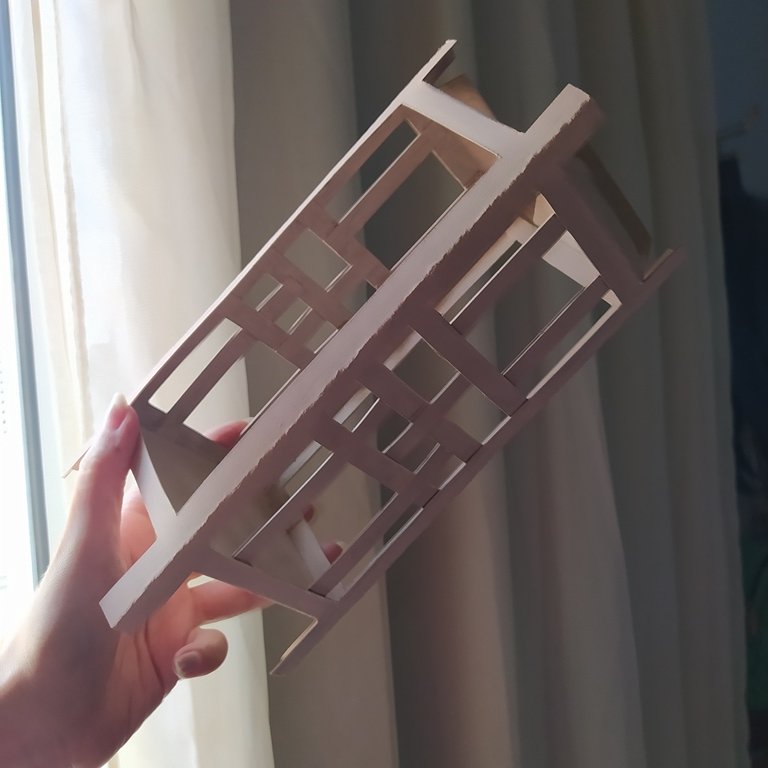
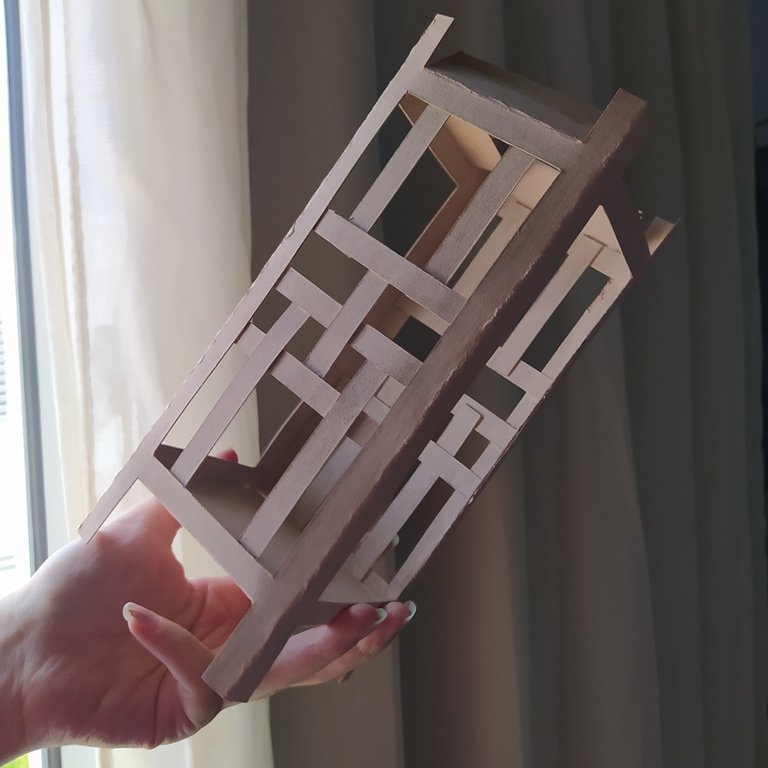
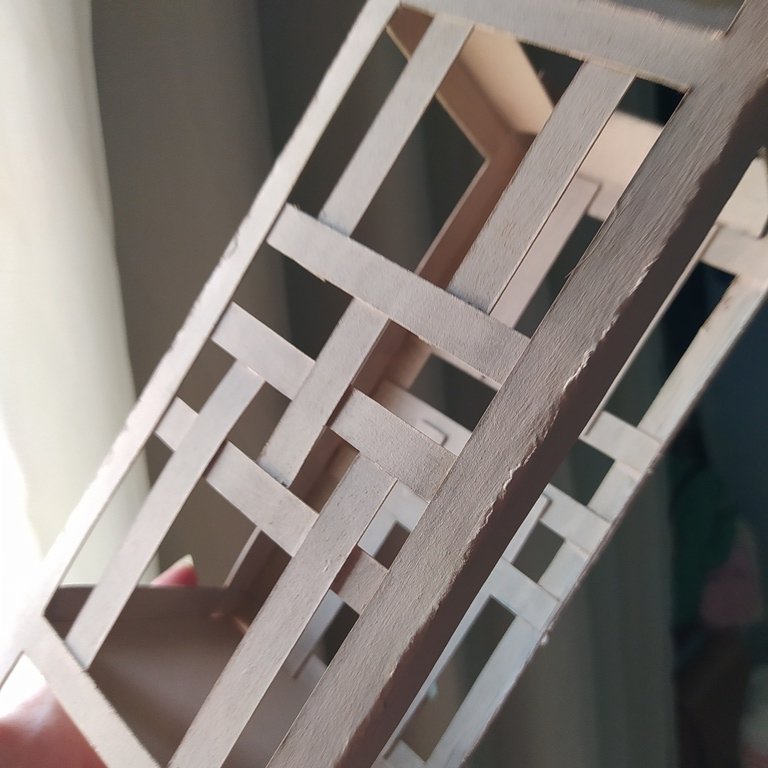
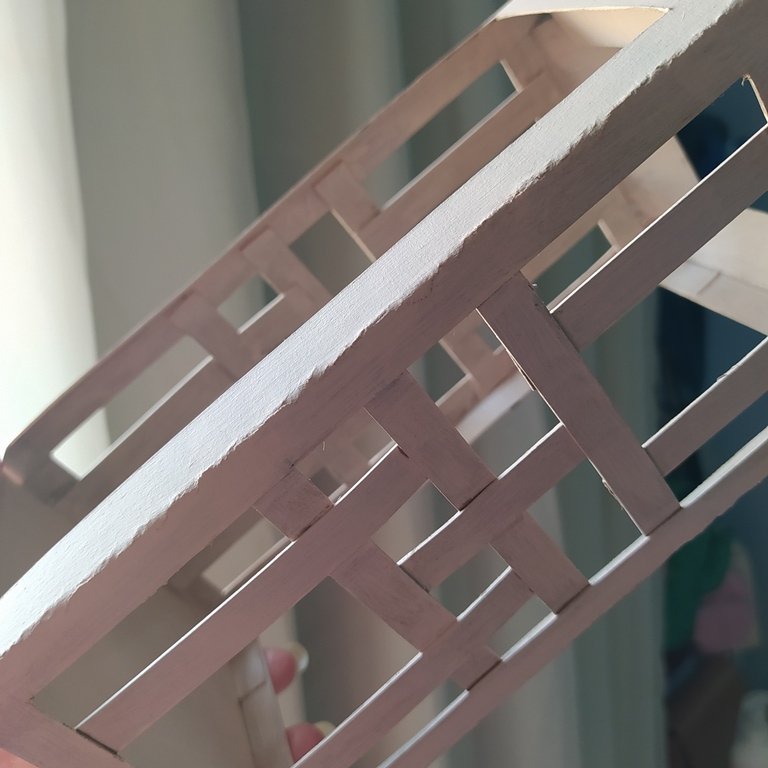
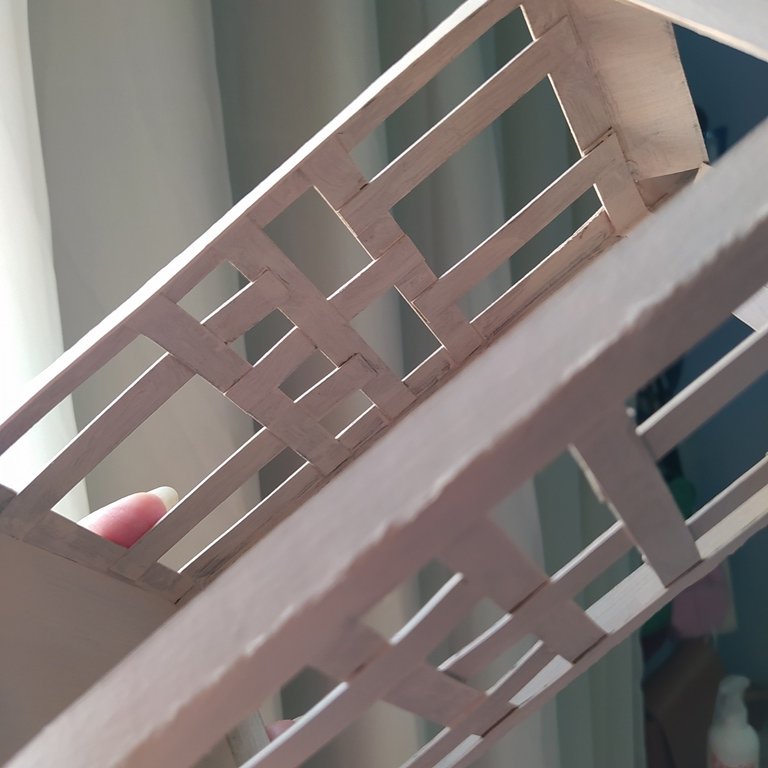
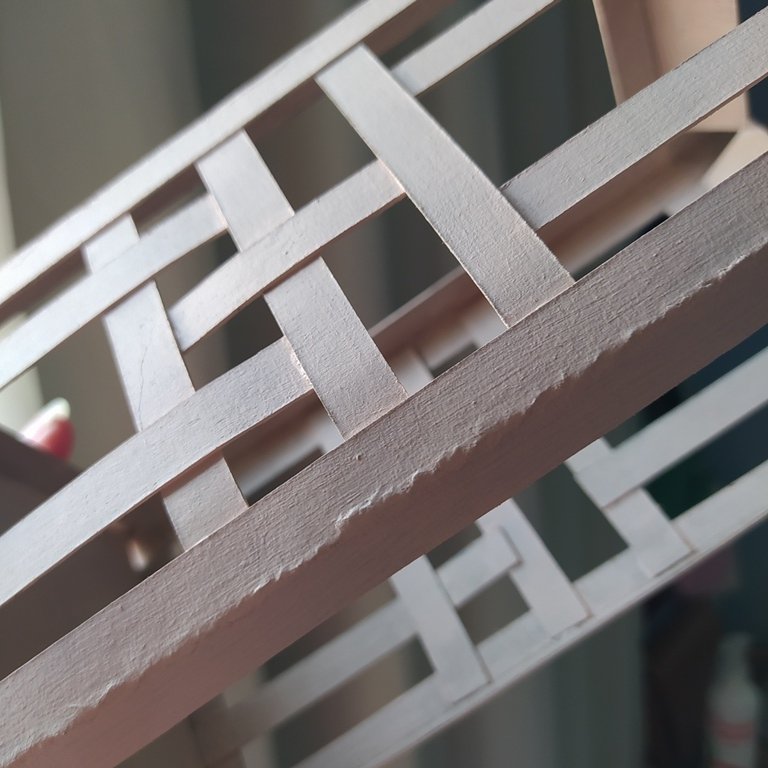
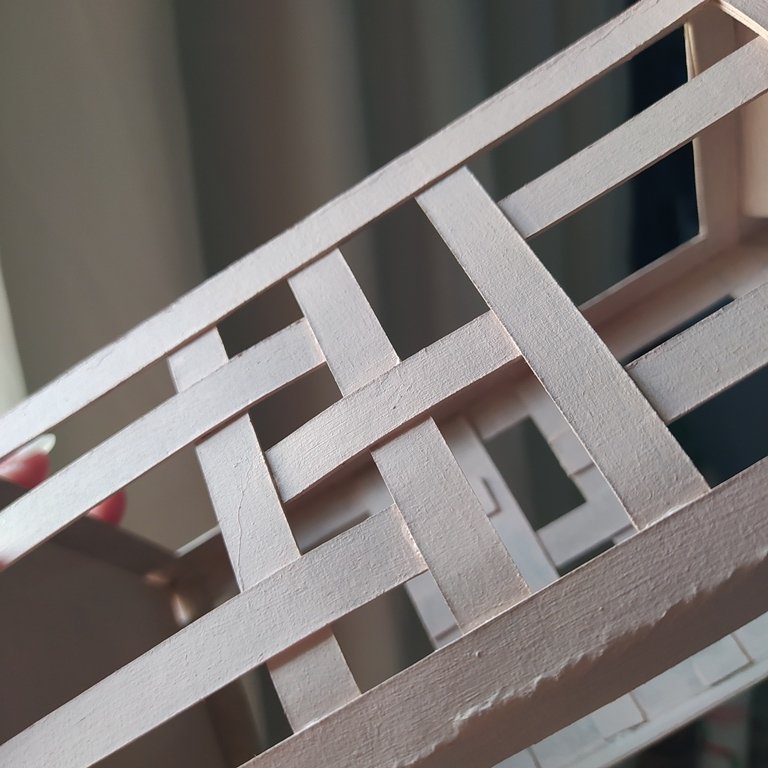
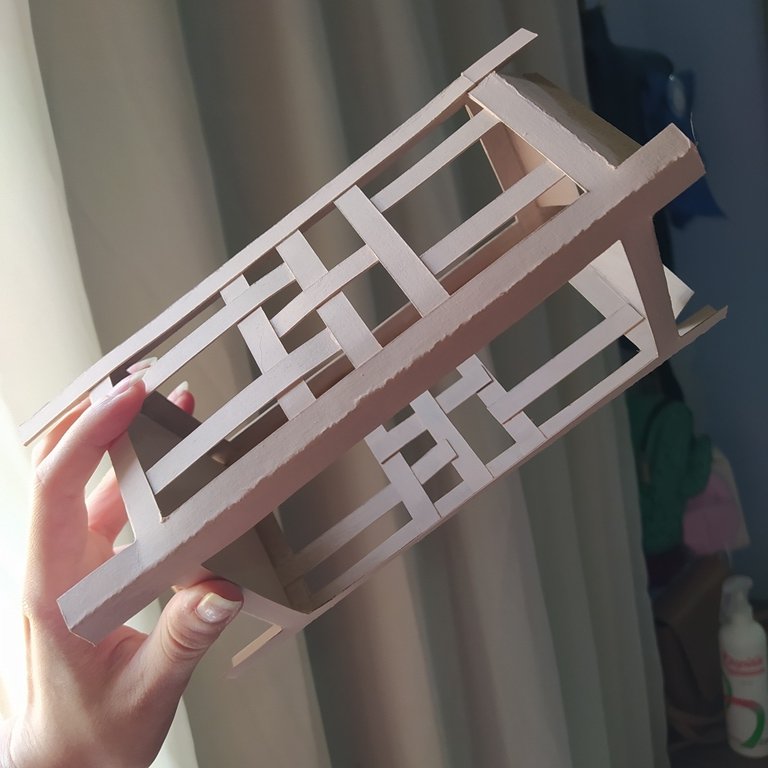
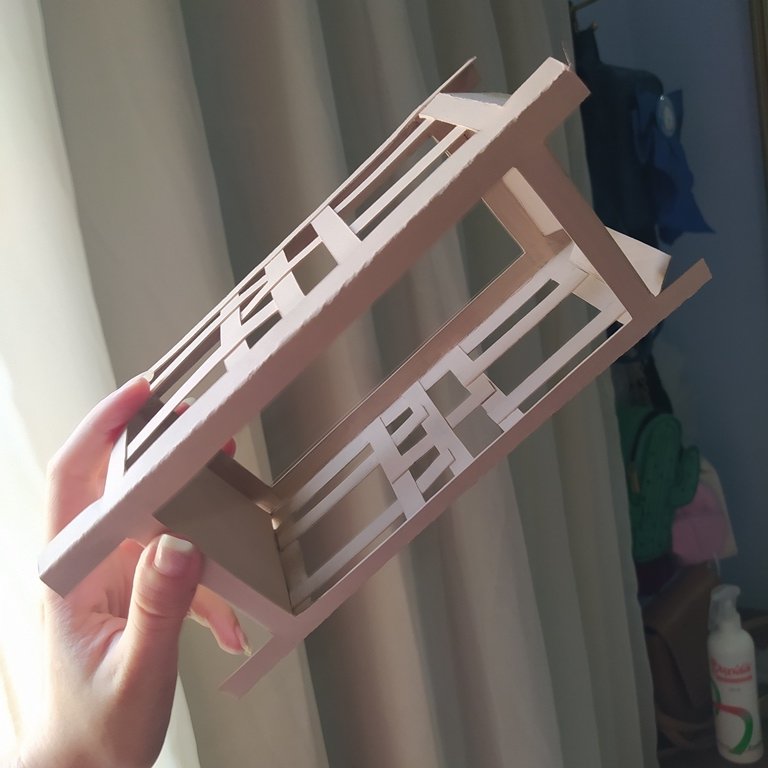
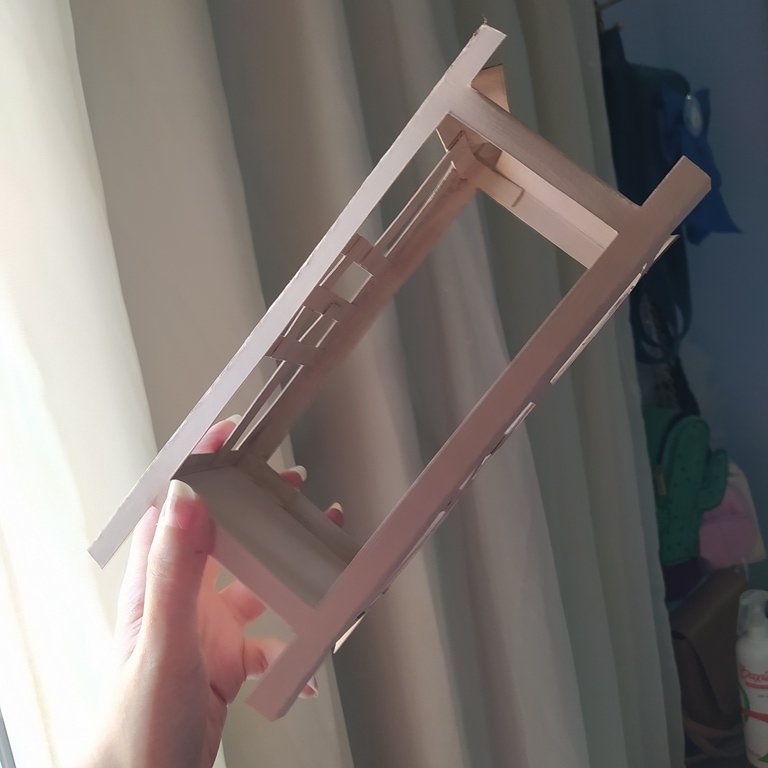
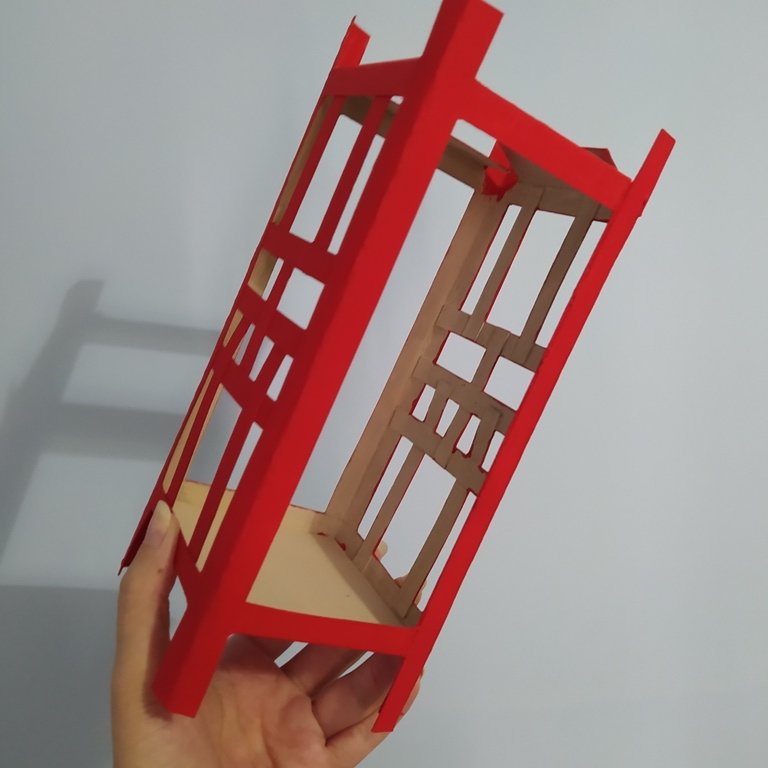
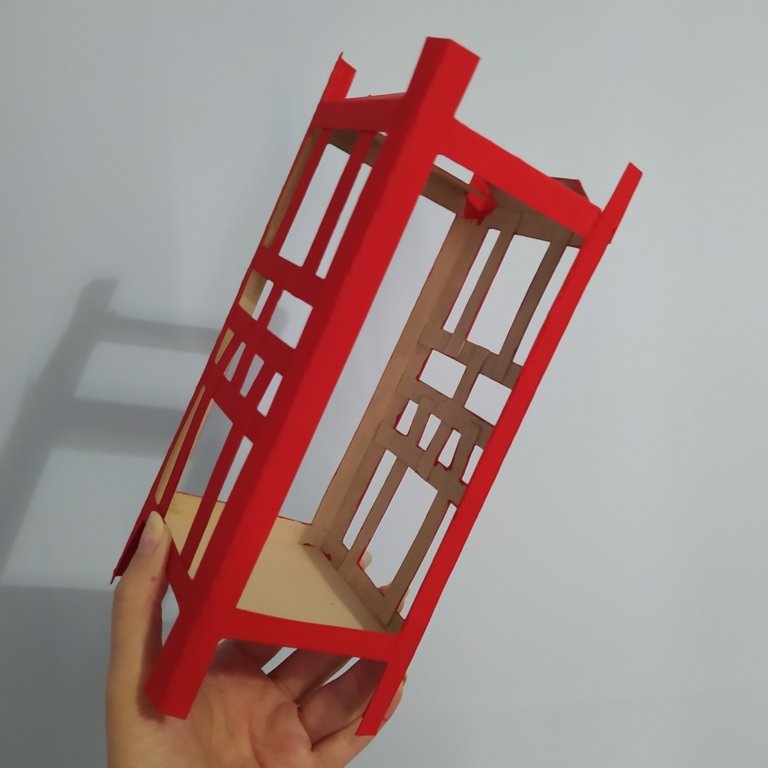
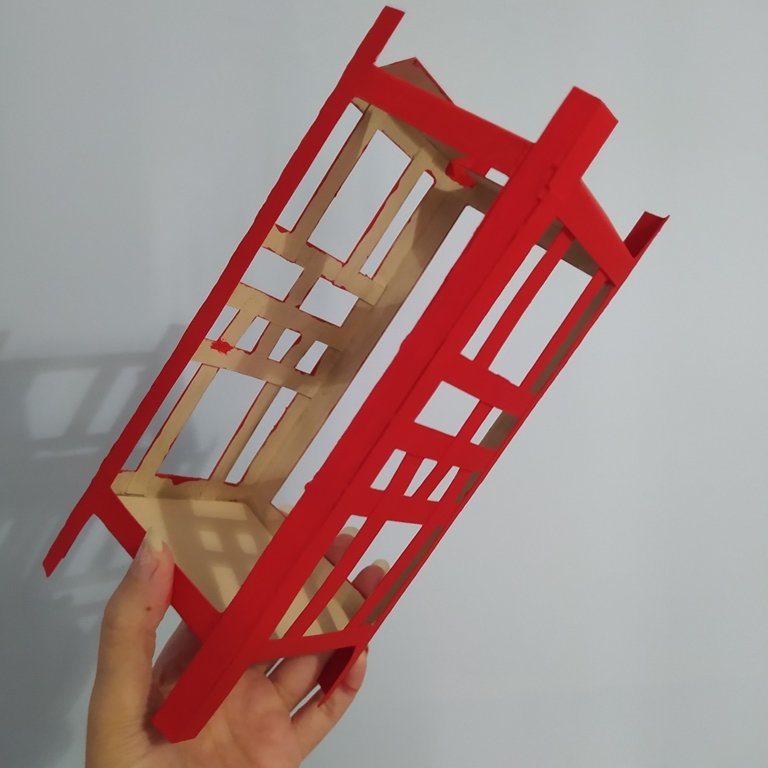
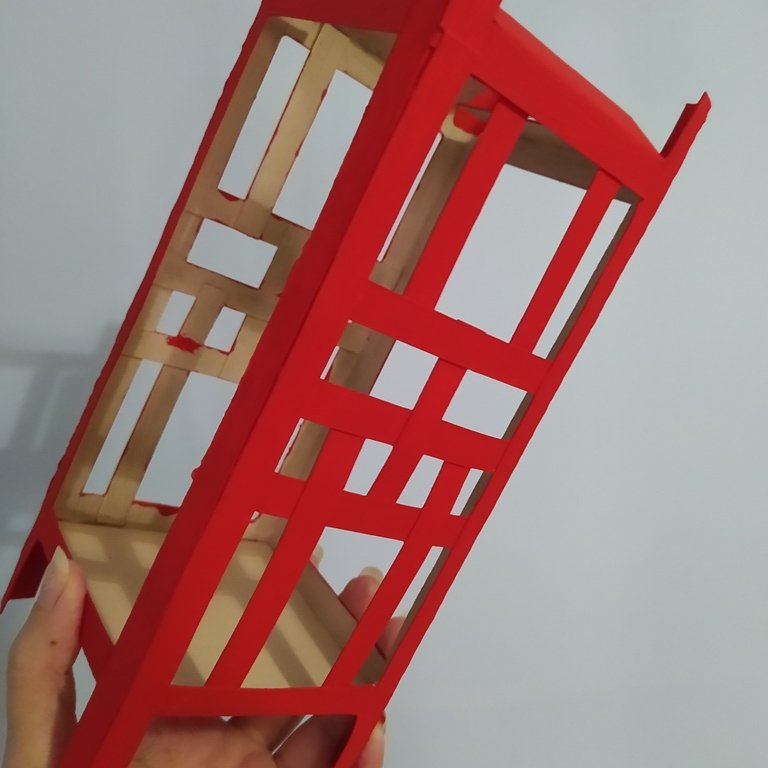
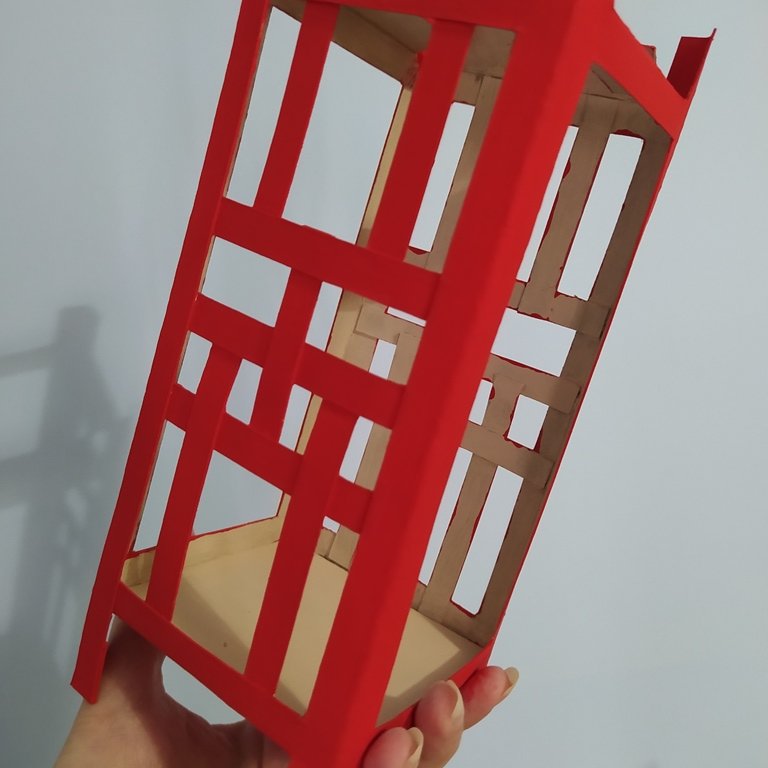
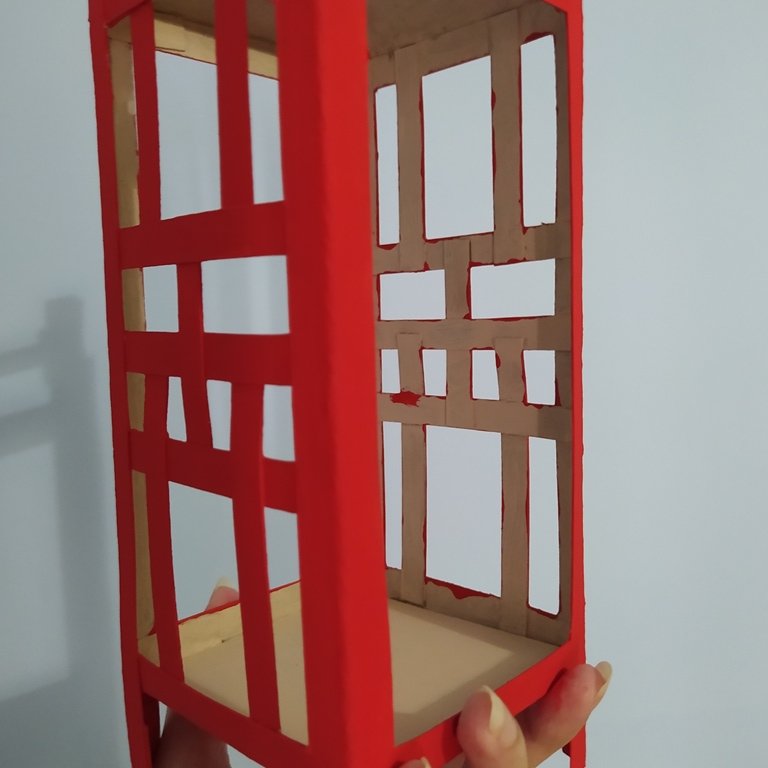
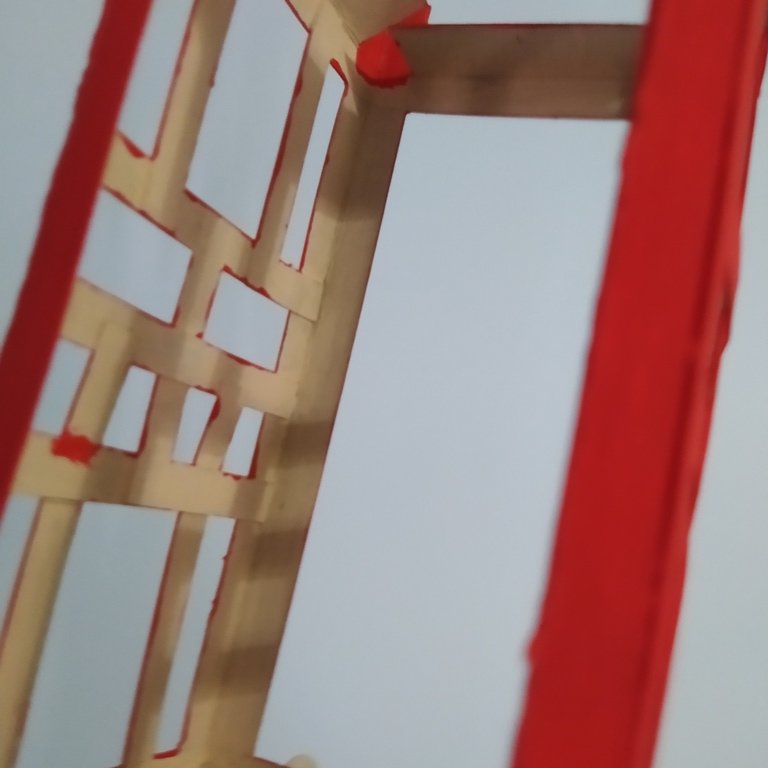
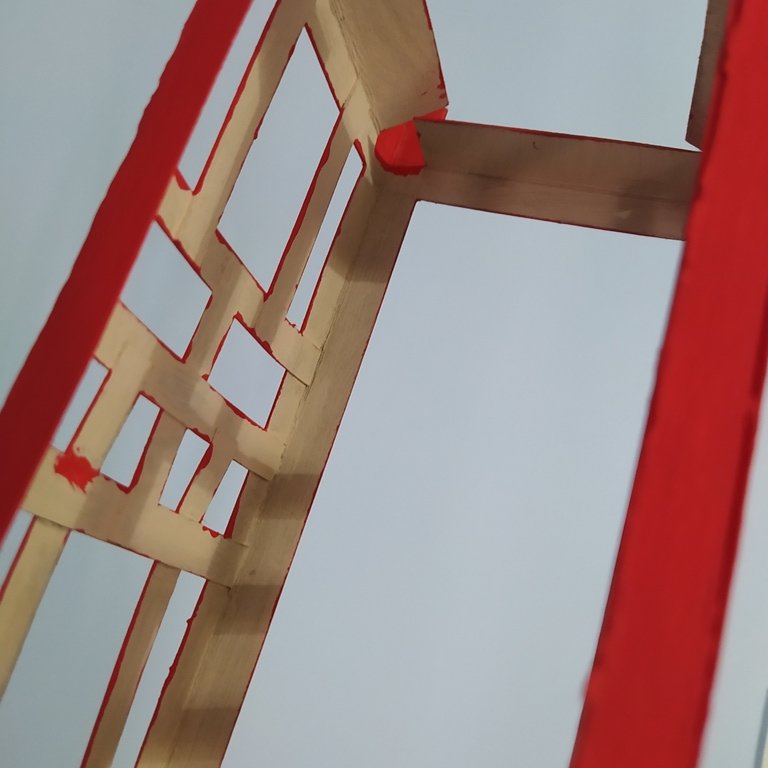
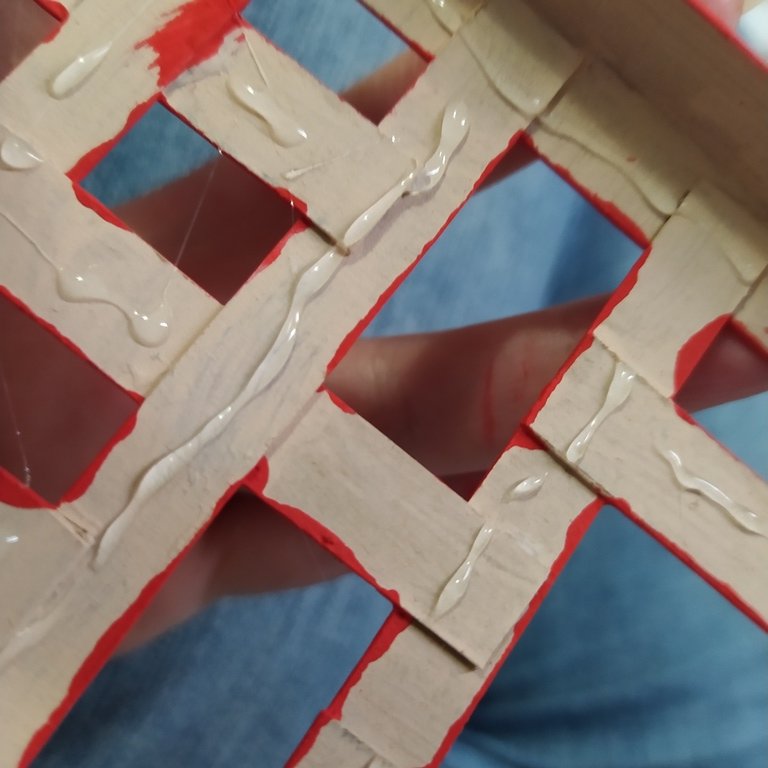
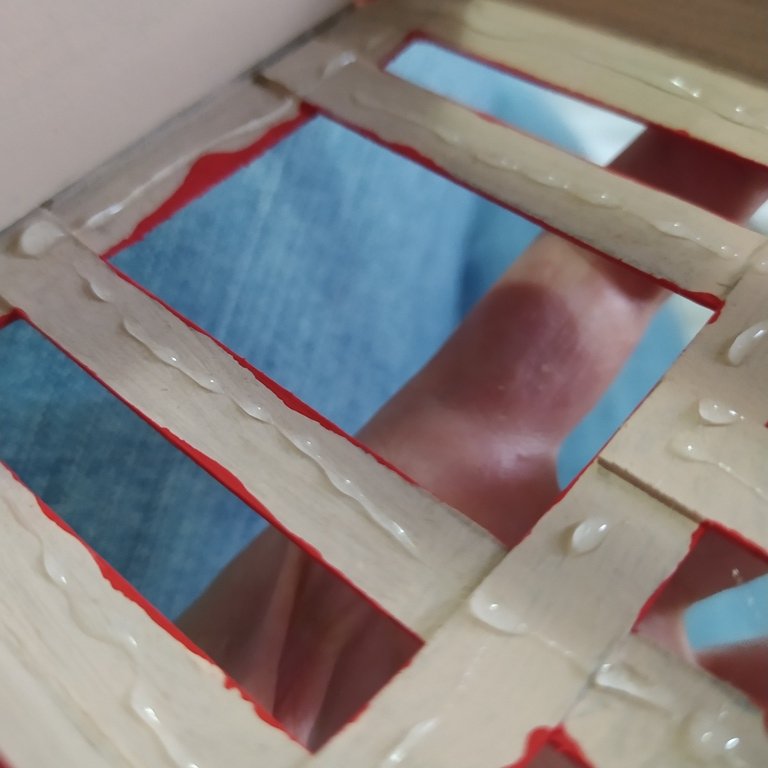
Tienes 100% de libertad en escoger el patrón de las celdas de cada ventana, pero si quieres replicar lo que yo he hecho necesitas: 4 piezas de 7 cm, 10 piezas de 9 cm, y 2 pieza de 6 cm.
You have 100% freedom in choosing the pattern of the cells of each window, but if you want to replicate what I have done you need: 4 pieces of 7 cm, 10 pieces of 9 cm, and 2 pieces of 6 cm.
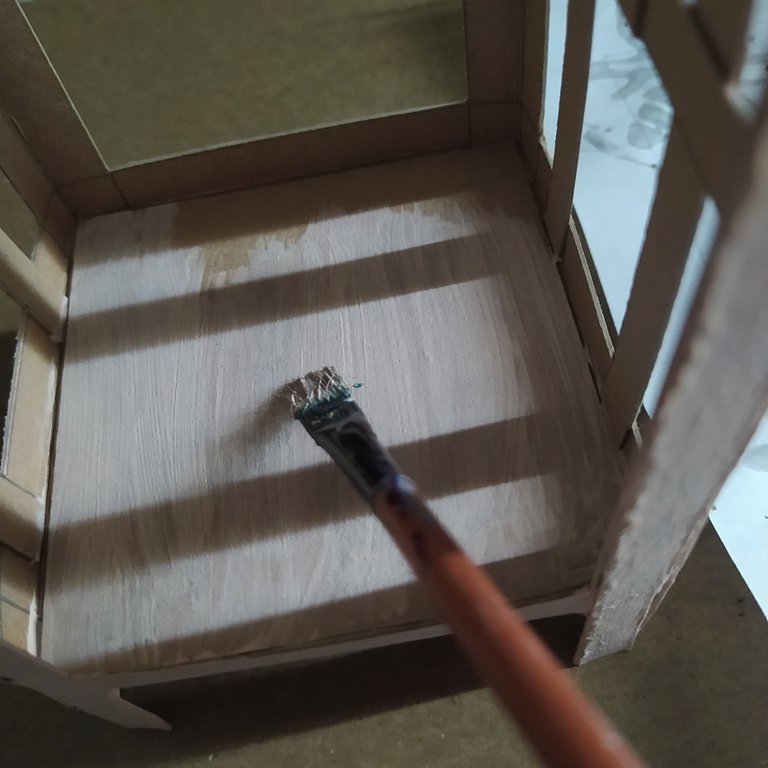
Pégalas superponiéndolas o "trenzándolas" una por una, y pinta con pintura acrílica en 2 capas toda la estructura por dentro y por fuera cuando se cumpla el tiempo de secado. Mientras se evapora toda la humedad de nuestra linterna base, vamos a elaborar el sello para estampar el papel.
Glue them overlapping or “braiding” them one by one, and paint with acrylic paint in 2 layers the whole structure inside and outside when the drying time is over. While all the humidity of our base lantern evaporates, we are going to elaborate the stamp to stamp the paper.
 |  |
|---|---|
 |  |
 |  |
 |  |
 |  |
 |  |
 |  |
 |  |
 |  |
 |  |
 |  |
 |  |
Para elaborar el sello de foami me inspire en la fabulosa guía de "El Taller de Diana" que recomiendo mucho seguir y apoyar, ¡te queremos mucho @chacald.dcymt! 🙌 💖
To elaborate the foami stamp I was inspired by the fabulous guide of “El Taller de Diana” that I highly recommend to follow and support, we love you very much @chacald.dcymt! 🙌 💖
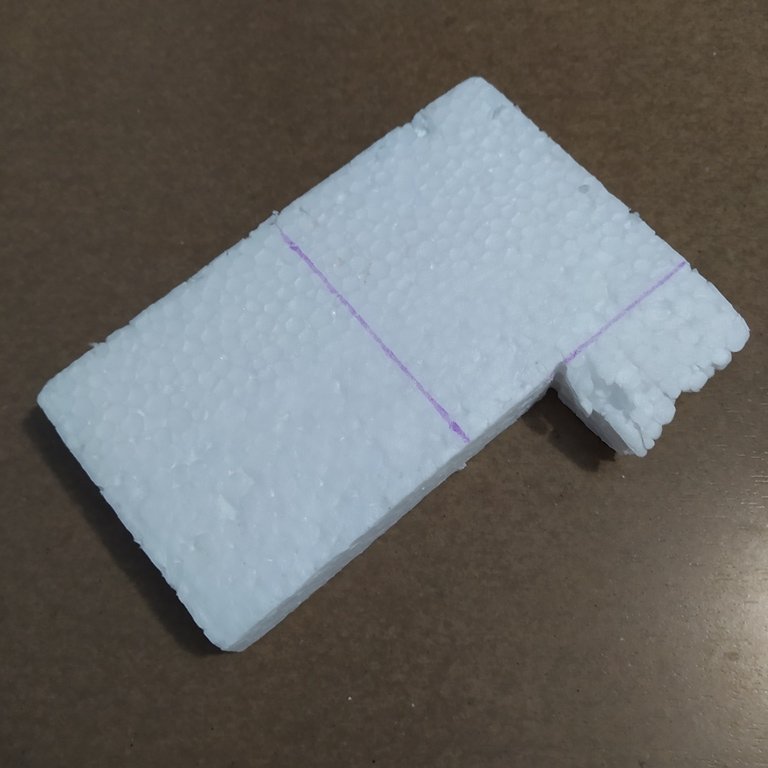
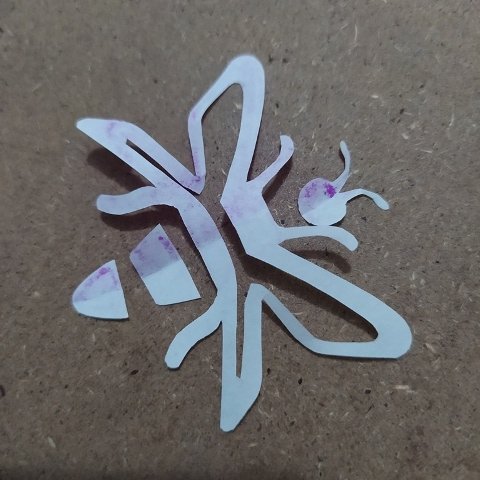
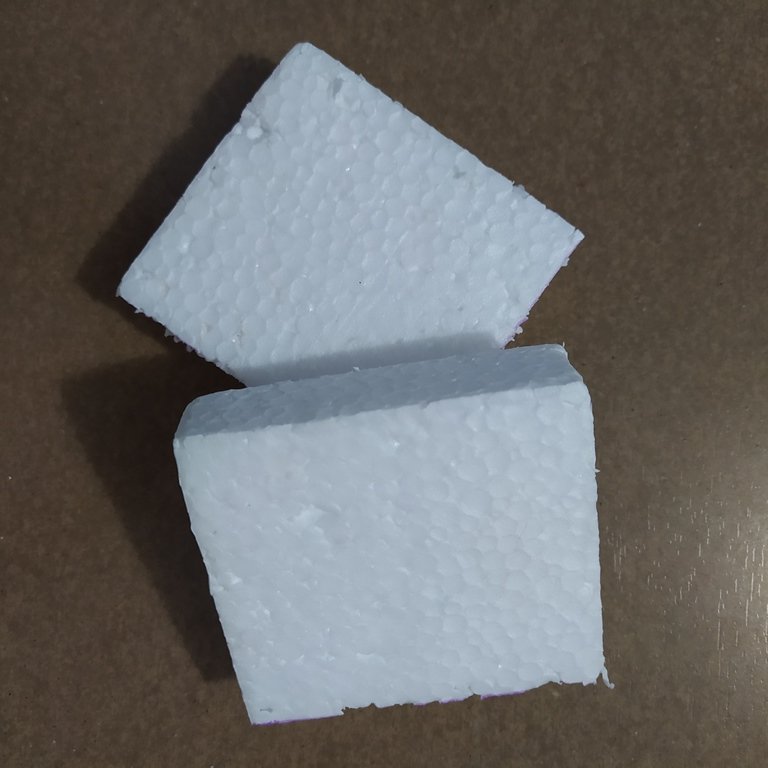
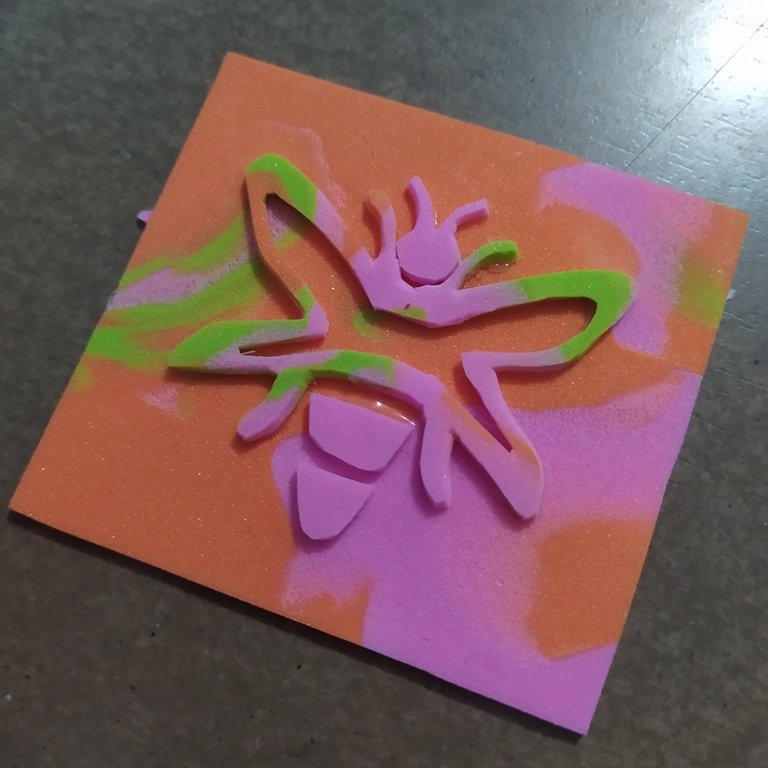
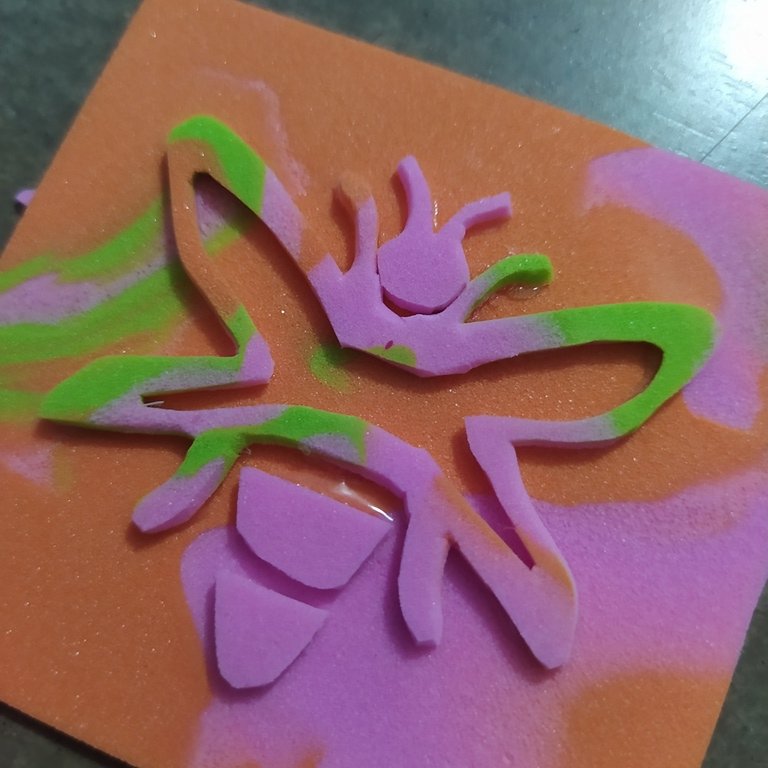
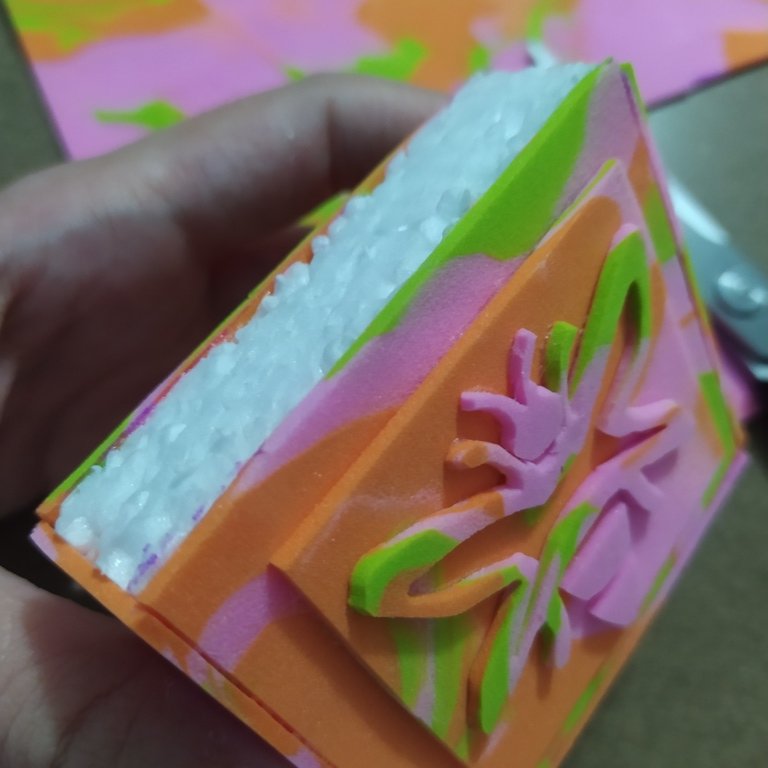
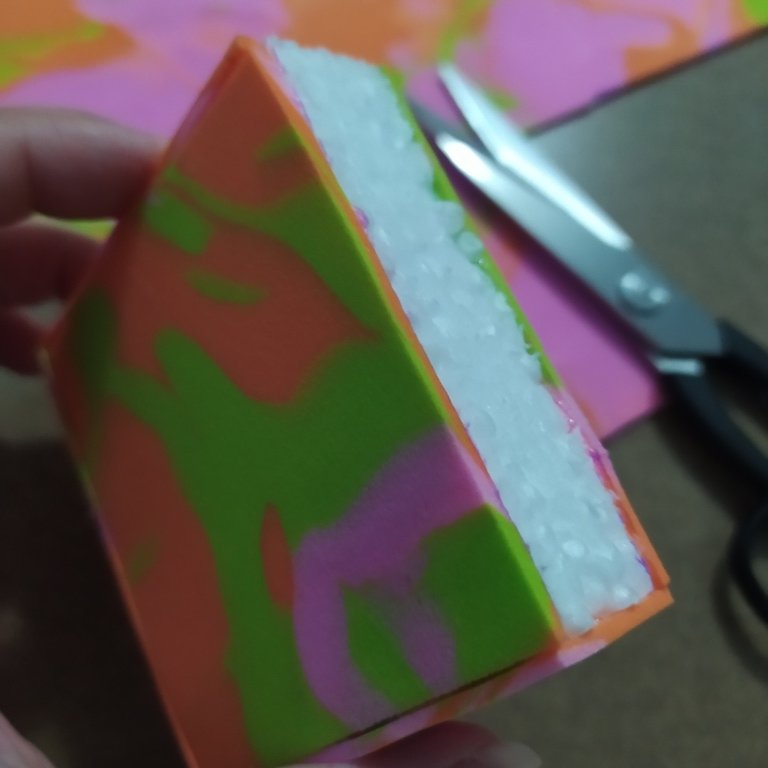
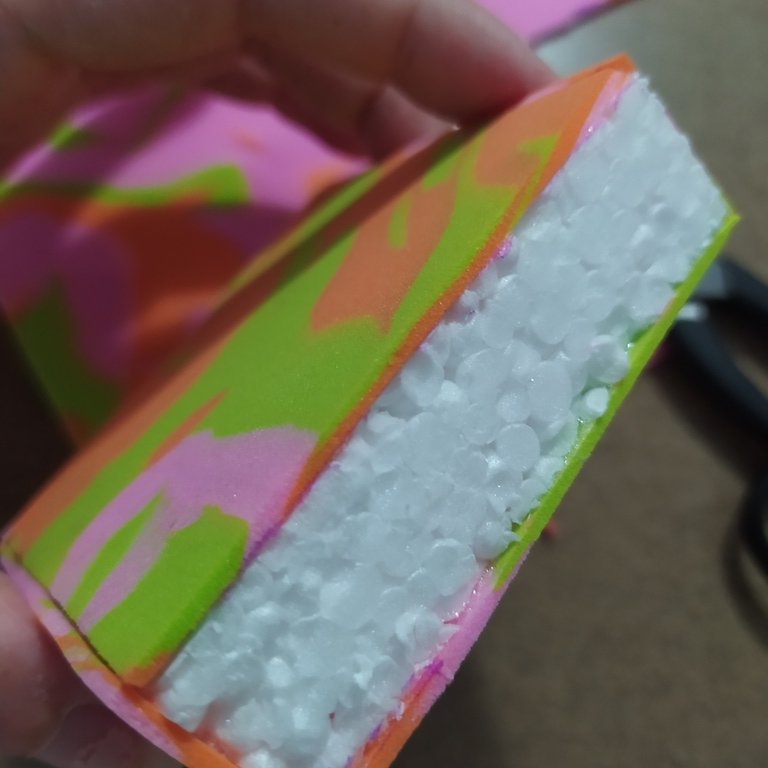
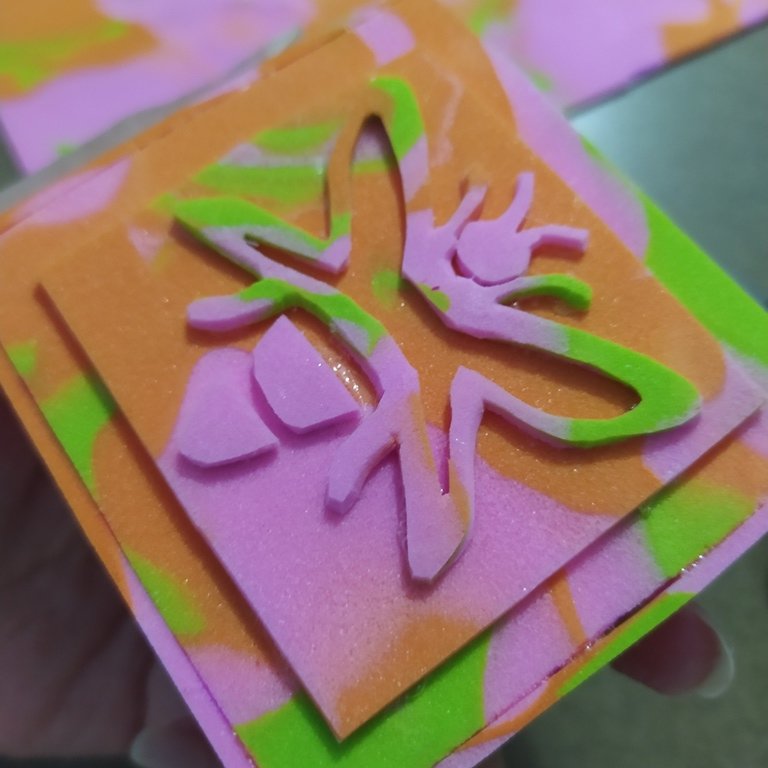
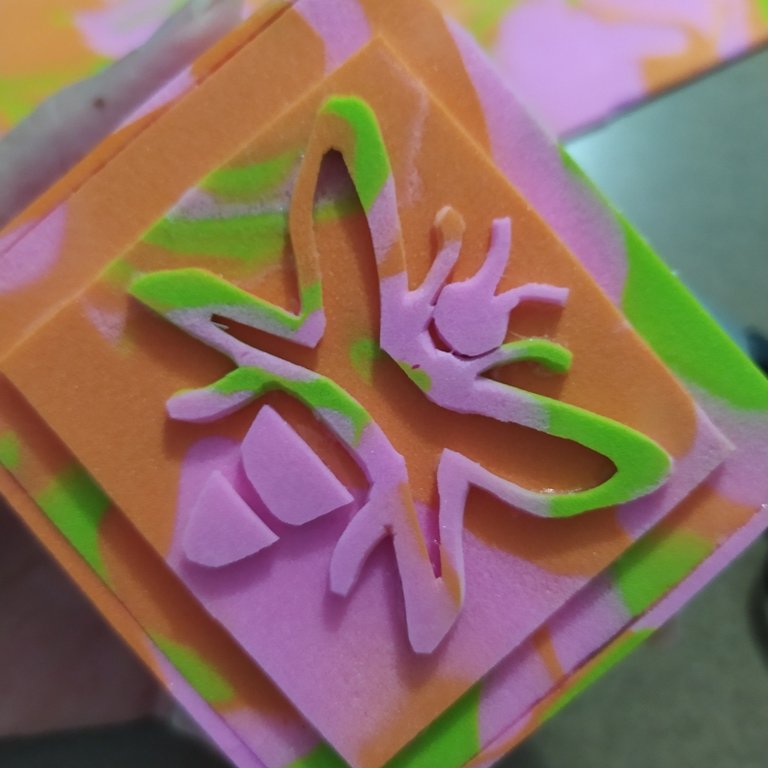
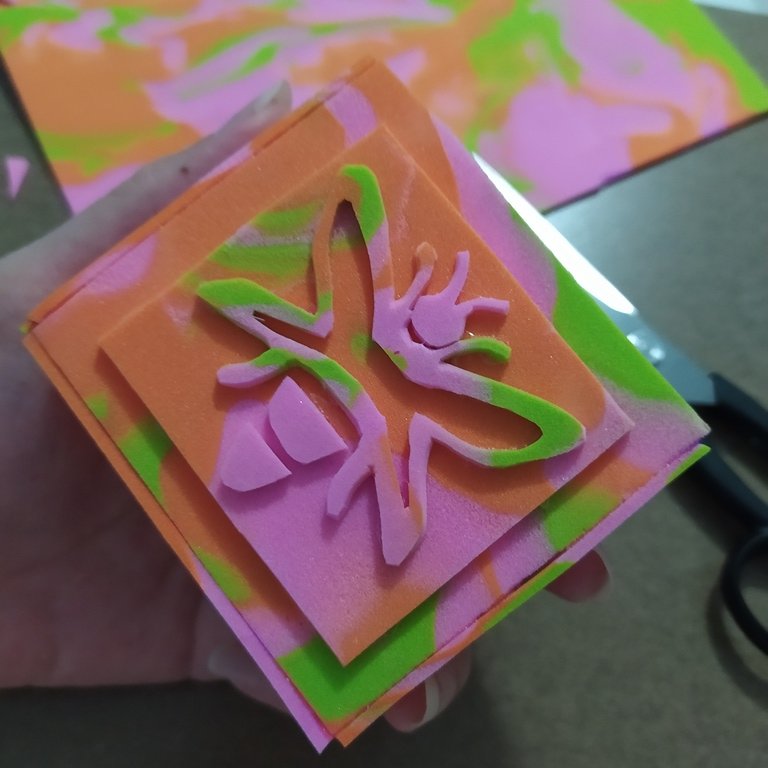
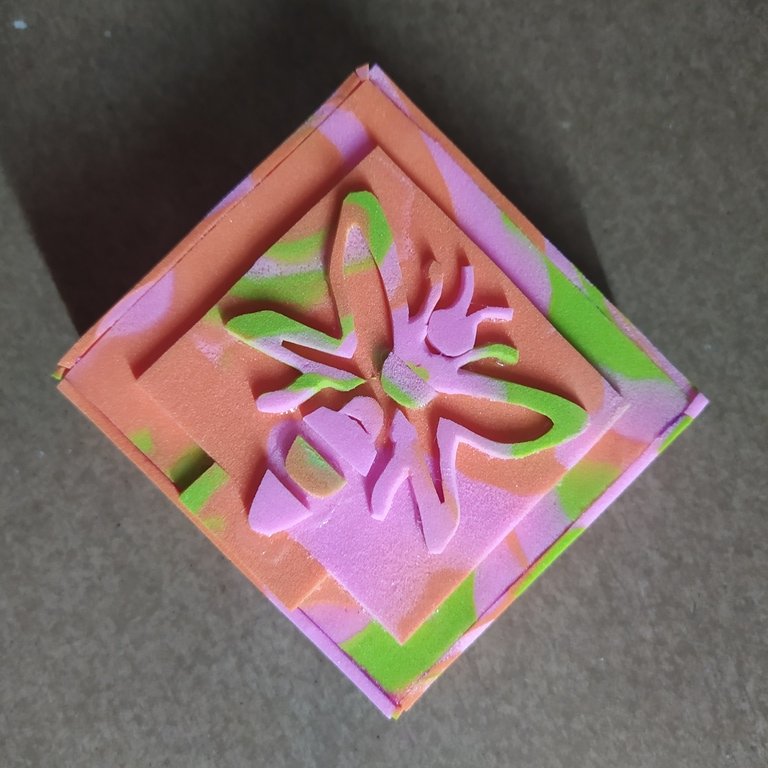
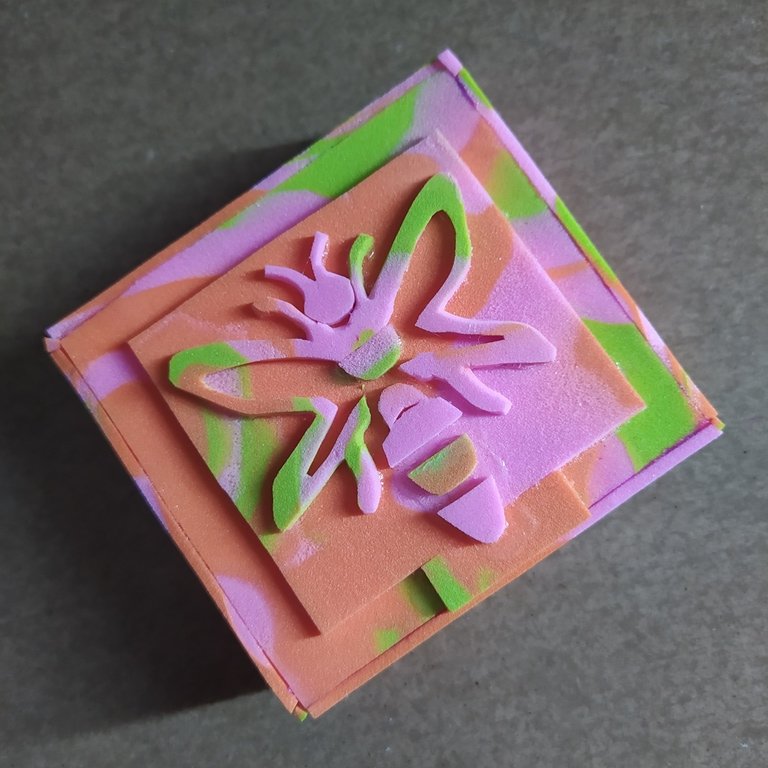
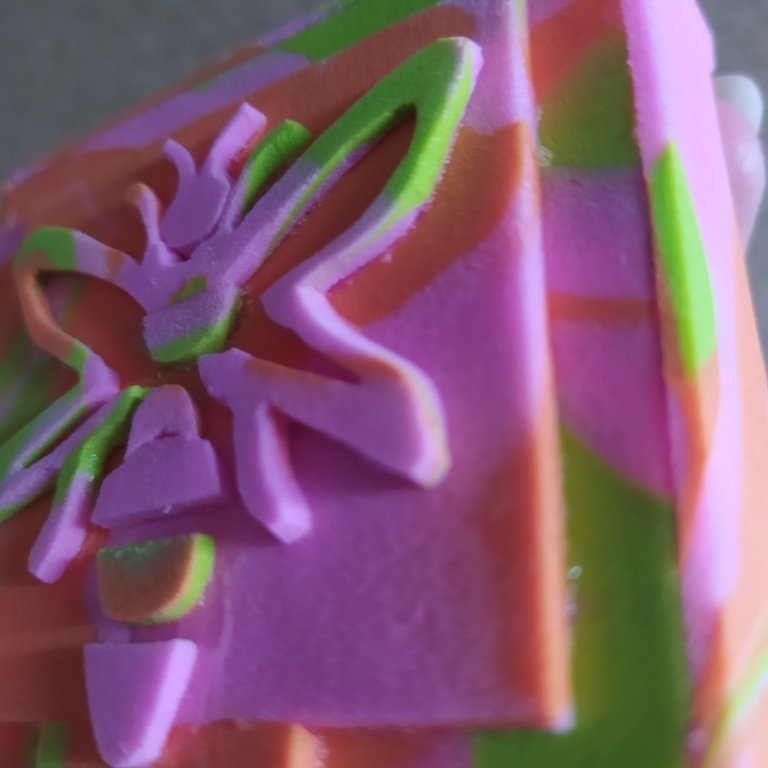
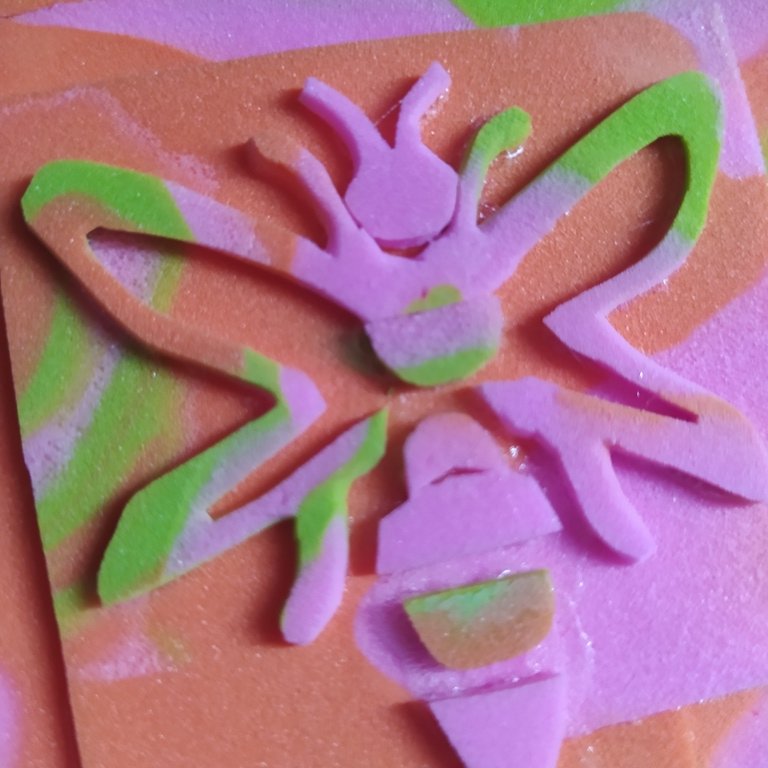
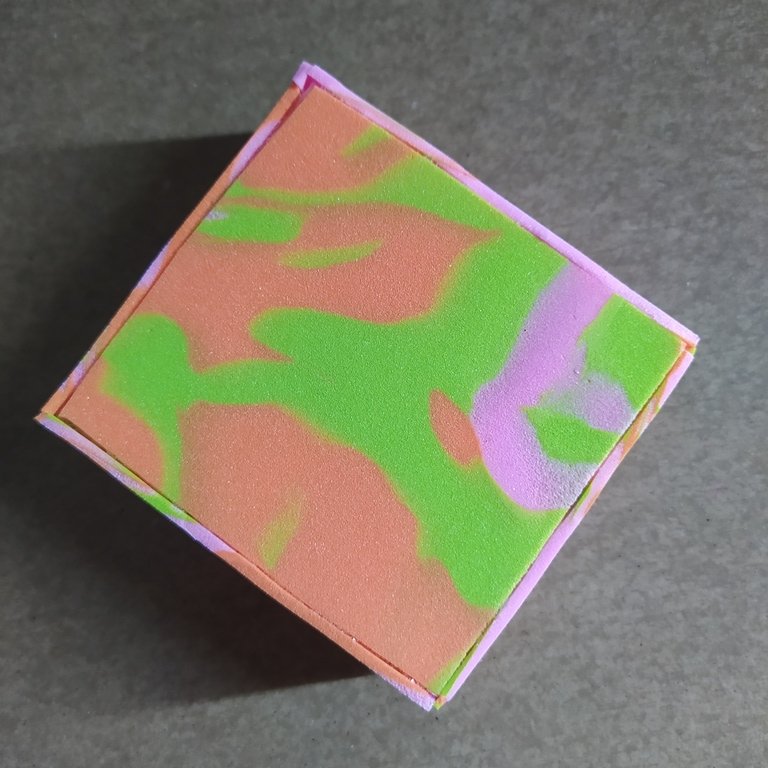
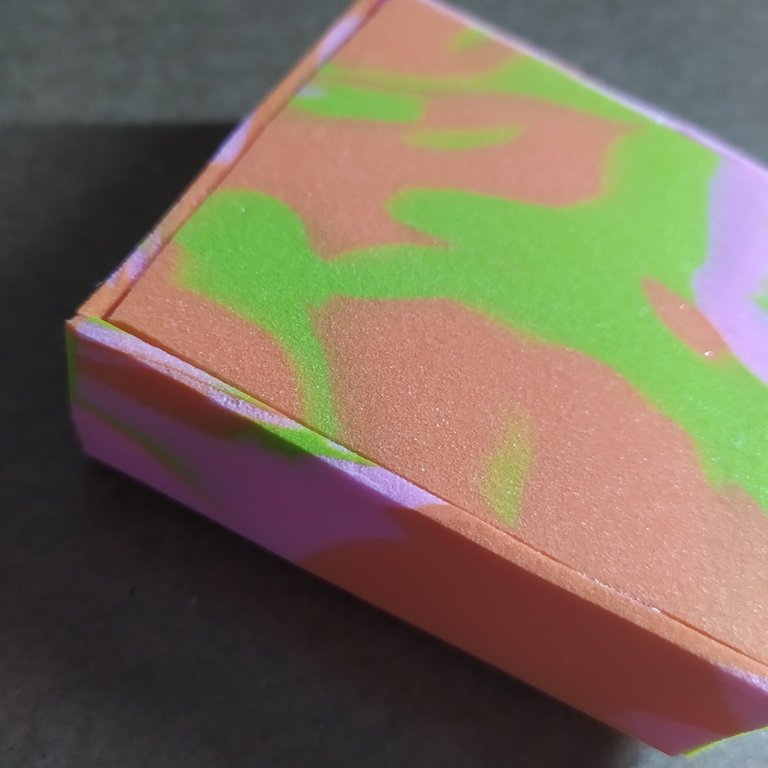
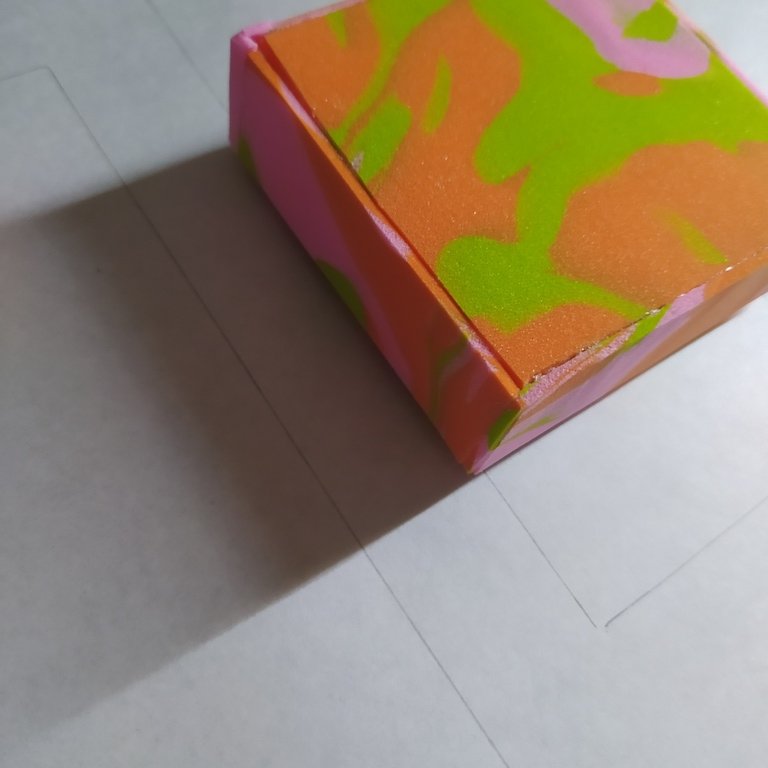
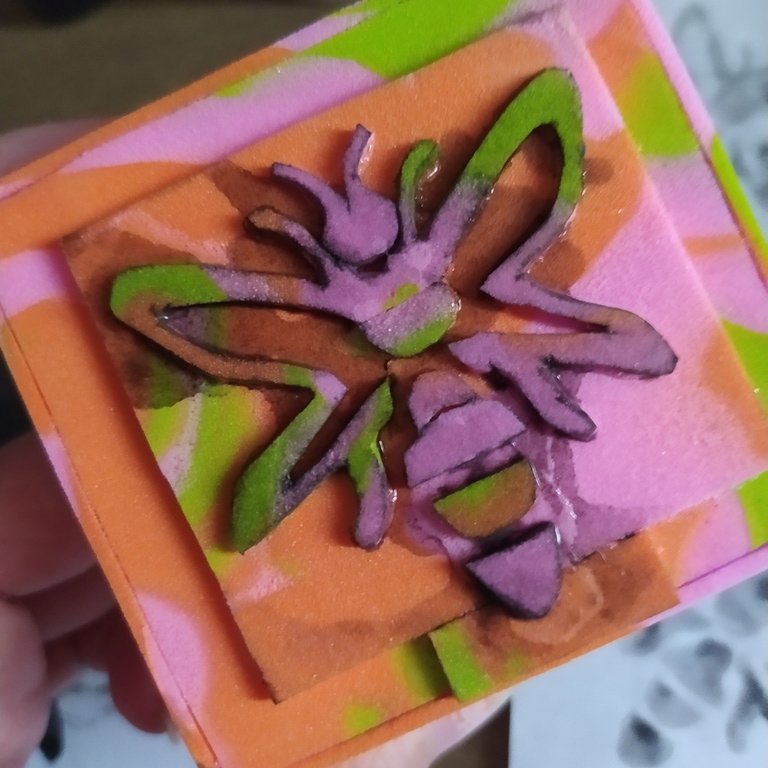
Corta un rectángulo de poliuretano, y fórralo con foami escolar. Dibuja en papel la silueta de una abeja, recórtala incluyendo el relleno, y pega esas figuritas de papel en un rectángulo aparte de foami, déjalo secar completamente.
Cut a rectangle of polyurethane, and line it with school foami. Draw on paper the silhouette of a bee, cut it out including the filling, and glue these paper figures on a separate rectangle of foami, let it dry completely.
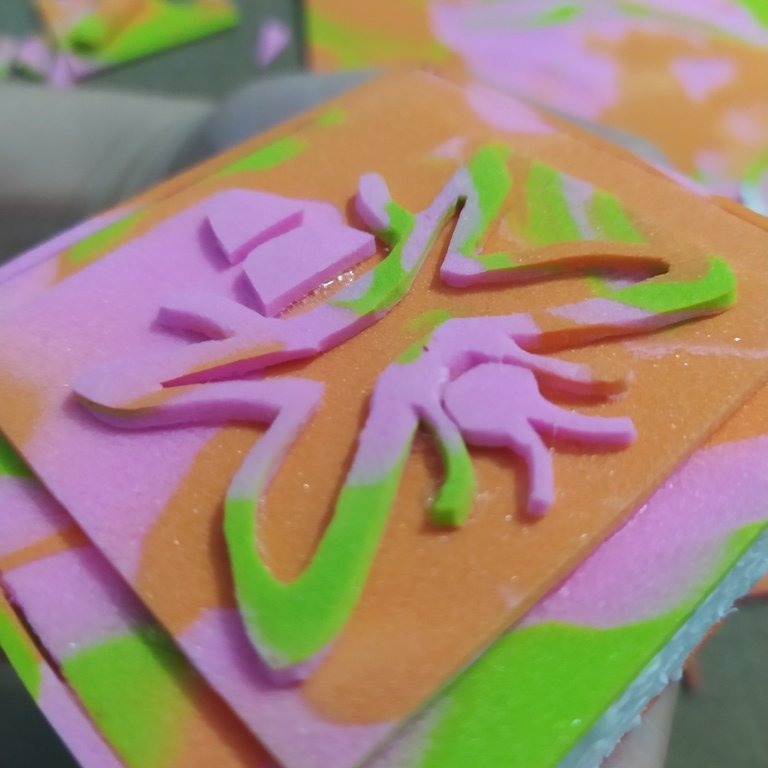
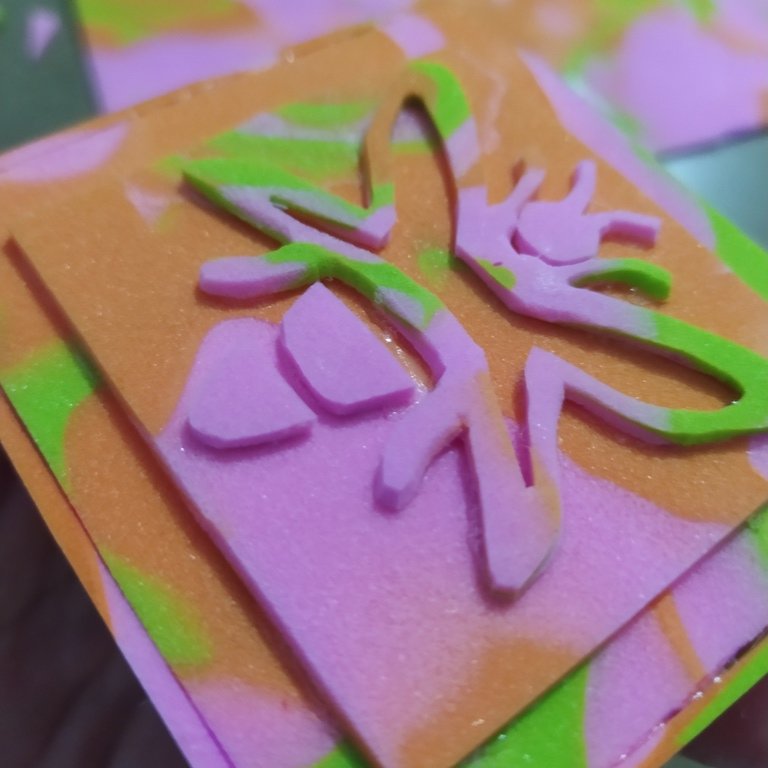
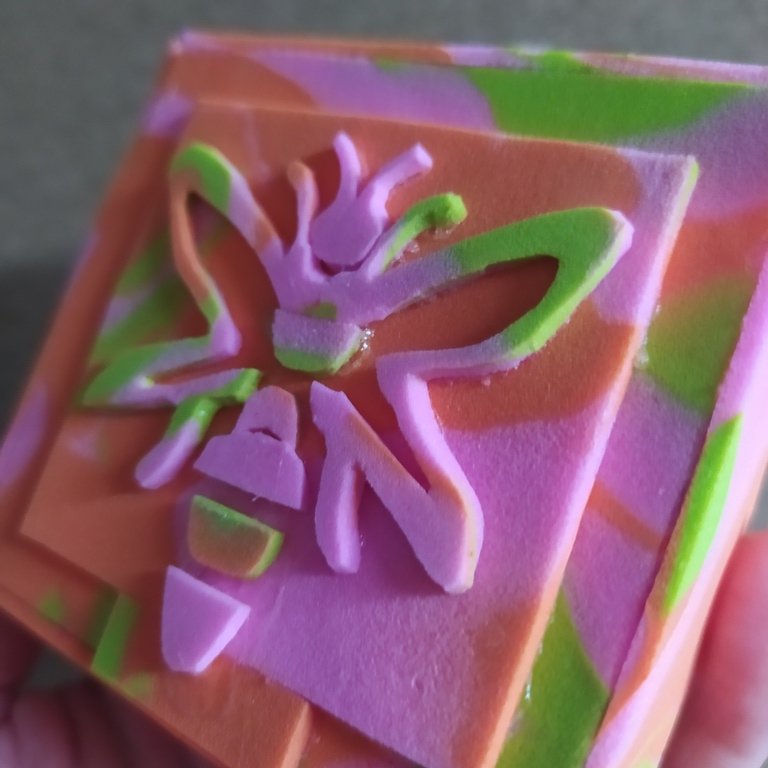
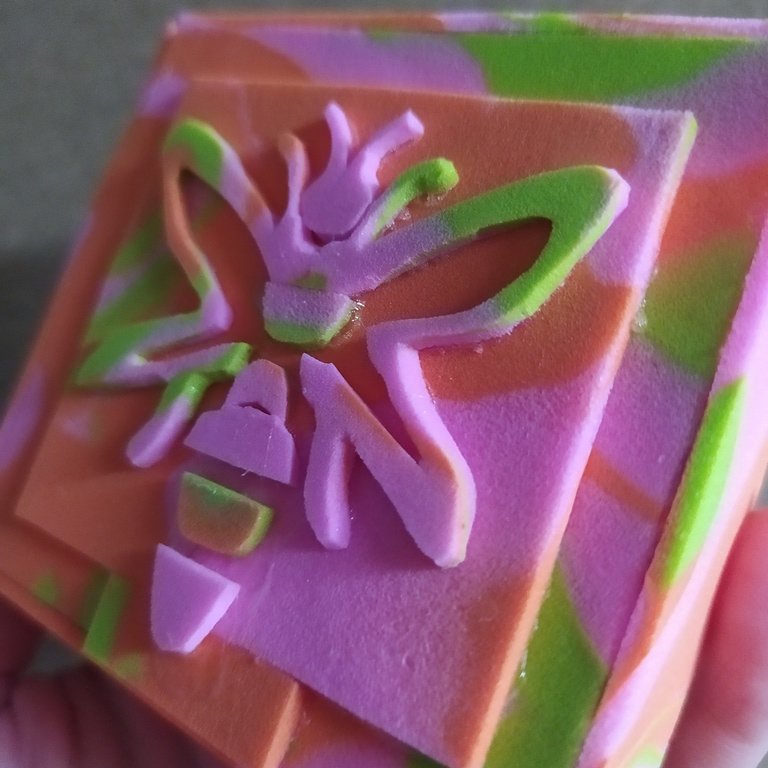
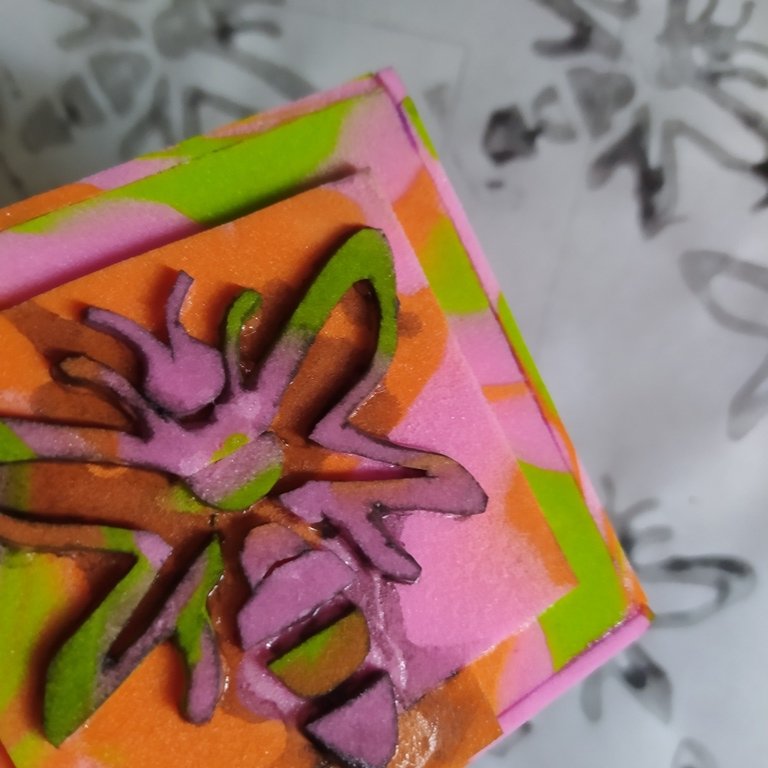
Éste es un pequeño truco muy útil para transferir dibujos a piezas para recortar en foami. Recorta todas las figuras que componen la abeja siguiendo la silueta de papel pegado al material, y pégalos al nuevo rectángulo de foami. Pega este nuevo rectángulo lo más centrado posible en el taquito de poliuretano forrado.
This is a very useful little trick to transfer drawings to pieces to be cut out of foami. Cut out all the figures that make up the bee following the paper silhouette glued to the material, and glue them to the new foami rectangle. Glue this new rectangle as centered as possible on the lined polyurethane block.
 |  |
|---|---|
 |  |
 |  |
 |  |
 |  |
 |  |
 |  |
 |  |
 |  |
 |  |
 | 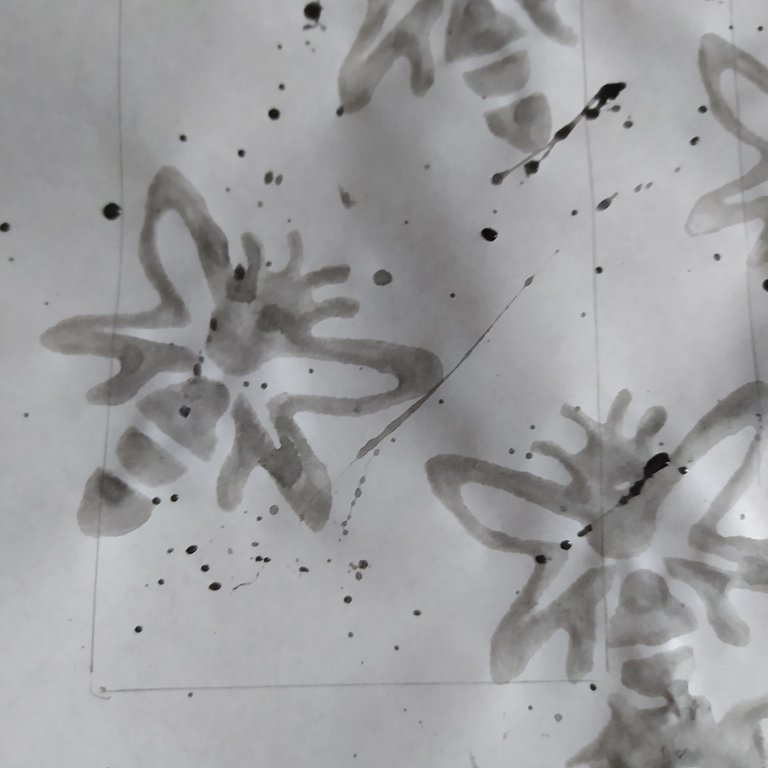 |
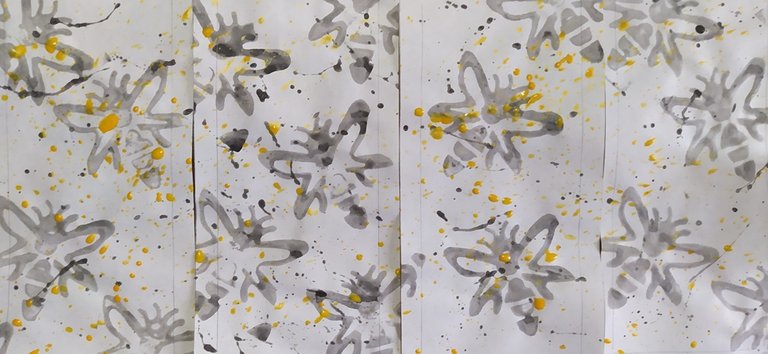
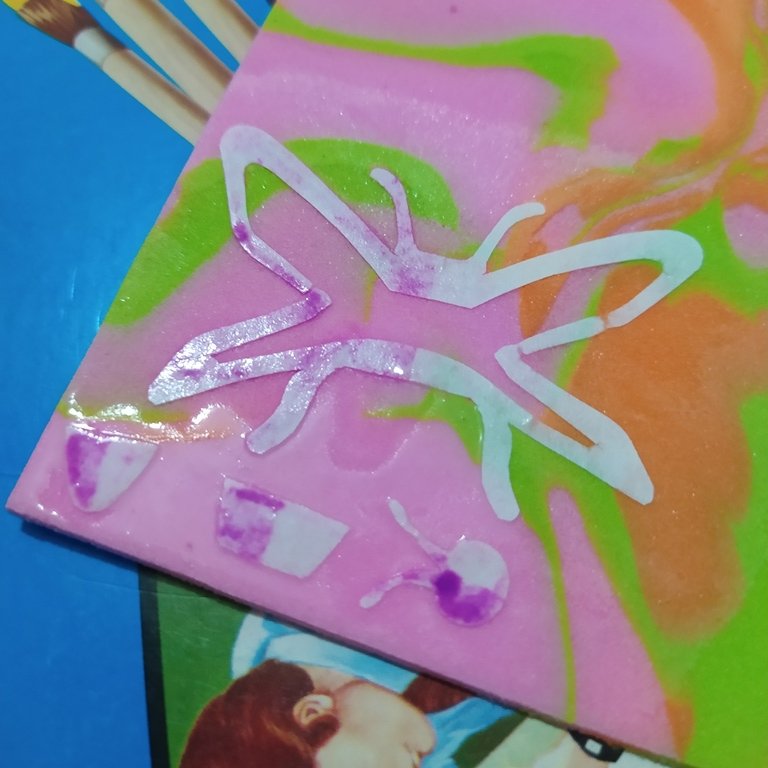
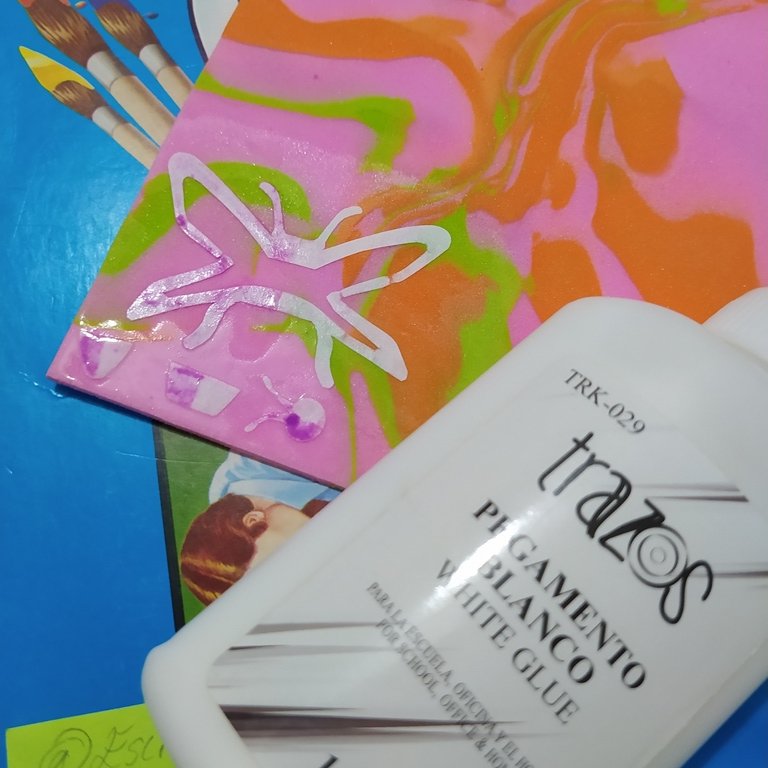
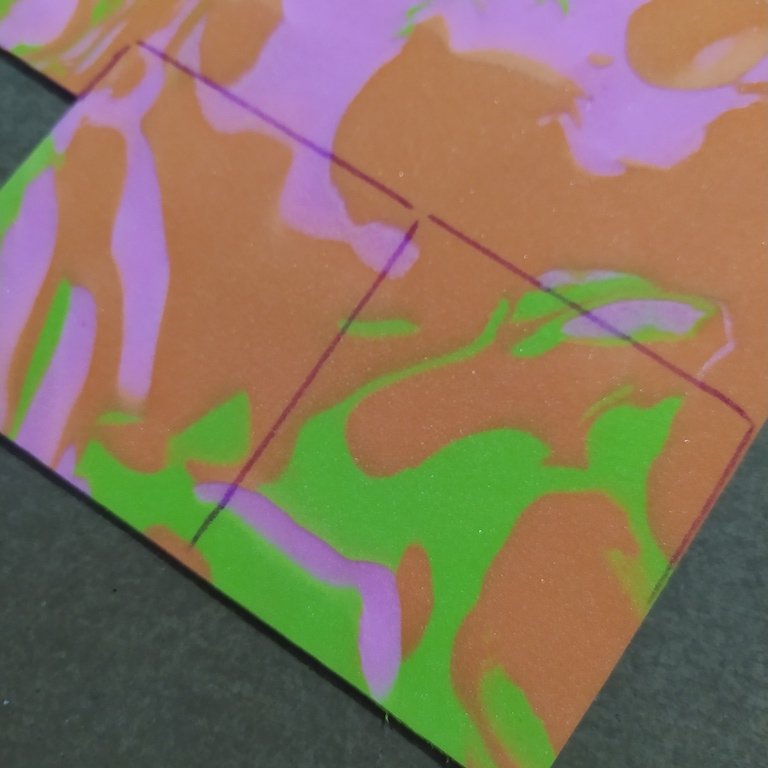
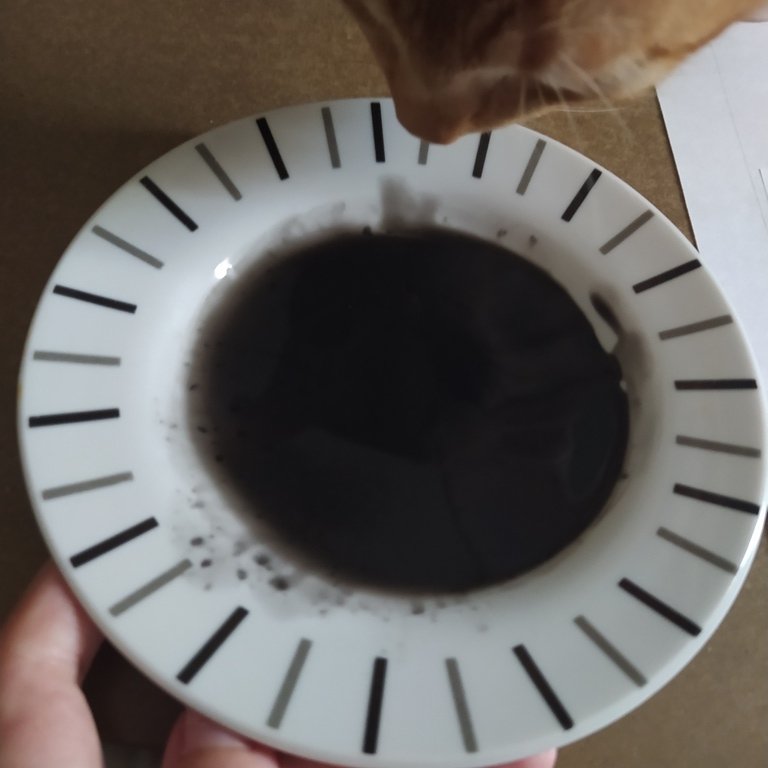
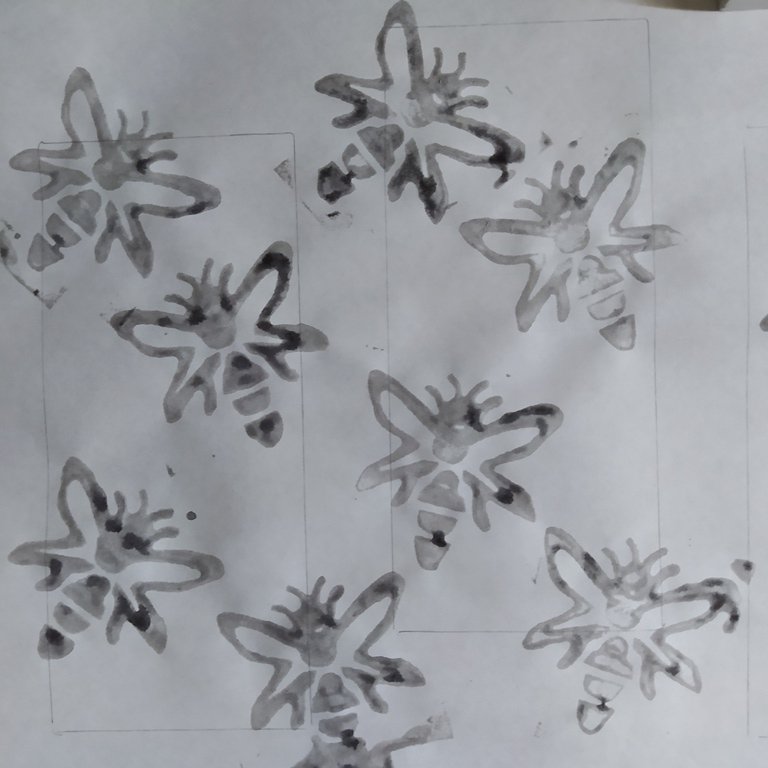
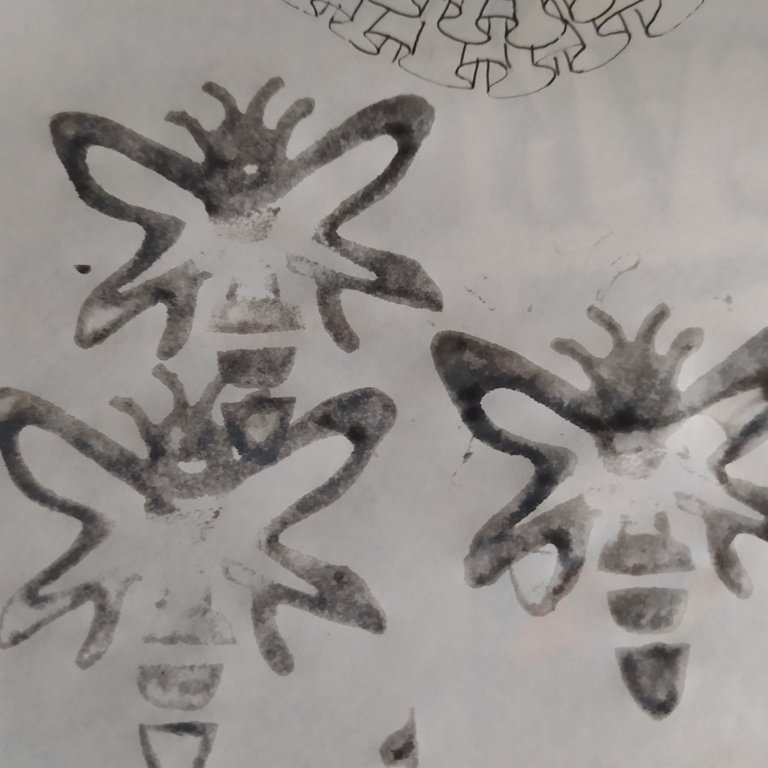
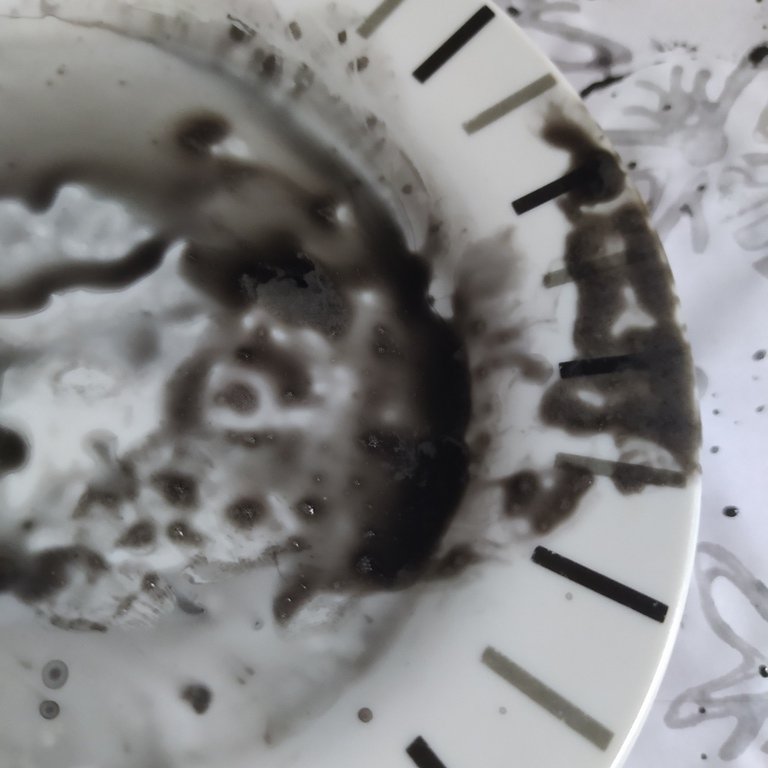
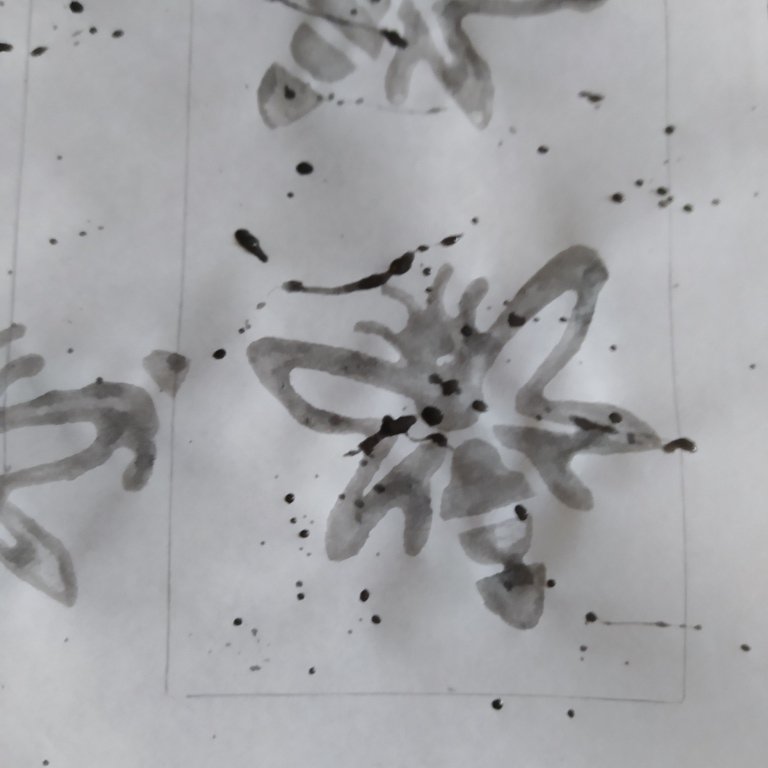
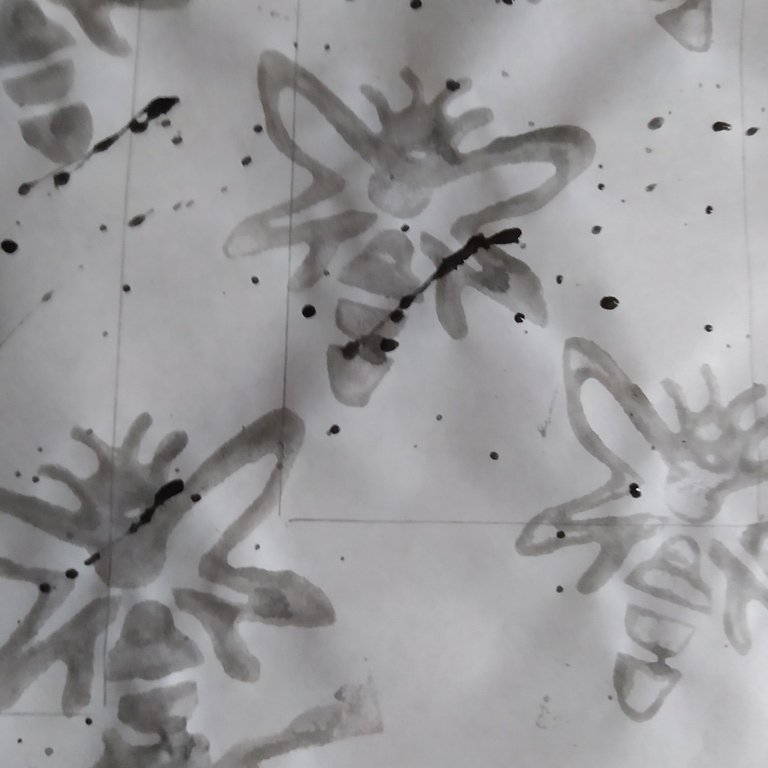
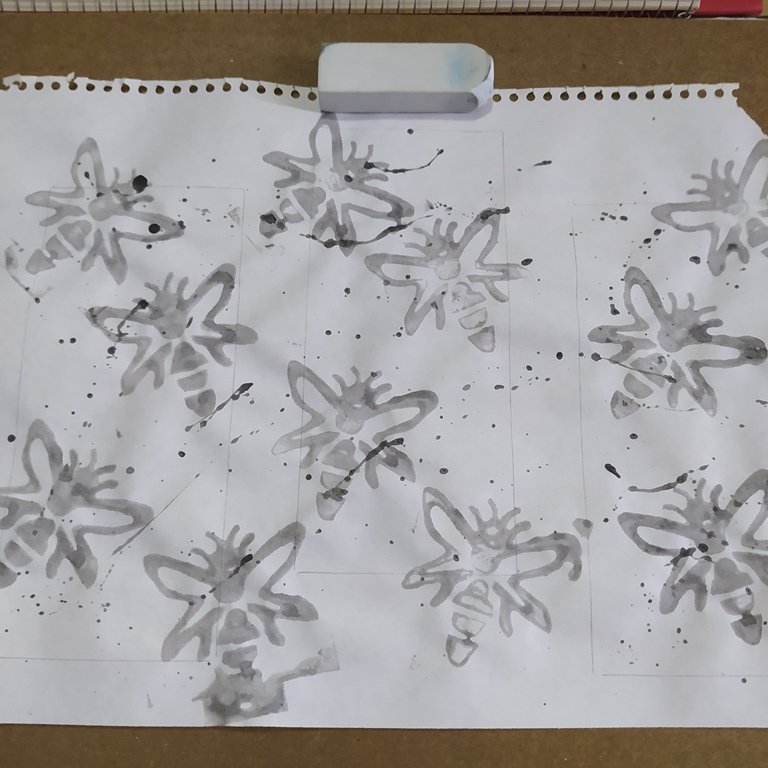
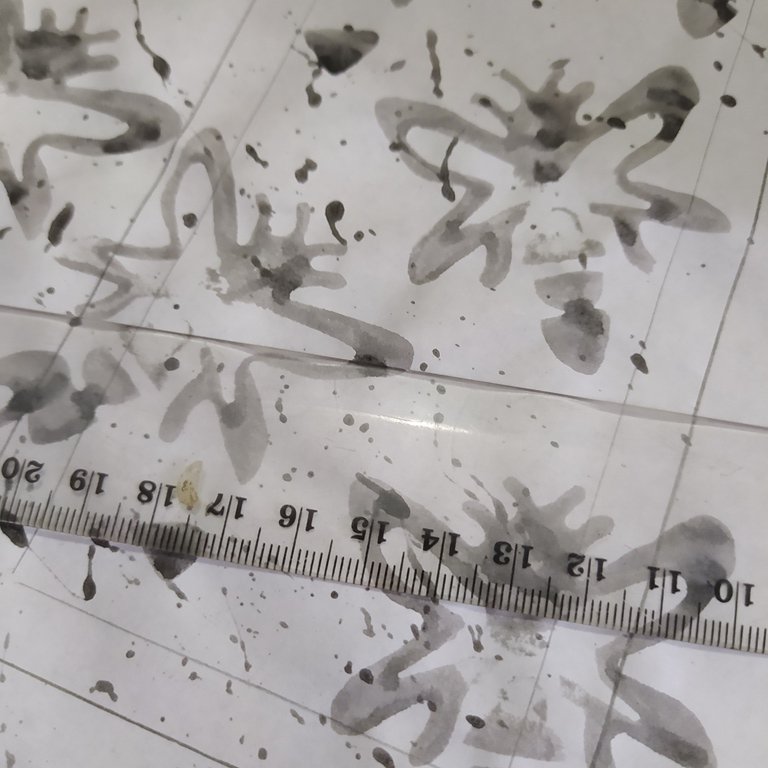
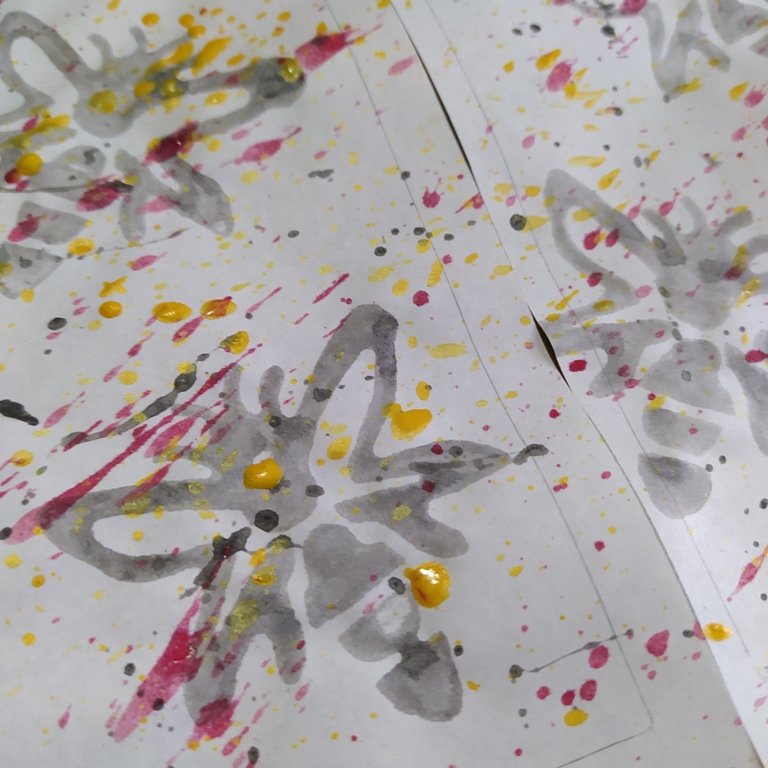
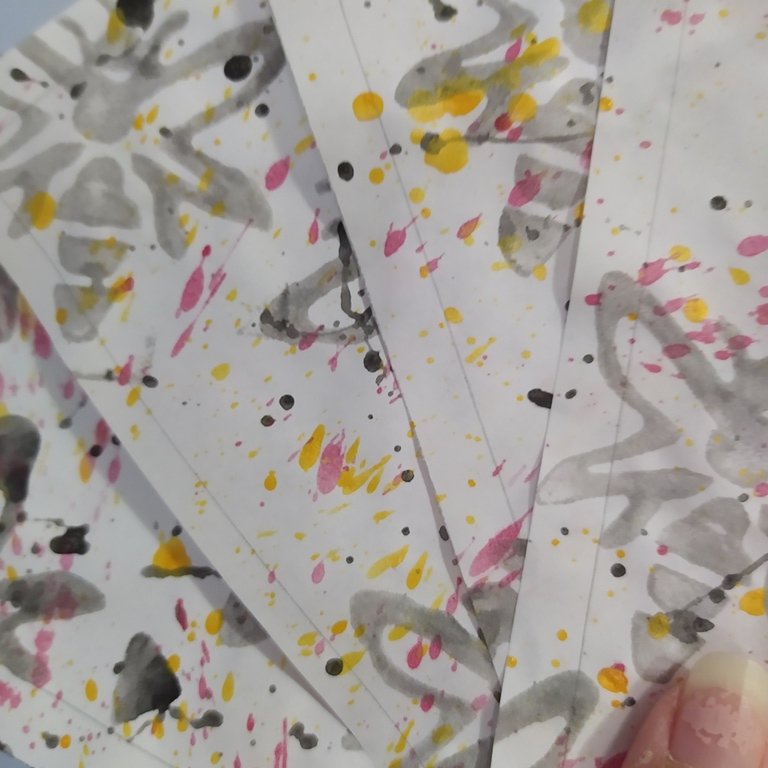
En hojas de papel reciclado o papel seda, dibuja 4 rectángulos de 9 c 18 cm, vierte un poco de pintura color oscuro en el plato, agrega unas gotas de agua, mezcla hasta diluir la pintura hasta que asimile la tinta, y empapa el sello antes de descargar el exceso de humedad en una hoja aparte.
On sheets of recycled paper or tissue paper, draw 4 rectangles of 9 c 18 cm, pour some dark colored paint on the plate, add a few drops of water, mix until the paint is diluted until it assimilates the ink, and soak the stamp before discharging the excess moisture on a separate sheet.
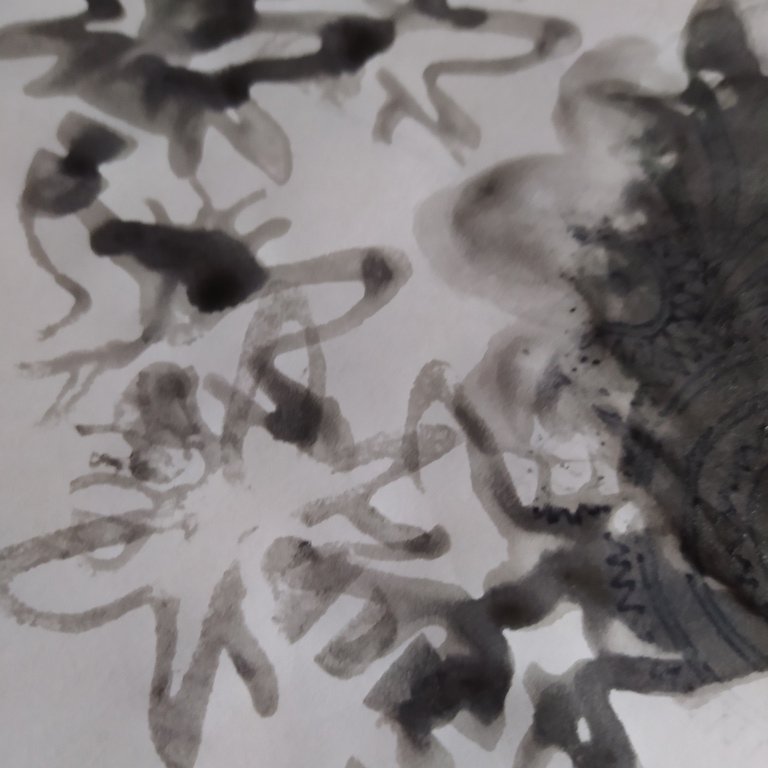
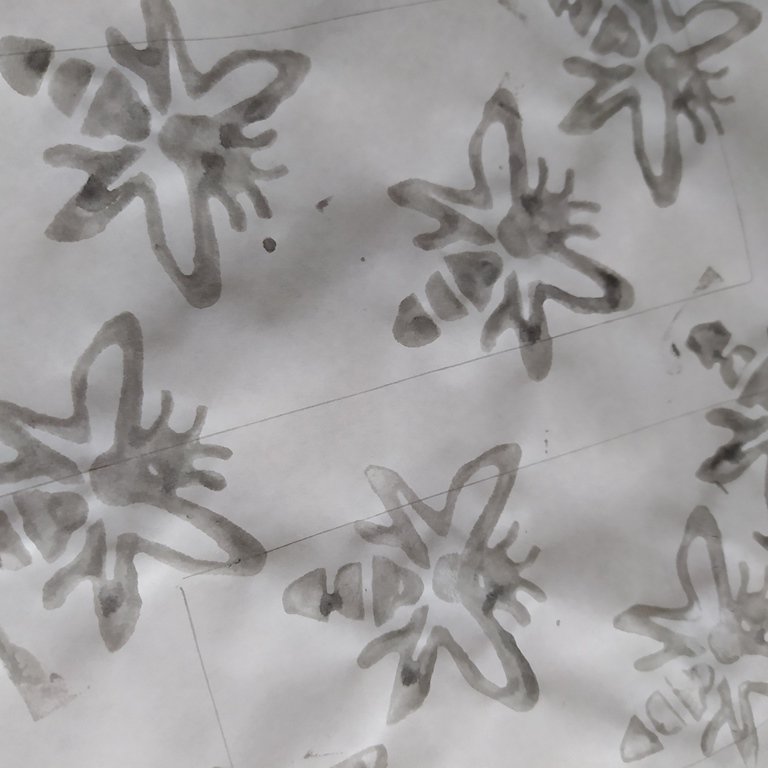
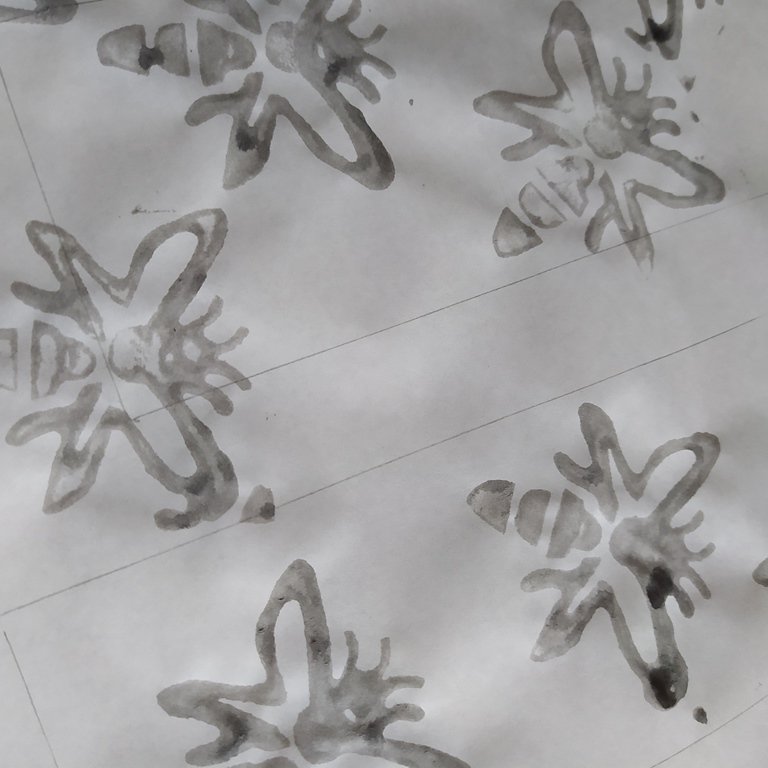
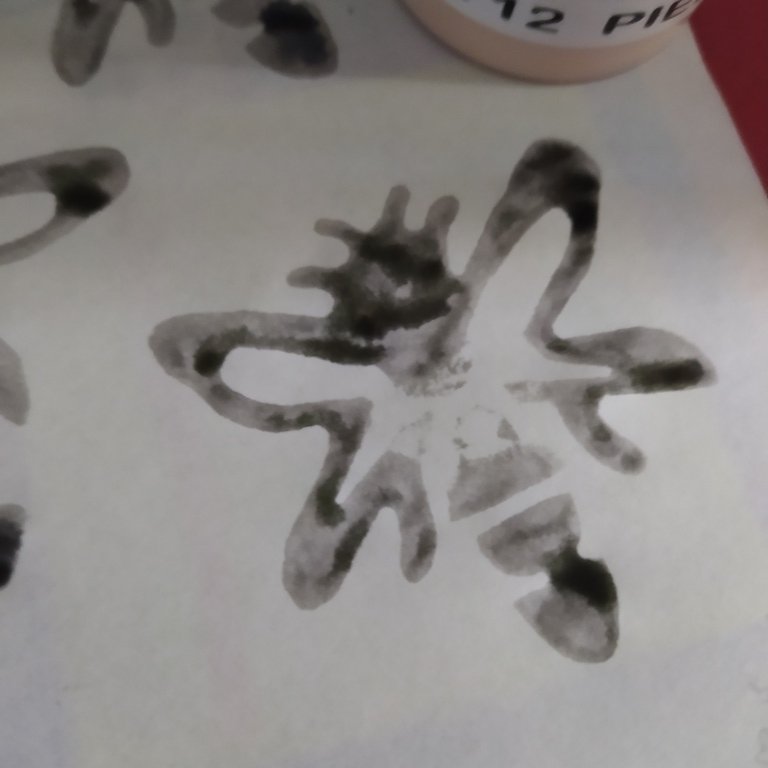
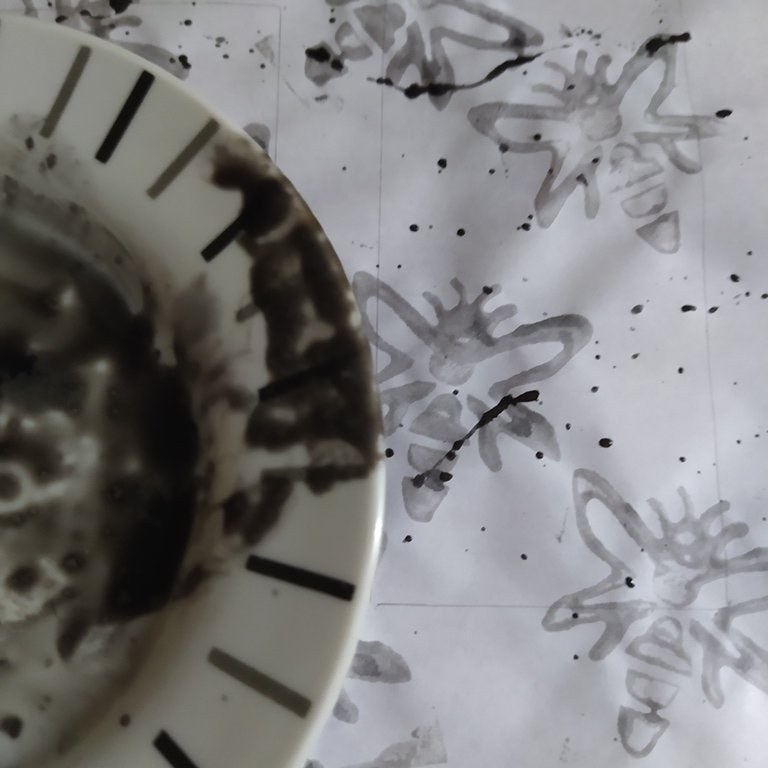
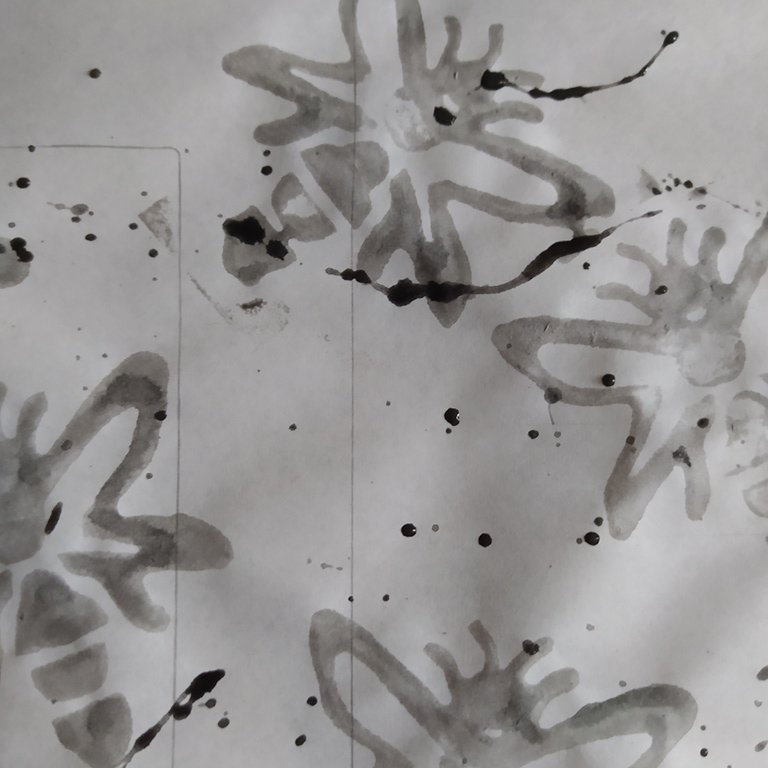
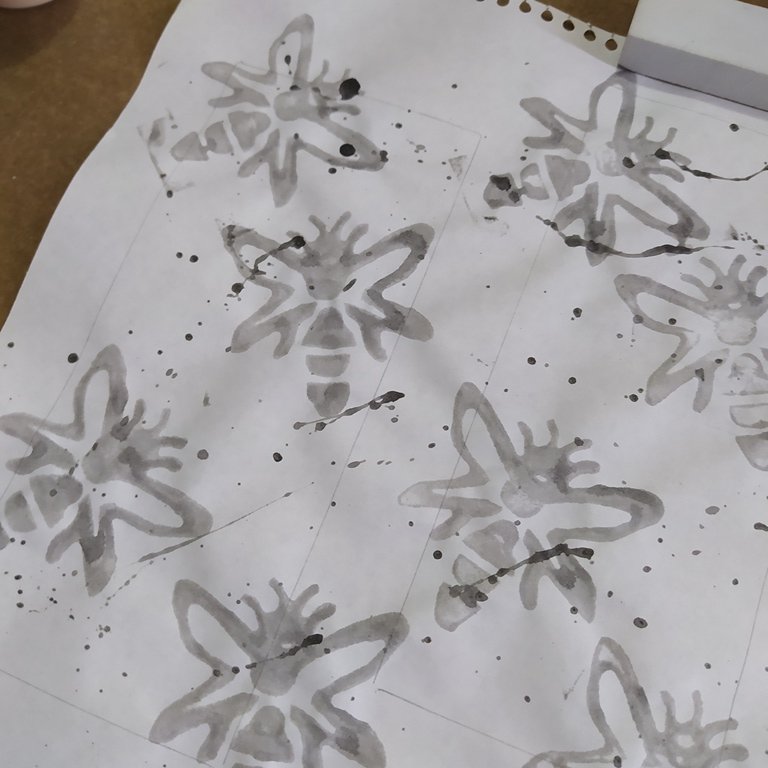
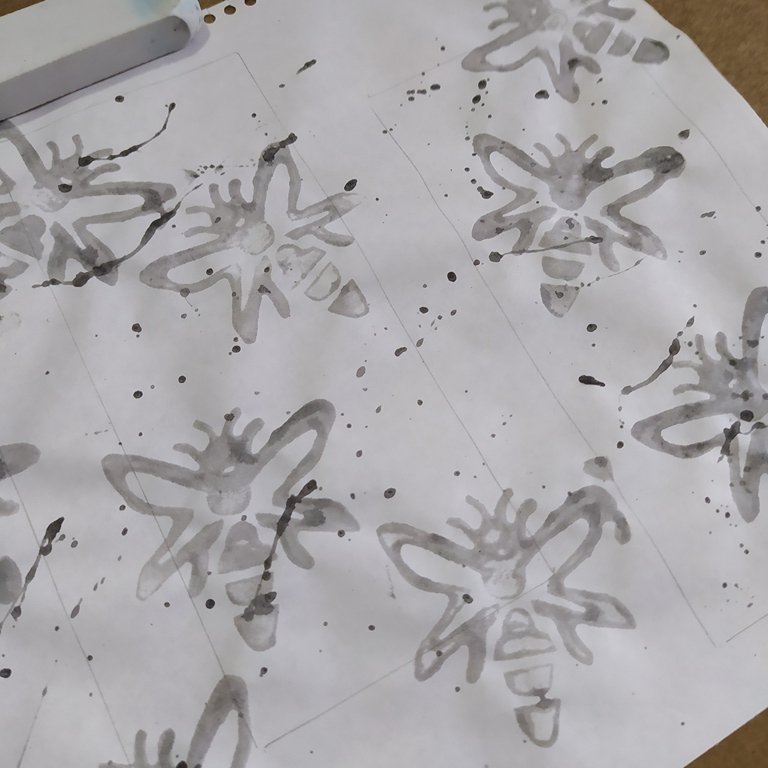
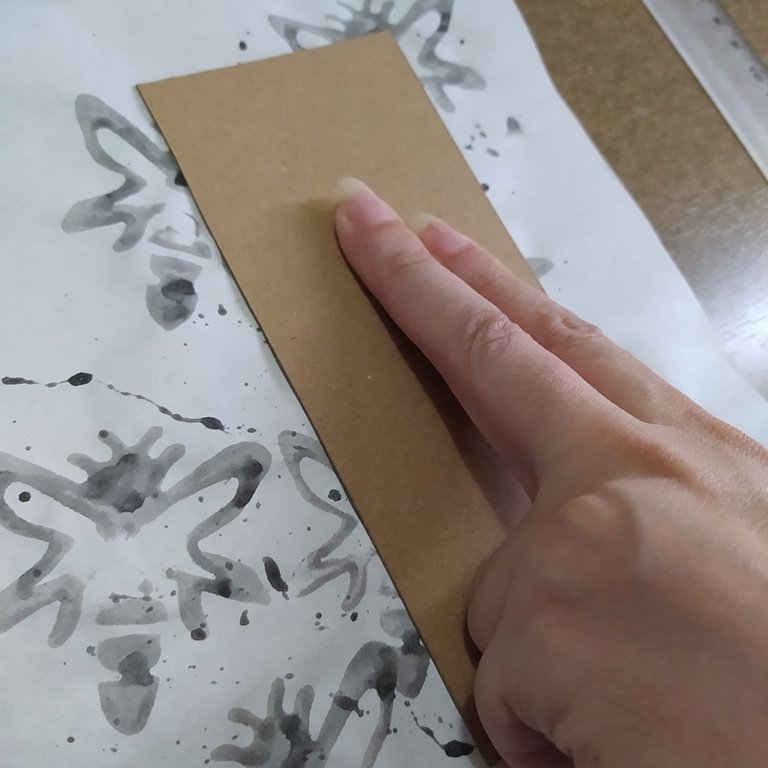
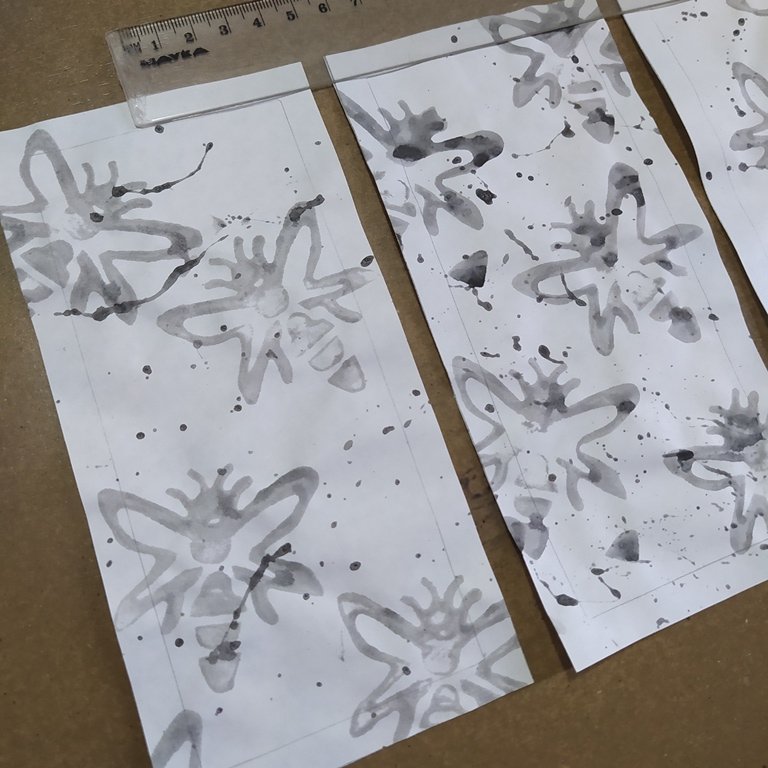
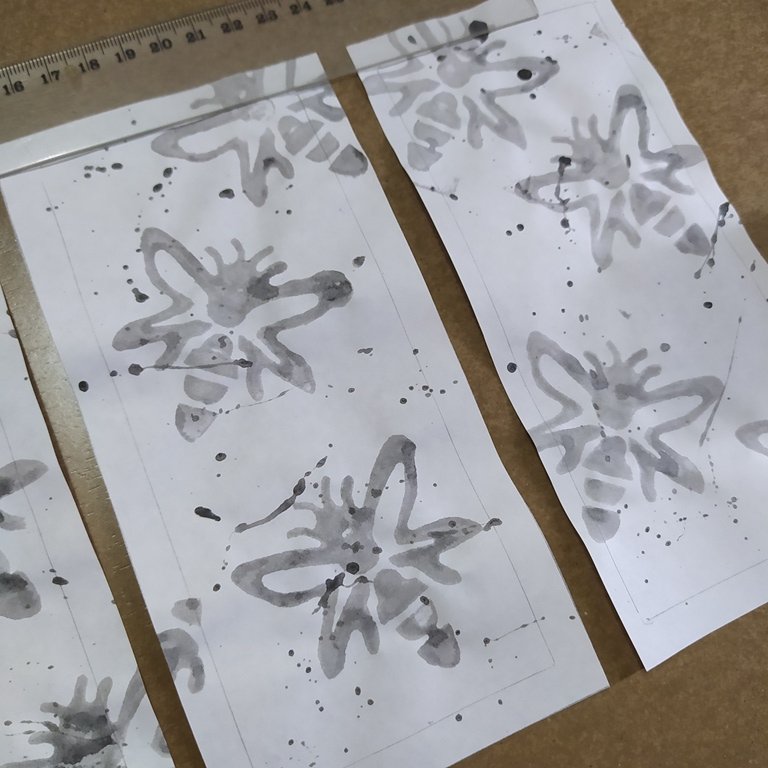
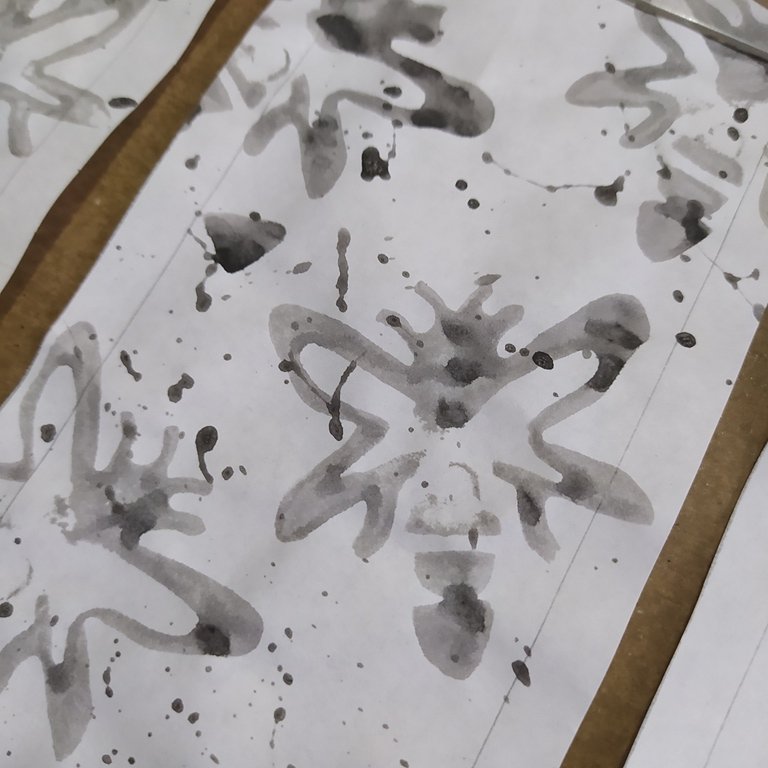
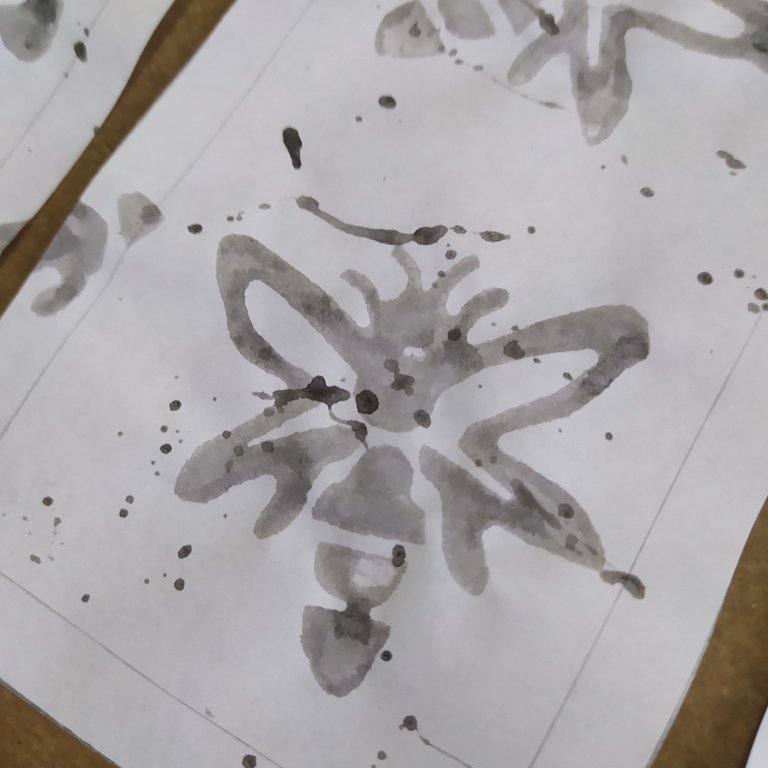
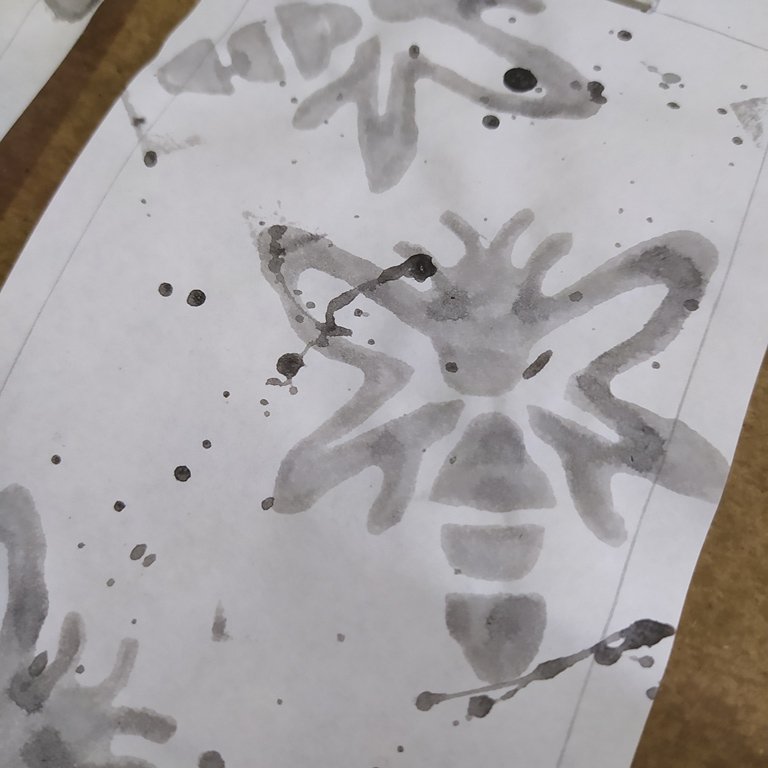
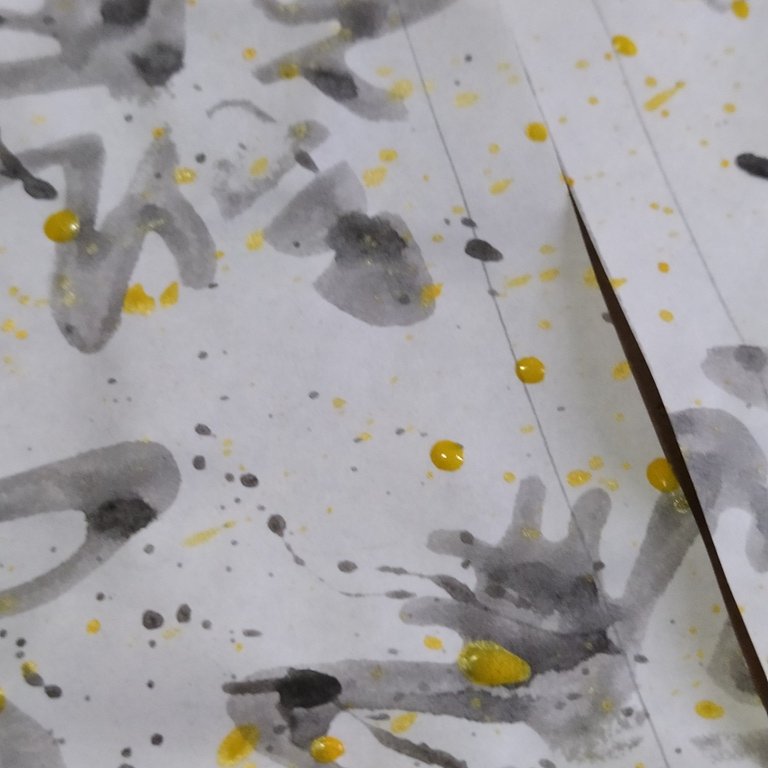
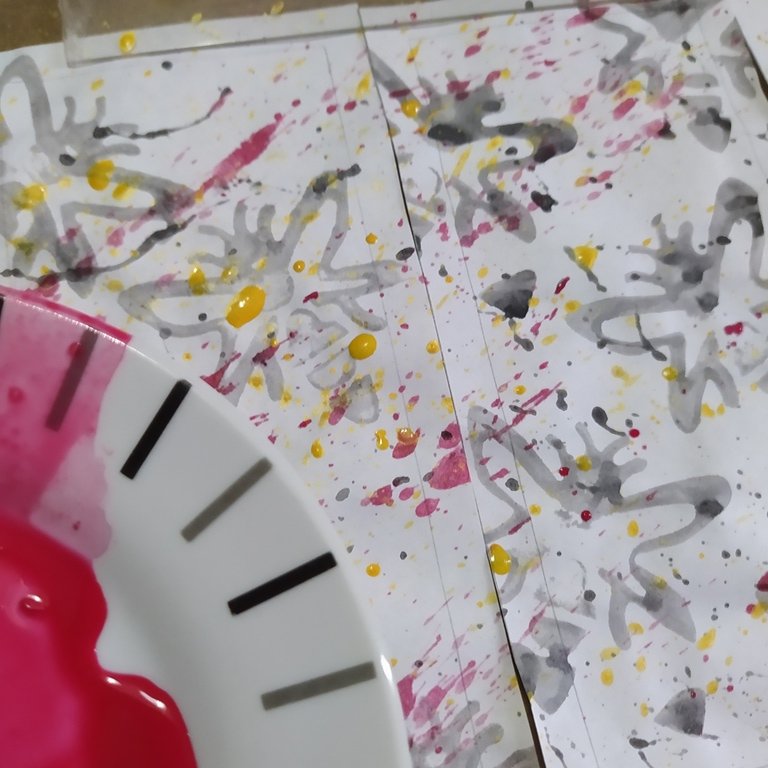
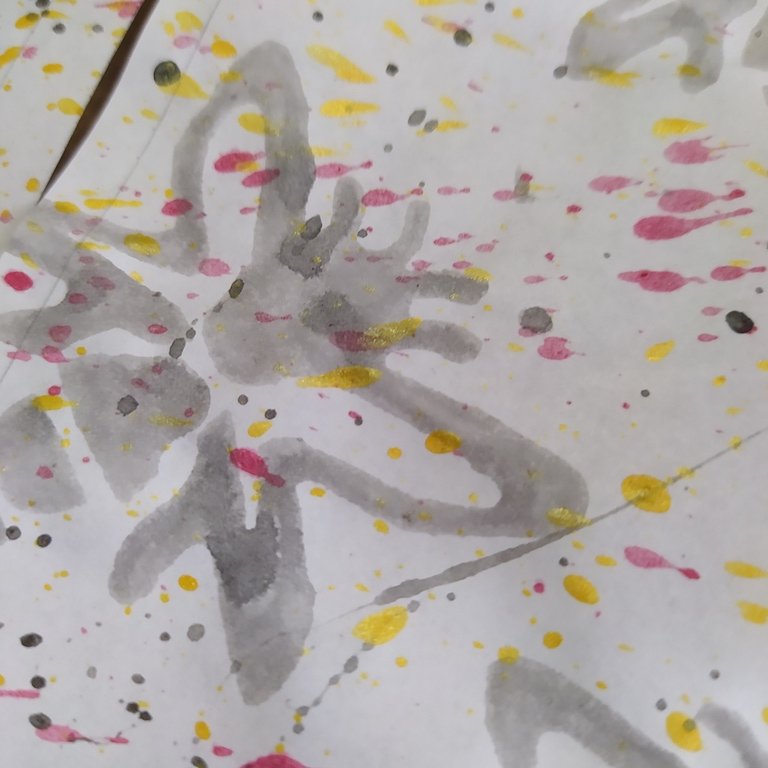
Cuando obtengas una carga de tintura que te guste, estampa el sello varias veces en los rectángulos que dibujaste en el papel. Espera a que seque totalmente, y con el pincel cargado raspa sus cerdas contra e borde del plato para salpicar el papel con más pintura, procura mantener una misma dirección.
When you get a dye load you like, stamp the stamp several times on the rectangles you drew on the paper. Wait for it to dry completely, and with the loaded brush scrape its bristles against the edge of the plate to splatter the paper with more paint, trying to keep the same direction.
 |  |
|---|---|
 |  |
 |  |
 |  |
 |  |
 |  |
 |  |
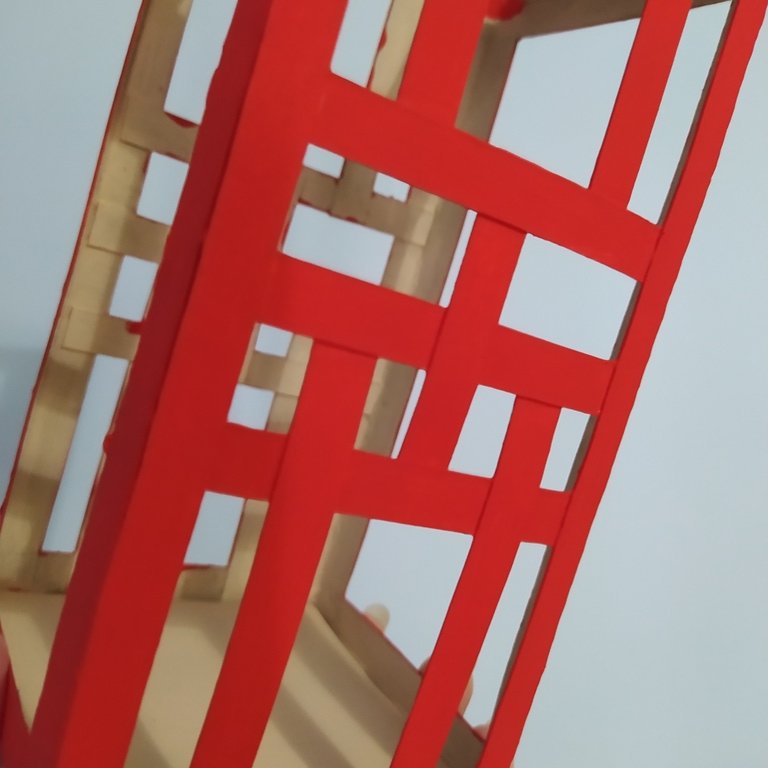 | 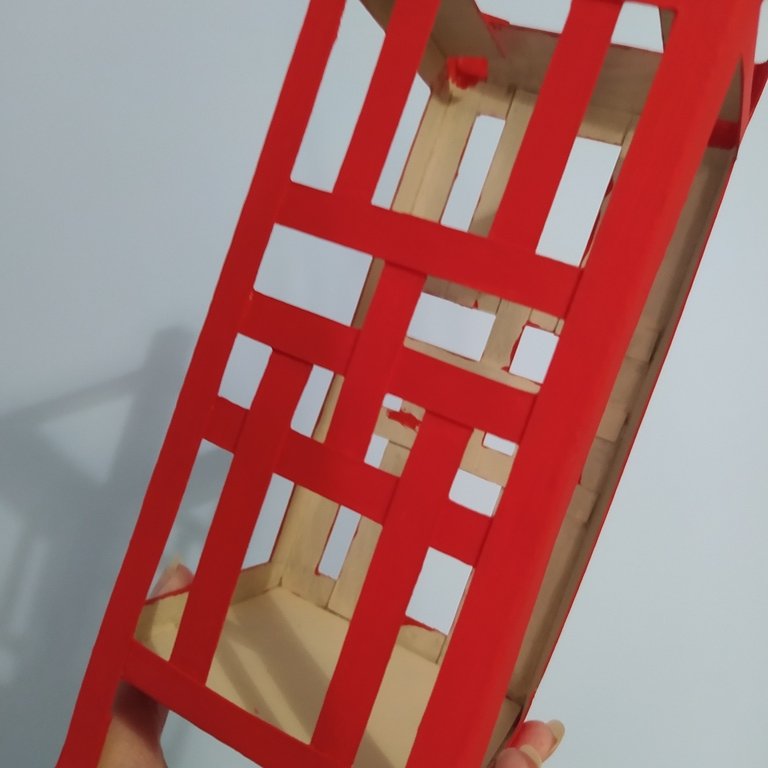 |
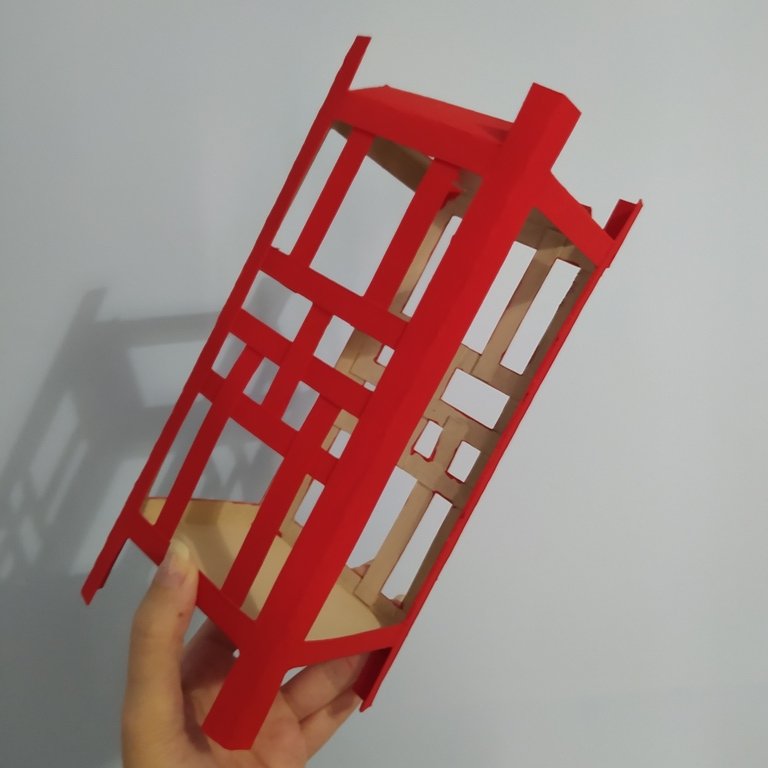
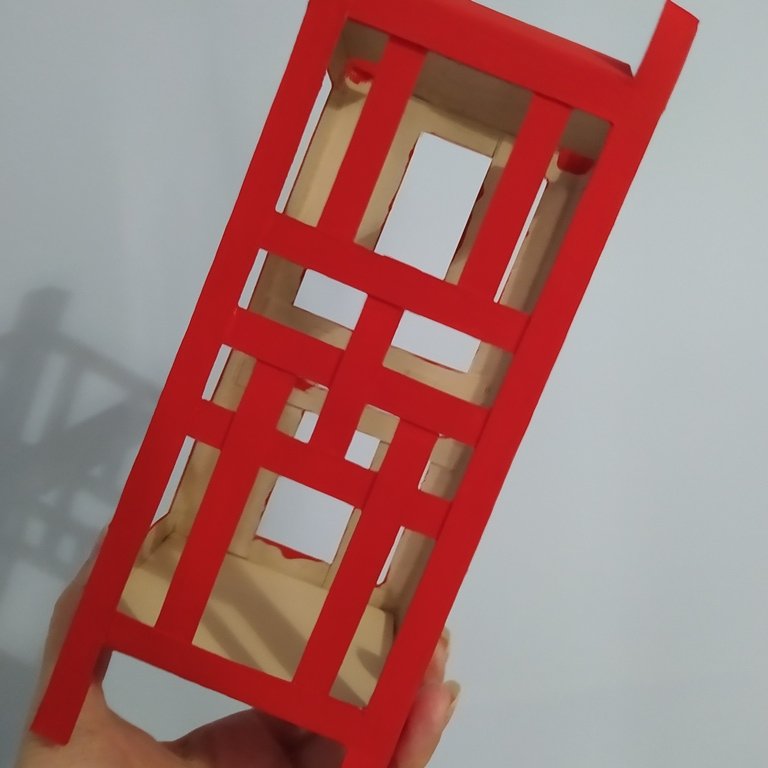
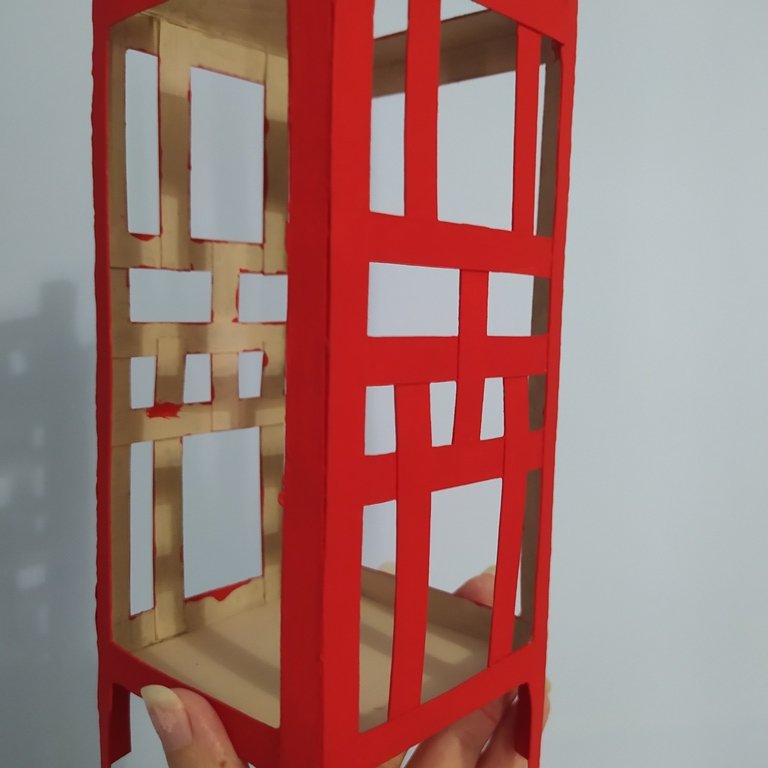
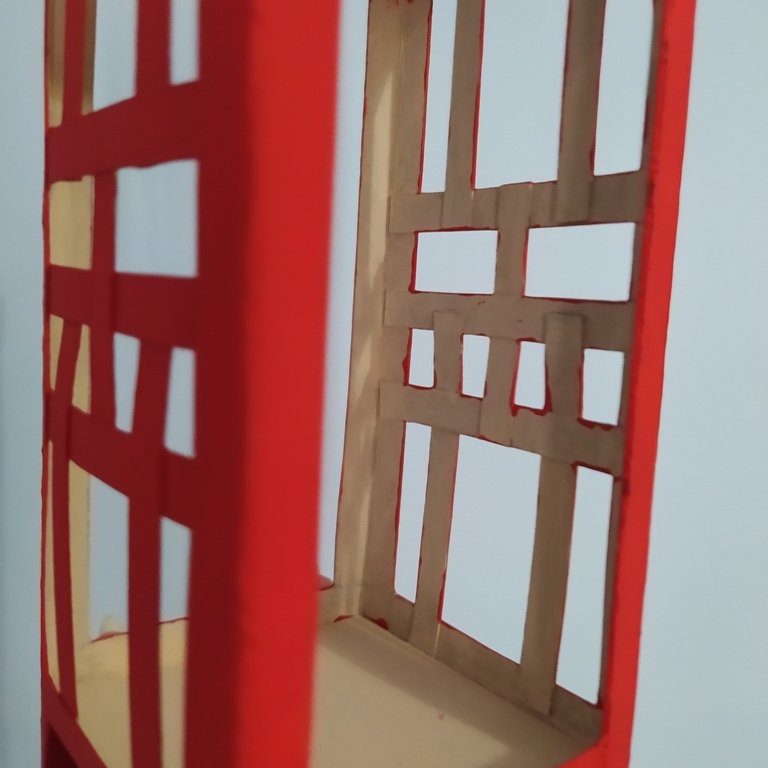
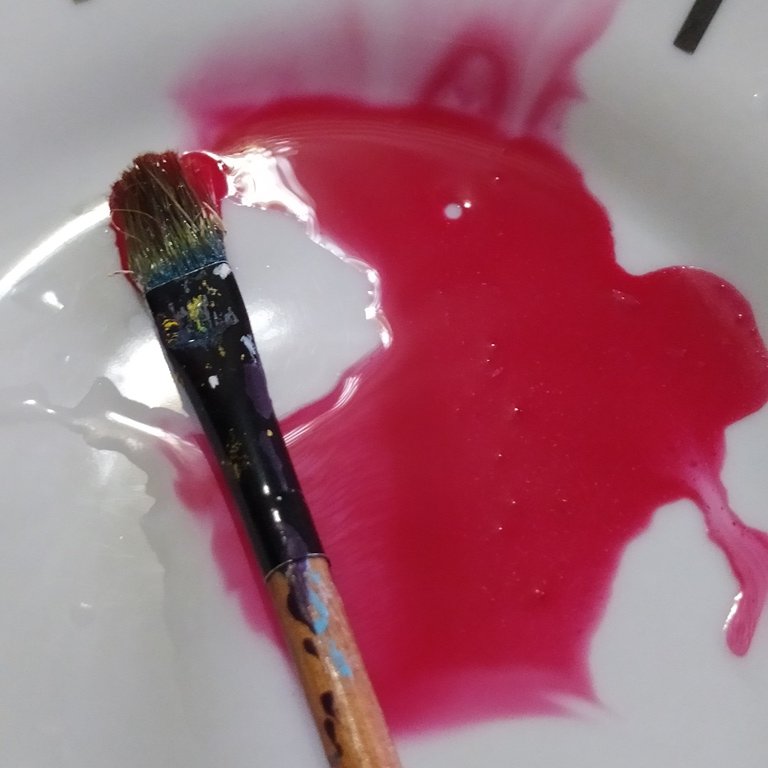
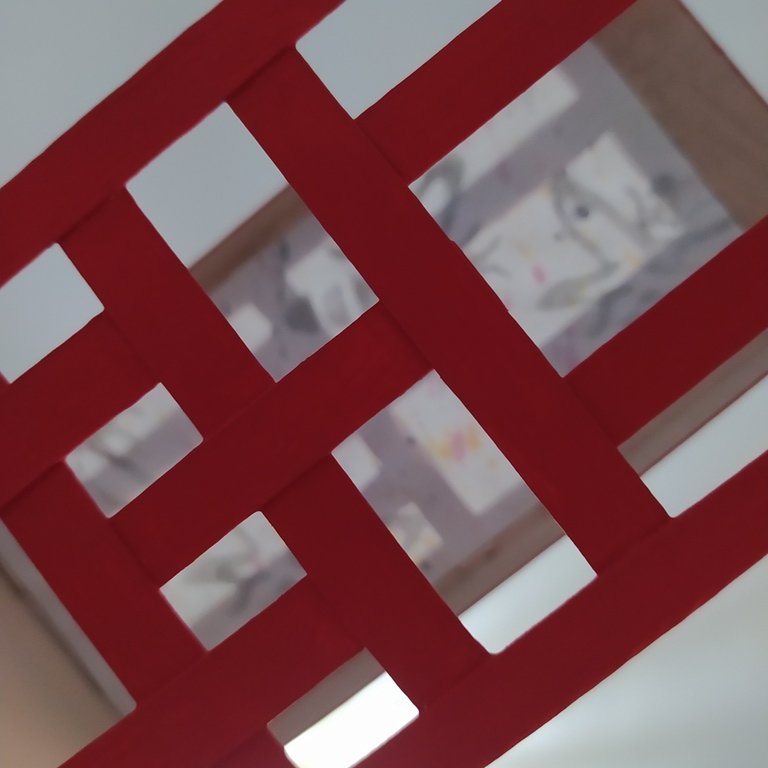
Deja reposar el papel en una superficie limpia y donde no haya viento; ahora vamos a pintar de rojo todo el exterior de la estructura de la linterna, minimo dos capas. Y deja secar la pieza mínimo hora y media, no te asustes si se deforma un poco, es por la humedad de a pintura pero eso desaparecerá y volverá a su forma recta.
Let the paper rest on a clean surface and where there is no wind; now we are going to paint red all over the outside of the lantern structure, minimum two coats and let the piece dry for at least an hour and a half, don't be afraid if it deforms a little, it is because of the humidity of the paint but that will disappear and it will return to its straight shape.
 |  |  |
|---|---|---|
 |  |  |
 |  |  |
 |  |  |
 |  |  |
 |  |  |
|  |  |
 |  | 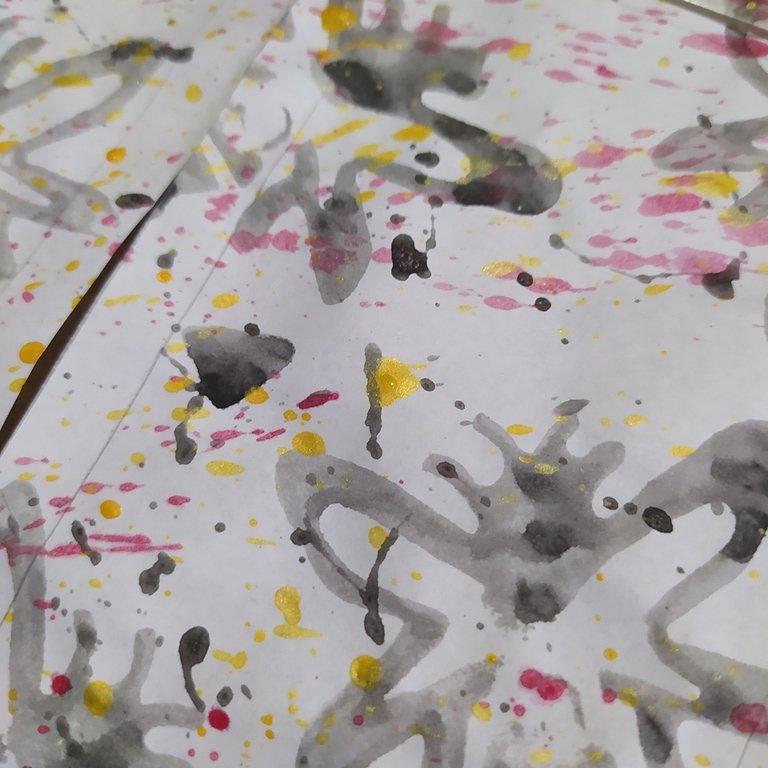 |
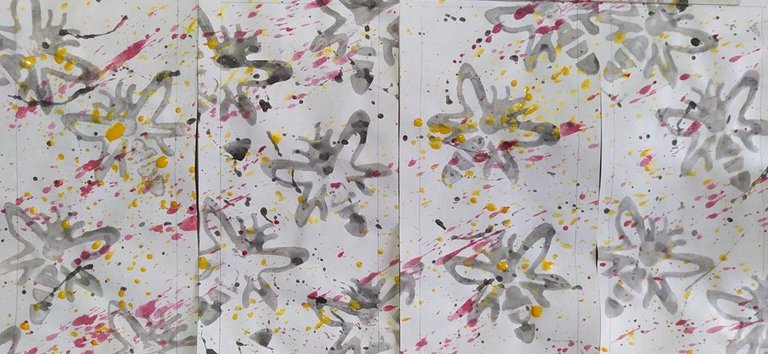
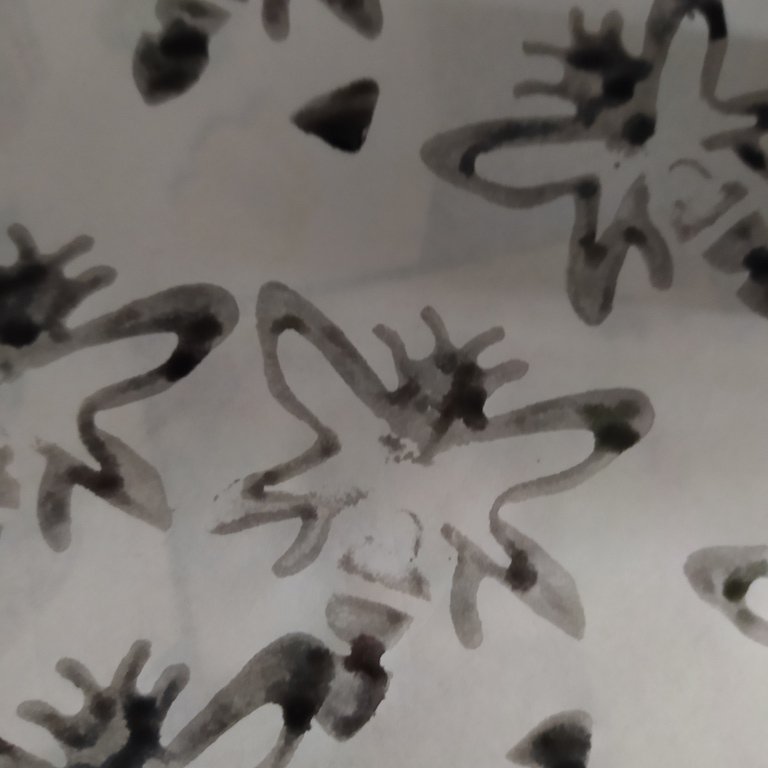
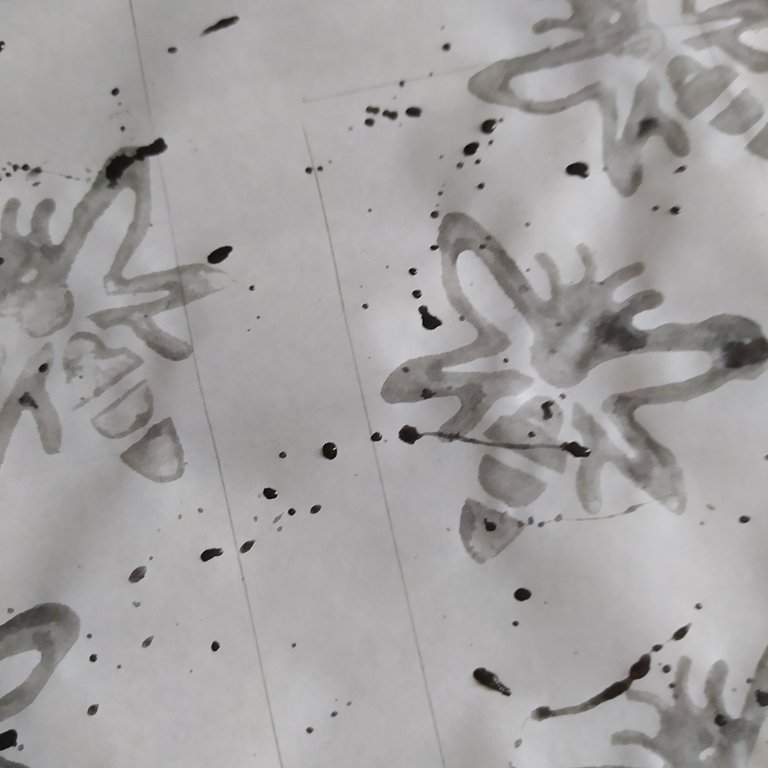
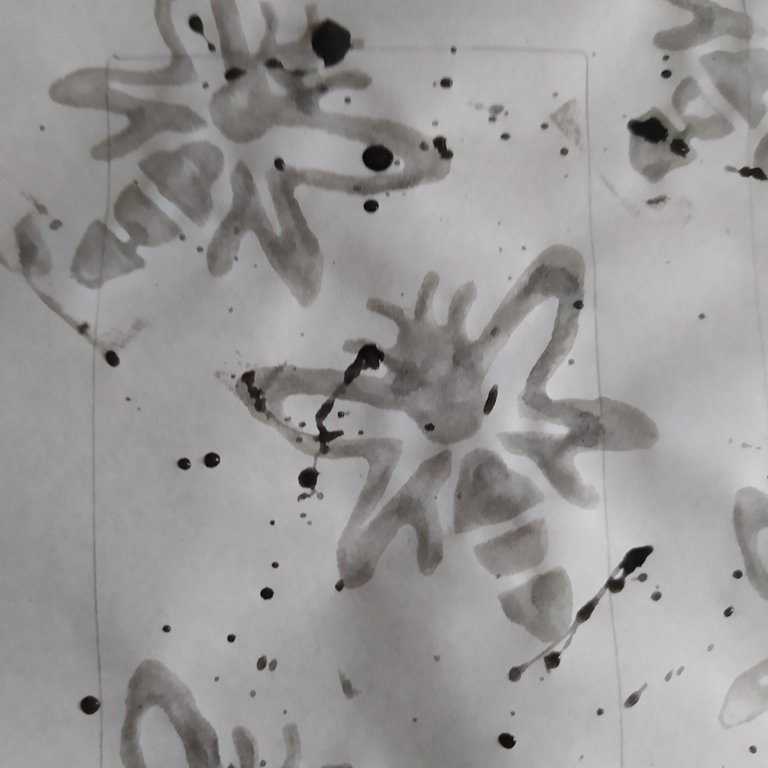
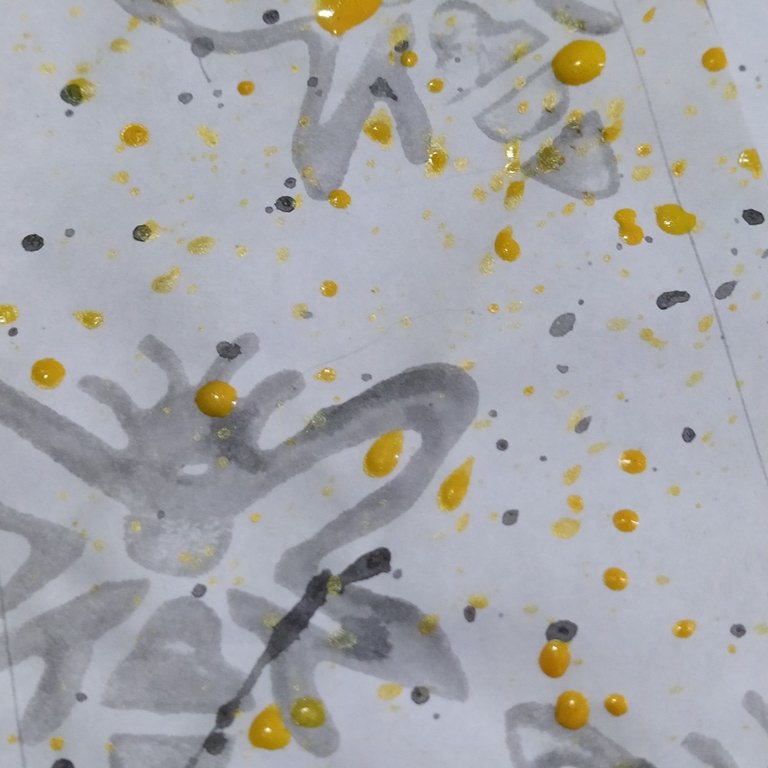
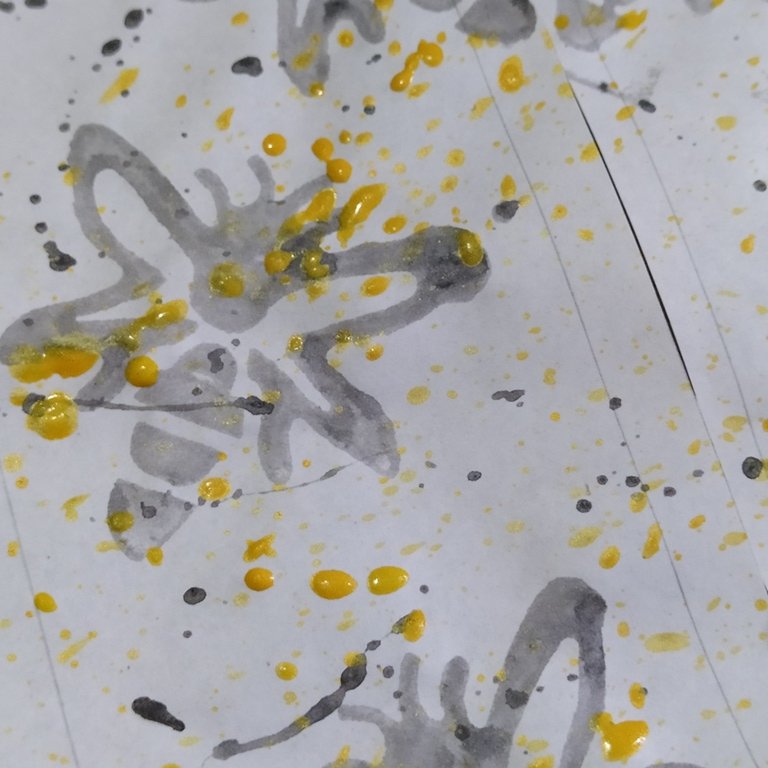
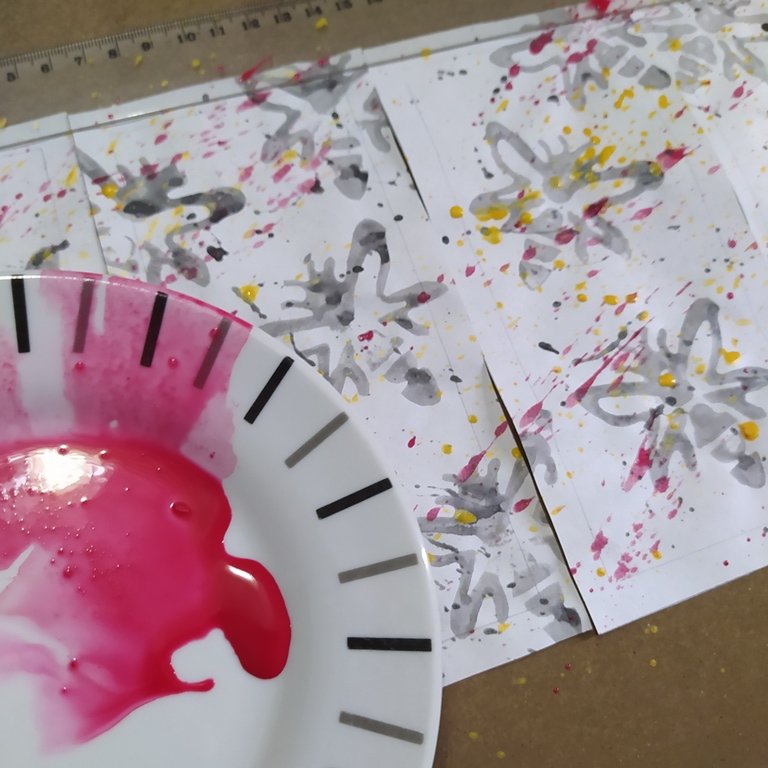
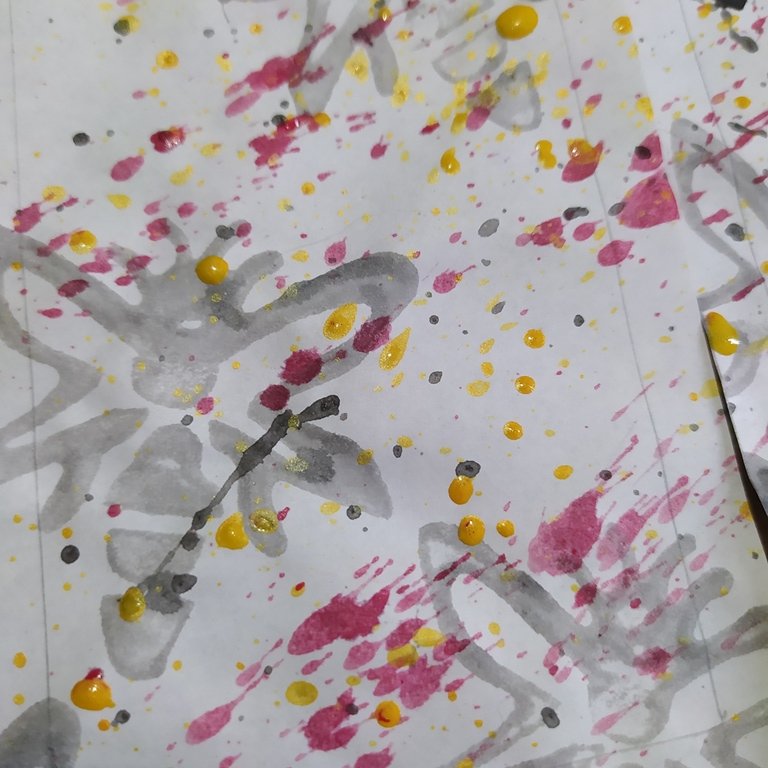
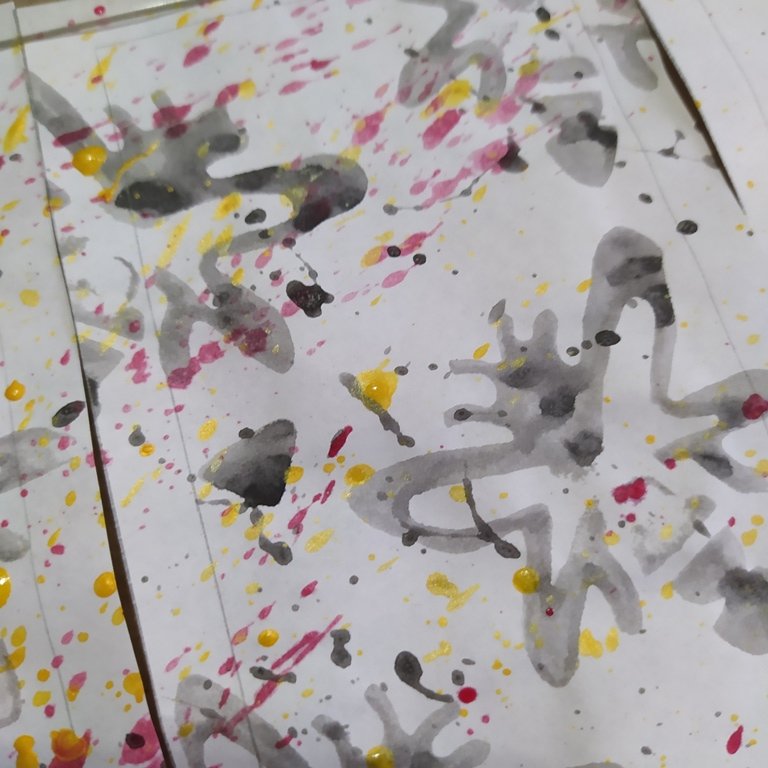
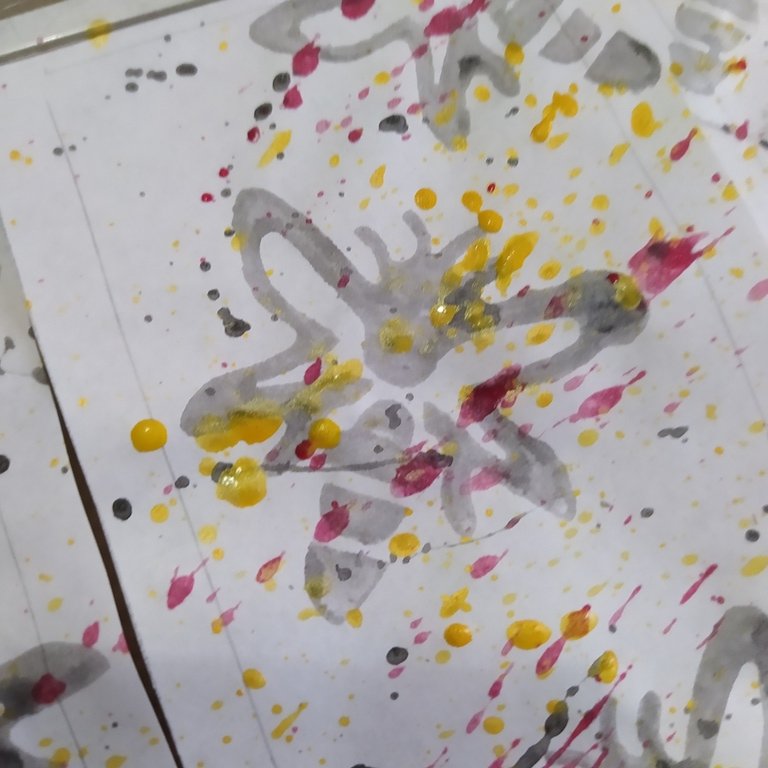
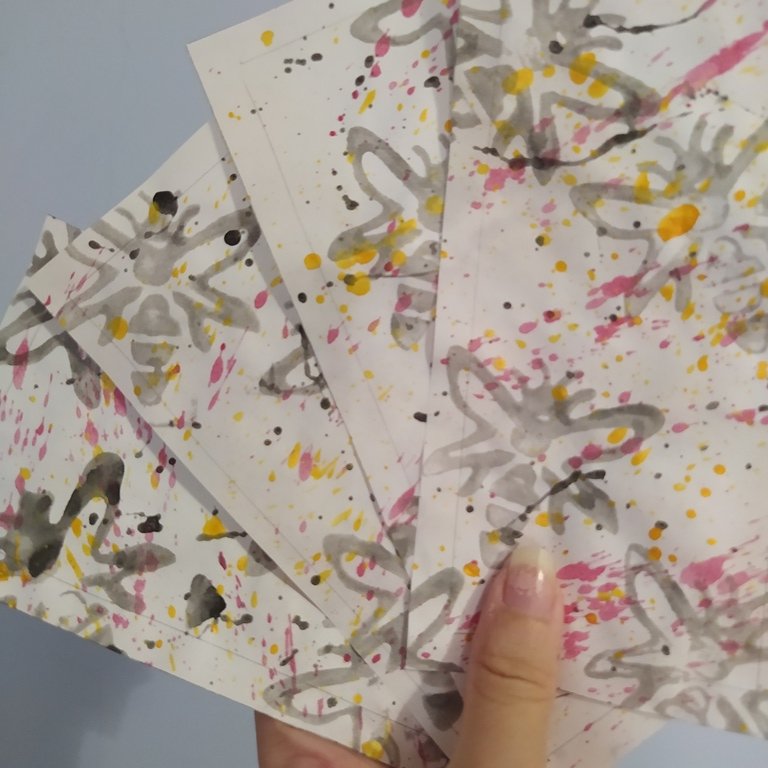
Regresamos al papel cumplido el tiempo de secada, y repetimos el paso con el cepillo salpicando pintura, esta vez en color rojo y dorado. Recuerda salpicar la pintura en una sola dirección.
We return to the paper after the drying time has elapsed, and repeat the step with the brush splashing paint, this time in red and gold. Remember to splash the paint in one direction only.
 |  |
|---|---|
 |  |
 |  |
 |  |
 |  |
 |  |
 |  |
 |  |
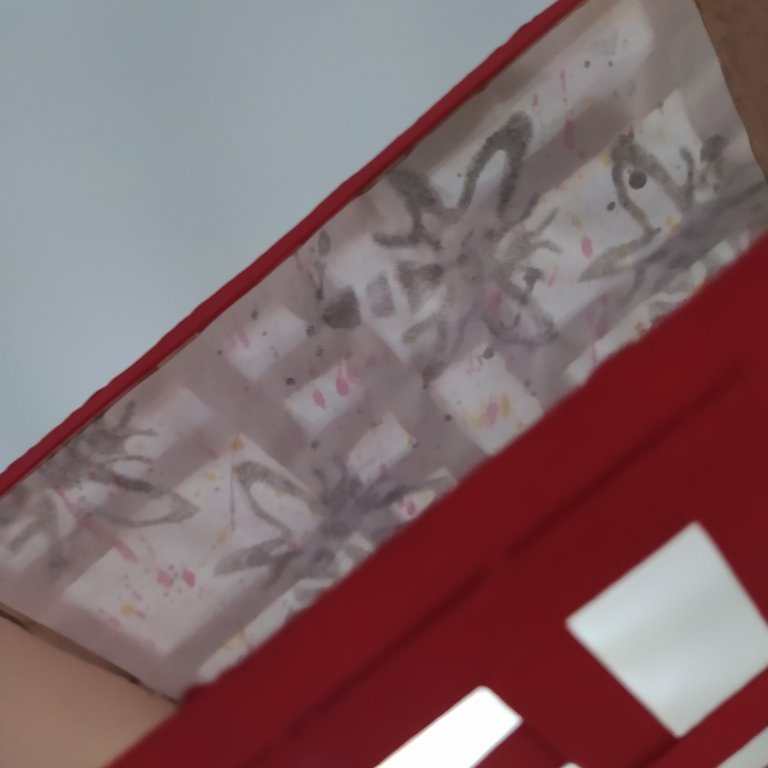
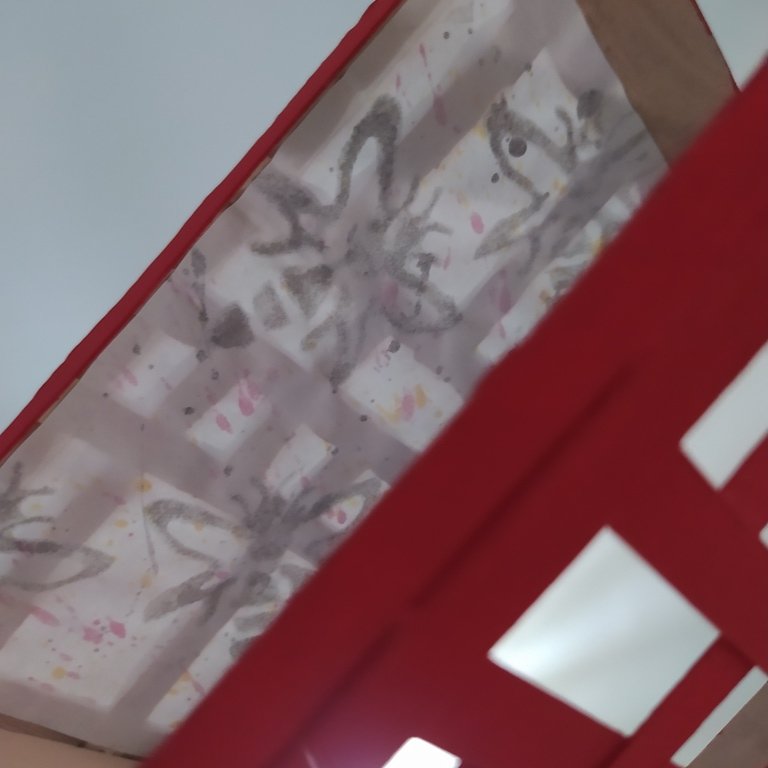
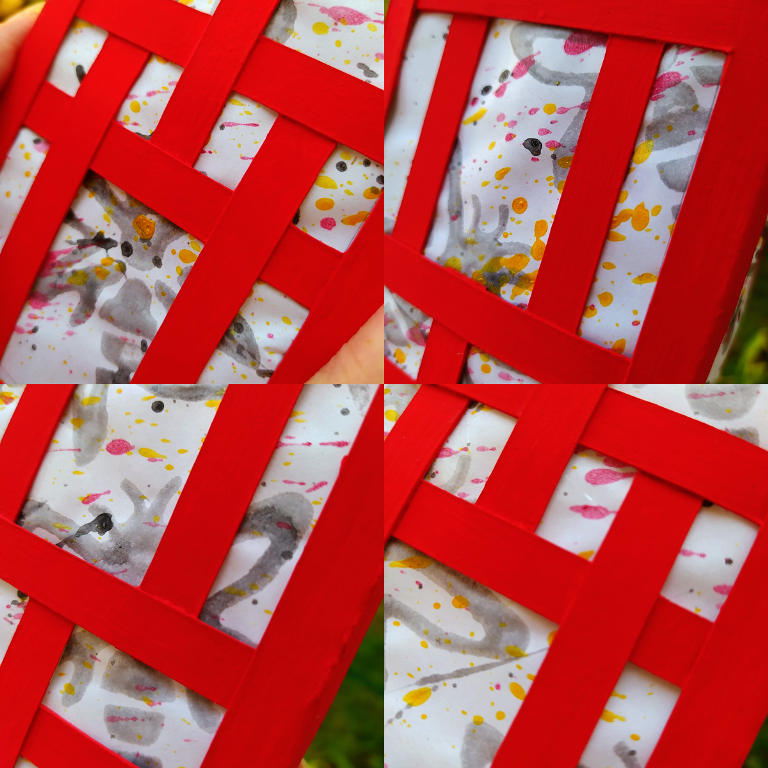
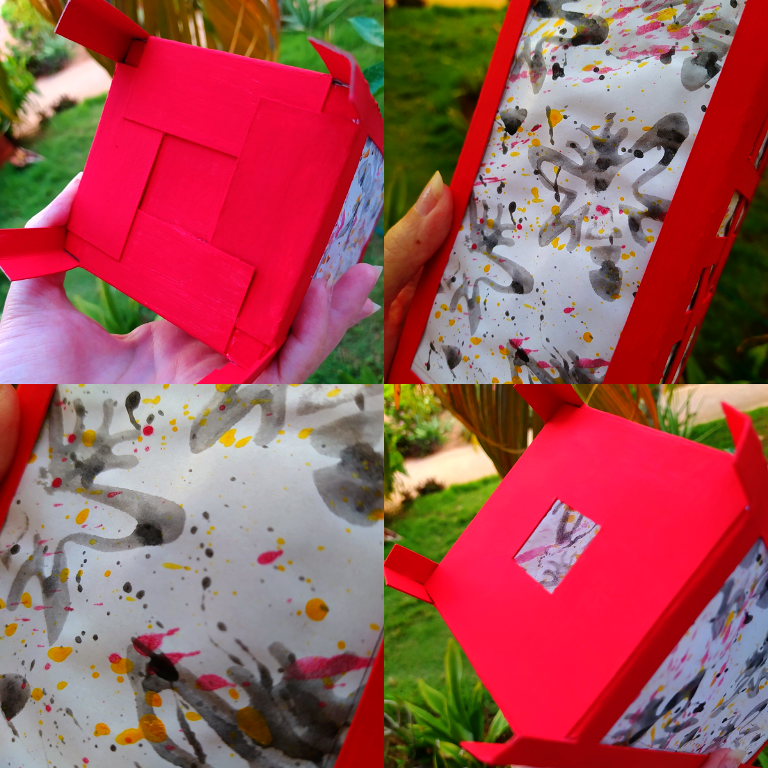
Recorta todos los paneles de papel, agrega pegamento en el interior de cada ventana y pega una por una con mucho cuidado. Finalmente cierra la parte superior con ayuda de un cuadrado de 9 x 9 cm y una ventana en su centro de 2,5 x 2,5 cm.
Cut out all the paper panels, add glue on the inside of each window and **glue one by one with great care **Finally close the top with the help of a square of 9 x 9 cm and a window in its center of 2.5 x 2.5 cm.
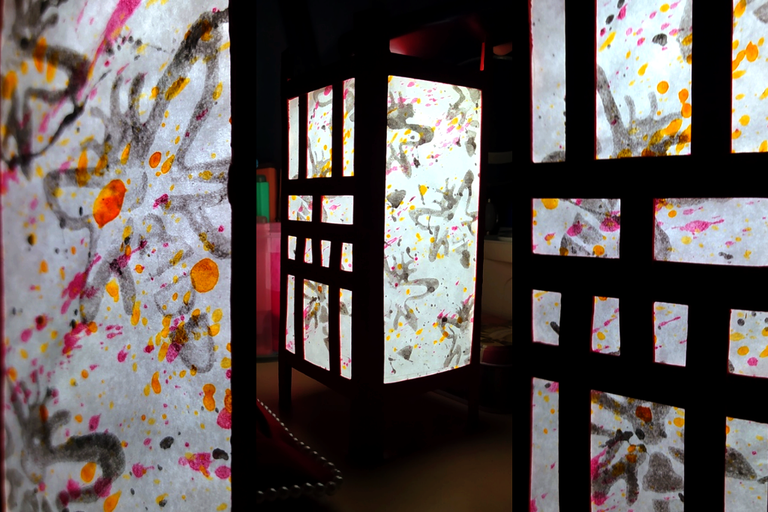
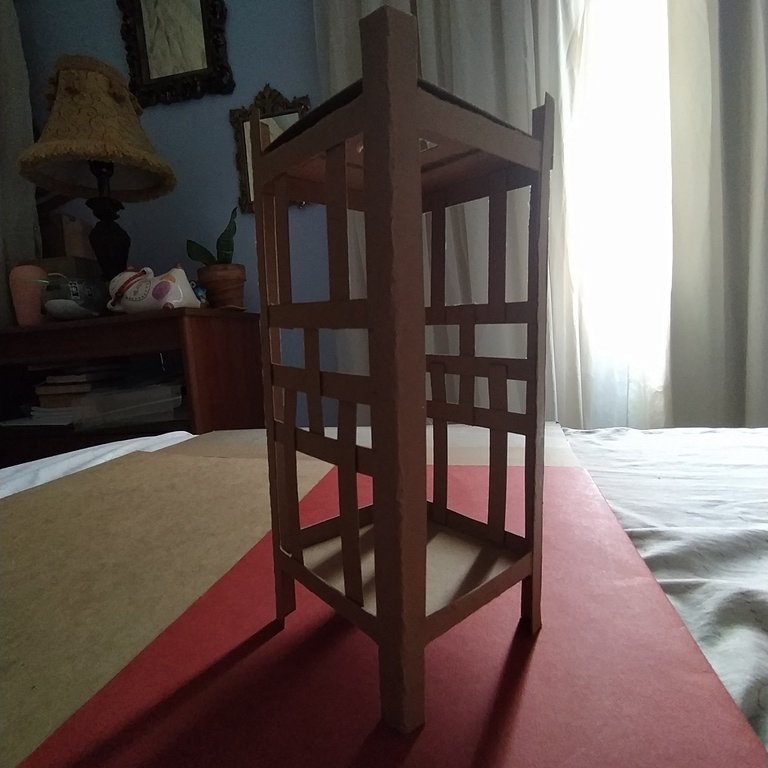
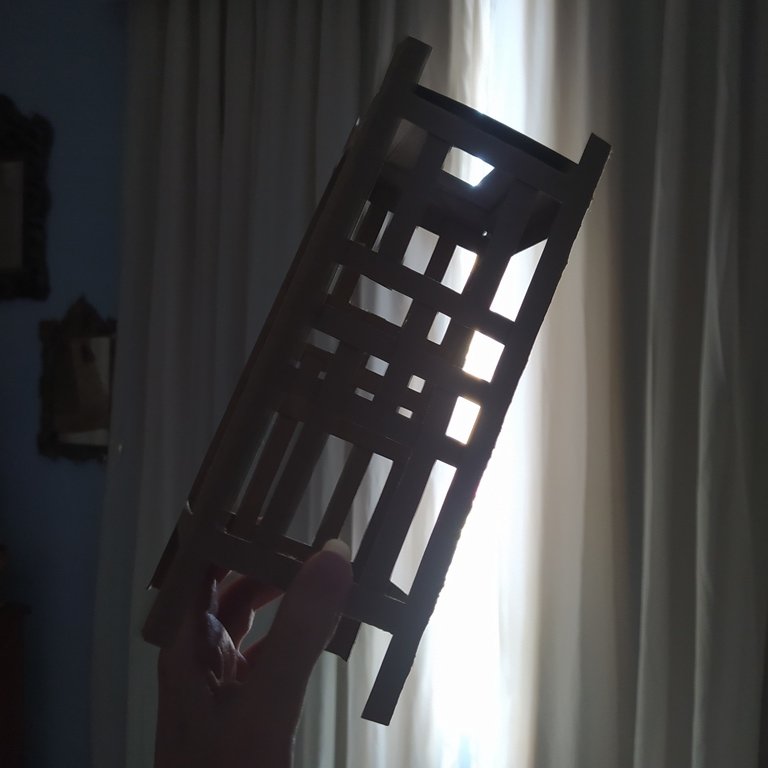
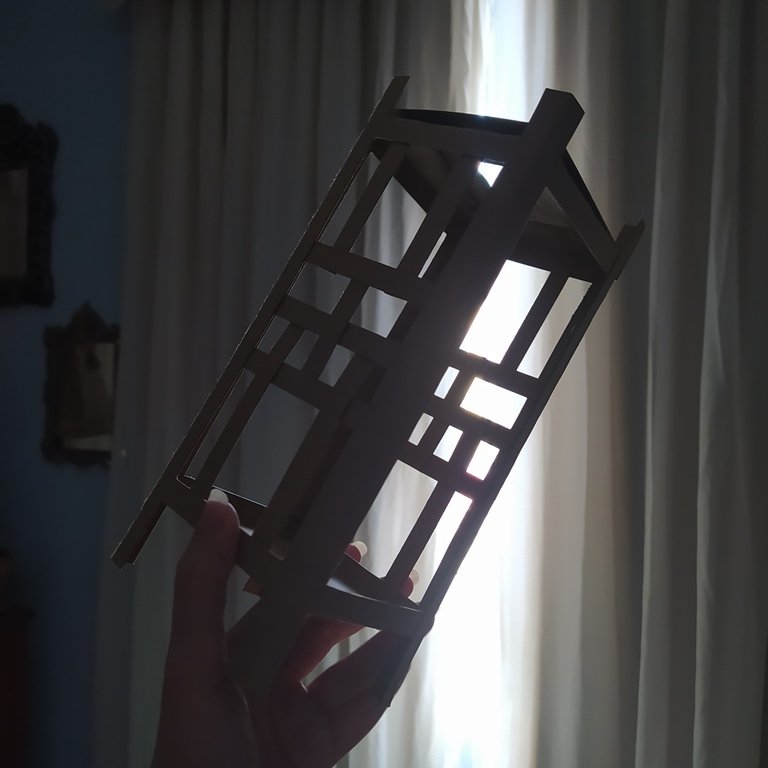
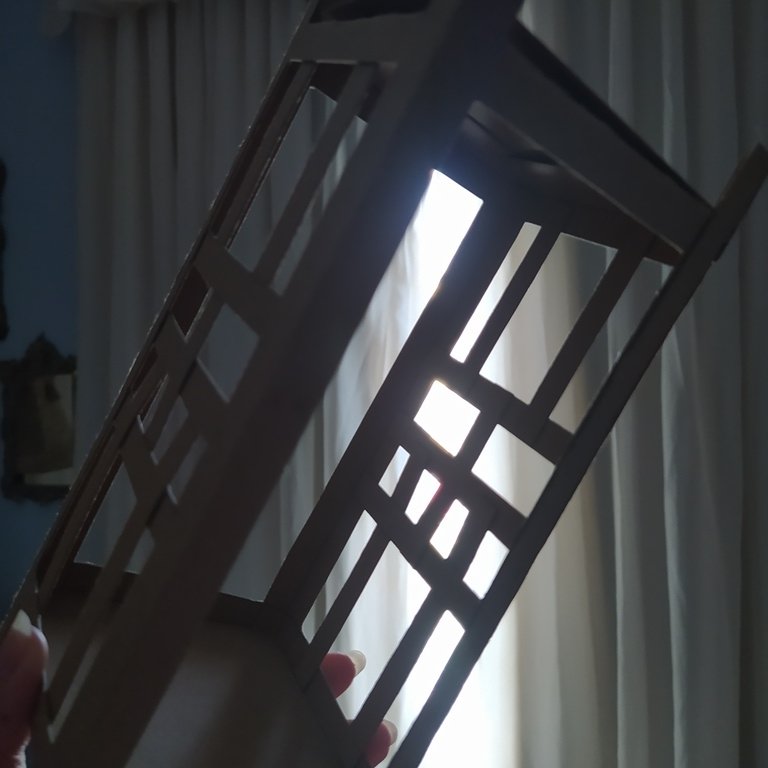
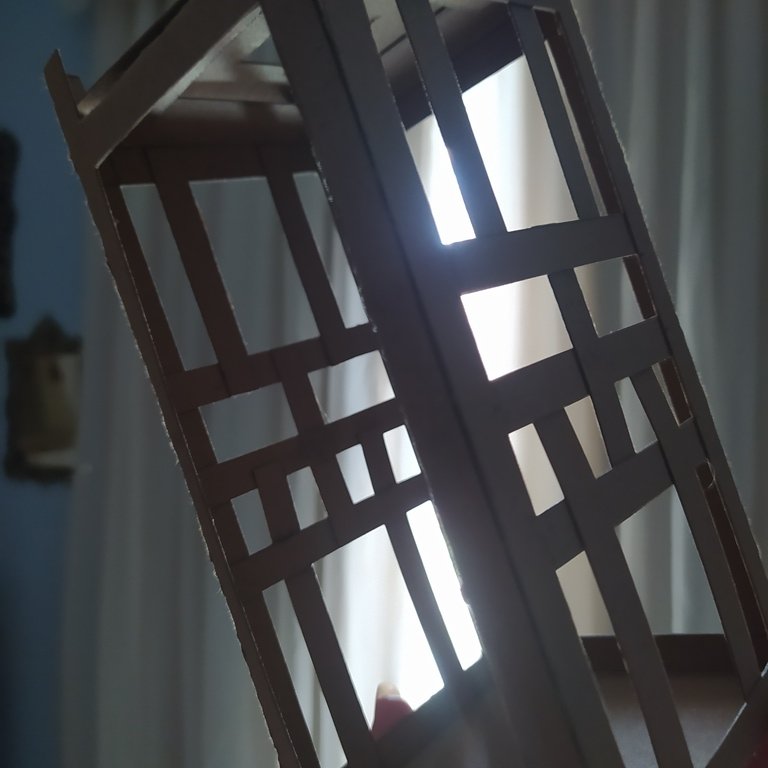
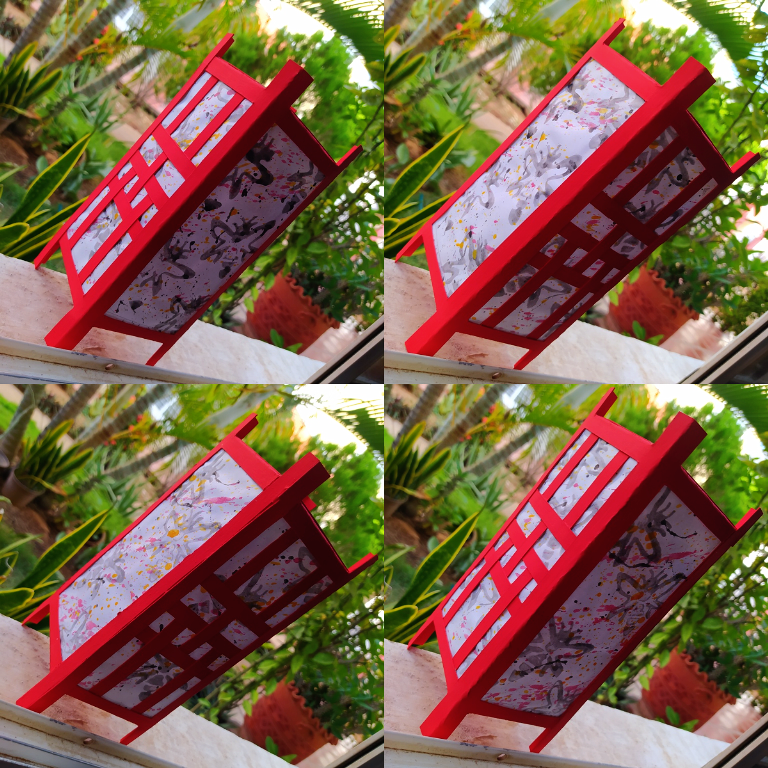
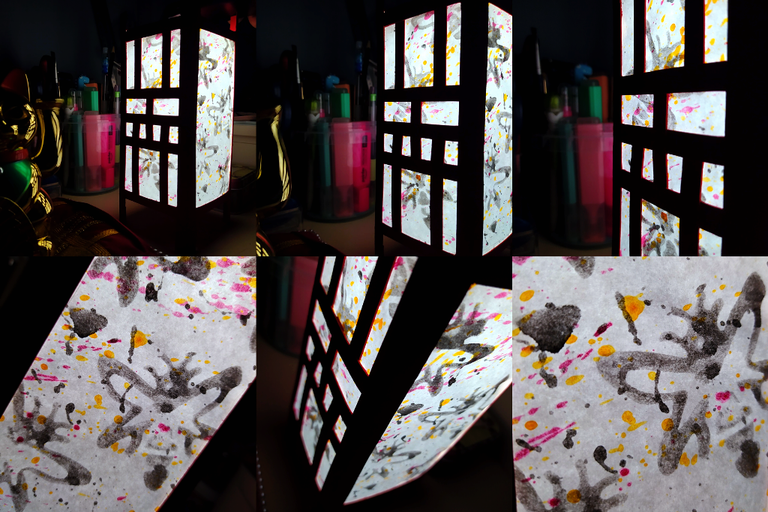
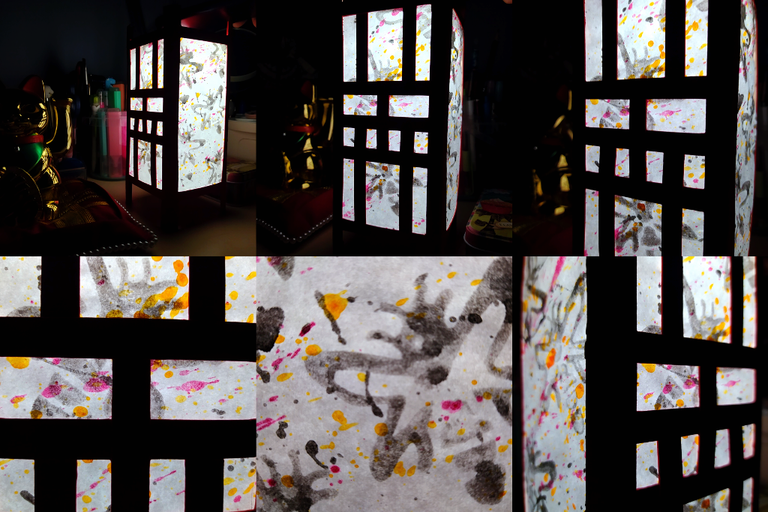
⭐ Japanese “Shoji” Lamp with Bee Pattern [daytime photos] ☀ 🐝 ✨

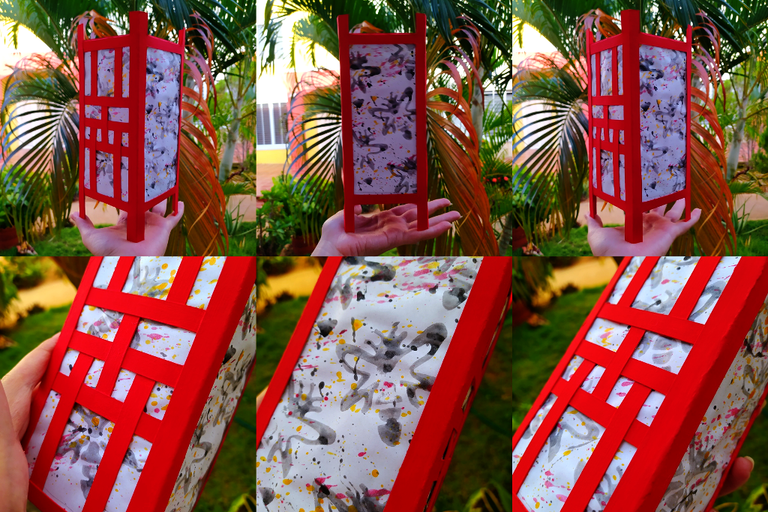
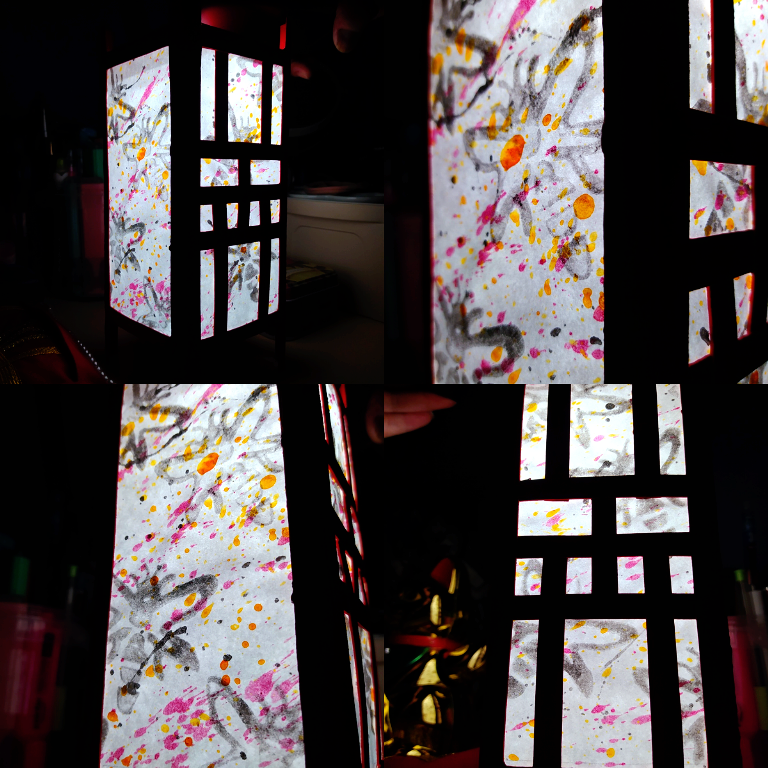
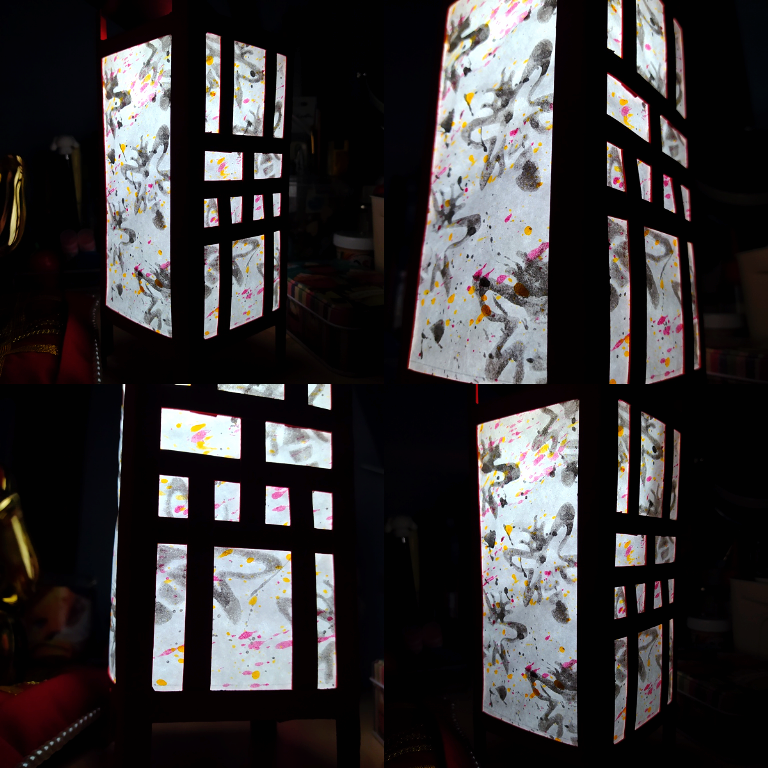
⭐ Japanese “Shoji” Lamp with Bee Pattern [night photos] 🌙 🐝 ✨

 |  | |
|---|
Pensando en la luz de la lámpara atravesando el papel:
Mi intensión era recrear un patrón de abejas con un estilo influenciado por el "nihonga e" pero más descuidado, como mas al agua, y como no tengo los pinceles suaves de fibra larga que necesito para pintar asi, opte por hacer un sello de foami y diluir bastante la pintura.
Te invito a que investigues sobre distintos tipos de dibujo y pintura sobre papel y que hagas experimentos con el material que tengas a la mano.
Espero hayas disfrutado el recorrido de este proyecto, y recuerda leer las pautas del Concurso de la Comunidad DIYhub, un abrazo inmenso y mucho éxito para todos 🥰 💖
Thinking about the light of the lamp going through the paper:
My intention was to recreate a bee pattern in a style influenced by “nihonga e” but more sloppy, more water based, and since I don't have the soft long fiber brushes I need to paint like this, I opted to make a foami stamp and dilute the paint a lot.
I invite you to do some research on different types of drawing and painting on paper and to experiment with the material you have at hand.
I hope you enjoyed the journey of this project, and remember to read the DIYhub Community Contest guidelines, a huge hug and much success to all 🥰 💖

 |  |  |  |  |  |  |  |  |
|---|
✨ 🍓 All texts and images by @Tesmoforia 🍓 ✨
📸 Tools: Smartphone 📲 Snow 🎬 Remini 🌓 FotoJet 📐
🚨 ¡Please do not take, edit or republish my material without my permission! 🚨
💌 ¿Do you wish to contact me? Discord #tesmoforia 💌
🌙 Banner, signature and separators by Keili Lares and FlatIcon: 1 - 2 - 3 - 4
wow amazing work, thanks for sharing.
Thank you ! ! !
Woooo!!!! Es simplemente hermoso este trabajo. Sabía que tu versión de los sellos sería maravillosa 🥰.
Me gustó mucho la forma de sustituir la madera por material de reciclaje, le da un toque personalizado y !DIY a tu trabajo. Te felicito y te deseo suerte en el concurso. Un abrazo infinito 😘💜
Pd: Soy tu fan 😊👍🏽
!discovery 45
Tu tutorial es lo máximo bella, es todo un mundo de posibilidades lo que abre la posibilidad de hacer estos sellos, me quiero estampar hasta la frente XD mucho cariño para ti tambien omg ! ! ; v ; 🎈 ✨
P.D: ACHUMAKINA, el sentimiento es mutuo! Tu eres muy badass 👑
🥰💜😘
!HUG
This post was shared and voted inside the discord by the curators team of discovery-it
Join our Community and follow our Curation Trail
Discovery-it is also a Witness, vote for us here
Delegate to us for passive income. Check our 80% fee-back Program
Thank you o//7//o ! ! 💜
You can query your personal balance by
!DIYSTATS@tesmoforia no vi el link de tu entrada en el post del concurso... Es una de las reglas ⚠️
Muchisimas gracias por avisarme, se me había olvidado ;; ready!
😊👍🏽🥰
Muy buena idea de la lámpara, te quedo muy interesante la imagino hecha en madera y la pintura me recordó un poco a pollock y al exprexionismo abstracto,
[googleando Jackson Pollock] esto esta muy muy genial :o impactada!
En madera debe quedar infinitamente mejor, es un proyecto en cola; gracias @torre-alba 💙
Wow! This is so cute and creative ❤️
Thank you @meyateingi 💙
You're welcome 🤗
Amazing work and lovely, indeed you are a talented and skillful person. I love it and well done 👍
Thank you so much for so many kind words! 🌼 🌼 🌼