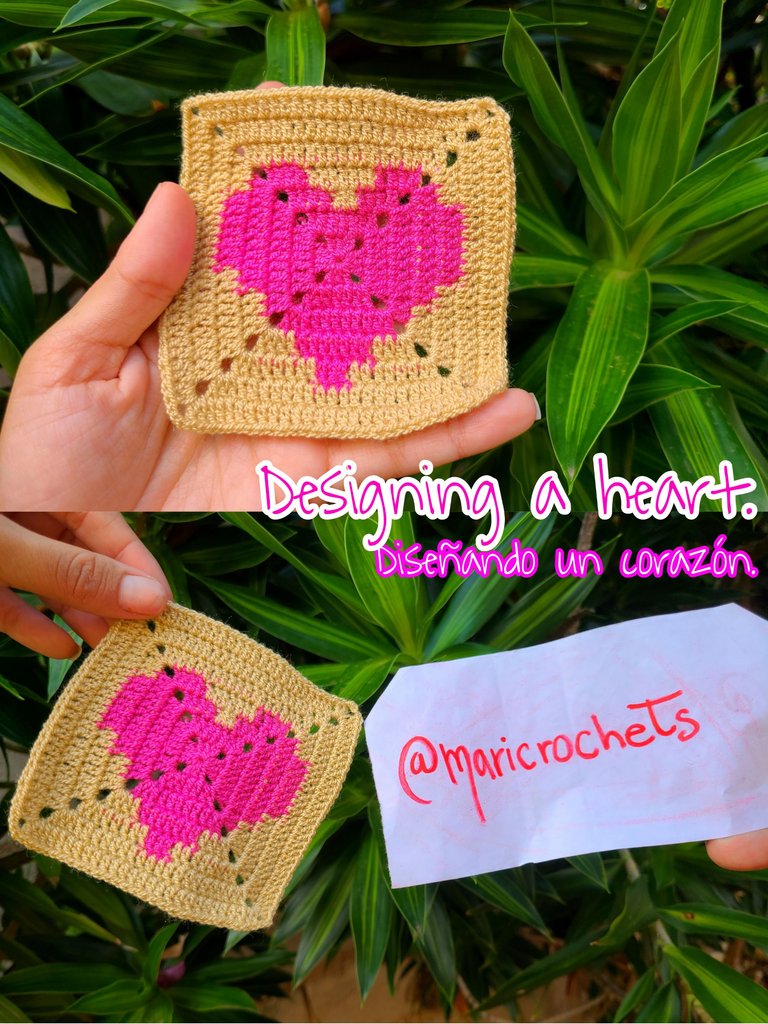
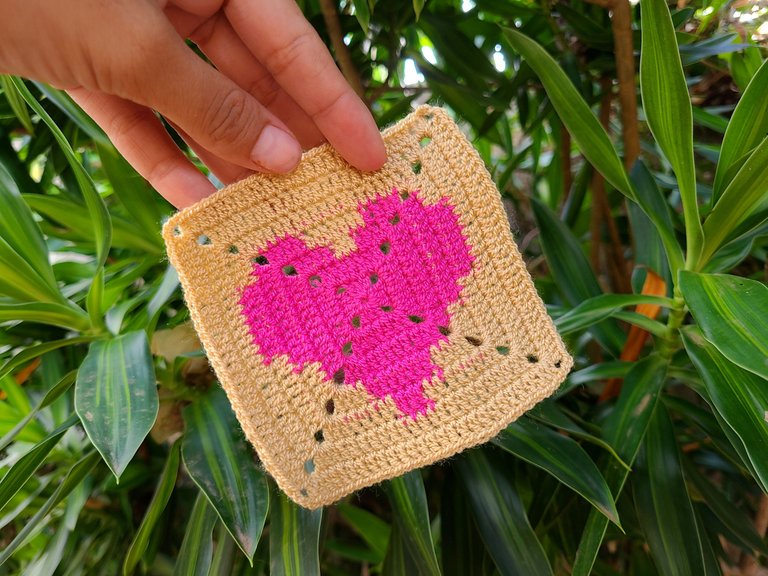
Tutorial: Designing a cute heart in the shape of a granny, in crochet (step by step) - Diseñando un lindo corazón en forma de granny, en crochet (paso a paso). 💖🧶
Dear friends 🌸 today I bring you a fairly simple tutorial, it is a crochet heart in the shape of a granny, with its step by step to make its preparation easier, I hope you enjoy it. 🧶💖
Apreciados amigos 🌸 hoy les traigo un tutorial bastante sencillo, se trata de un corazón a crochet en forma de granny, con su paso a paso para que su elaboración sea más fácil, espero lo disfruten. 🧶💖
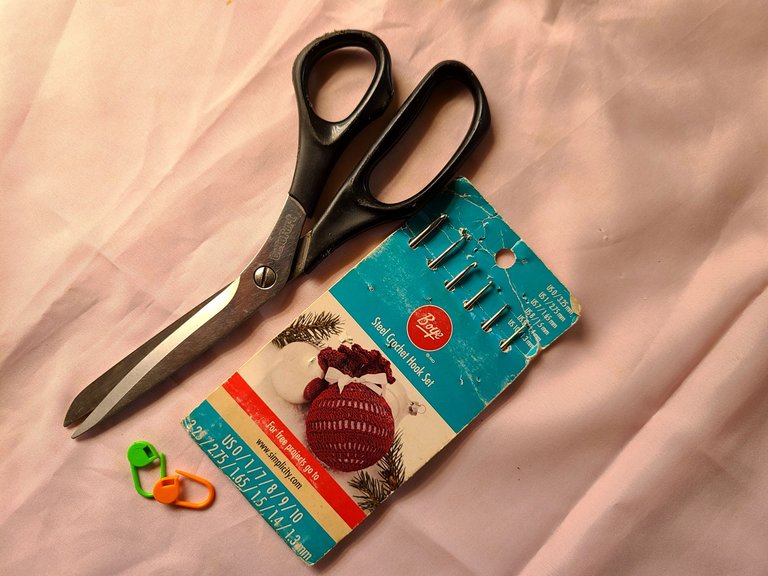
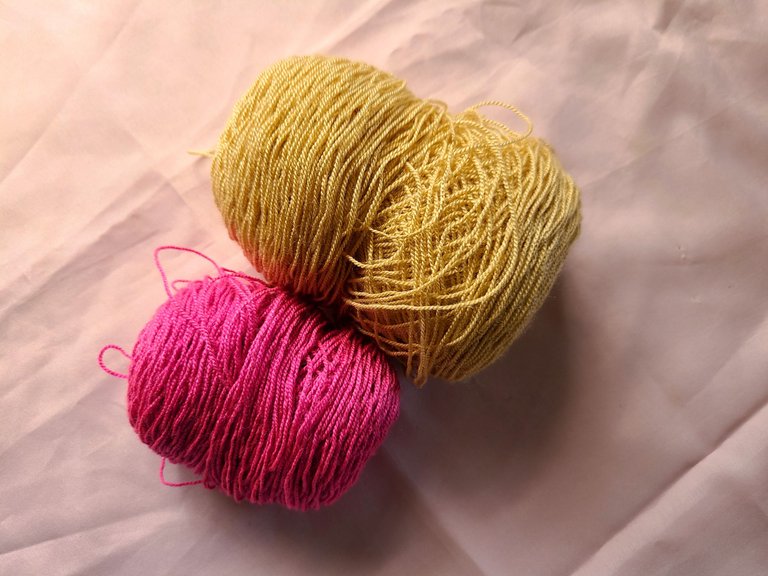
🧶 Materials to use:
♡Crochet threads: Light beige and guava pink.
♡Crochet needle number 7
♡Scissors.
🧶 Points to use:
♡Normal high points.
♡Medium high points.
♡Chains.
🧶 Materiales a utilizar:
♡Hilos crochet: Beige claro y rosa guayaba.
♡Aguja crochet número 7
♡Tijeras.
🧶 Puntos a utilizar:
♡Puntos altos normales.
♡Puntos medios altos.
♡Cadenas.

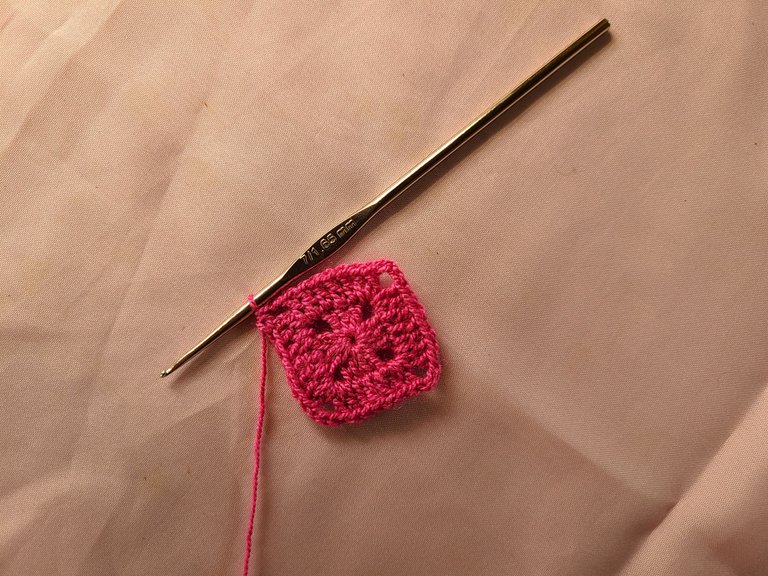
🧶 Step 1: We do it with the guava pink thread.
Row 1: We start by making a magic ring, and inside we make 3 normal double crochets and 3 chains, 3 normal double crochets and 3 chains, 3 normal double crochets and 3 chains, 3 normal double crochets and we close with 1 chain and 1 half double crochet that we insert in the third chain of the first normal double crochet.
Row 2: We continue with the guava pink, in the arch we make 2 normal double crochets, then 1 normal double crochet over each point of the previous round, when we reach the arch we make 2 normal double crochets, 3 chains, 2 normal double crochets, and we follow the same sequence on the other 3 sides, to close again with half double crochet.
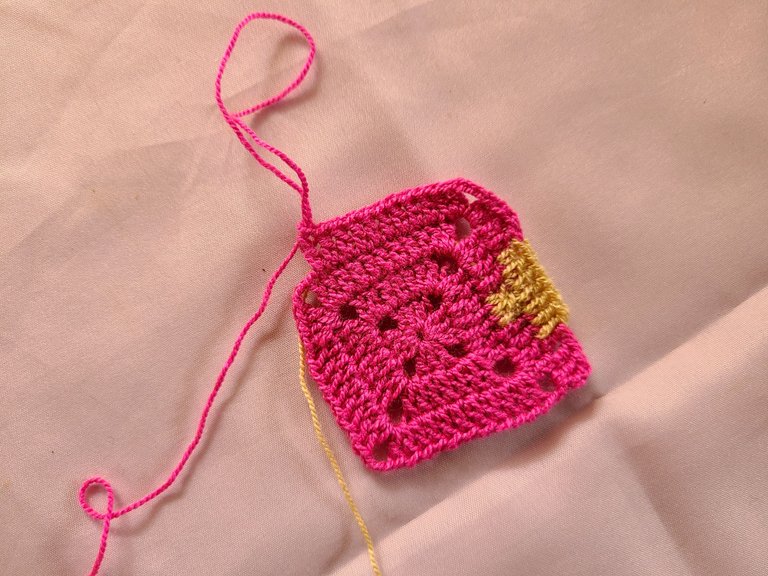
Row 3: We continue with the guava pink thread and 2 normal double crochets in the arch, followed by 2 normal double crochets on the previous row, here we place the beige thread and make 3 normal double crochets, again we work with the thread guava pink and we make 2 normal double crochets and we work the corners again as before.
Row 4: We continue with the guava pink thread, 2 normal double crochets in the arch and 2 over the previous stitches, again we take the beige thread and make 7 normal double crochets, again we use the guava pink thread, for this Finally, when we change the threads we hide it in the stitches so that we can use it later without having to cut the threads. Here we make 2 and normal double crochets and in the arch 2 normal double crochets, 3 chains, 2 normal double crochets and we continue with 9 stitches guava pink normal treble stitches, as we bring the beige thread dragged into the fabric, we make 2 normal treble crochets, plus the arch, 2 normal treble crochets follow and we take the guava pink thread and make 7 normal treble crochets, we continue 2 normal treble crochets, more the arch, plus 2 normal double crochets, and again with guava pink thread we make 9 normal double crochets, and the normal double crochets of the arch, and we close as I explained previously.
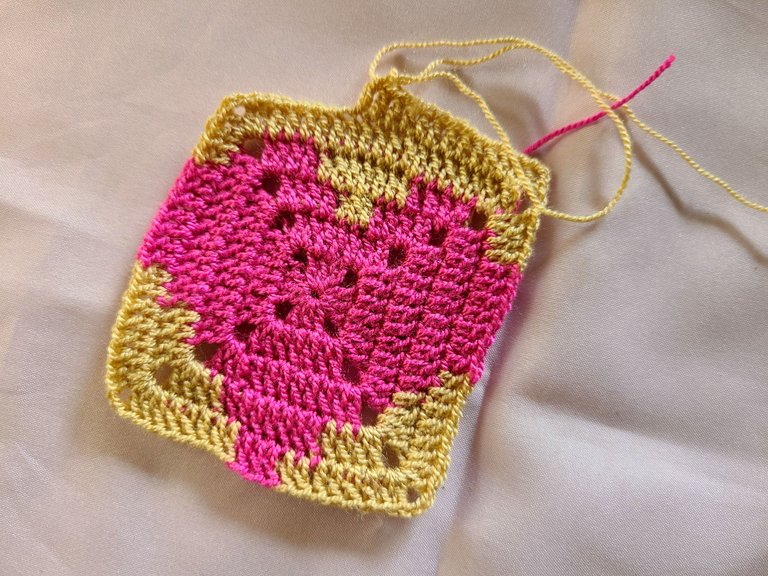
Row 5: Here we start with the beige thread all along this side until we reach the corner, 2 normal double crochets on the top of the previous stitches, we change to the guava pink thread and make 7 normal double crochets, we change to the beige thread and we make 6 normal double crochets, again the arch, 6 normal double crochets, we place the thread in guava pink again and make 3 normal double crochets, again we change the thread to beige and make 6 normal double crochets, the arch, 6 points normal treble stitches and again we place guava pink thread and make 7 normal treble stitches, we change to the beige thread, we make 2 normal treble stitches over the previous ones and we finish the arch by closing with 1 chain and half treble stitch.
Rows 6 and 7: They are worked in beige thread, stitch over stitch of the previous row, respecting the arches of each row.
🧶 Paso 1: Lo realizamos con el hilo rosa guayaba.
Fila 1: Comenzamos haciendo un anillo mágico, y dentro elaboramos 3 puntos altos normales y 3 cadenas, 3 puntos altos normales y 3 cadenas, 3 puntos altos normales y 3 cadenas, 3 puntos altos normales y cerramos con 1 cadena y 1 punto medio alto que insertamos en la tercera cadena del primer punto alto normal.
Fila 2: Seguimos con el rosa guayaba, en el arco hacemos 2 puntos altos normales, luego 1 punto alto normal sobre cada punto de la vuelta anterior, al llegar al arco hacemos 2 puntos altos normales, 3 cadenas, 2 puntos altos normales, y seguimos la misma secuencia en los otros 3 lados, para cerrar nuevamente con punto medio alto.
Fila 3: Seguimos con el hilo rosa guayaba y 2 puntos altos normales en el arco, seguido 2 puntos altos normales sobre la fila anterior, aquí colocamos el hilo beige y hacemos 3 puntos altos normales, nuevamente trabajamos con el hilo rosa guayaba y hacemos 2 puntos altos normales y volvemos a trabajar las esquinas como las anteriores.
Fila 4: Seguimos con el hilo rosa guayaba, 2 puntos altos normales en el arco y 2 sobre los puntos anteriores, de nuevo tomamos el hilo beige y hacemos 7 puntos altos normales, nuevamente usamos el hilo rosa guayaba, para este fin cuando cambiamos los hilos lo escondemos en los puntos para poderlo usar luego sin tener que estar cortando los hilos, acá hacemos 2 y puntos altos normales y en el arco 2 puntos altos normales, 3 cadenas, 2 puntos altos normales y seguimos con 9 puntos altos normales rosa guayaba, como traemos el hilo beige arrastrado dentro del tejido, hacemos 2 puntos altos normales, más el arco, siguen 2 puntos altos normales y tomamos el hilo rosa guayaba y hacemos 7 puntos altos normales,continuamos 2 puntos altos normales, mas el arco, mas 2 puntos altos normales, y de nuevo con hilo rosa guayaba hacemos 9 puntos altos normales, y los puntos altos normales del arco, y cerramos como les explique anteriormente.
Fila 5: Acá empezamos con el hilo beige todo este lado hasta llegar a la esquina, 2 puntos altos normales en el sobre los puntos anteriores,cambiamos al hilo rosa guayaba y hacemos 7 puntos altos normales, cambiamos al hilo beige y hacemos 6 puntos altos normales, nuevamente el arco, 6 puntos altos normales, colocamos de nuevo el hilo en rosa guayaba y hacemos 3 puntos altos normales, de nuevo cambiamos el hilo a beige y hacemos 6 puntos altos normales, el arco, 6 puntos altos normales y de nuevo colocamos hilo rosa guayaba y hacemos 7 puntos altos normales ,cambiamos por el hilo beige, hacemos 2 puntos altos normales sobre los anteriores y terminamos el arco cerrando con 1 cadena y punto medio alto.
Filas 6 y 7: Se trabajan en hilo beige, punto sobre punto de la fila anterior respetando los arcos de cada fila.
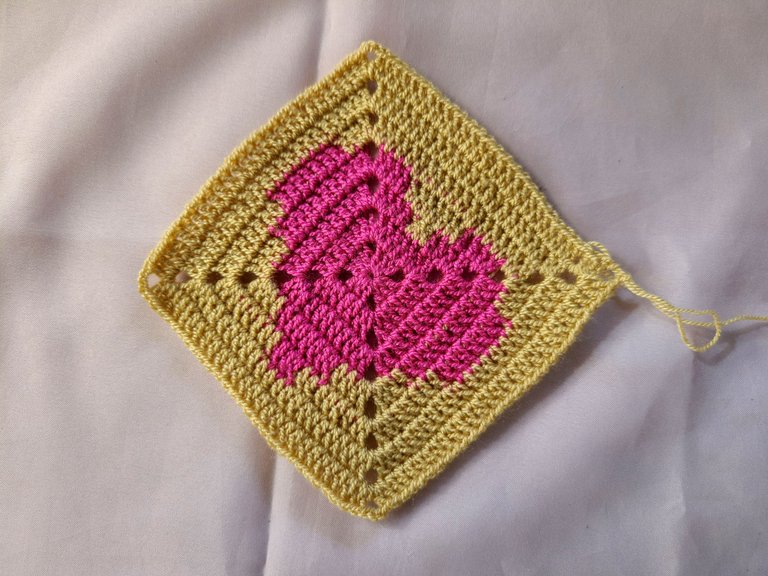
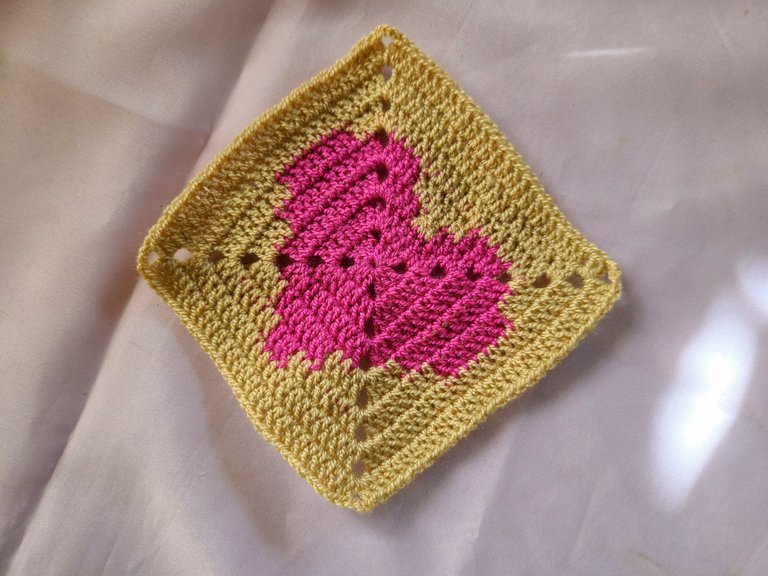
Dear Hive community, today I have brought you again a very simple granny, so that you can enjoy it, I hope you like it, I added the step by step to make it easier to understand.
Grateful for the time you spend commenting on my posts, thank you, thank you. Happy weekend.
Apreciada comunidad Hive, hoy les he traído de nuevo un granny muy sencillo, para que ustedes lo puedan disfrutar espero les guste, le agregué el paso a paso para que sea más fácil el ntfnderlo.
Agradecida por el tiempo que dedican a comentar mis publicaciones, gracias, gracias. Feliz fin de semana. 🧶💖

Muchas gracias por apoyarme
Muy lindo y delicado trabajo amiga, me encanto como fuiste formando el corazón, es un trabajo de mucha dedicación para que se vea tan impecable. felicidades.
Gracias amiga
💖
Muy lindo diseño!! 😍Pienso que se puede aplicar en un sweater hecho con grannys y quedaría hermoso!! Gracias por compartirlo ❤
Se vería muy bien, muchas gracias
Wow 🩷💗 Amazing..
Doing Crochet is not so easy, you have done it fabulously 👍🏻
Thanks you
This is really beautiful
Thanks you
Welcome
Thanks you
Muy hermoso tu granny mi querida amiga, te felicito, que tengas una semana espectacular
Gracias amiga
Gracias amiga